
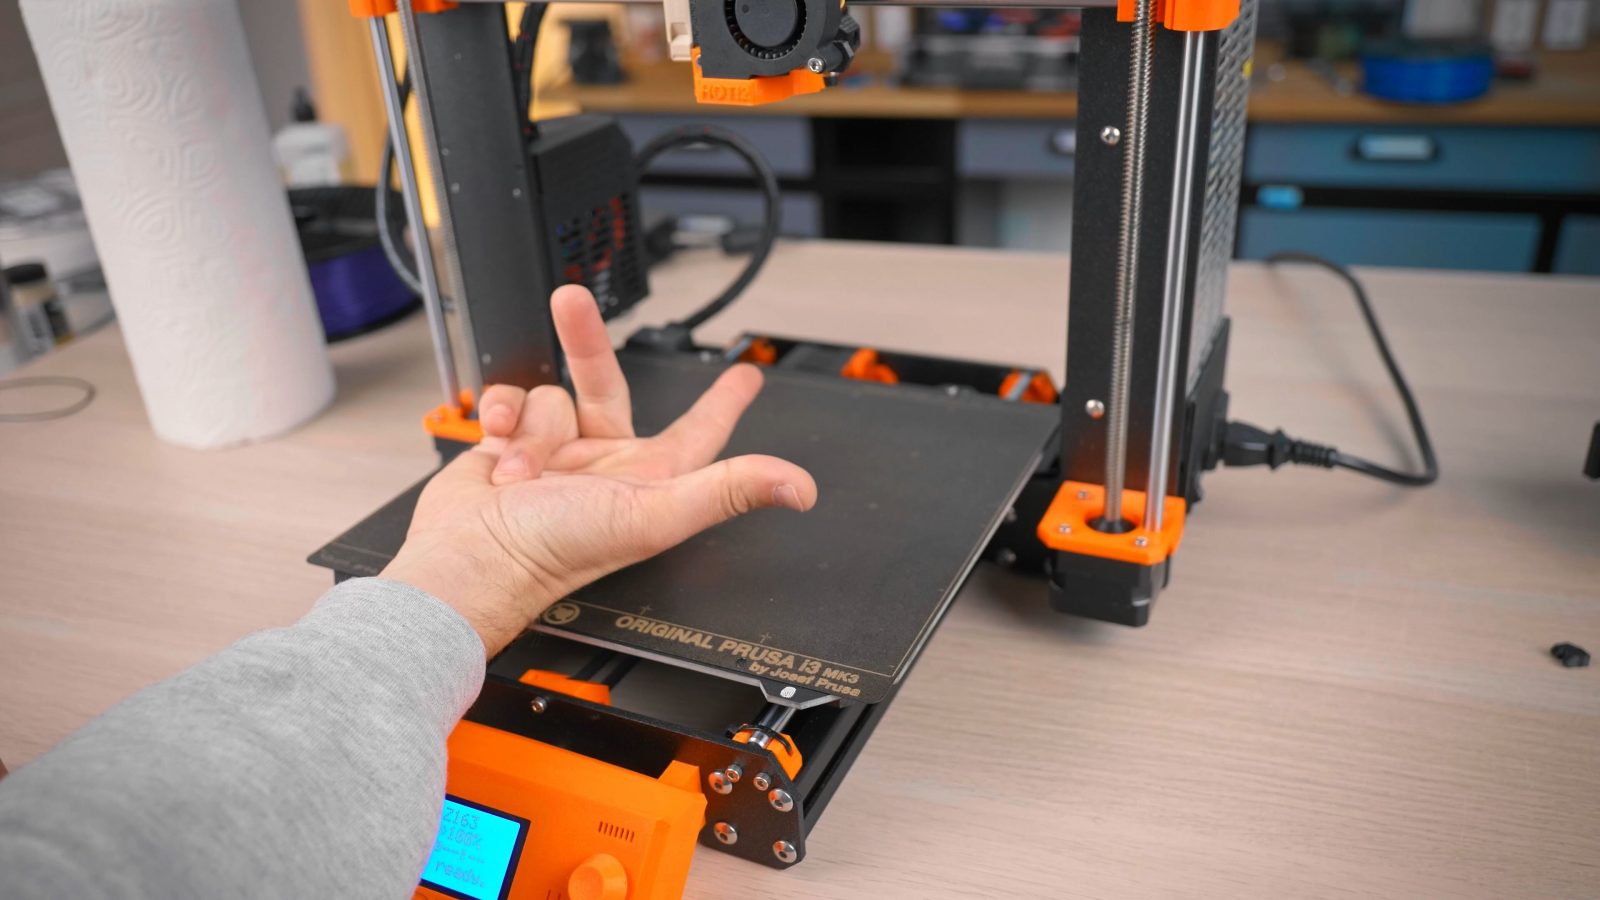
I know I’ve been using terminology for all the printer parts in the other basics videos without stopping to explain them, so in this video, let’s go over all the weird and unique parts, what they’re called and what they do. Also, while we’re at it, let’s look at what sort of maintenance and care these machines and their components need.
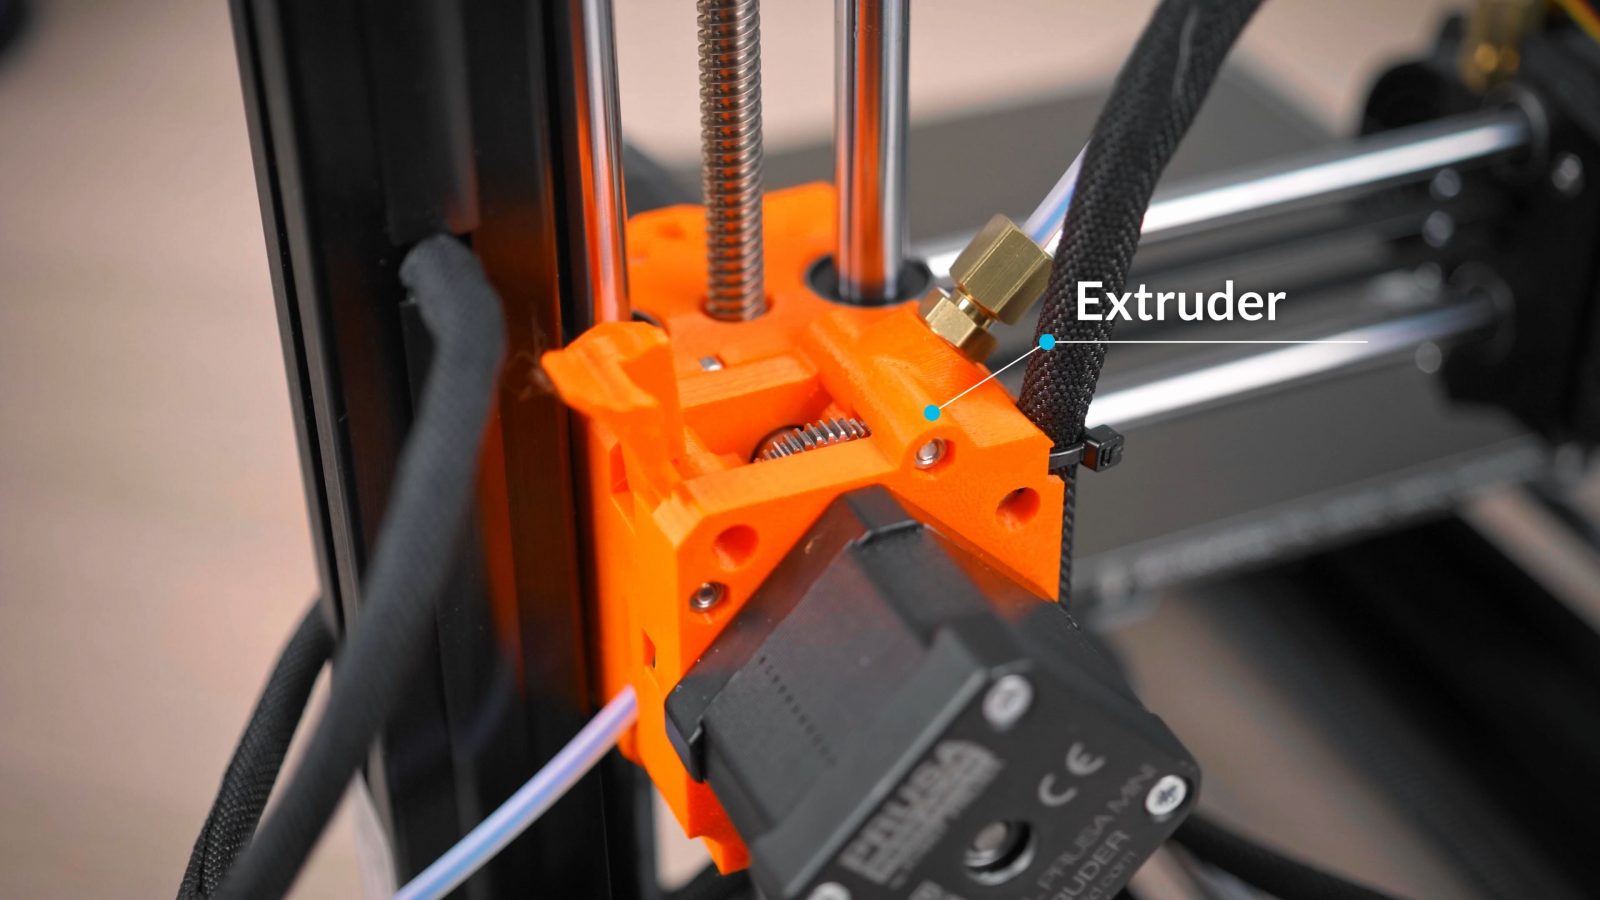
Extruder and Hotend
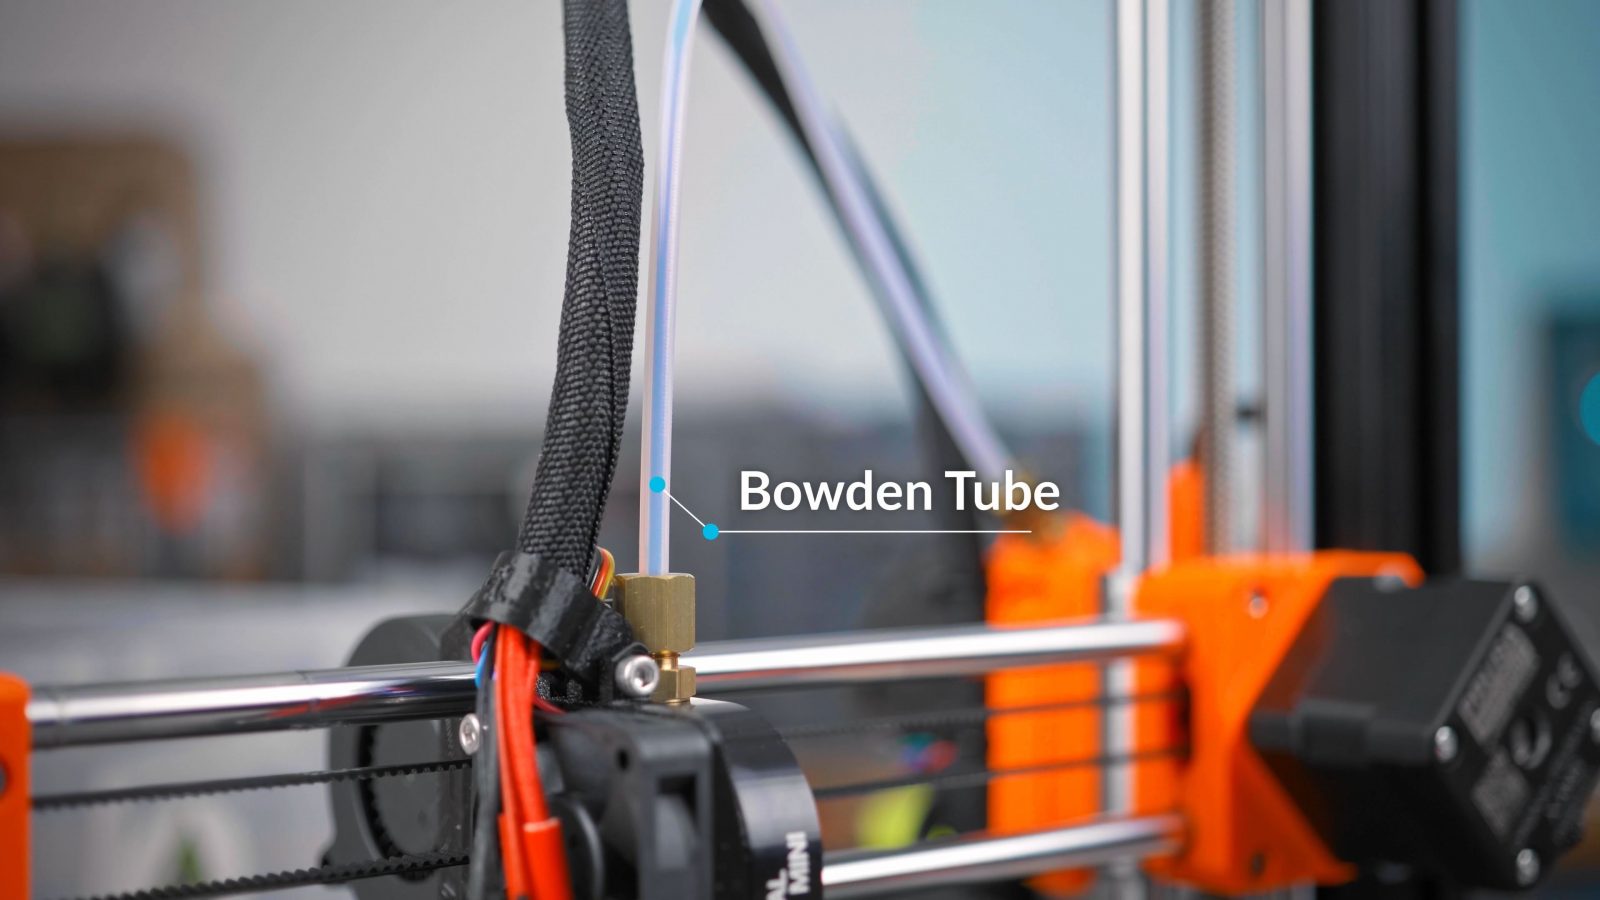
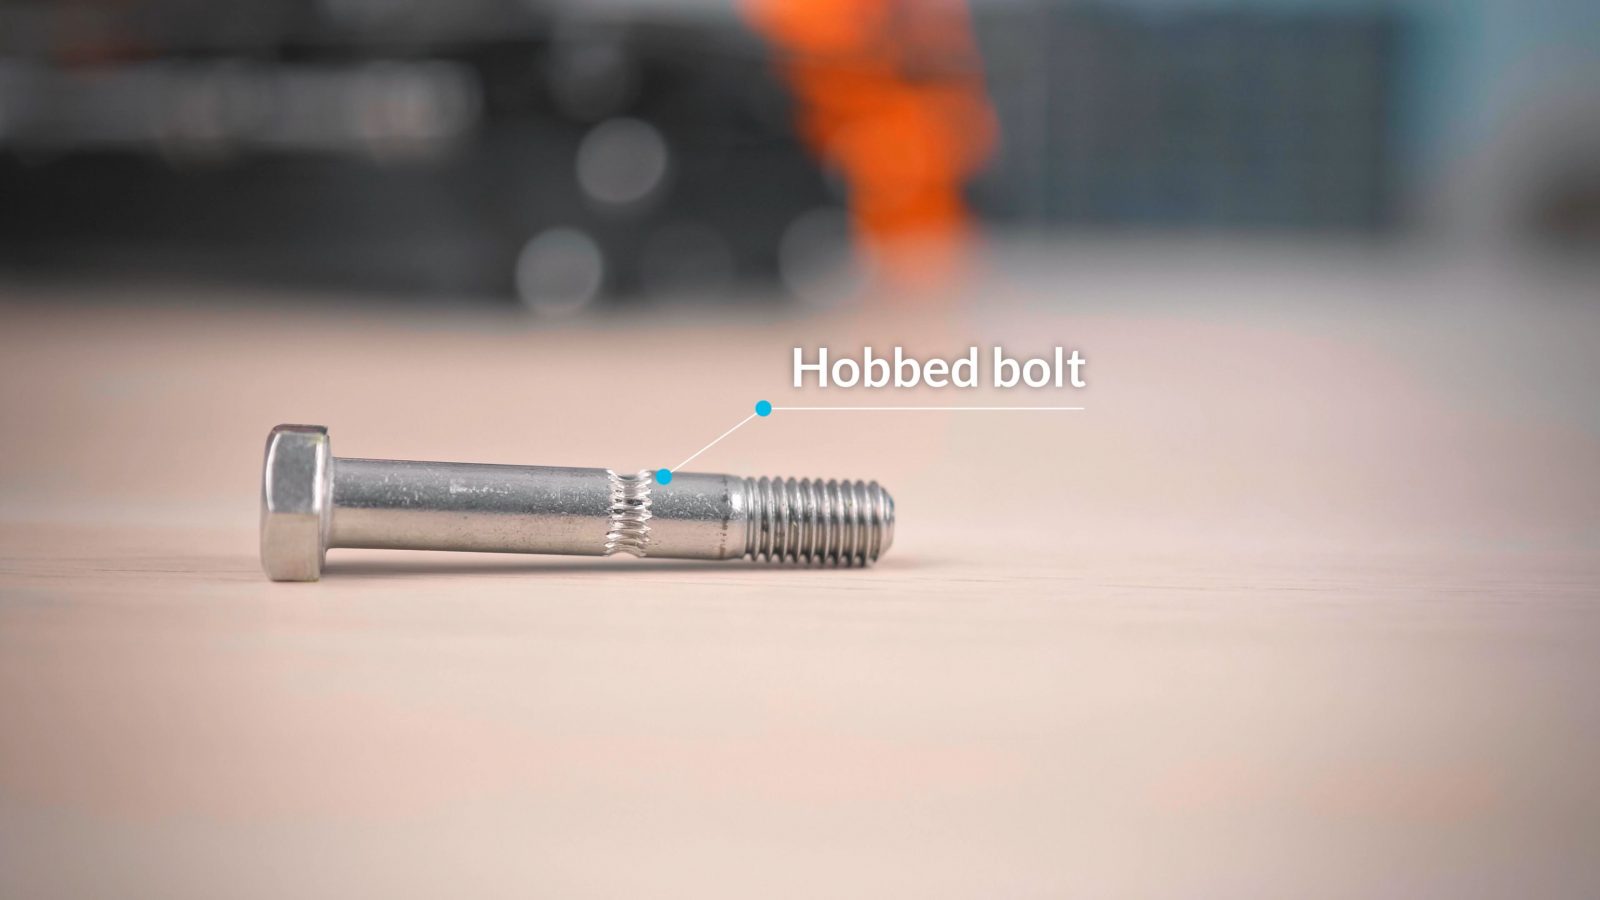
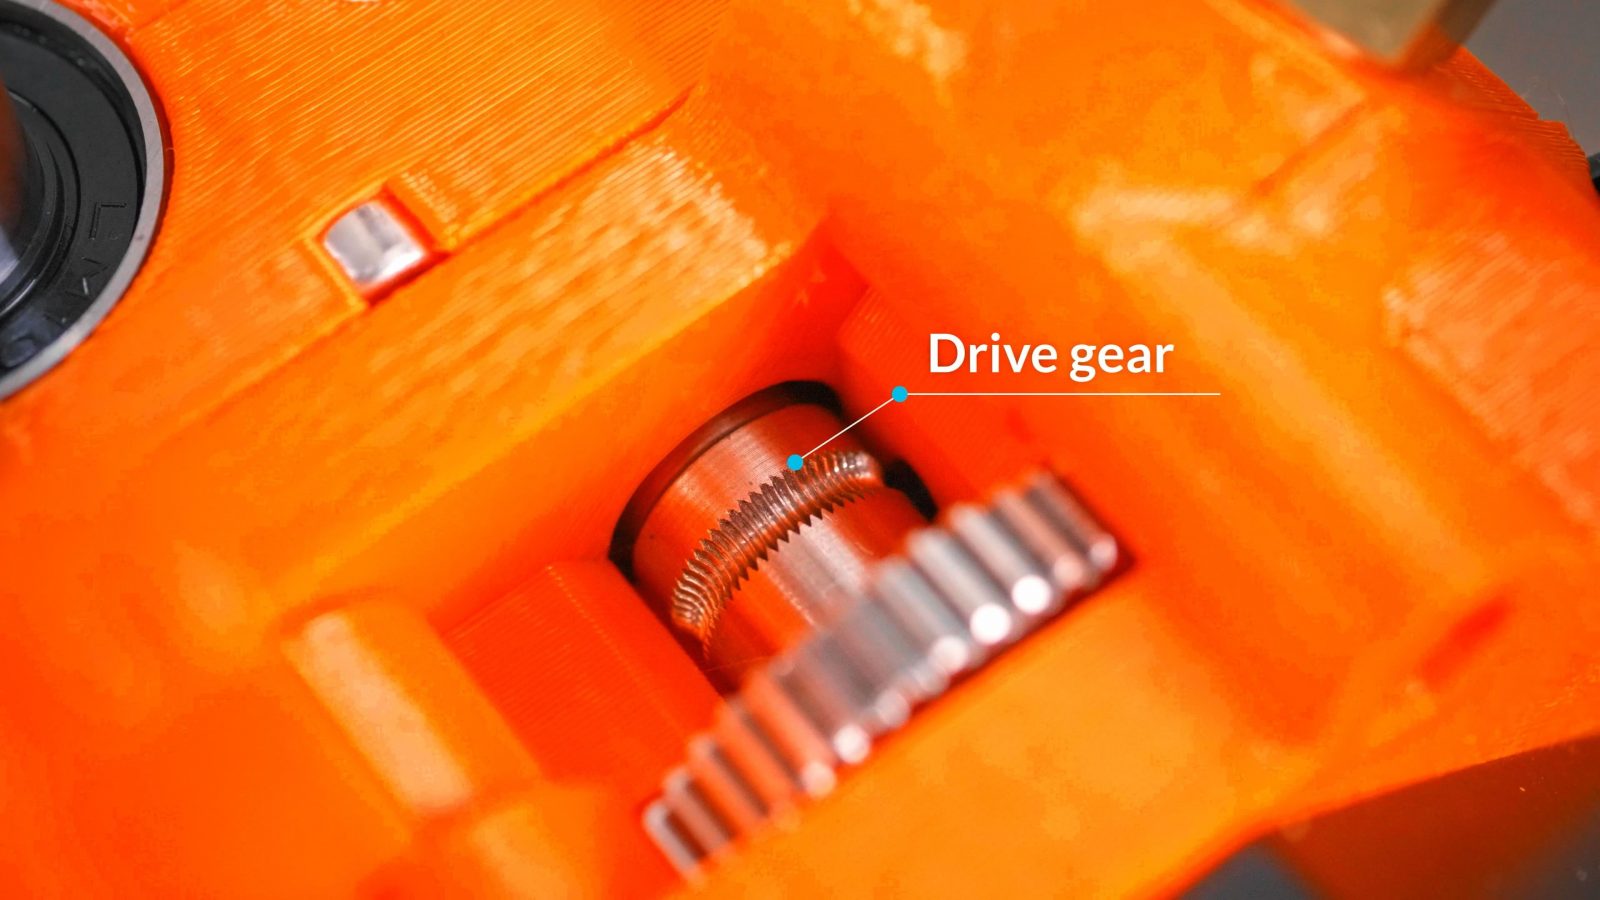
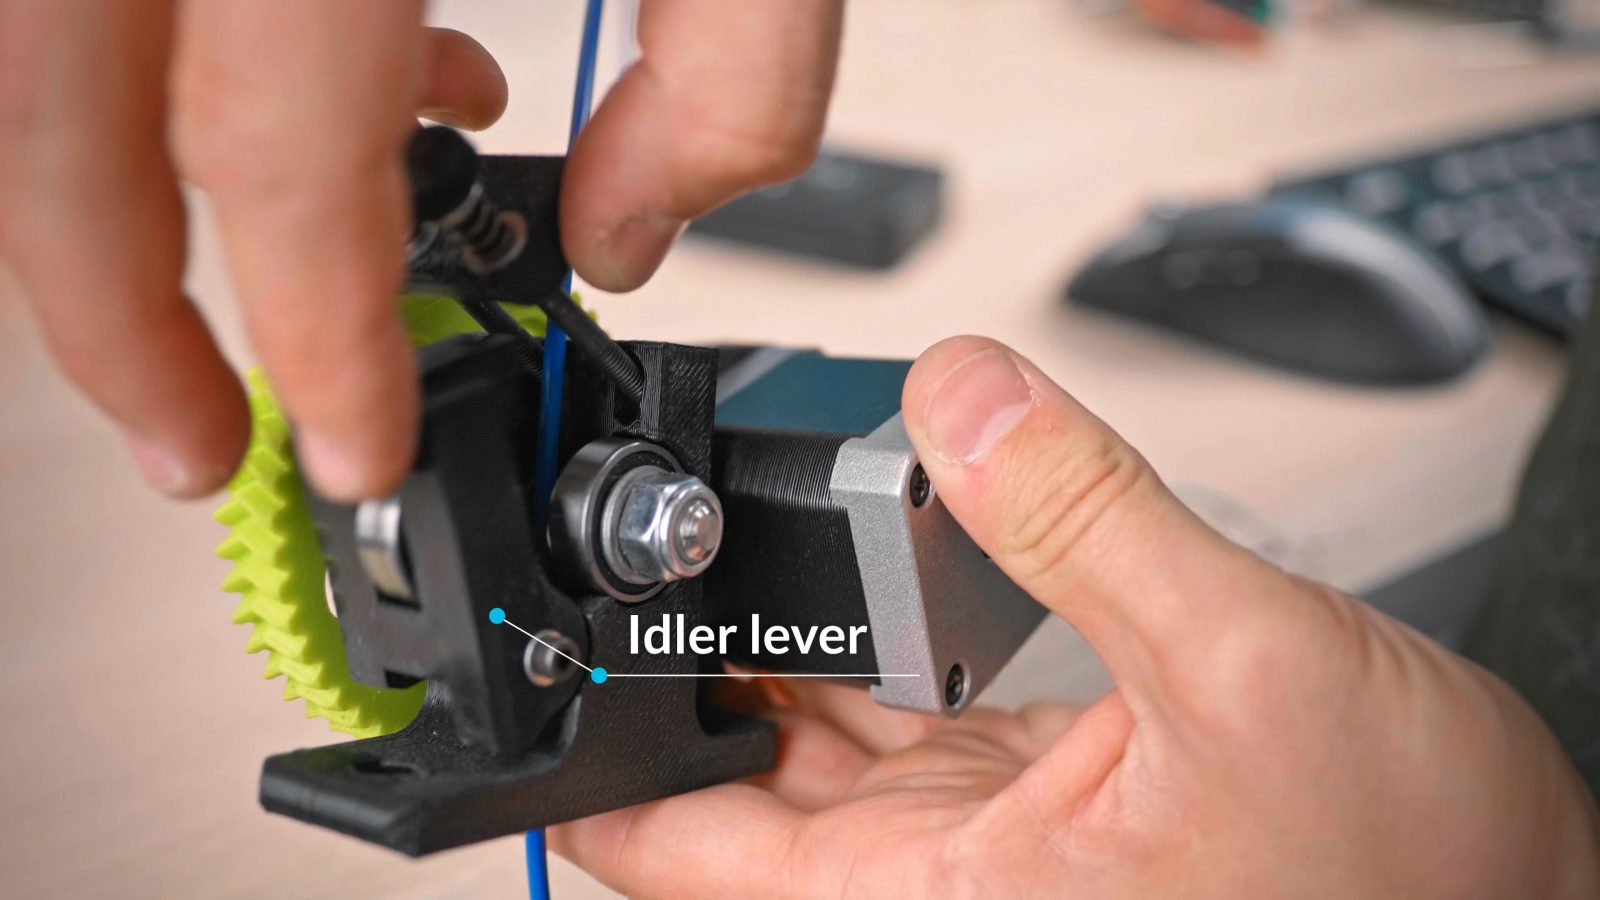
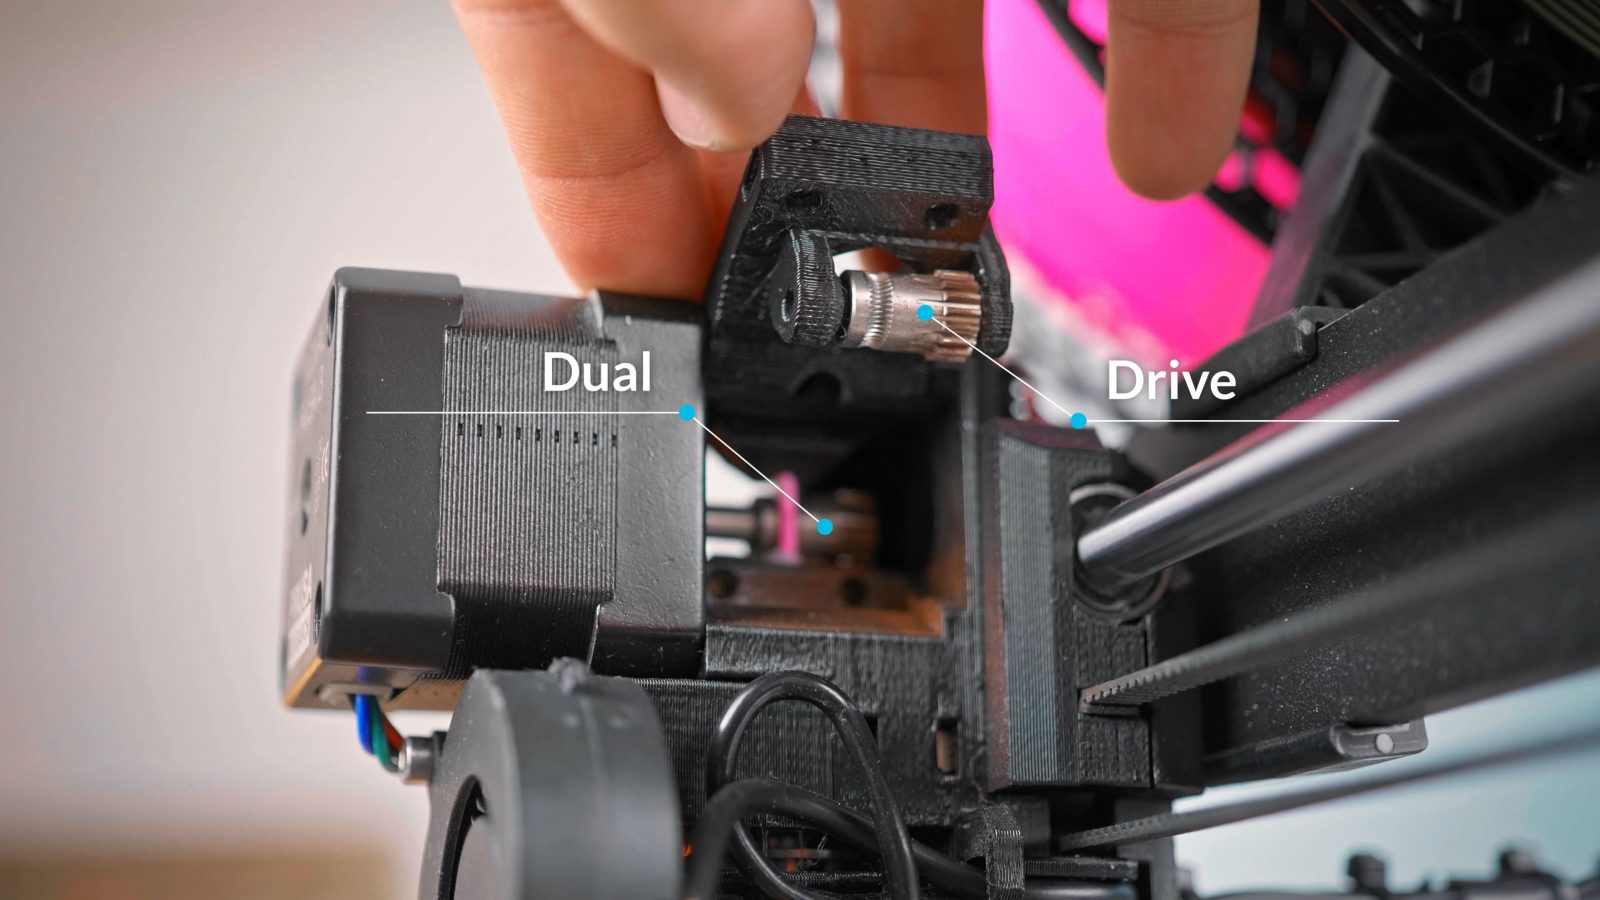
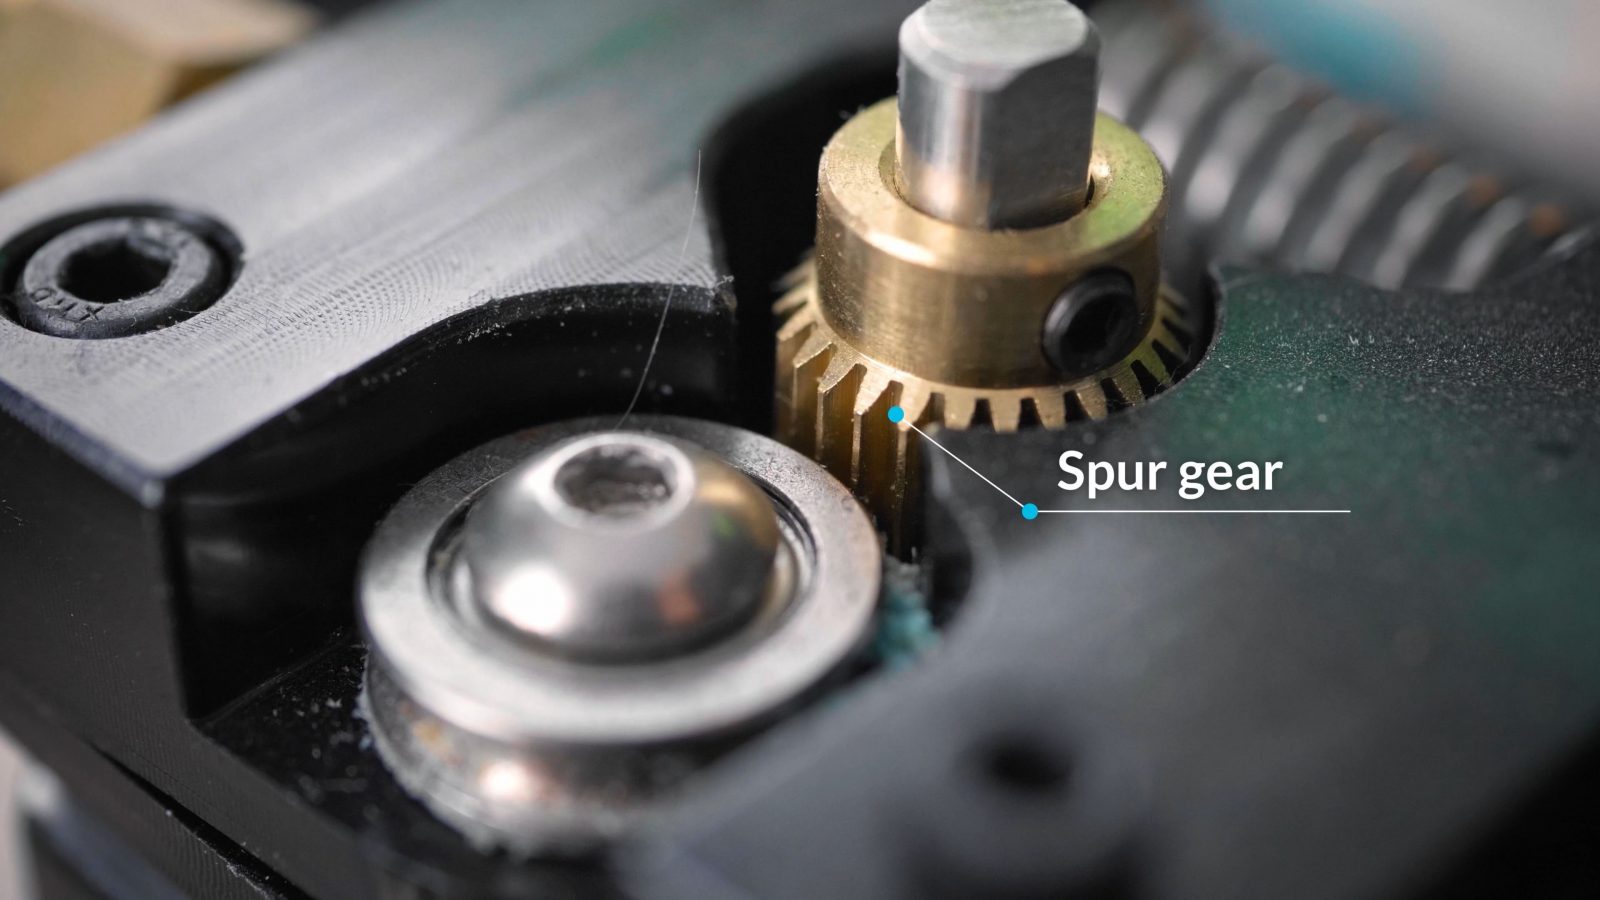
Okay, let’s start with the core of any filament printer: The extruder and hotend. To feed filament, it first gets grabbed by the extruder and then pushed into the hotend, either directly or through a bowden tube. Inside the extruder, the hobbed bolt, or in newer machines, the hobbed gear or drive gear engages with the filament and that is either pushed into that gear with a spring-loaded idler or with a second drive gear in a dual-drive setup. I guess the term “gear” is a bit misleading, because even though the surface of a hobbed gear, where it’s grabbing the filament kinda looks like a gear, but an actual spur gear is a pretty bad option since it’s too coarse and not sharp enough to really bite into the filament.

Maintenance
As far as maintenance goes, there is not much to do here. If your extruder lets you adjust the spring tension, it only needs to be set tight enough to not slip on the filament. As with all moving parts, the bearings need to be able to move freely. For all of these maintenance jobs, I’ll try to roughly rate how often you need to do them in printed filament spools. Checking if the extruder bearing has seized or is running rough is something you only need to do after probably 50 spools or more. If you’re having printing problems, you should also give the drive surface of the extruder gears a look. If it’s clogged up with filament shavings, there’s something wrong in your extrusion path and even though it’s rarely the extruder itself causing it, it never hurts to check the idler spring tension. Every 20 spools or so you should check that the teeth haven’t worn down or dulled, probably more often if you’re printing aggressive filaments like carbon-filled materials.
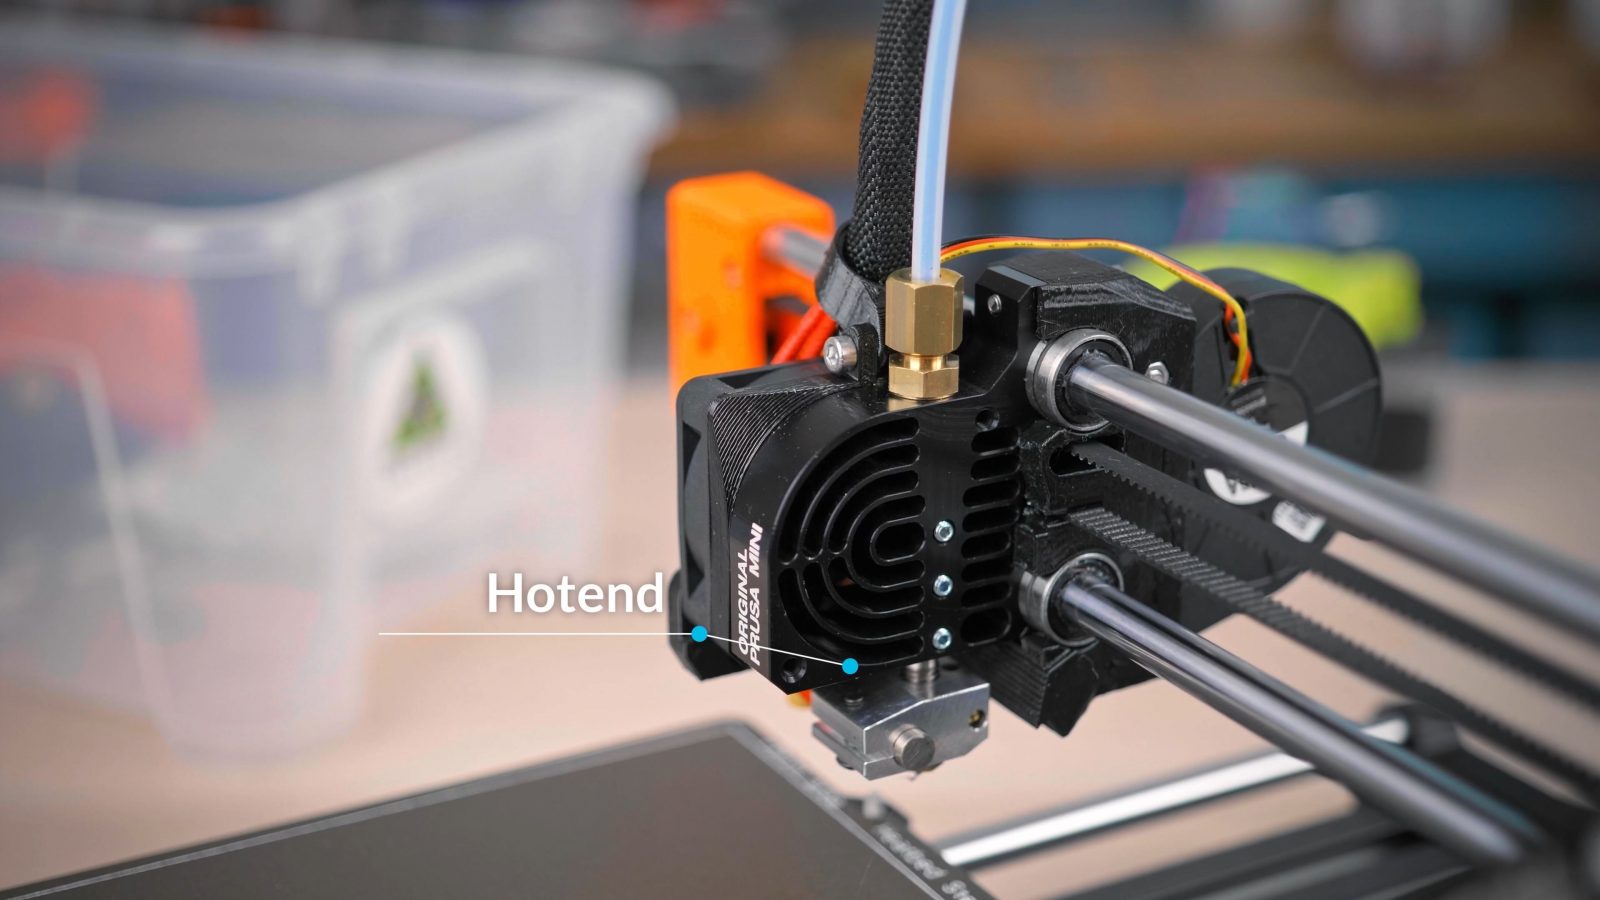
Hotend
Moving down to the hotend, that’s made from four main parts usually.
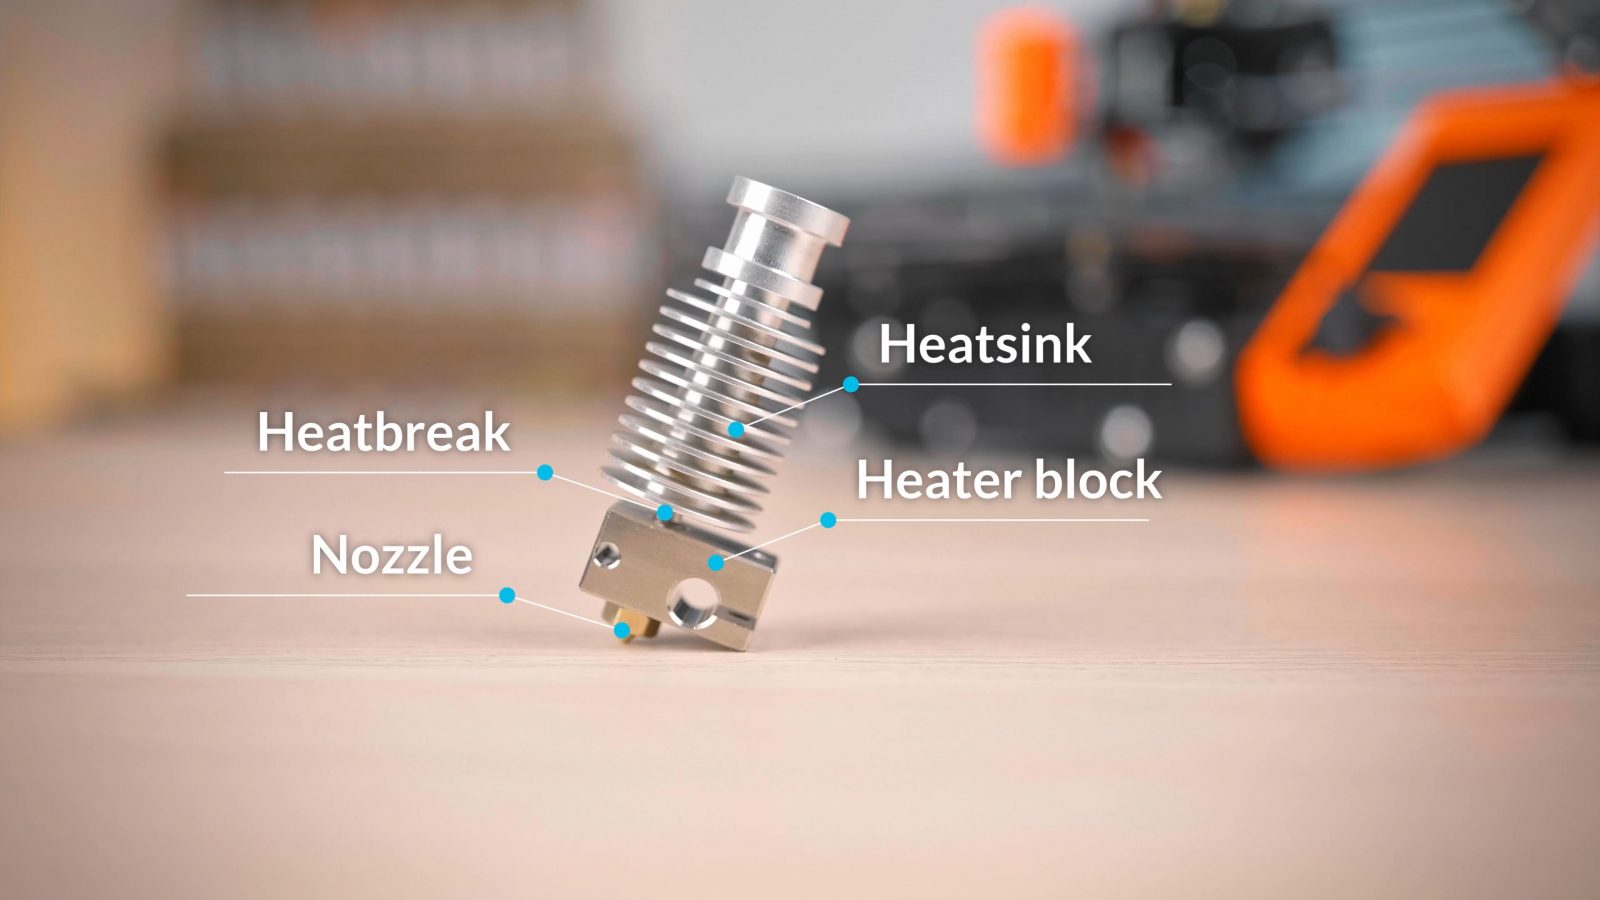
Starting at the bottom, you’ve got the nozzle, which is threaded into the heater block, then that’s mounted to the heatsink with the heatbreak. Some hotends look a bit different, but the basic functionality is the same. The heat break’s job is to mechanically support the heater block, and to only allow as little heat as possible to travel up into the heatsink. So the heatsink’s job is not to cool down the heater block at all, you’re actually trying to keep that warm, but only to keep the upper half of the heatbreak cool enough to function. Half-molten filament is already sticky, but doesn’t flow well yet, so that transition state is something that needs to be avoided. To assist with temperature control, almost all hotends have a cooling fan which either turns on when the hotend reaches a set temperature or is simply always on. The other fan you’ll find on the toolhead is the part cooling fan.

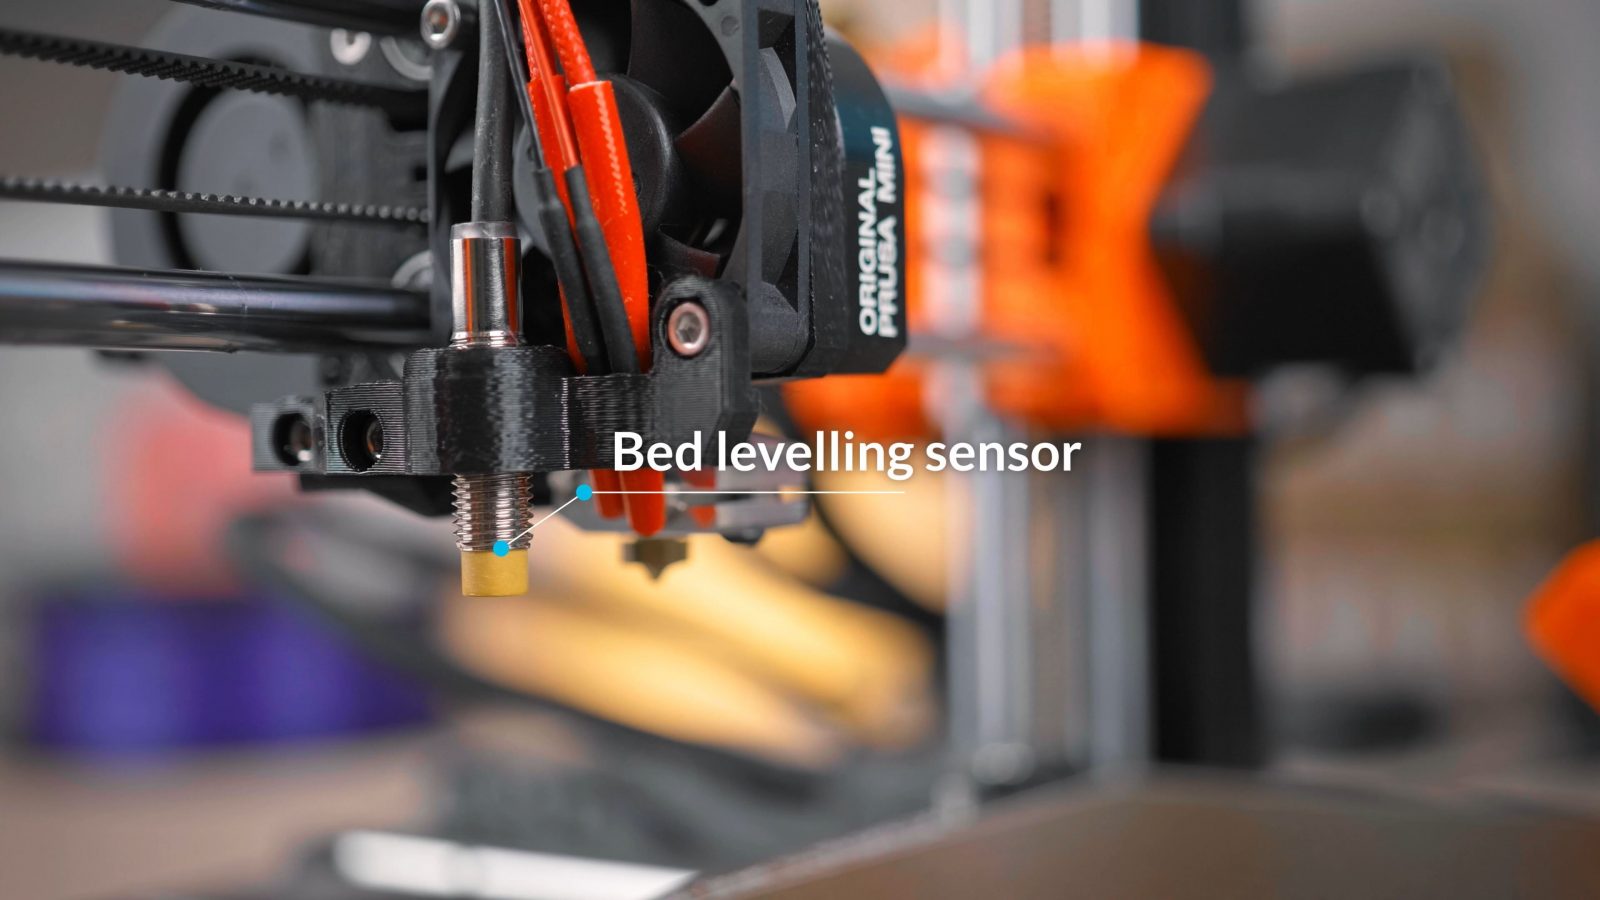
This one is angled down and blows cool air over the print as it’s being built up and that fan will be turned on or regulated as needed. You might also find a bed leveling sensor, depending on how they work they can look quite different.
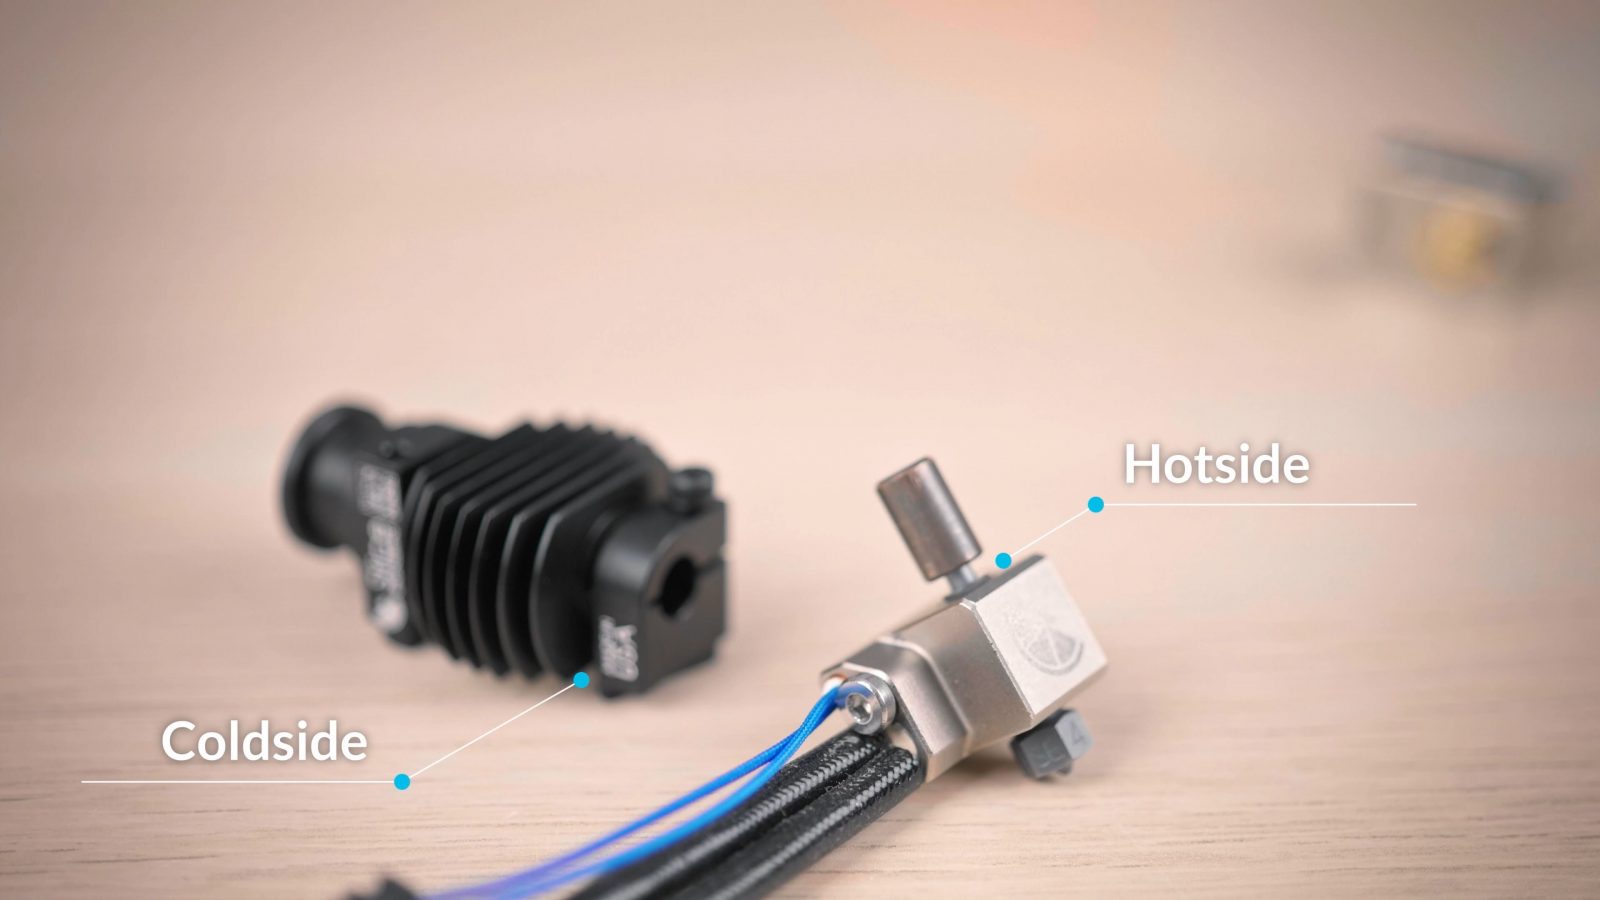
In the heater block of the hotend, you’ll find a heater cartridge and a thermistor, which measures the temperature. The nozzle, heater block, heatbreak, heater cartridge and thermistor make up the hot side of a hotend. I mean, they’re all hot in use and you probably shouldn’t touch them.

Maintenance – Fans
So for maintenance, starting with the two fans on the toolhead, every two to five spools you should check that they are free of dust and can spin freely, if they are dusty, blow them out with some compressed or canned air, but hold the fan blades so that they don’t go spinning crazy fast.
These fans turn into generators when you spin them, and that can damage the fan itself, or, worst case, the rest of the printer’s electronics. Though that’s pretty unlikely.
Also make sure the part cooling fan doesn’t blow over the hotend’s nozzle or heater block. You’ll always get some little air flow over the heated parts, but try to keep it to a minimum by either adjusting where the fan blows or by using a different fan duct.
Maintenance – Hotend
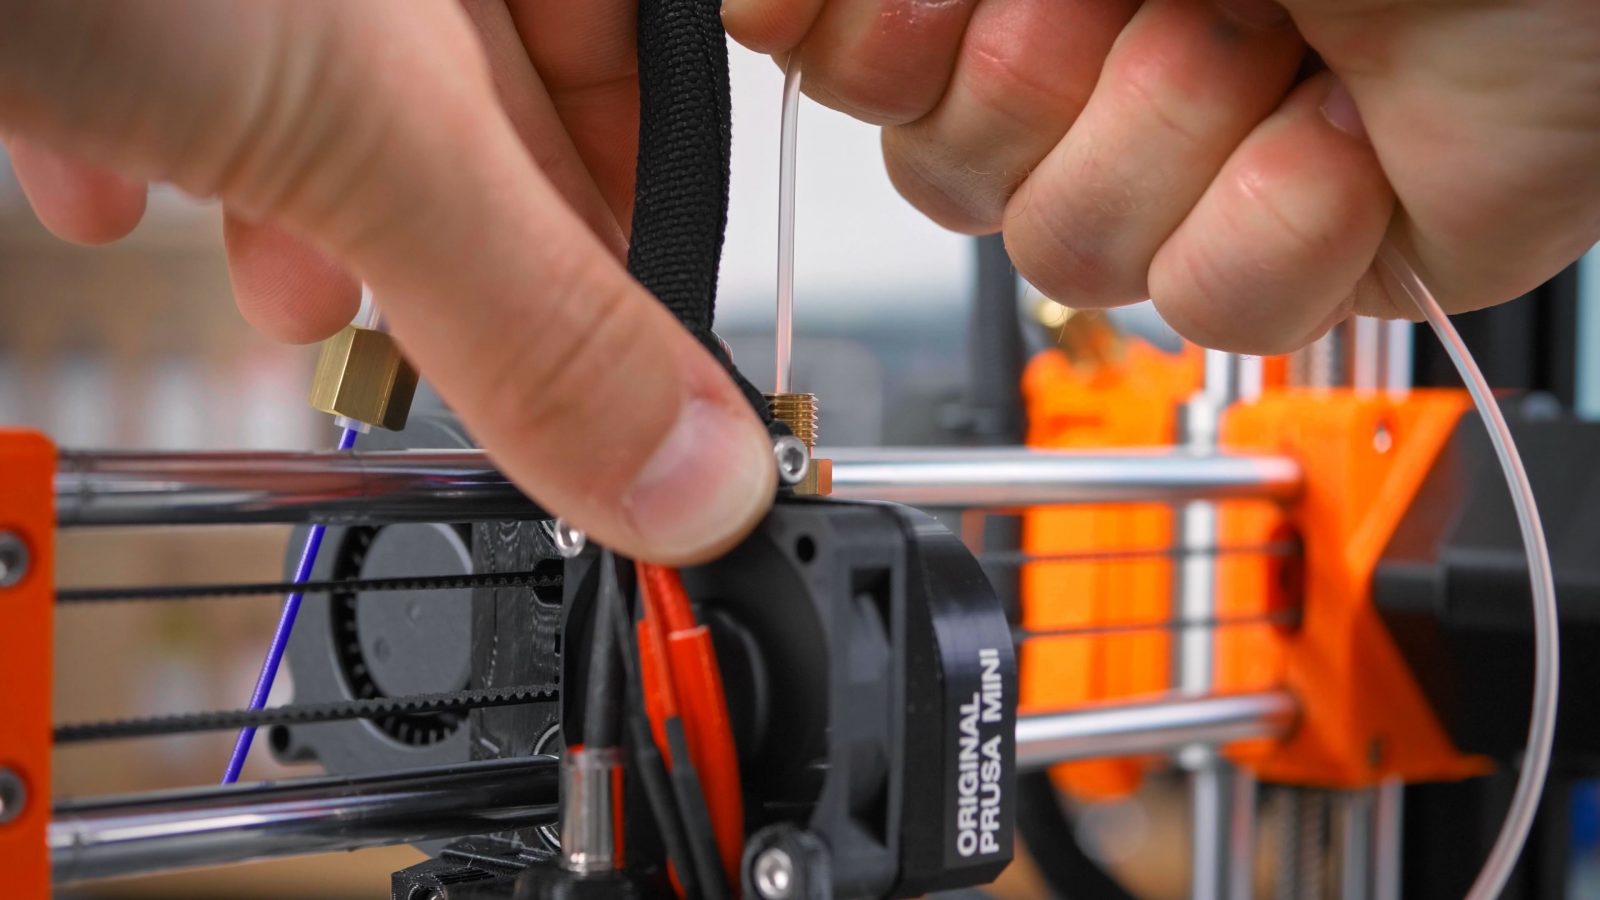
For the hotend, there are a few maintenance steps to keep it working optimally. After every print, especially if that print didn’t work out perfectly, make sure there are no plastic chunks stuck to the hotside. If there are, preheat the hotend before the next print and pick them off with some tweezers.
Also, occasionally give the thermistor a good look and make sure it’s still held in place properly. You definitely don’t want this to fall out. Its leads are delicate, so be careful with them.
Something that can help to keep your hotend working well is to keep the inside clean. An easy way to do that is a cold pull, which you usually don’t have to do more often than every two or three spools, if at all. Load some filament into the hotend, usually, you’d use Nylon here, but PETG also works, then let it cool down completely. Now, what you want to do is heat it up again, but keep trying to pull it out of the hotend by hand while it’s getting up to temperature. At some point between 50 and 100°C on the hotend, the filament should come out and, if it worked, should have a perfect impression of the inside of the nozzle.
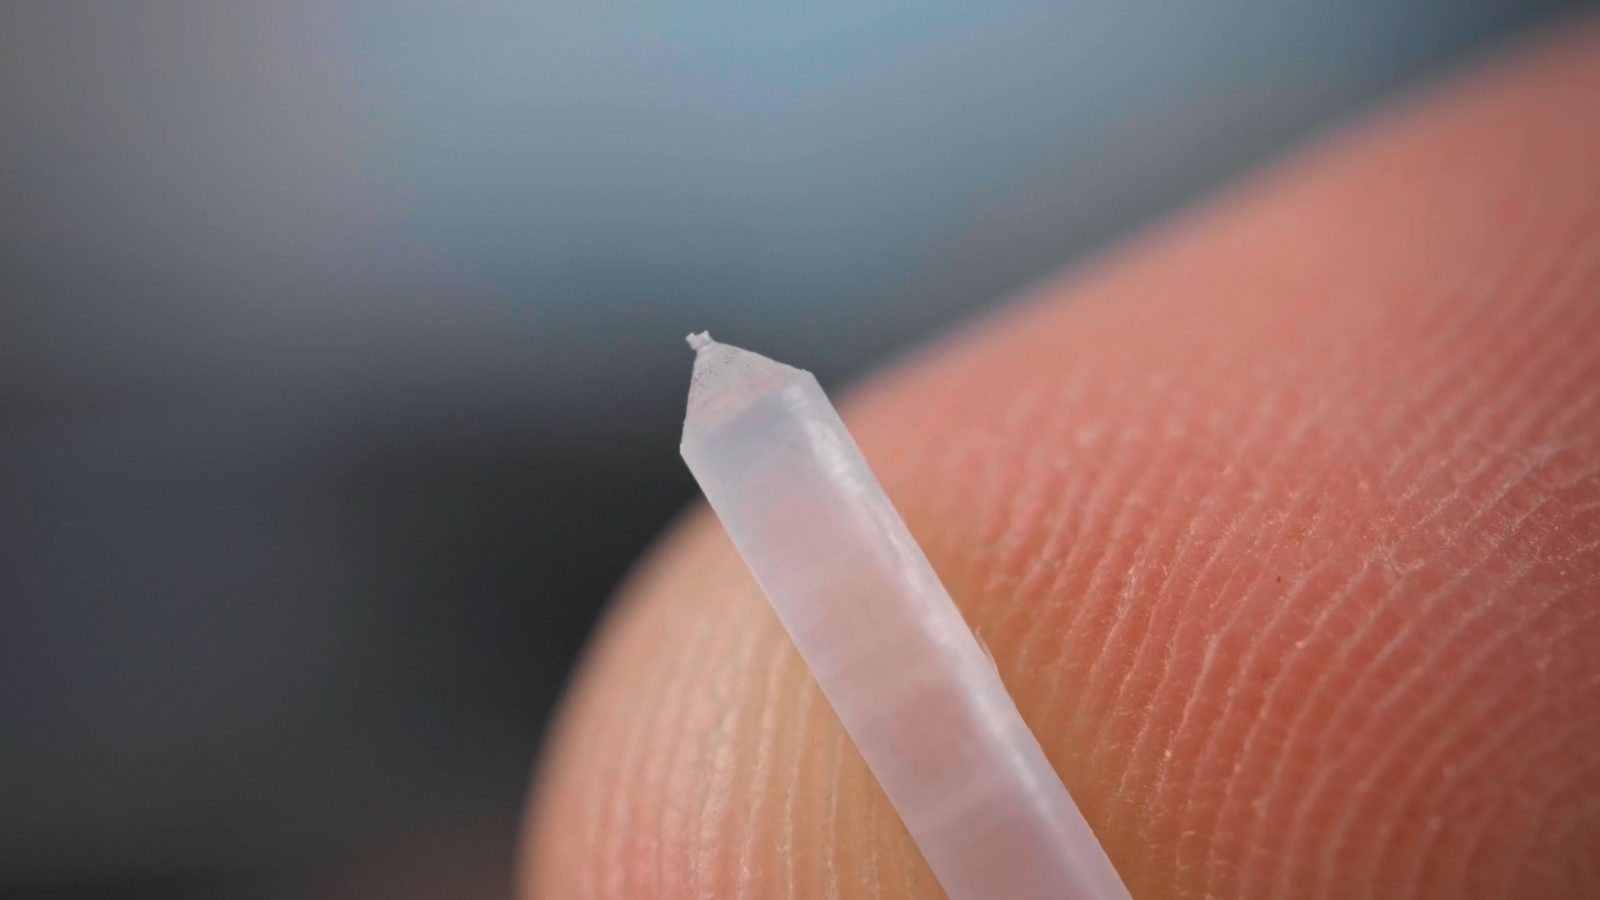
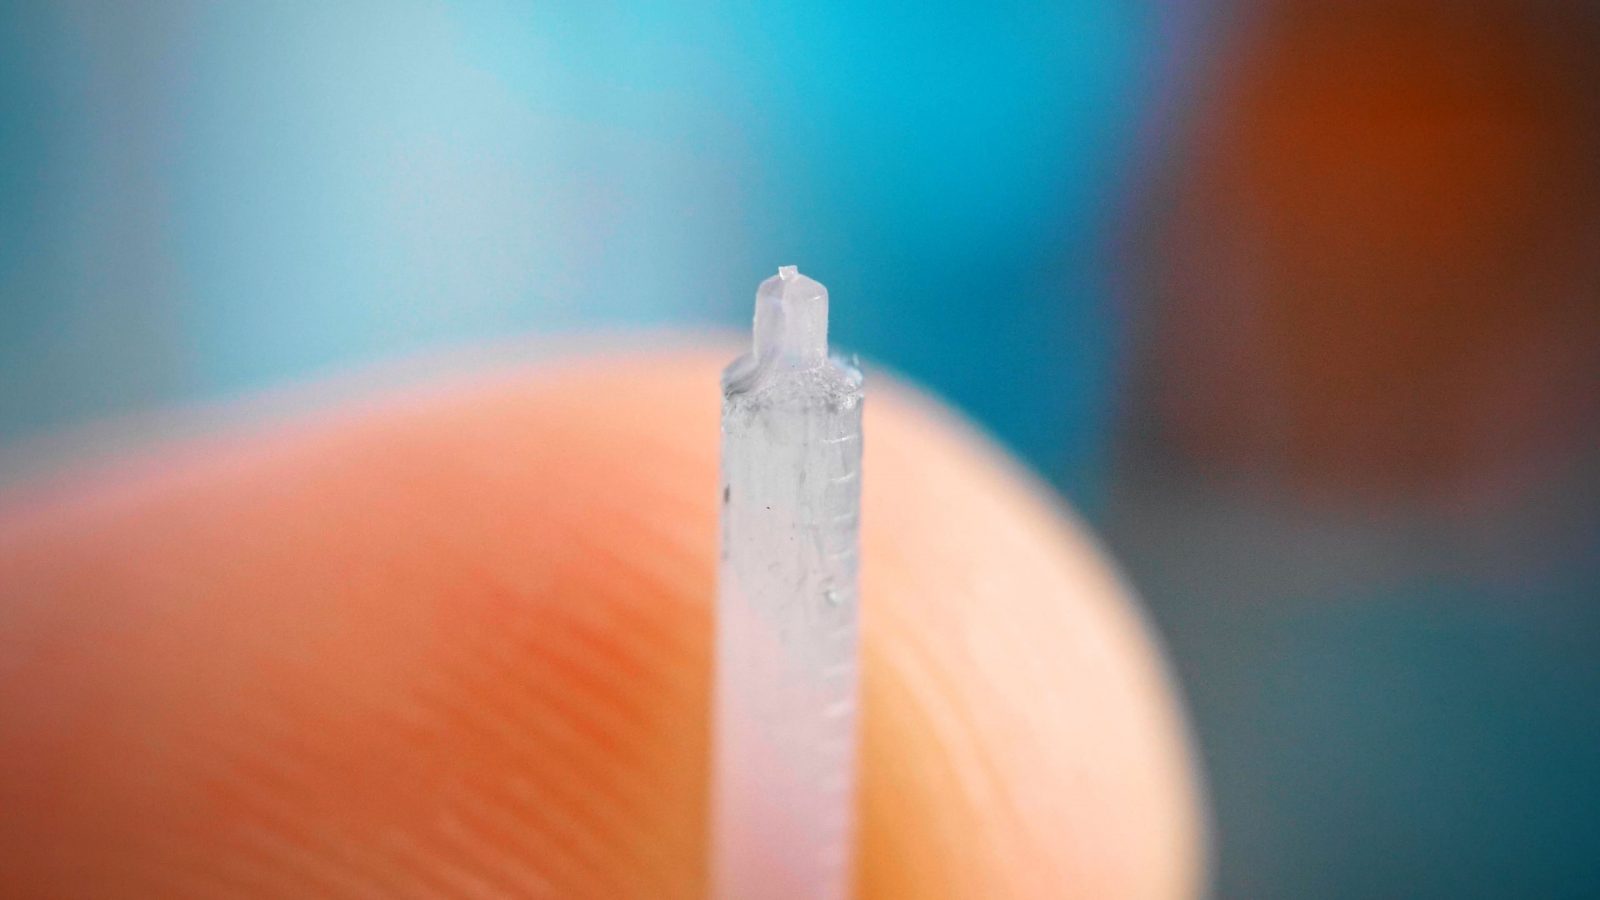
What this does is to take out charred debris that won’t fit through the nozzle and might clog it at some point. How much of that stuff accumulates heavily depends on the filament you use, and how you print it, so you might have to repeat the process to get it perfectly clean. If you have a bowden setup, it’s a good idea to remove the bowden tube so that you can feed and pull on the filament directly on the hotend.
On a lined hotend, the lining itself can degrade over time. Depending on how exactly your printer is built, check it about every 10 to 20 spools. If there is visible deformation or you’re seeing darker, toasted spots, you can usually just cut off the end and feed it back in.
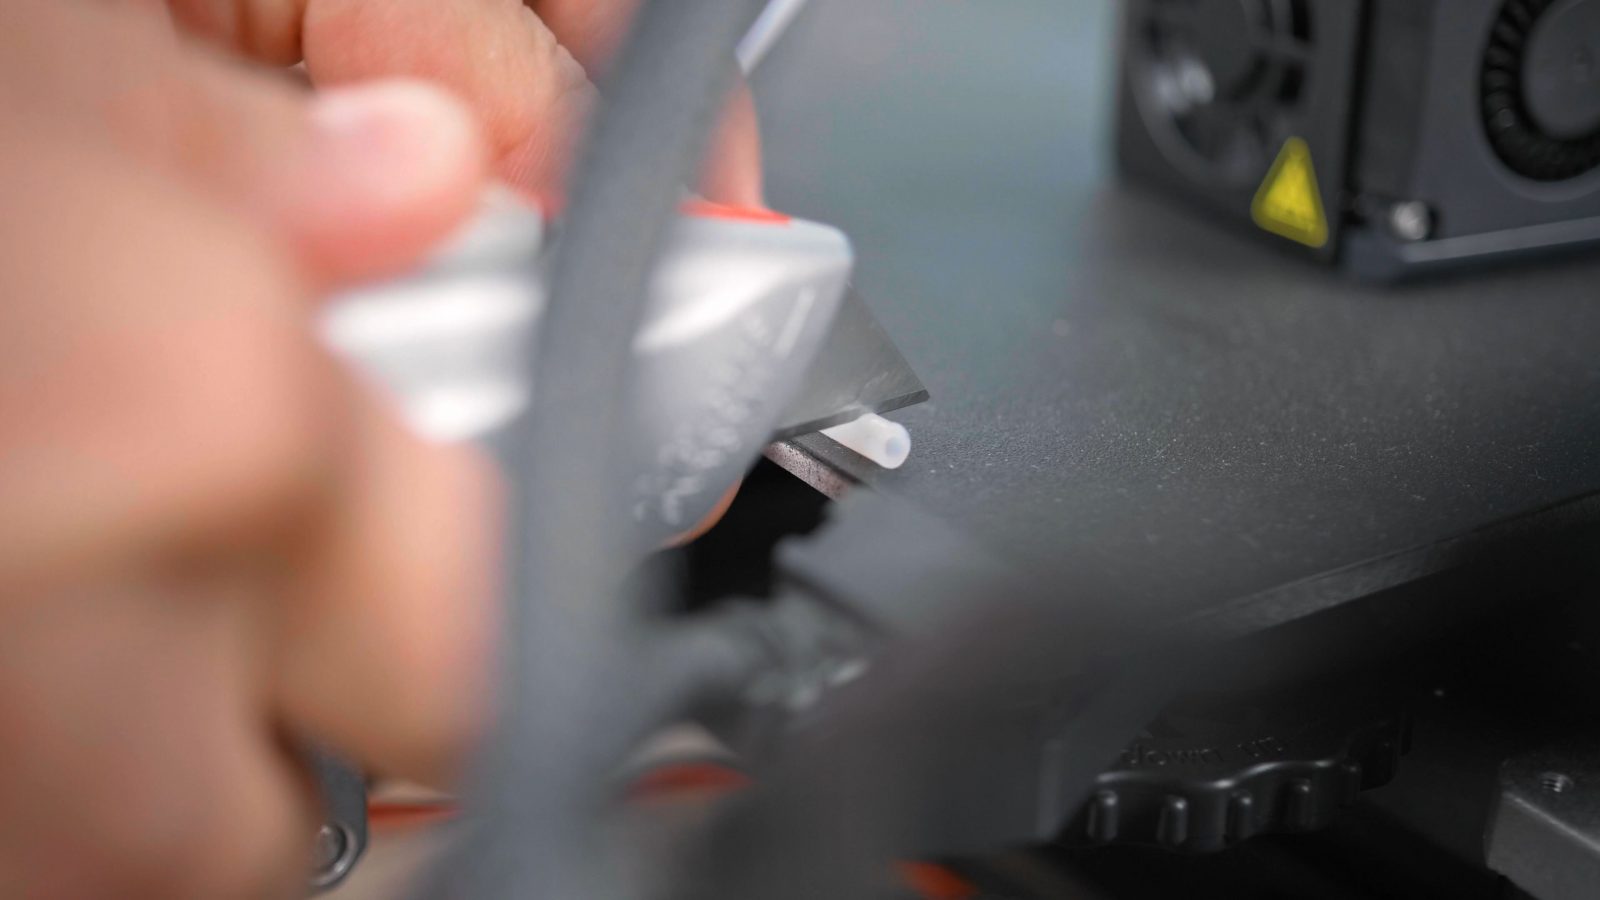
Getting a square and straight cut is important here. Keep in mind that this will make the bowden tube a bit shorter, so after a while, it might become too short and will need to be replaced. But the standard 4x2mm PTFE tube is pretty cheap. Bowden tubes also wear down over time, so replacing it every now and them is probably not too bad of an idea anyway. But whether you can just cut off the bowden and liner tube and whether that same tube is even going all the way down into the hotside or if there’s a separate piece of PTFE just going through the heatbreak will depend on how exactly your printer is built – there are plenty of variations and covering them all would be a bit too much now.
Maintenance – Nozzle
The last thing on the hotend is the nozzle itself. A standard brass nozzle can last a long time if you only ever print PLA. But especially materials with added fiber or metal particles can wear down a nozzle fairly quickly, so for those, you should never use a brass nozzle in the first place, but instead go for a special wear-resistant one.
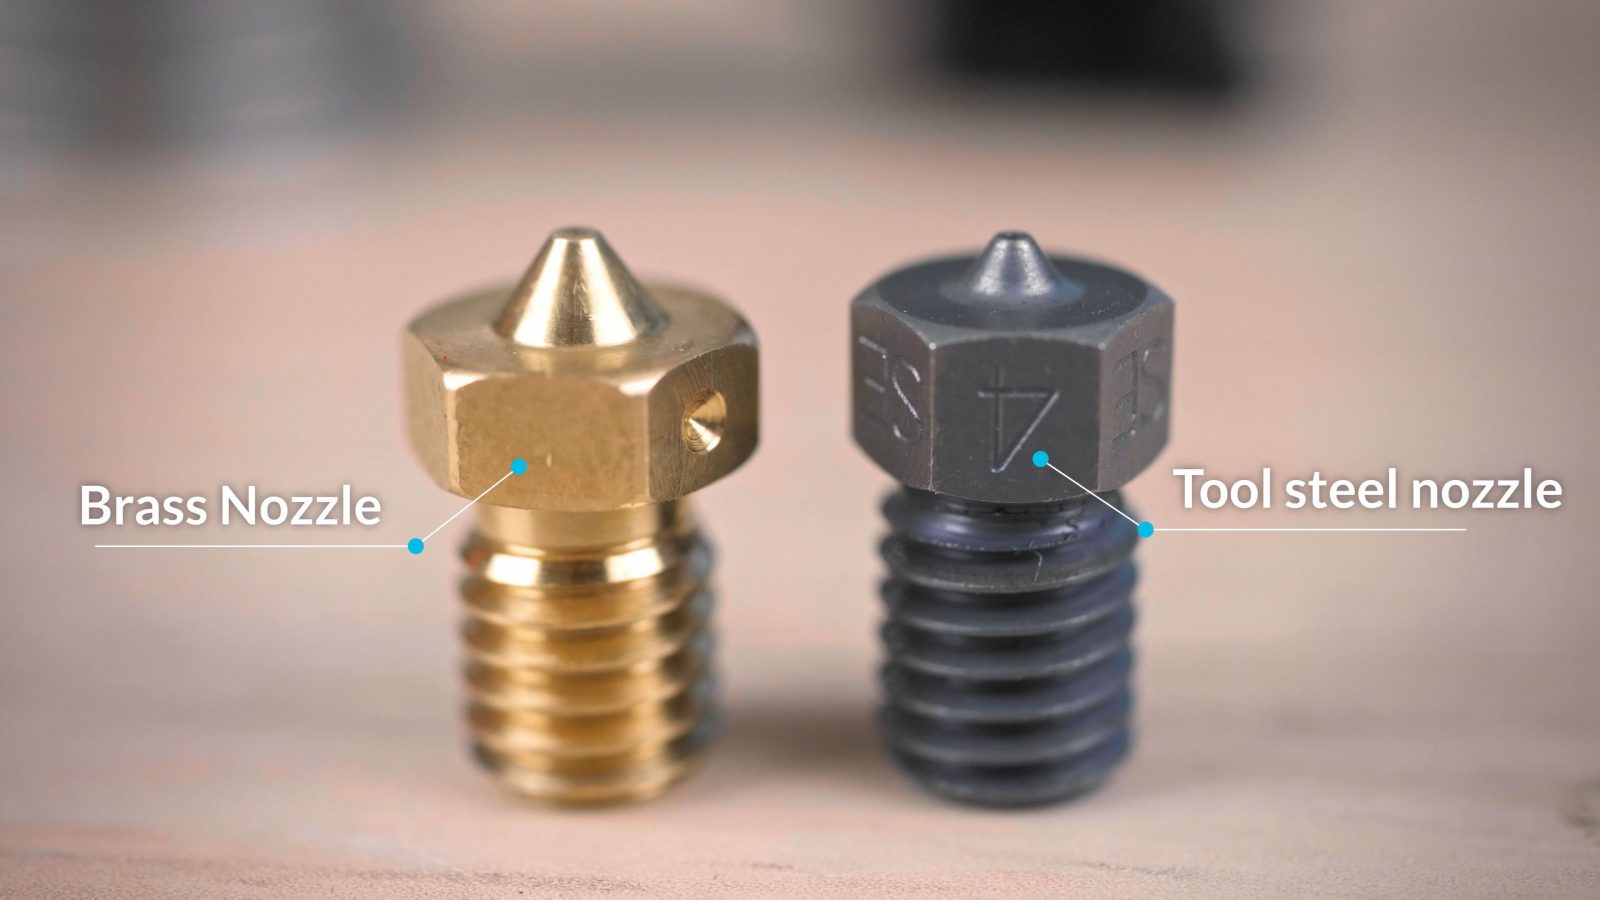
In either case, if you’re noticing the flat area around your nozzle’s orifice getting wider, it’s either time to see a doctor or to replace your printer’s nozzle. Follow the manufacturer’s instructions for how to disassemble and reassemble these parts. If you’re strong-arming parts, you’re usually about to break something.
Mechanics
Let’s move on to mechanics. Starting with the linear motion system.
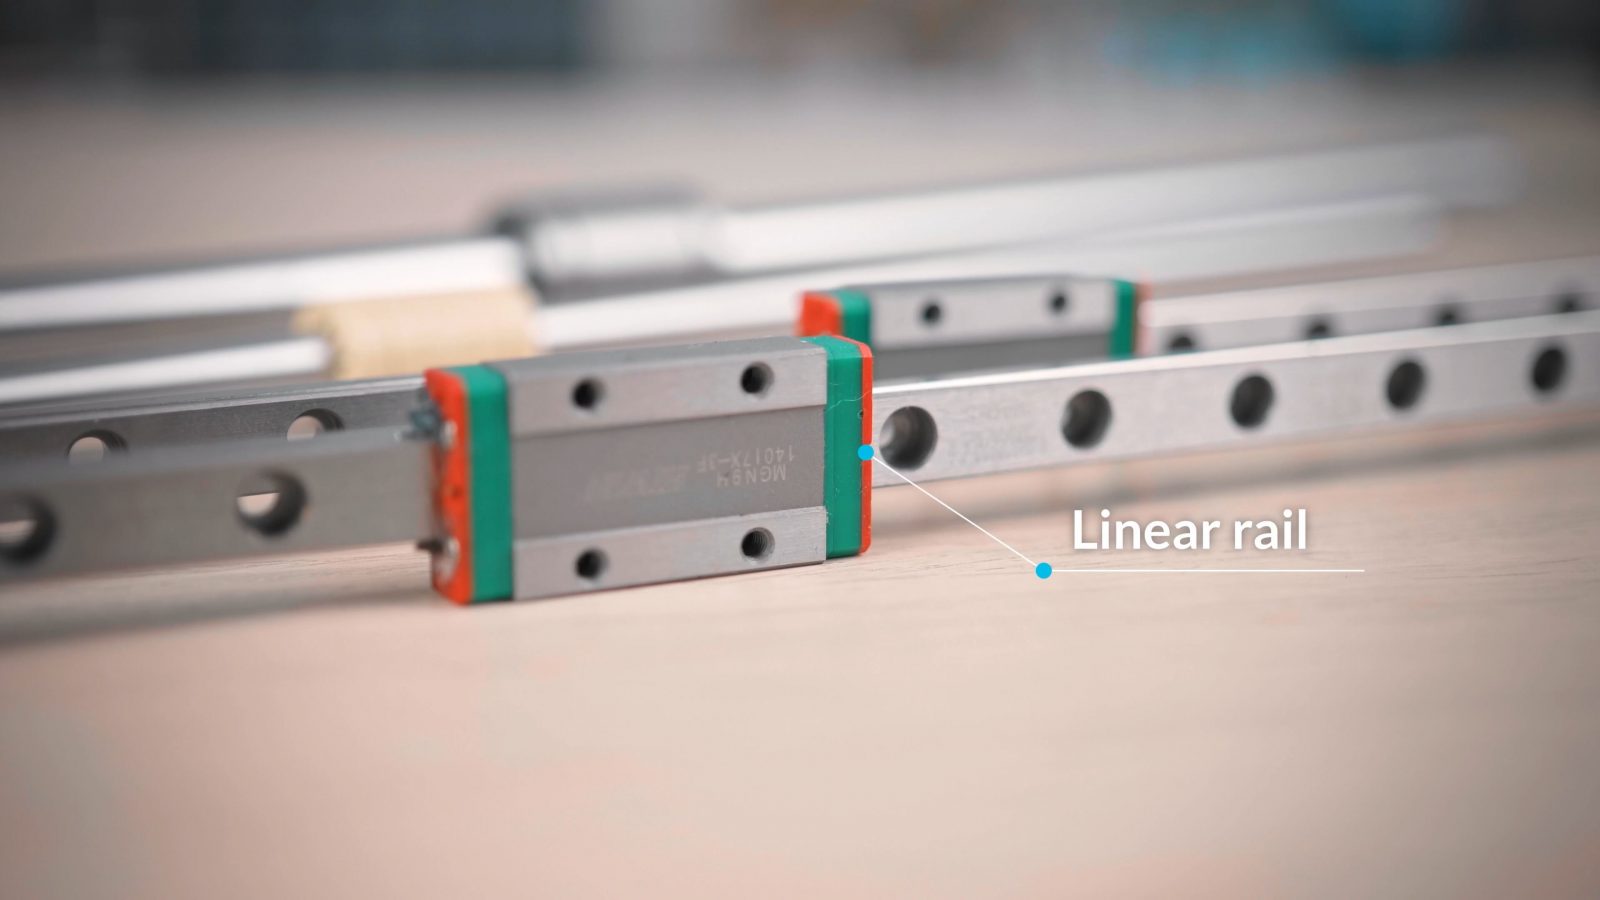
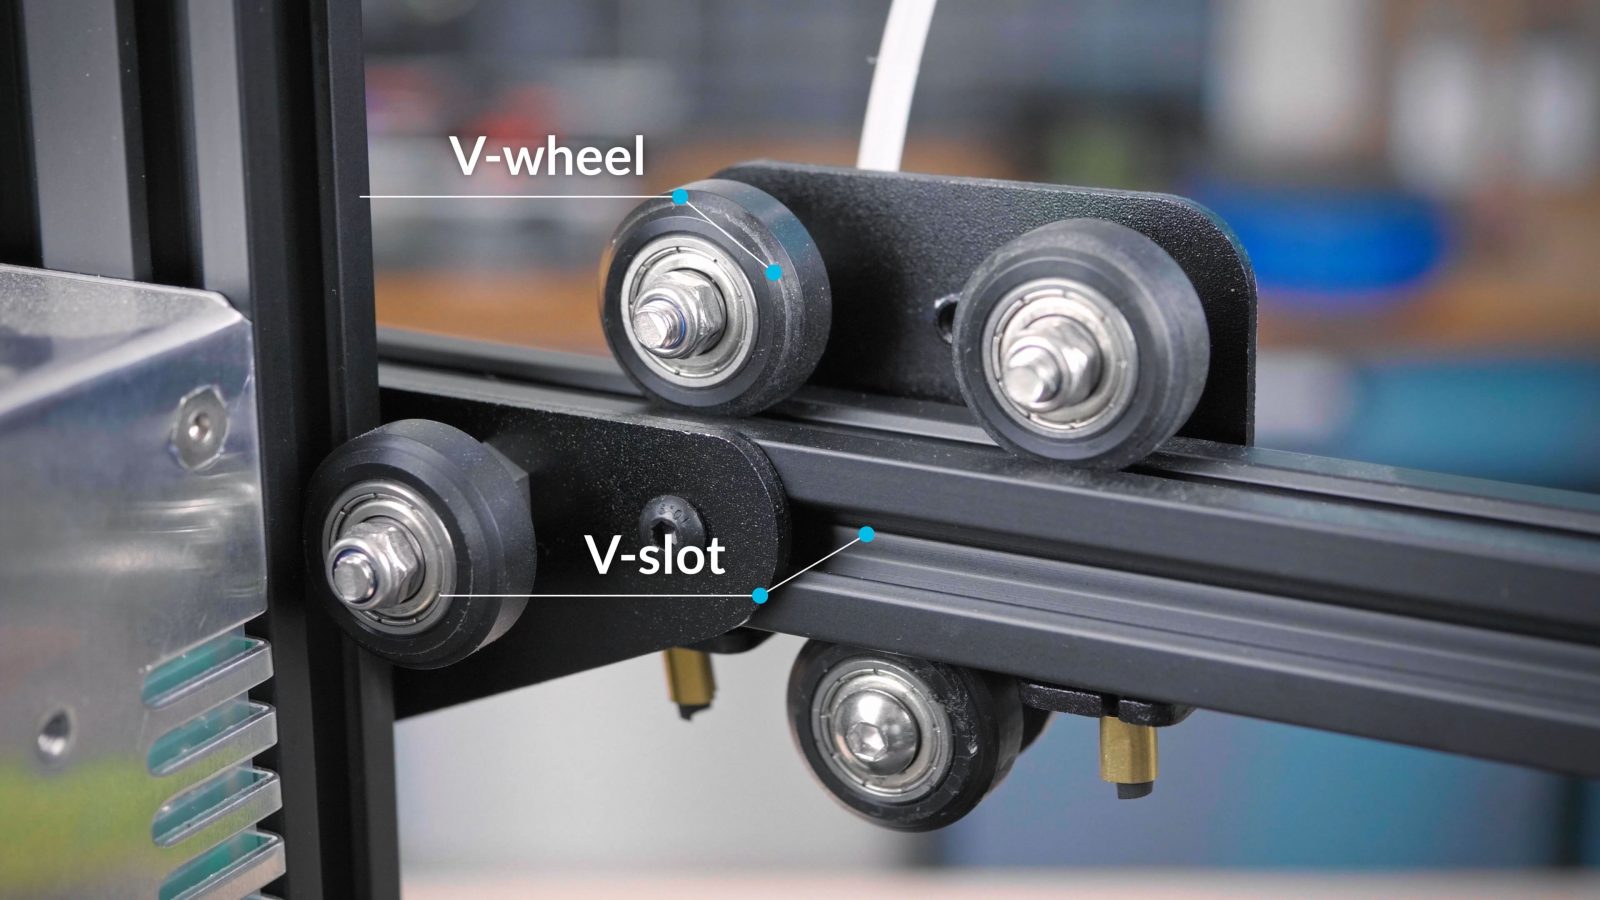
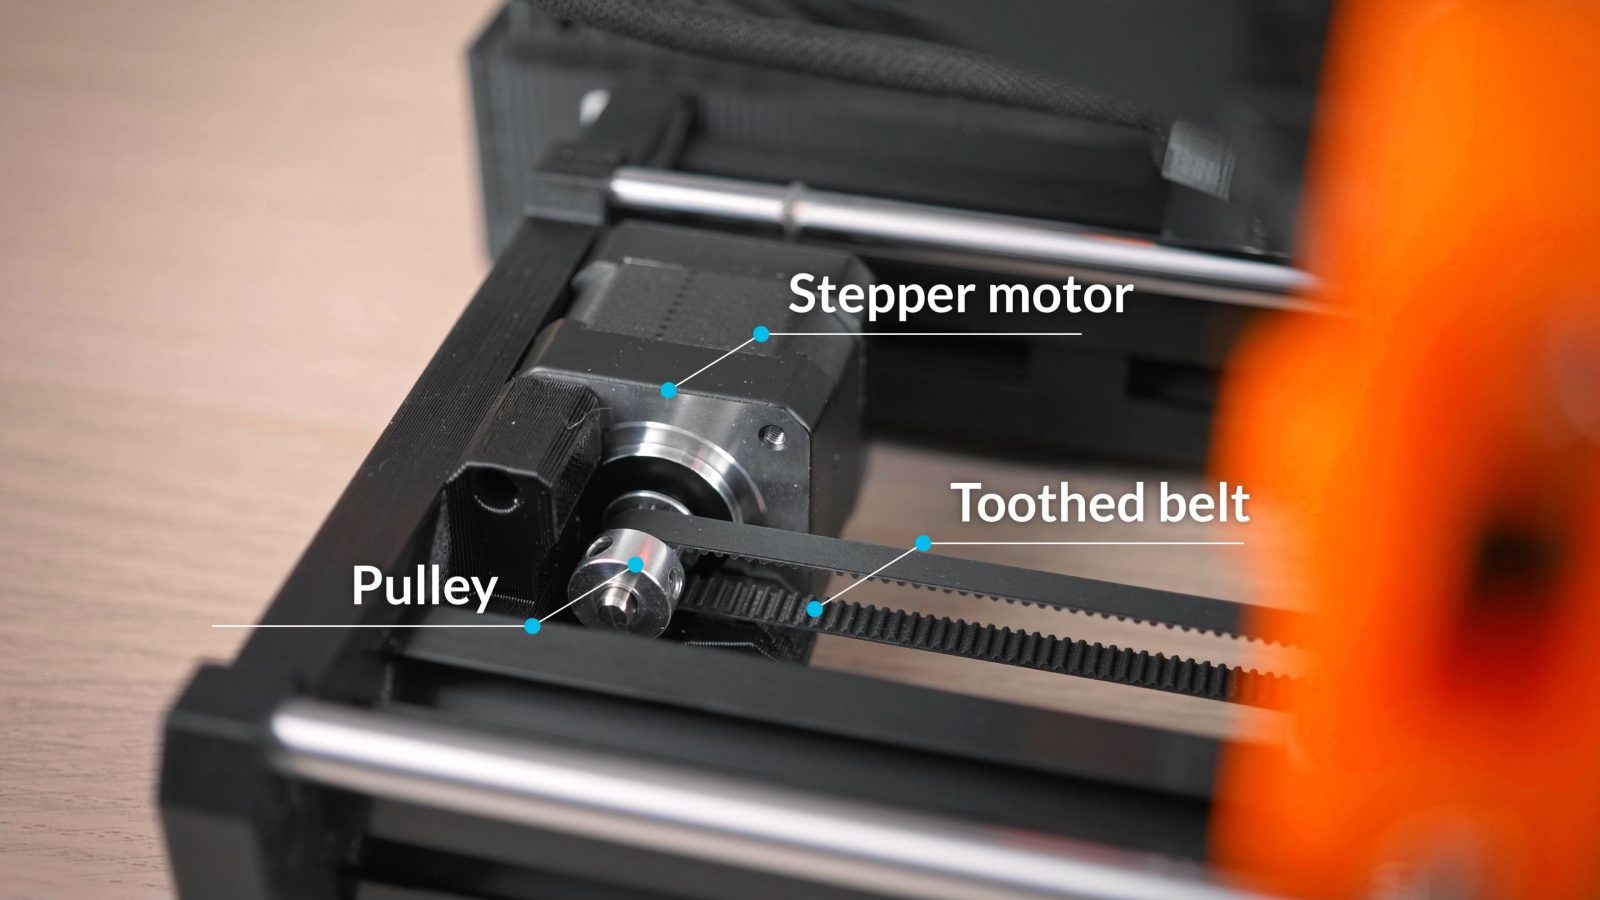
Your X, Y and Z-axes usually run on either round smooth rods and linear bearings or bushings, linear rails or on V-Slot aluminum profiles or extrusions with V-wheels. You might hear this system referred to as “Openbuilds” as they are the ones that came up with it. Driving the axes you’ve got toothed belts, which are driven by the pulley that’s sitting on the stepper motor and are looped back with an idler. For the vertical Z-axis, you’ve usually got a leadscrew and leadscrew nuts, or sometimes ballscrews. Usually, you’ll find an endstop on at least one of the ends of each axis, telling the printer when it has reached the end of its allowable motion range.
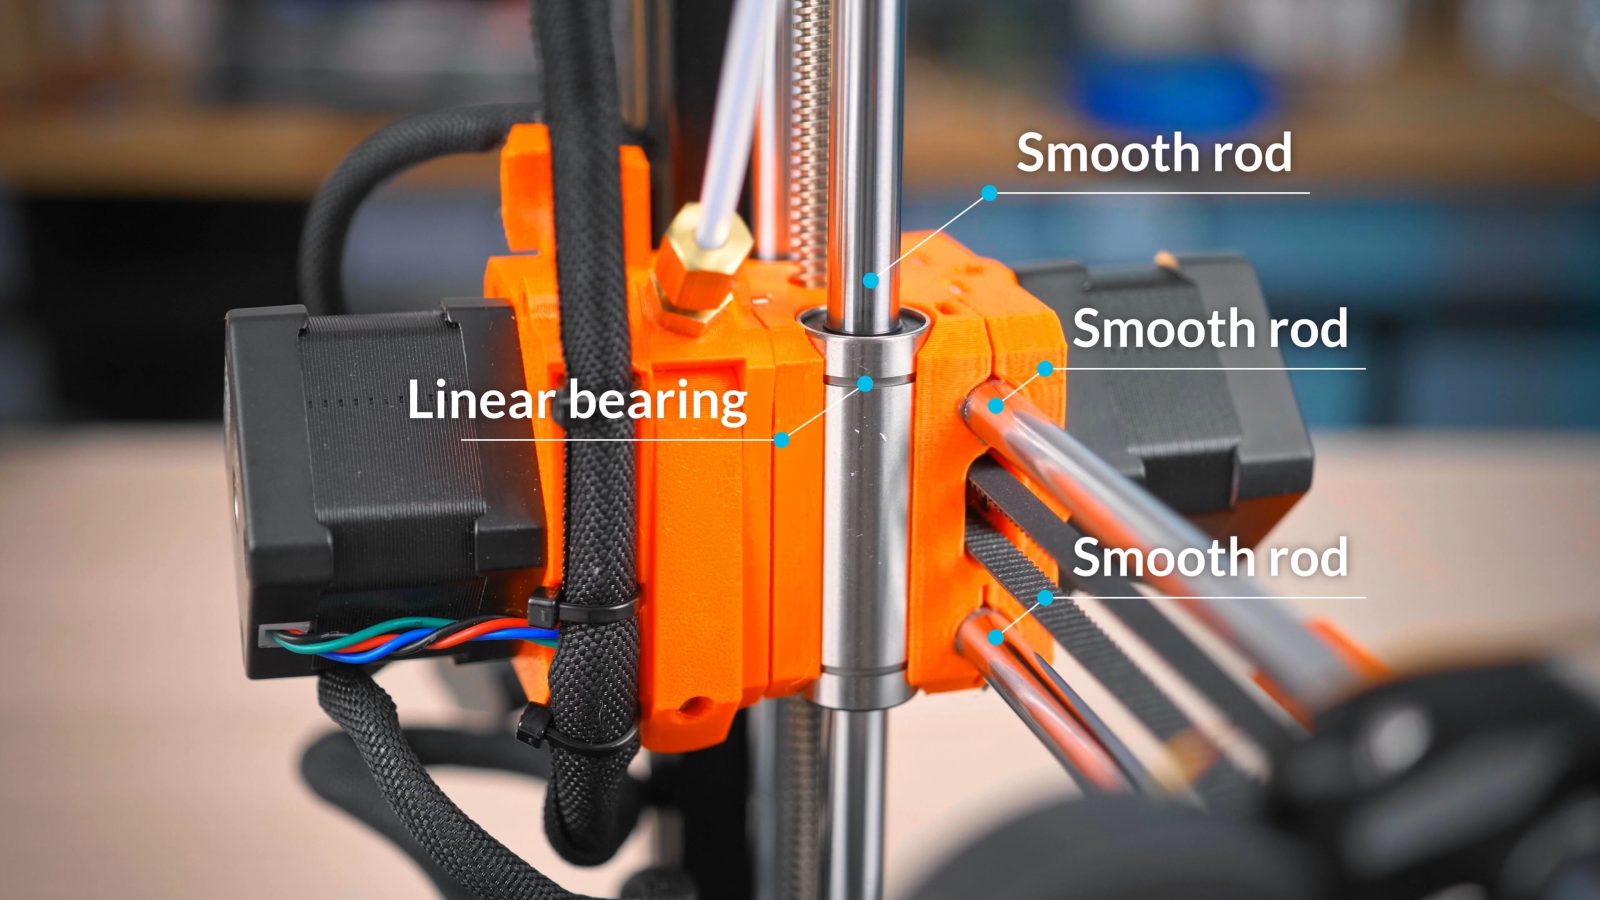
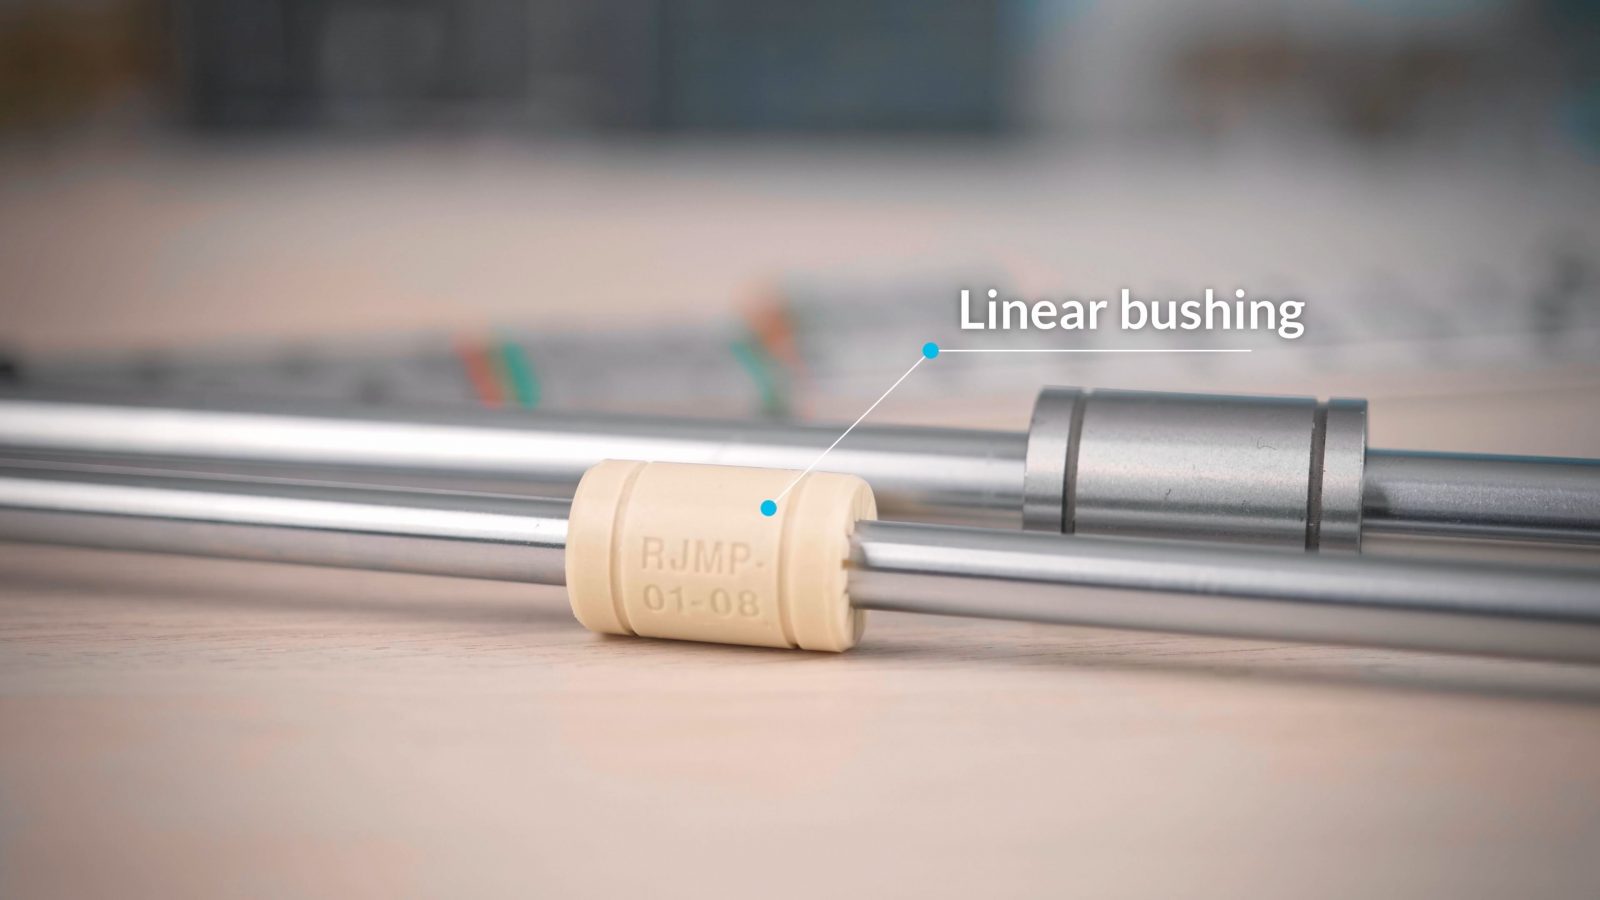

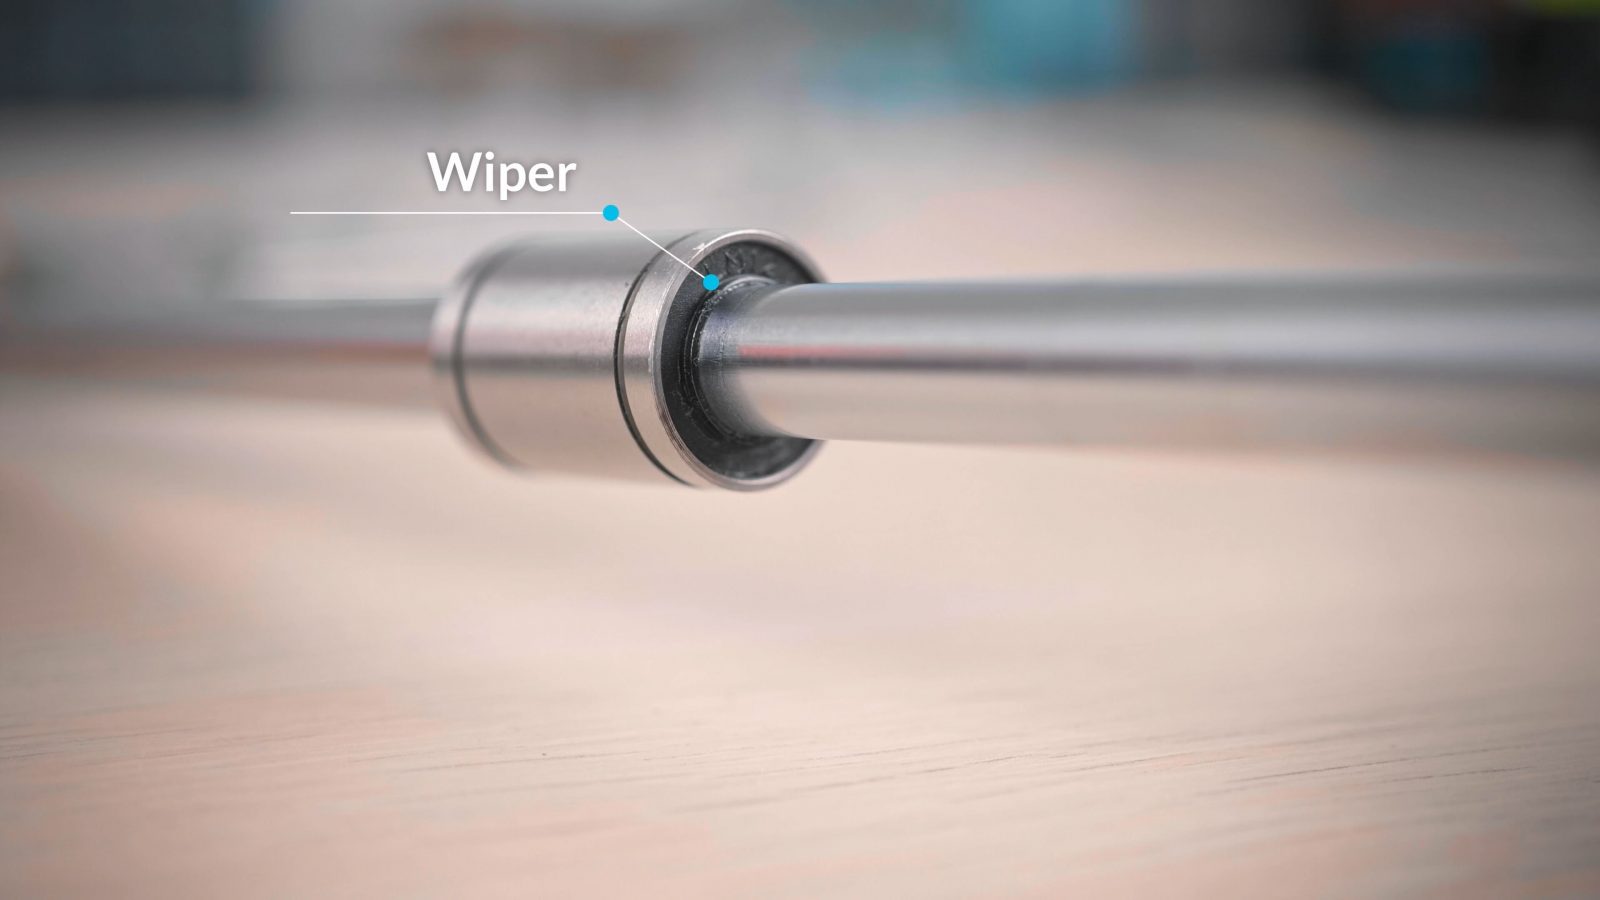
For linear guides using linear bearings, it’s important to keep the rods they run on free of dust and debris. These bearings have wipers that will shove dust away, but not letting dust or especially sand get onto them is a good bit of prevention. These rods will naturally be oily, that’s ok as the bearings themselves are lubricated.
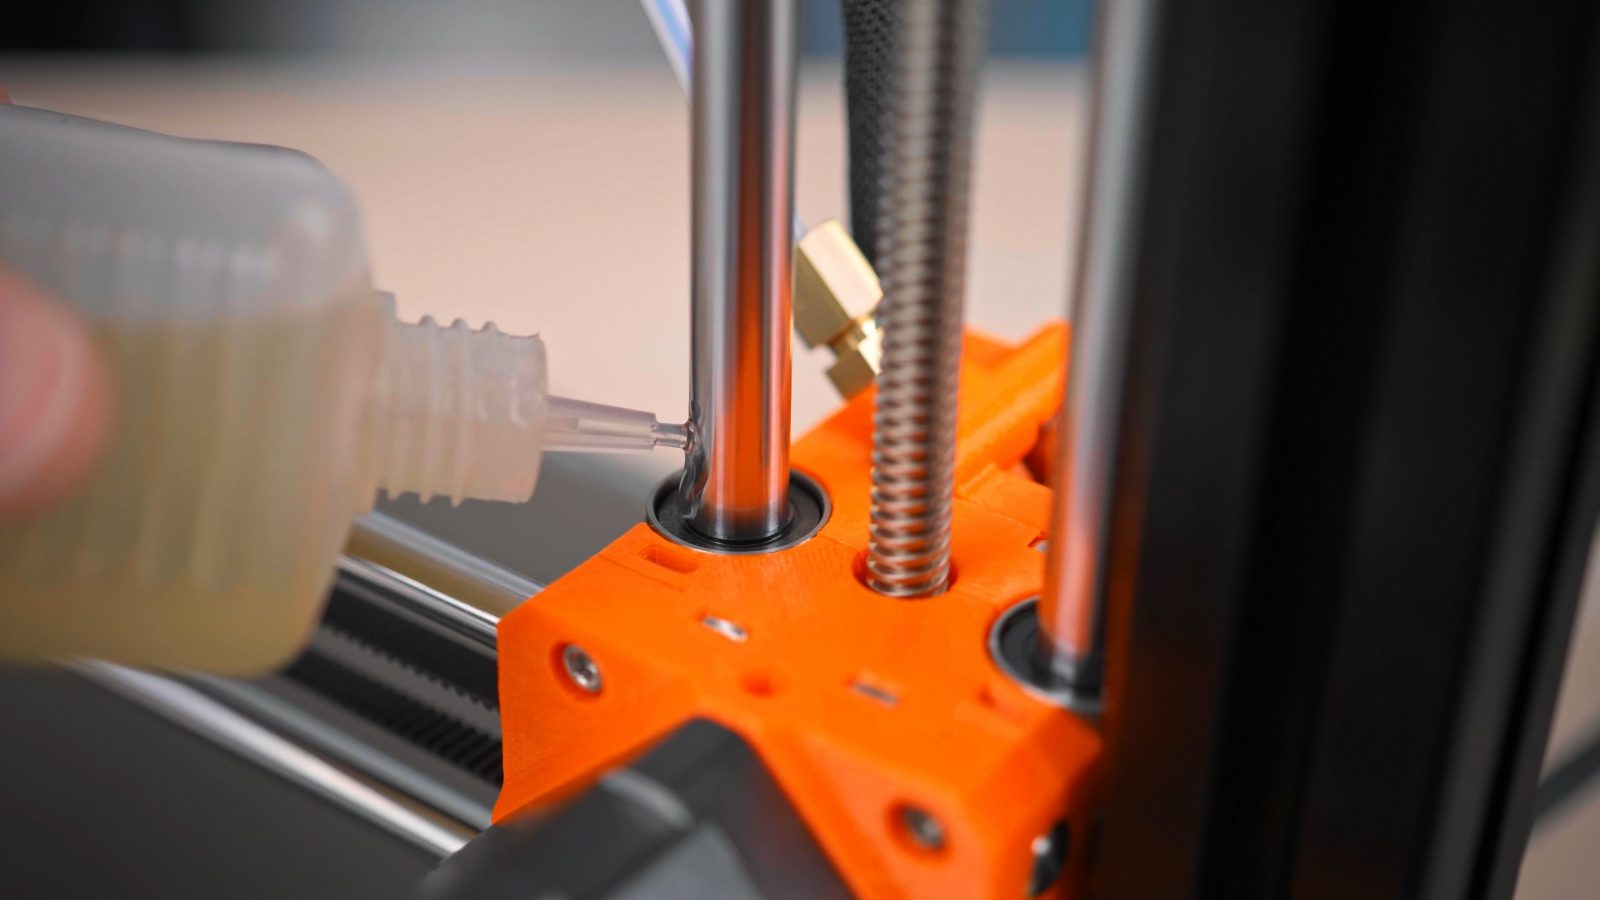
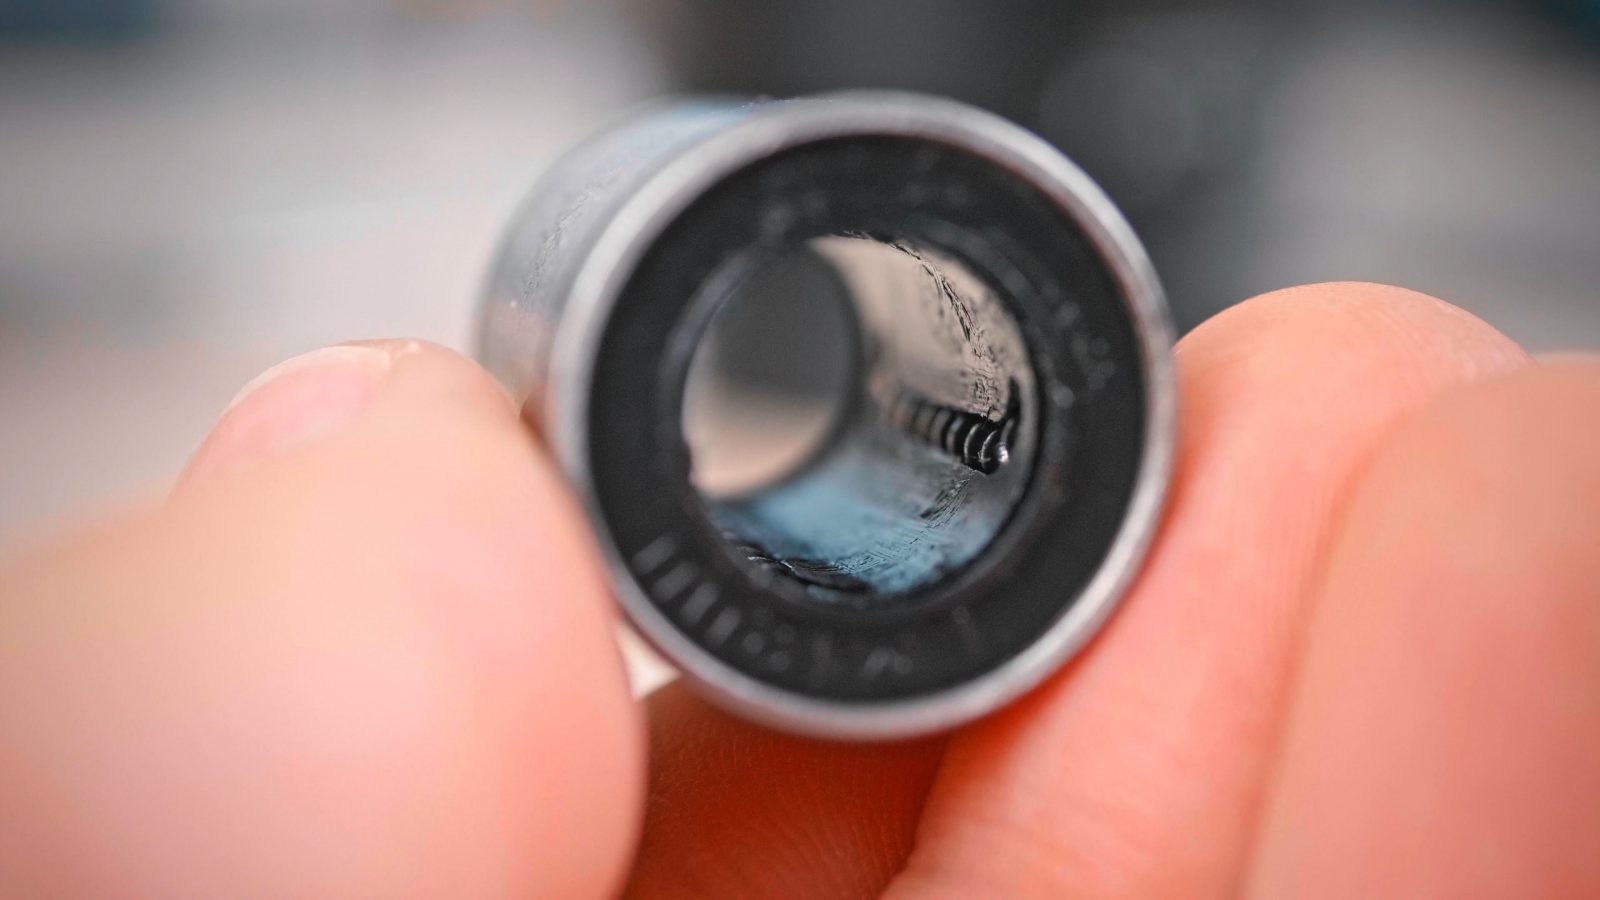
If you can stay on top of it, it’s certainly not a bad idea to add a drop of medium-viscosity oil onto the ends of the bearings after each spool of filament. But if you prefer a more thorough, but less frequent schedule, you can also take out the bearings every 20 spools or so and pack them with grease. There are some good printable helpers available for this.
On Vslot designs, you’ll get a bit of rub-off from the plastic wheels, which can bunch up as bumps and create issues on your prints. Remove those as soon as you see them. Also wipe down the aluminum V-Slot extrusion itself to pick up any ruboff before it can cake on. The bearings inside these wheels should be manufactured with a lifetime grease packing, so you don’t have to worry about them. But because the wheels themselves wear down and can lose their adjustment, you will need to periodically adjust the tension on them. Check every two or three spools if you can feel any slop in the carriage.
For the belts, there’s very little periodic maintenance to be done. But while the printer is new and things are still settling in, it’s a good idea to check the belt tension every spool or so. When you pluck it, it should be in the frequency range of a bass guitar, if it’s not, your belt tension is probably off.
And for leadscrews, a bit of grease every now and then certainly doesn’t hurt. As leadscrews are a sliding mate, and not a rolling one like bearings, oil instead of grease is probably too thin here.
One last note on every linear axis – you’re able move them by hand when the printer is off, but try not to jerk them too fast. When a stepper motor is spun up externally, just like a fan, it acts as a generator, and that backwards current can destroy or at least damage its driver chip.
Printbed
Typically on the Y-axis of a printer, you’ve got your printbed. If it’s heated, it’s a heated bed. Genius, isn’t it? Common ways of building bed heaters are using an aluminum-core PCB, a regular PCB, that’s “printed circuit board”, or using a silicone heater and a sheet of aluminum. On top, you’ve got the bed surface, using either a “Buildtak”-style sticker, this is typically a textured polycarbonate film, or a “PEI” film, also applied with double-sided adhesive, or a powder-coated textured PEI surface.
“Buildtak”-style sticker 
“PEI” film 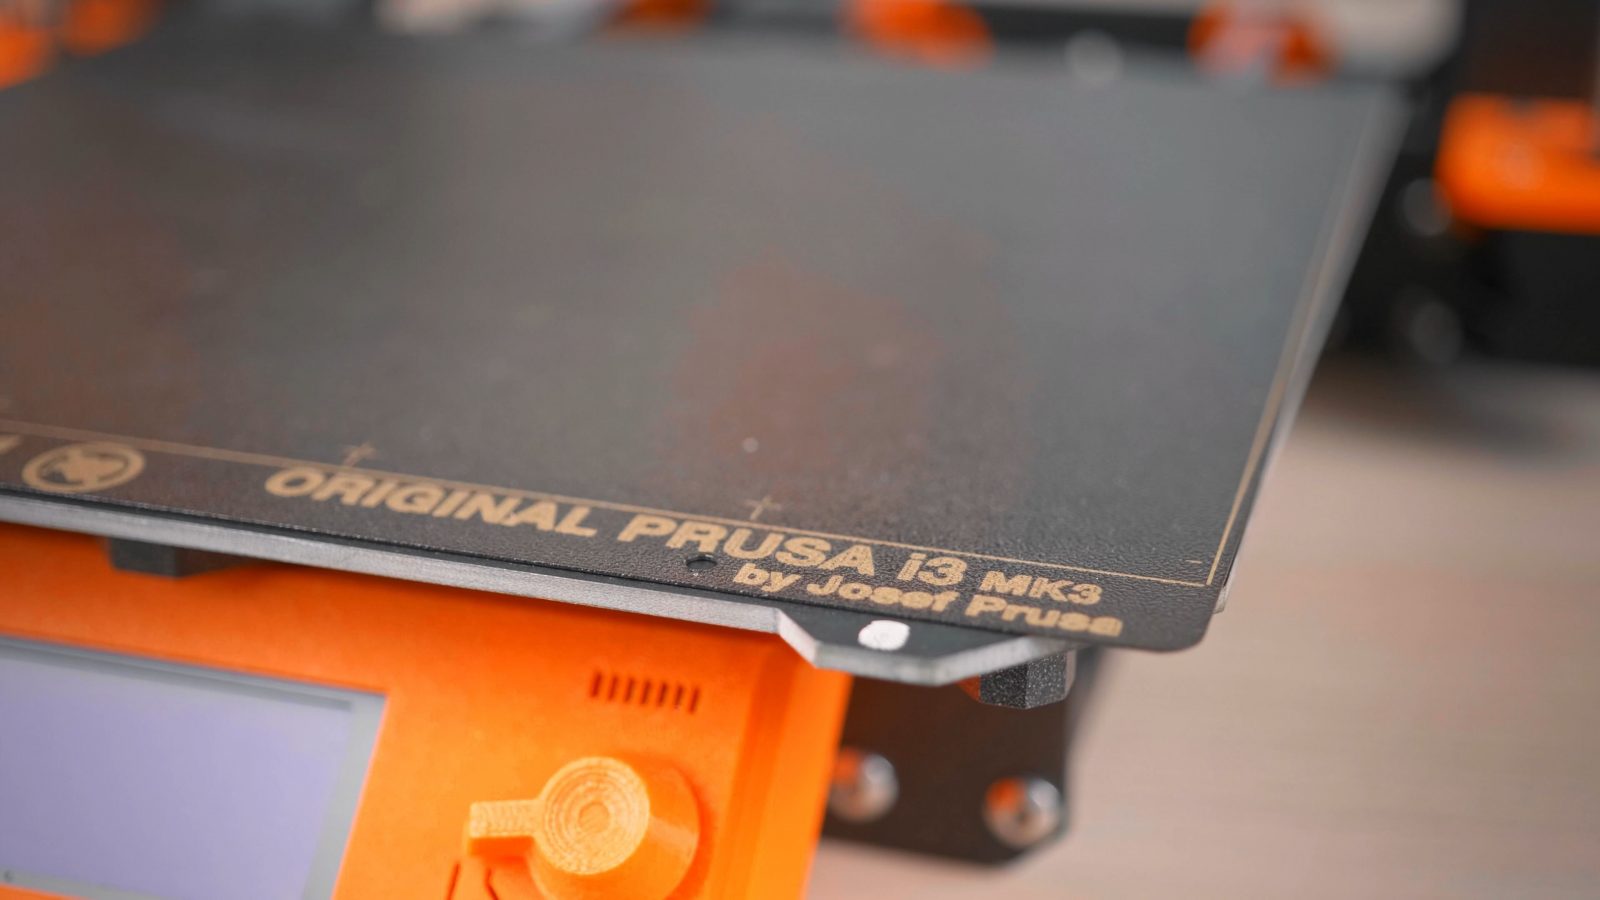
powder-coated textured PEI surface
If your printer just has a plain glass or aluminum surface, usually you use a bed adhesive that is sprayed or brushed on. On glass, just a clean surface with nothing on it will often work fine for PLA. There are different grades of glass, the one you will often hear is “borosilicate glass”, as that is more temperature resistant than plain soda-lime glass.
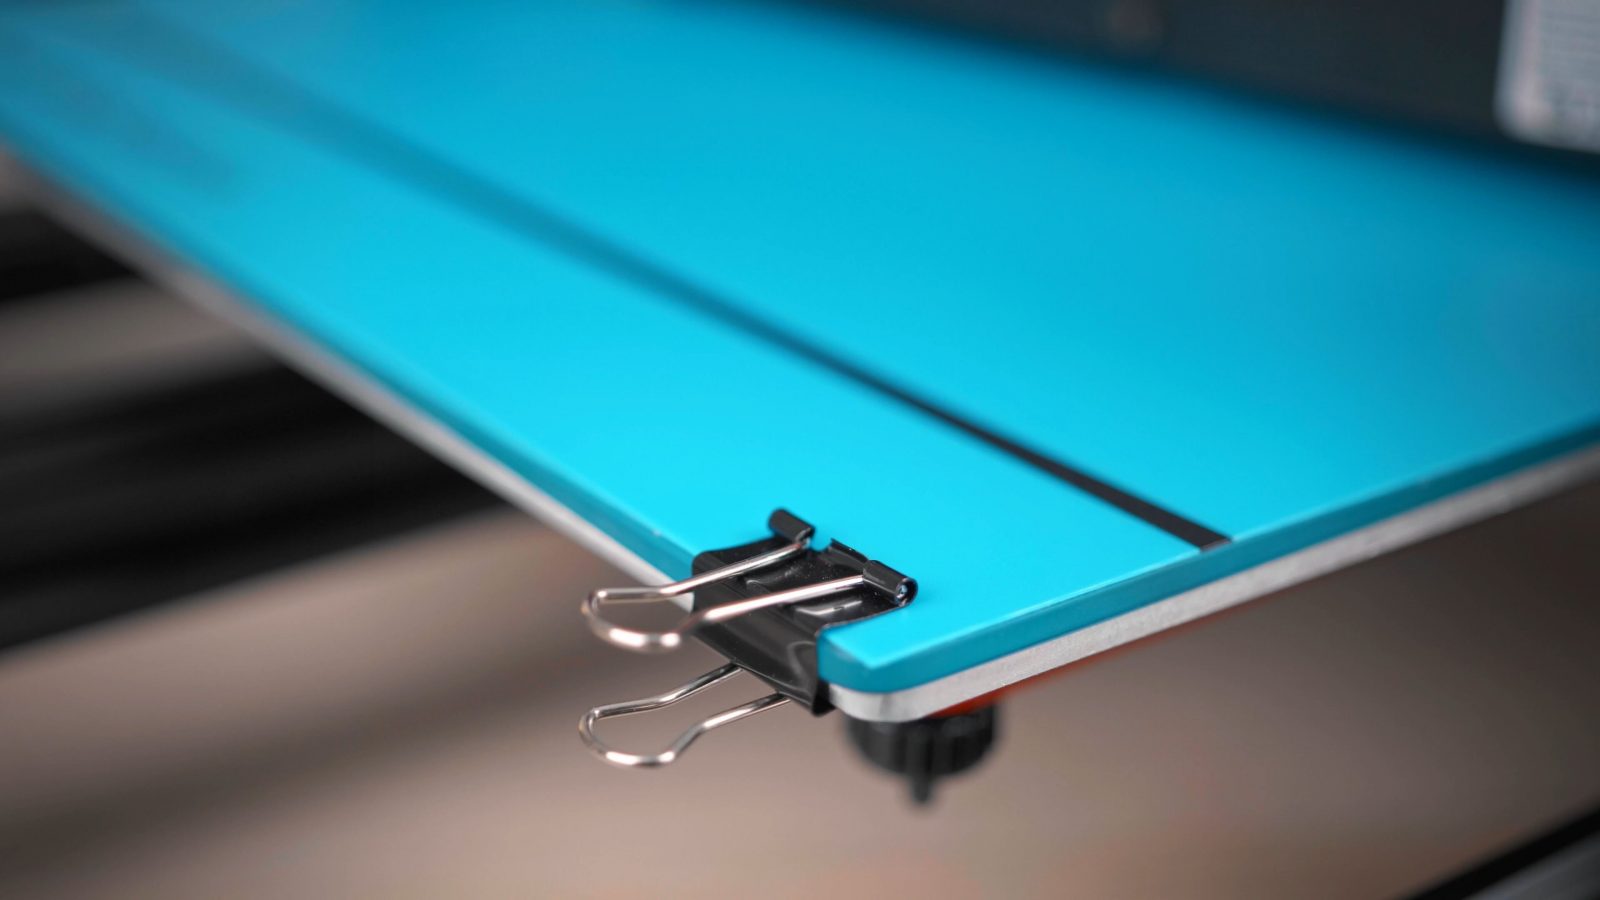
The most important part to maintaining a bed is to keep it clean. Dust and finger oil can decrease adhesion and lead to lifting prints. A good cleaning agent is a roughly 50/50 mix of water and ethanol, also known as Vodka. The alcohol will remove grease and the water will take care of other contamination that might not dissolve in pure alcohol. Depending on how much you touch your bed surface and what material combination you use, a quick wipedown every 5 prints should keep it serviceable. If you use an additional adhesive, remove or reapply according to the manufacturer’s instructions.
The other part to getting prints to stick is a level, well, technically, trammed bed and a correctly set nozzle distance for the first layer. We’ll be looking at those in video number 9, as they are not something that necessarily needs to be adjusted or checked in fixed intervals. You set it up once and only need to touch if stuff starts going wrong.
Electronics
Let’s move on to the electronics. The main components are a power supply, the mainboard, with stepper drivers either soldered on or on Pololu-style modules, as well as peripherals like an LCD screen or LCD controller. On the mainboard you also have a microcontroller, which contains the processor managing the entire printer, MOSFETs, switching the current to the hotend heater and the heated bed, and connectors for thermistors, stepper motors, heaters and other components.
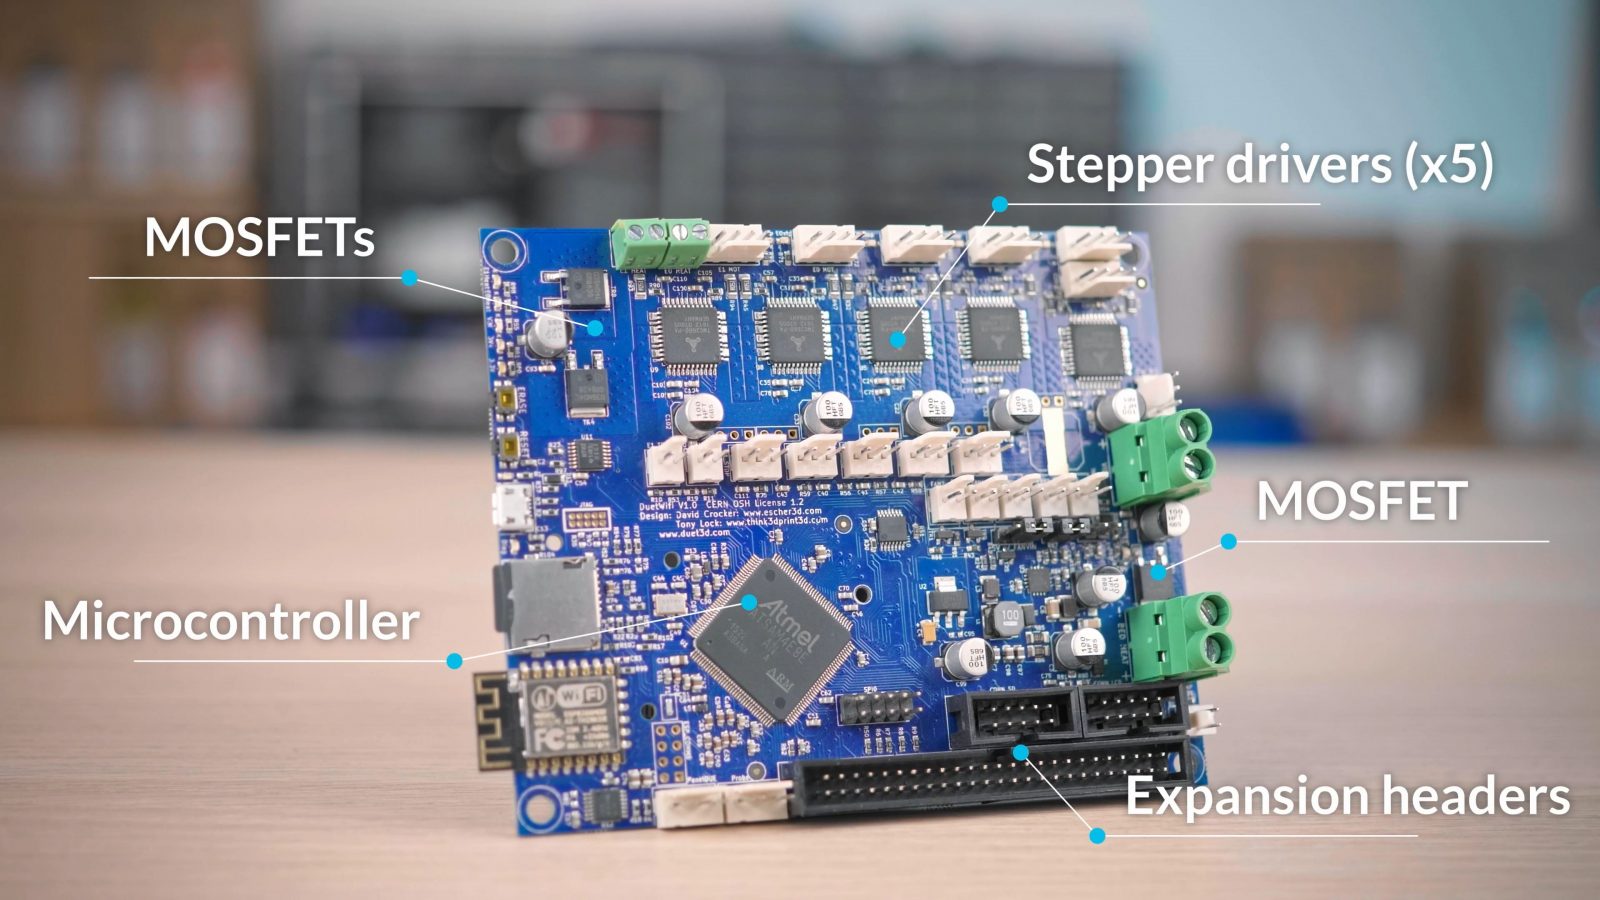
Since these are solid-state components with no moving parts, there is nothing to really service here. But you should still check every now and then – 10, 20 spools maybe – that there is no discoloration from heat on the PCB, components or cables, and that these screw connectors are still tight. Depending on how these were originally assembled, it may be necessary to retighten them at least once after the cable you’re clamping has settled. The other thing you should keep an eye on for wiring is that there are no spots that are chafing or where a cable keeps sharply bending in the same spot.
Alright, so that should cover the basic components and the maintenance of the printer itself. There is still terminology to be had with the actual print and all the features on that, but I’ll be covering those in the “Slicer basics” video as that’s where they will become relevant.
So lastly here, I want to give you a quick overview of the filament types that you’re going to be printing and what they’re used for.
Filament
Starting with the most common one, PLA is polylactic acid, and it’s made from cornstarch or other sources of sugar. It is generally the easiest material to print because of its low tendency of warping, and good layer adhesion even when printed at room temperature ambient temperature.
PETG is part of the polyester family and it’s Polyethylene Terephthalate, modified with Glycol. The G makes it tougher, but softer, but in general, polyesters are more temperature resistant than PLA. It can be printed on most printers, but if the ambient temperature is too low, it can start curling and cracking. Also, it will stick way too well to PEI film and plain glass bed surfaces and can easily take chunks out of those when removing prints. On the other hand, getting stuff like paints or glues to stick reliable to polyesters can be kind of tricky. A lot of materials that come with fancy brand names are based on polyesters, so they are going to be similar to PETGs.
The styrene-based family of filaments includes ABS, ASA and HIPS, those are Acrylonitrile butadiene styrene, Acrylonitrile styrene acrylate and High Impact Polystyrene. They are fairly similar materials, all requiring a printer enclosure for best results and the finished parts providing good temperature resistance. In turn, they require fairly high print temperatures, so printers with a lined hotend are not the best choice for printing them.
PC, polycarbonate is an incredibly strong plastic and has excellent temperature resistance, but just like the styrene materials, does require an enclosure or an elevated room temperature to print reliably, as well as an all-metal hotend.
Polyamides, also known as the brand name Nylon, come in a wide range of properties. Generally, they are very tough and hard-wearing, but can be tricky to print and to keep stuck down onto a printer’s bed. They are also nearly impossible to paint or glue with common materials.
Flexible filaments, also abbreviated as TPU or TPE, have a wide range of properties they can come in as well. They will usually stick very well to a bed’s surface or other materials, but because they are soft, they can be tricky to print in a bowden setup.
And lastly, there’s the water-soluble family of PVA, polyvinyl alcohol, and similar materials like BVOH. They are mostly used for dissolvable support material in print, but if you for example need a print that dissolves in the rain, then these can be useful for that as well.
More recently PP, Polypropylene, has also gained popularity. It is a material that is in a lot of ways similar to PETG, but is mechically very tough.
Alright, so that should give you a good overview of what the fancy terms are that describe the parts on these machines and give you a primer on what kind of TLC these machines need every now and then. Please keep in mind that, because there is more than just one model of printer, some of these maintenance jobs and the intervals that I came up with may be different for your exact machine, so if you have instructions by the manufacturer that contradict what I just told you, preferably stick to those instructions, not mine. I just don’t want to be responsible for that. And of course, use common sense. If something looks wrong or makes a weird noise, fix it before it gets worse.
So I’m not going to recap this video, I’d have to repeat the entire thing, so thank you for watching, make sure to get subscribed, keep on making, and I’ll see you later.
💙 Enjoying the videos? Support my work on Patreon!
Product links are affiliate links – I may earn a commission on qualifying purchases (at no extra cost to you)

Check out my second channel “More Layers” on YouTube for livestreams
3D Printing Basics – Episodes
- What is a 3D printer?
- Choosing a machine
- Resin printers
- Filament printer parts and maintenance
- Acquiring print files
- Basic slicer settings
- Whole 3D printing process
- Requirements for 3D printing
- Common issues
- Where to go from here