
When you start a print, how do you decide what settings to use? Of course, parameters like the solid shell thickness or the infill percentage are something that needs to be decided on a print-by-print basis, but what I mean are the settings that, ideally you figure out once and then leave as a preset for future you. But what if those presets are wrong? What if you didn’t even tune those in yourself and use whatever the filament manufacturer suggests or stick with the presets that come with your slicer? How do you know that whoever made those profiles actually did a good job? How do you know you’re achieving your filament’s true potential?
Well, you methodically test your settings and see if you can find anything that works better. But because that’s actually quite a bit of work, I tried to do that for you, and for the last three weeks, I’ve dedicated my main workhorse printer exclusively to printing test parts that would help me determine the best hotend temperature for the job. We’re going to test PLA and PETG inside and outside of their comfort temperatures, and we’ll look at aesthetic differences and at what print temperature you’ll get the strongest parts, too. And no, it’s not quite as simple as just going “print hotter, get stronger parts”. There is quite a bit more to it.
So what seems to be the generally agreed upon understanding is that there is a normal print temperature for any filament, 215°C for PLA, 230°C for PETG, and so on, and that’s generally going to be the one you want to use, but if you want parts that are stronger and are “welded together” better, you choose a higher temperature, and if you want parts that just look a bit crisper and less blobby, you choose a slightly lower temperature. But there are two problems with this: First, if you print hotter, you’re not just getting “better layer welds”, you’re also thermally degrading your filament, with ABS, you’re actually specifically boiling off some of the components that make the filament tough and flexible, that’s that horrible ABS smell that you get, and with PETG, in particular, you have a process called hydrolysis where the hotter it gets, any moisture in the filament will violently turn to steam and actually rip the polymer chains apart that make up the plastic. At least that’s how E3D explained it to me a while ago. And ripped apart, shorter polymer chains mean a more brittle plastic, so by increasing the temperature, you may have gotten better layer welds, but made the material itself weaker.

There’s also the challenge of the material bubbling up, your extrusion getting less consistent, which makes for more gaps in the parts, it’s all factors that you’re going to have to weigh against the gain you might be getting from better layer adhesion. The other way around, dropping temperatures, only goes so far, too – when your filament is “less molten”, the extruder and hotend are going to have a harder time pushing it and laying down filament in the exact spots you want, which often results in underextrusion or even extruder skips.

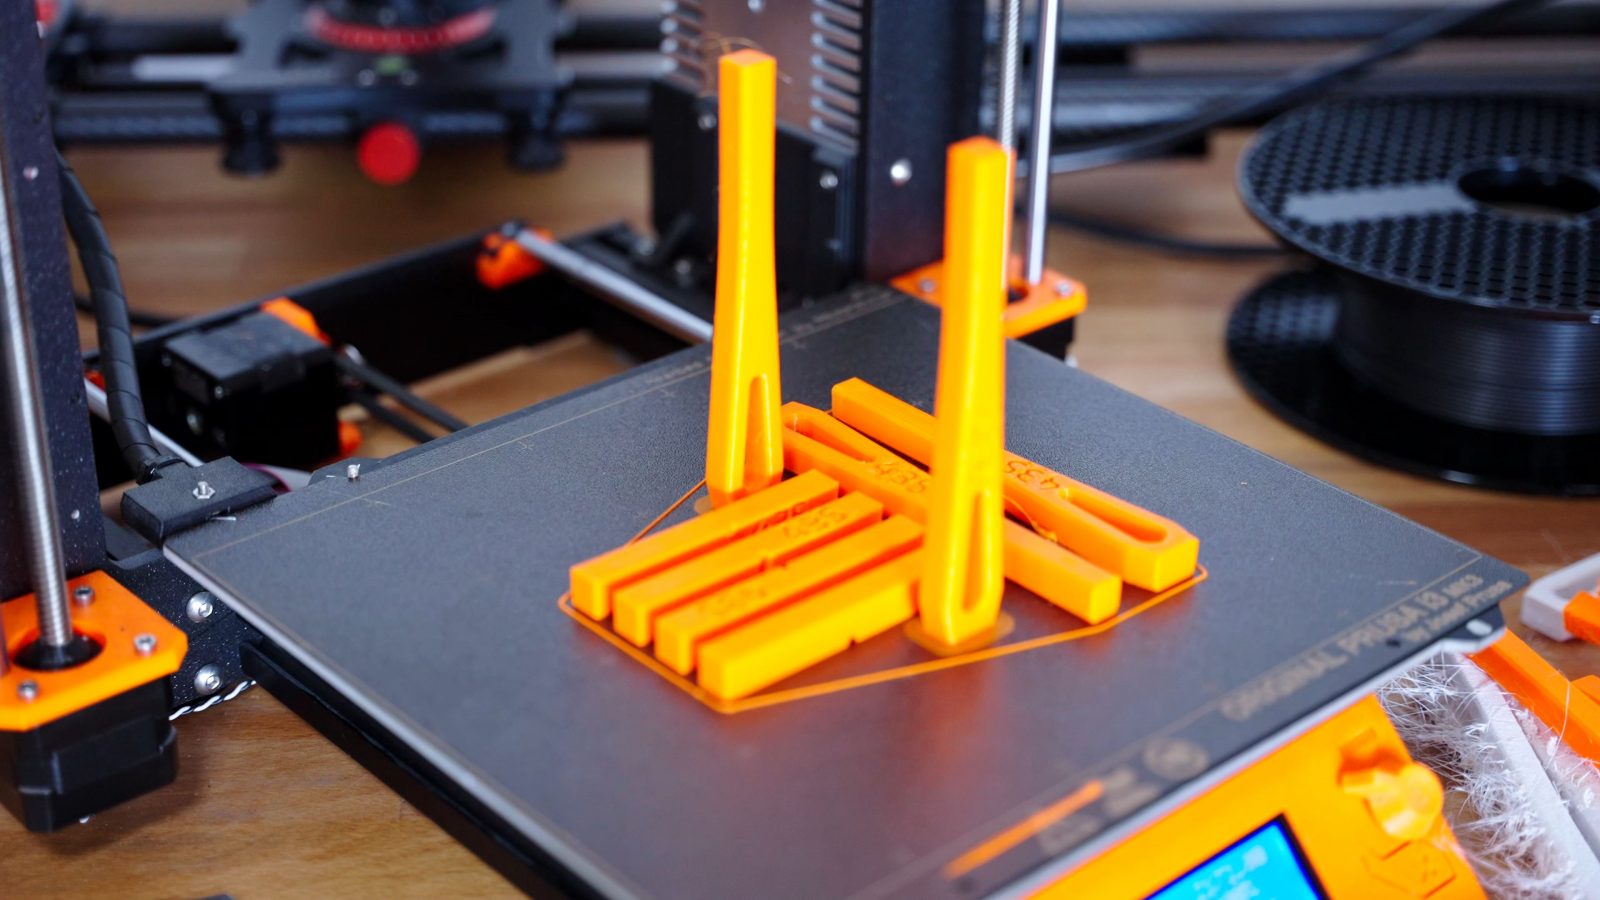
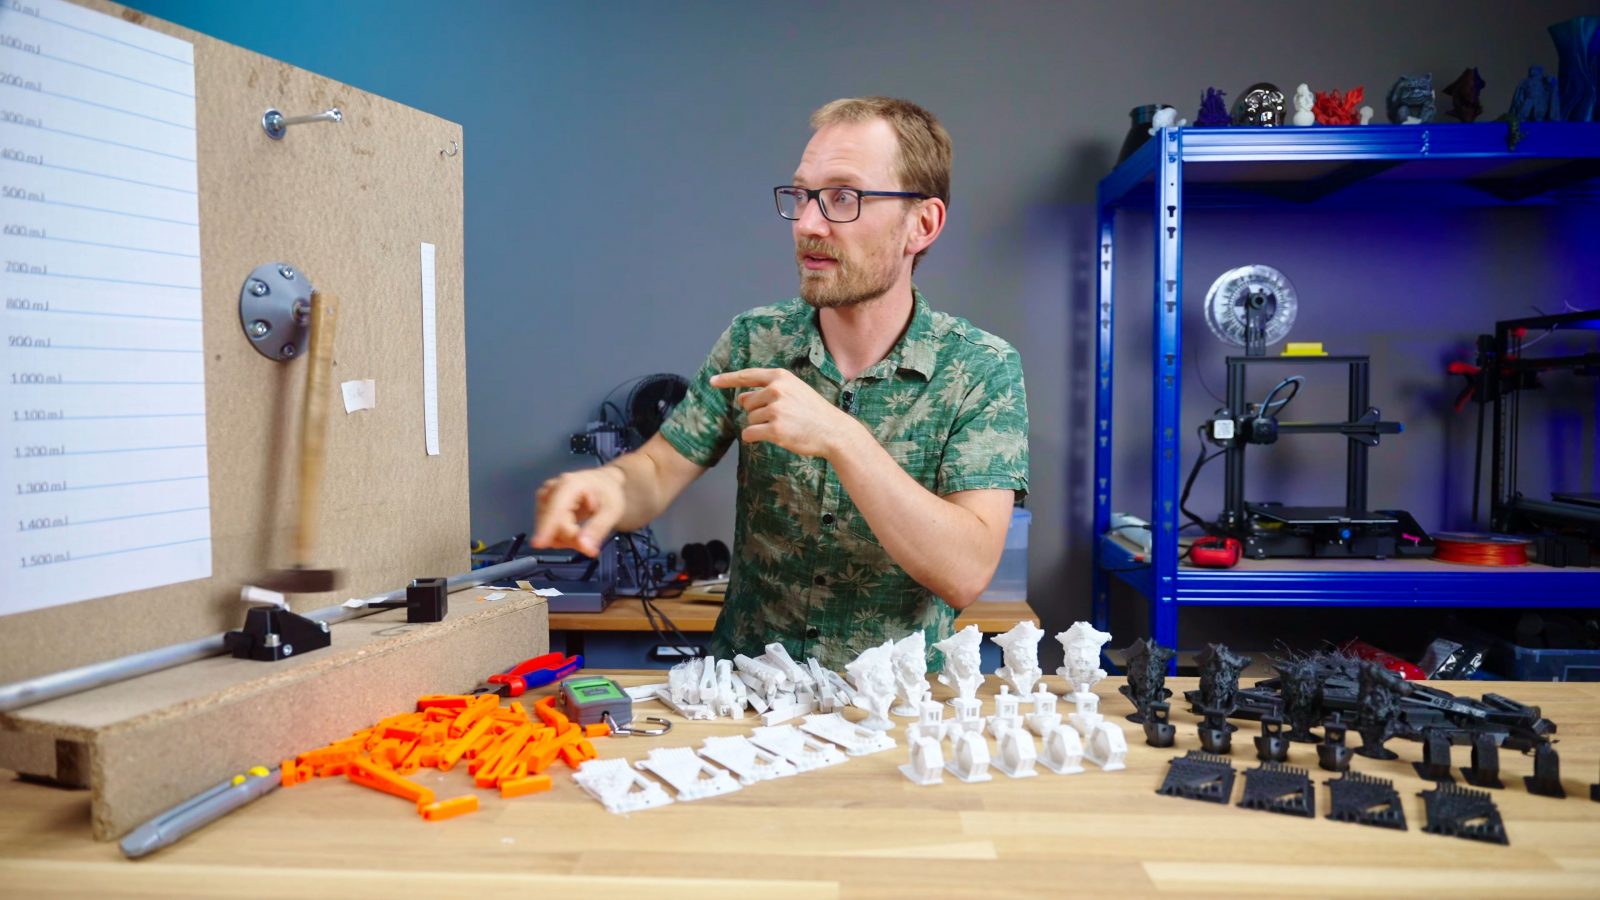
So let’s get this tested. I prepared two different plates for each temperature of PLA and PETG – one to look for aesthetic differences between temperatures and one to test for strength.


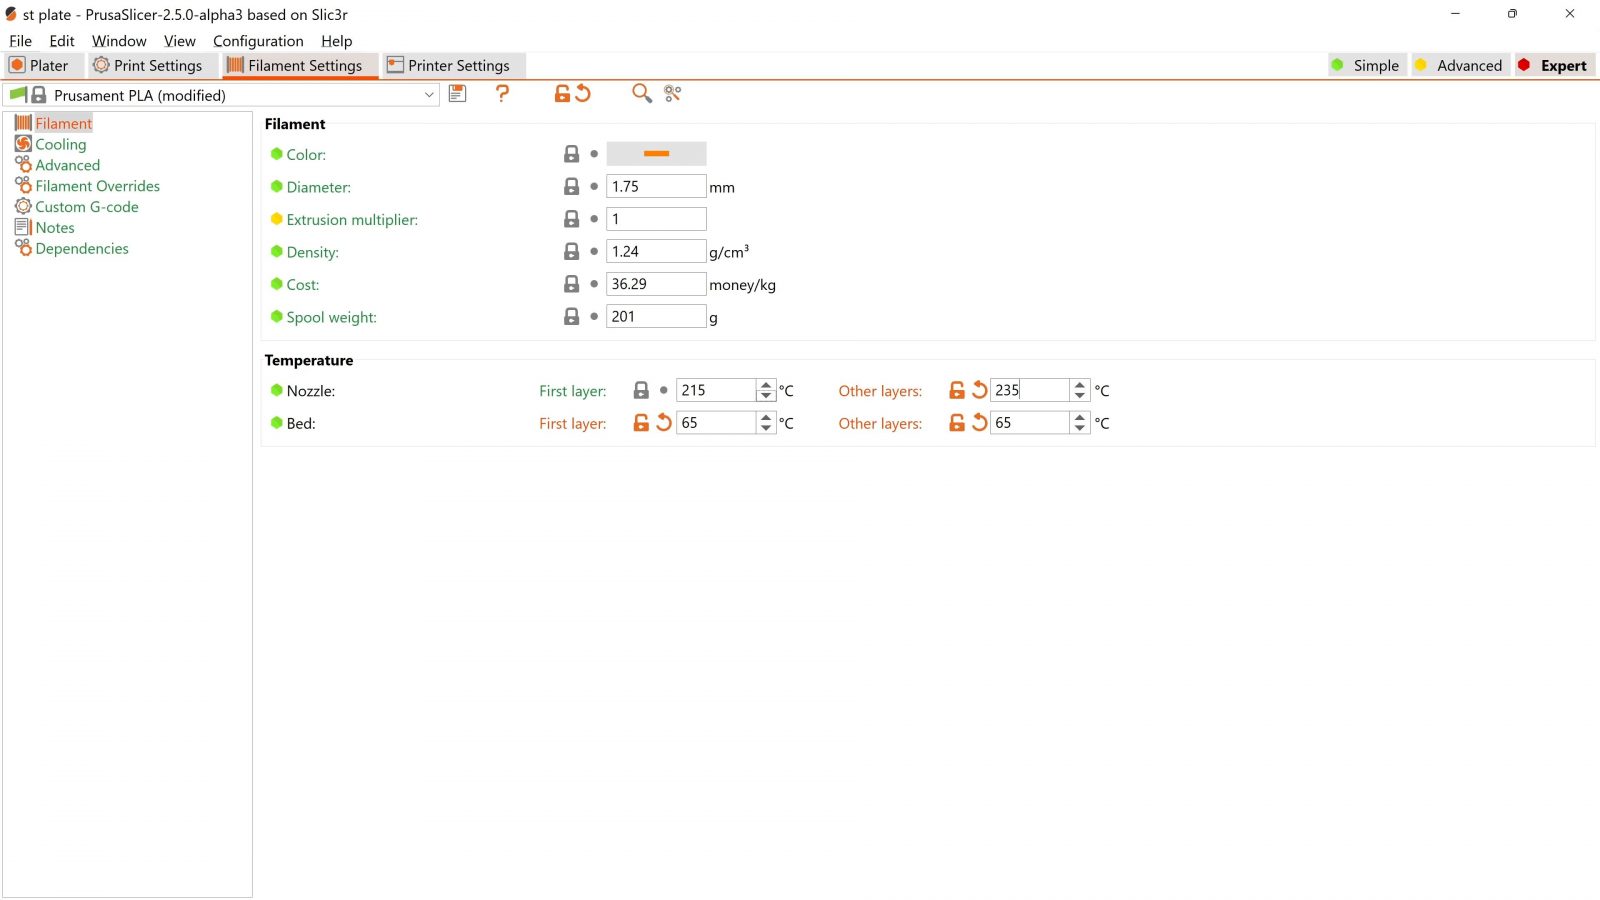
I’m using one of my MK3s, with a 0.6mm Revo, which, of course, is the best nozzle size there is, and I’m slicing with PrusaSlicer 2.5 beta 3, using Arachne, and the included 0.2mm layer height profiles. Then all I’m doing is that I’m changing the temperature for everything but the first layer, because we know that the default contact temperature is going to work for keeping the parts stuck while printing, and then, more importantly, for being able to release them again once the print is done.
For the aesthetic test parts, even though they’re all on a single plate, I’m printing them sequentially one at a time, which means I only have to start a print once and I’ll get all four parts printed in a row, exactly as if I had started them one by one.

On the plate, we’ve got, of course, a 3D Benchy, you really can’t do tests without that, we’ve got the TomTest, with dedicated areas for bridging, fine details, text, curling, and overhangs, we’ve got a scaled-down Salty McCreedy, and finally the Prusa SL1 test part with some insanely fine details.
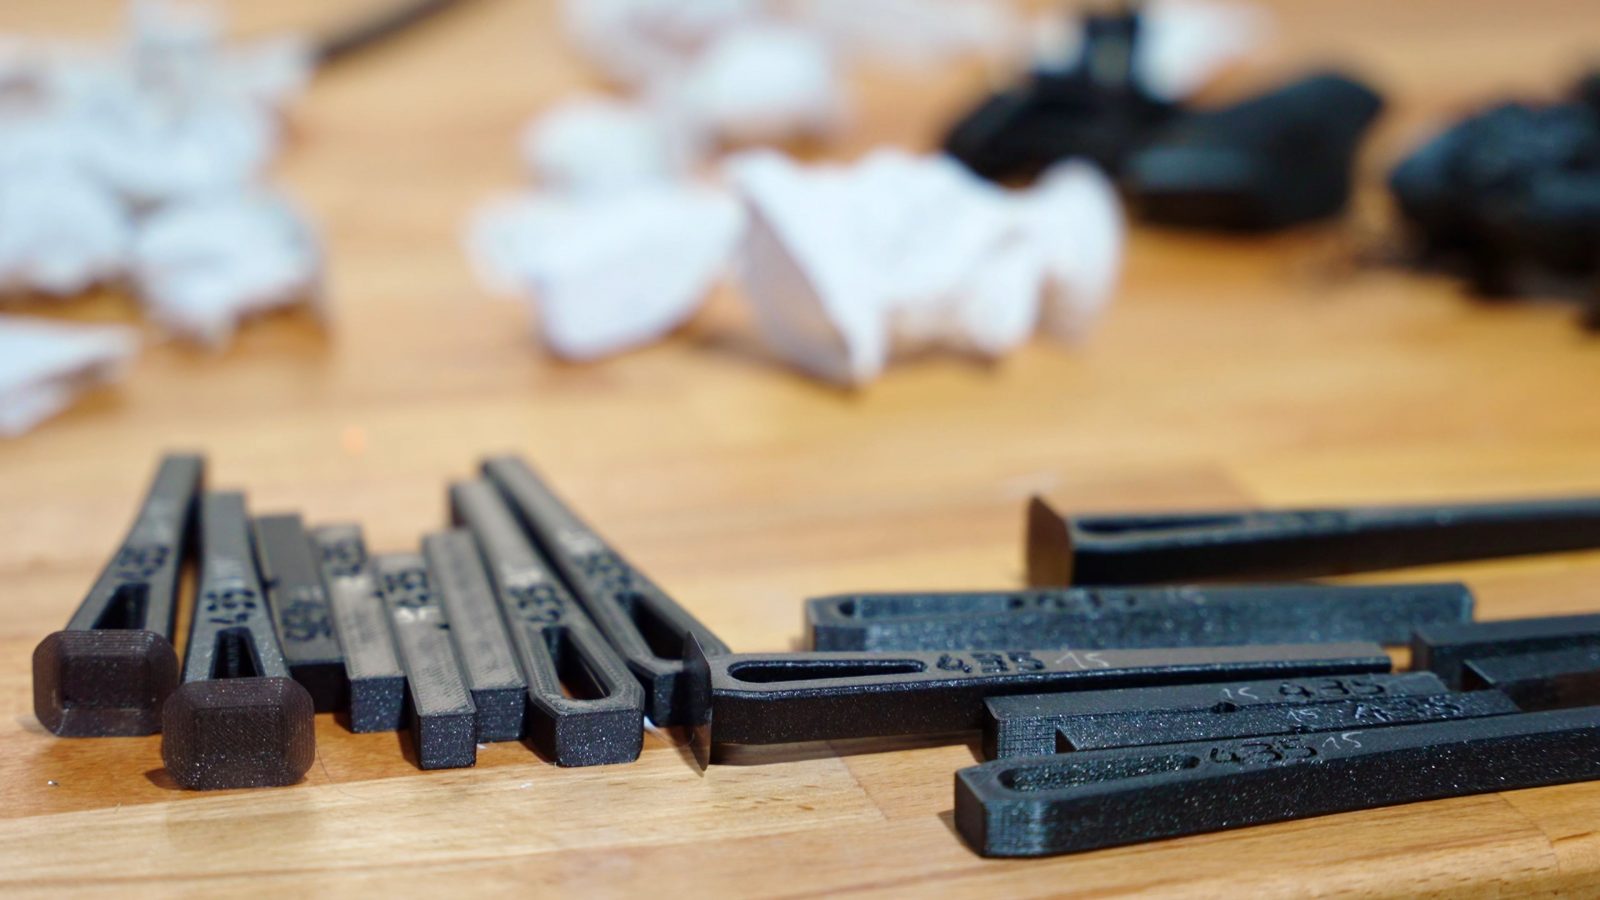
For the strength tests, we’ve got the bend strength and impact strength test parts, both printed in two different orientations and with two copies of each.
As always, these are all done with “normal” print settings, 2 shells, 15% infill, because I think that’s much more representative and interesting than just looking at the failure mode of a boring standardized test sample that’s pretending to be an injection molded part at 100% infill. That’s just not the reality of what a 3D print is.
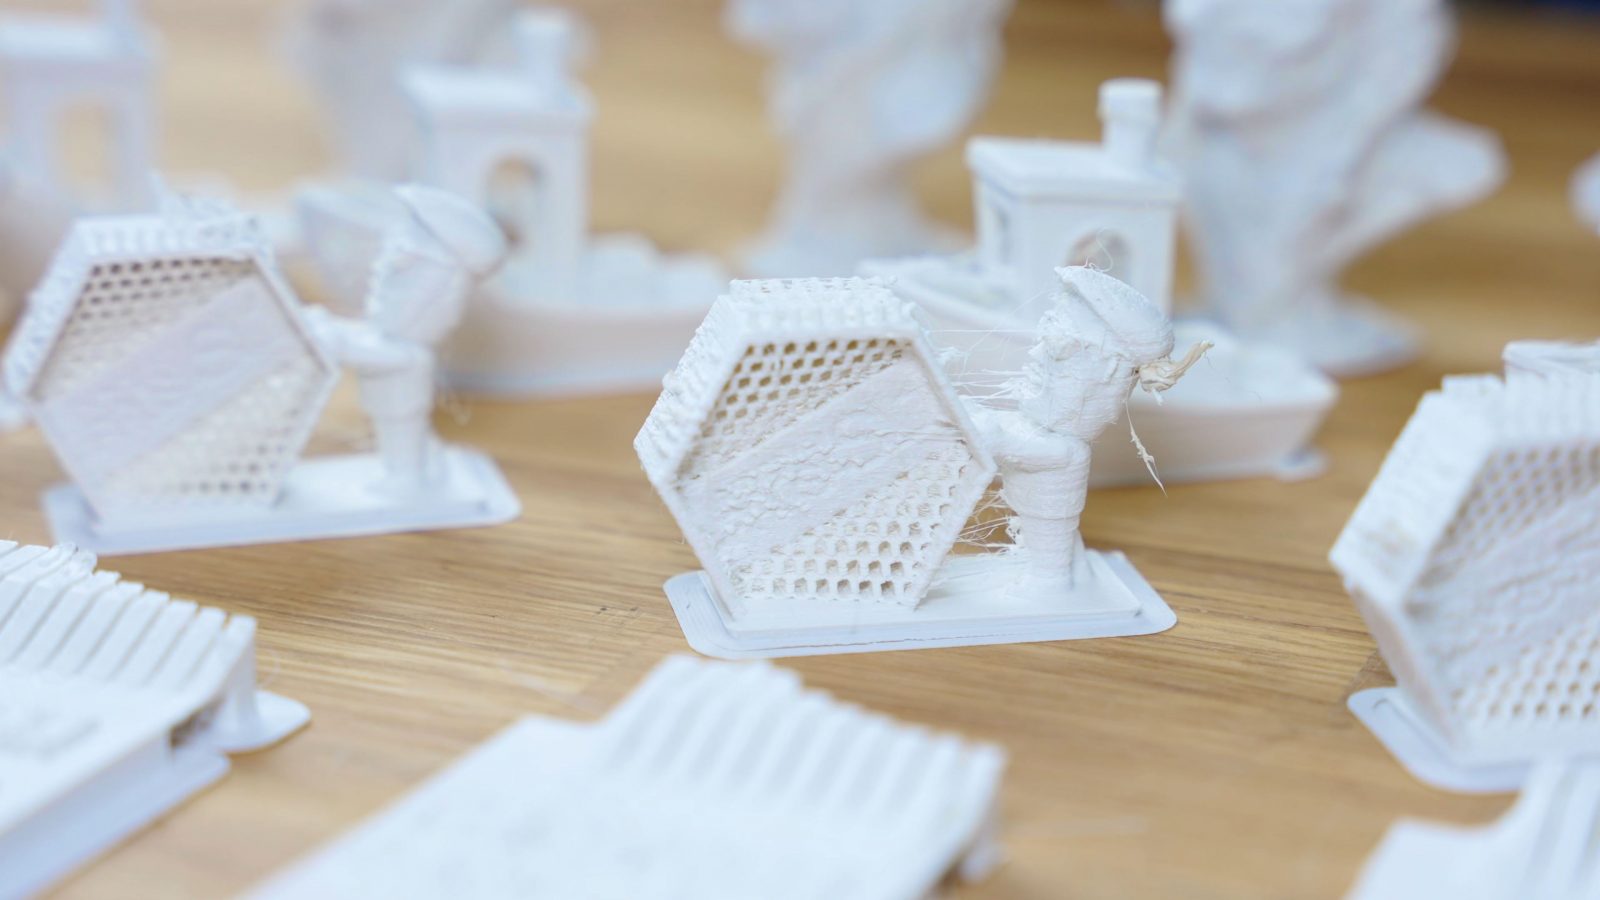
But let’s start with how the parts look. Honestly, pretty bad. We get a ton of stringing, especially with the PETG, which is Extrudr XPETG matte white.
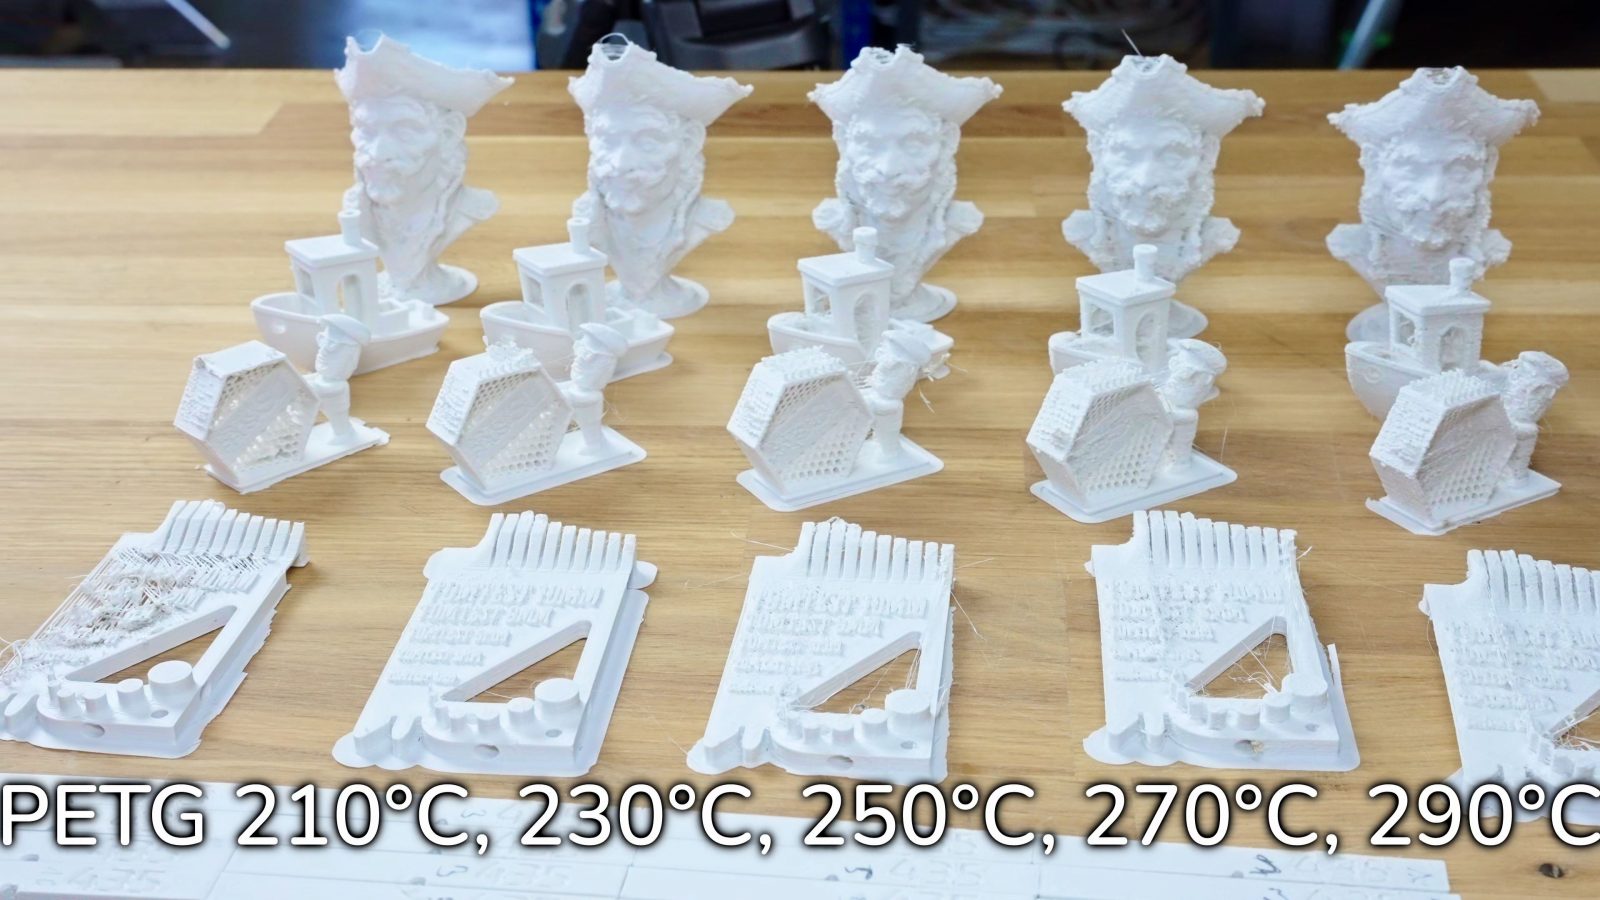
I did dry all the filaments in the Eibos drybox for a bit before I started the prints and then occasionally turned the dryer back on while printing, but still, what I got with the XPETG would never fit in my test fixtures. Bridges just didn’t print well at any temperatures and the parts just didn’t look particularly great and they didn’t print reliably. So, running out of time, I actually reprinted all the mechanical test parts PETG with Prusament and those turned out so much better and honestly they now all look fine, with just a bit of this branch building that PETG likes to do.
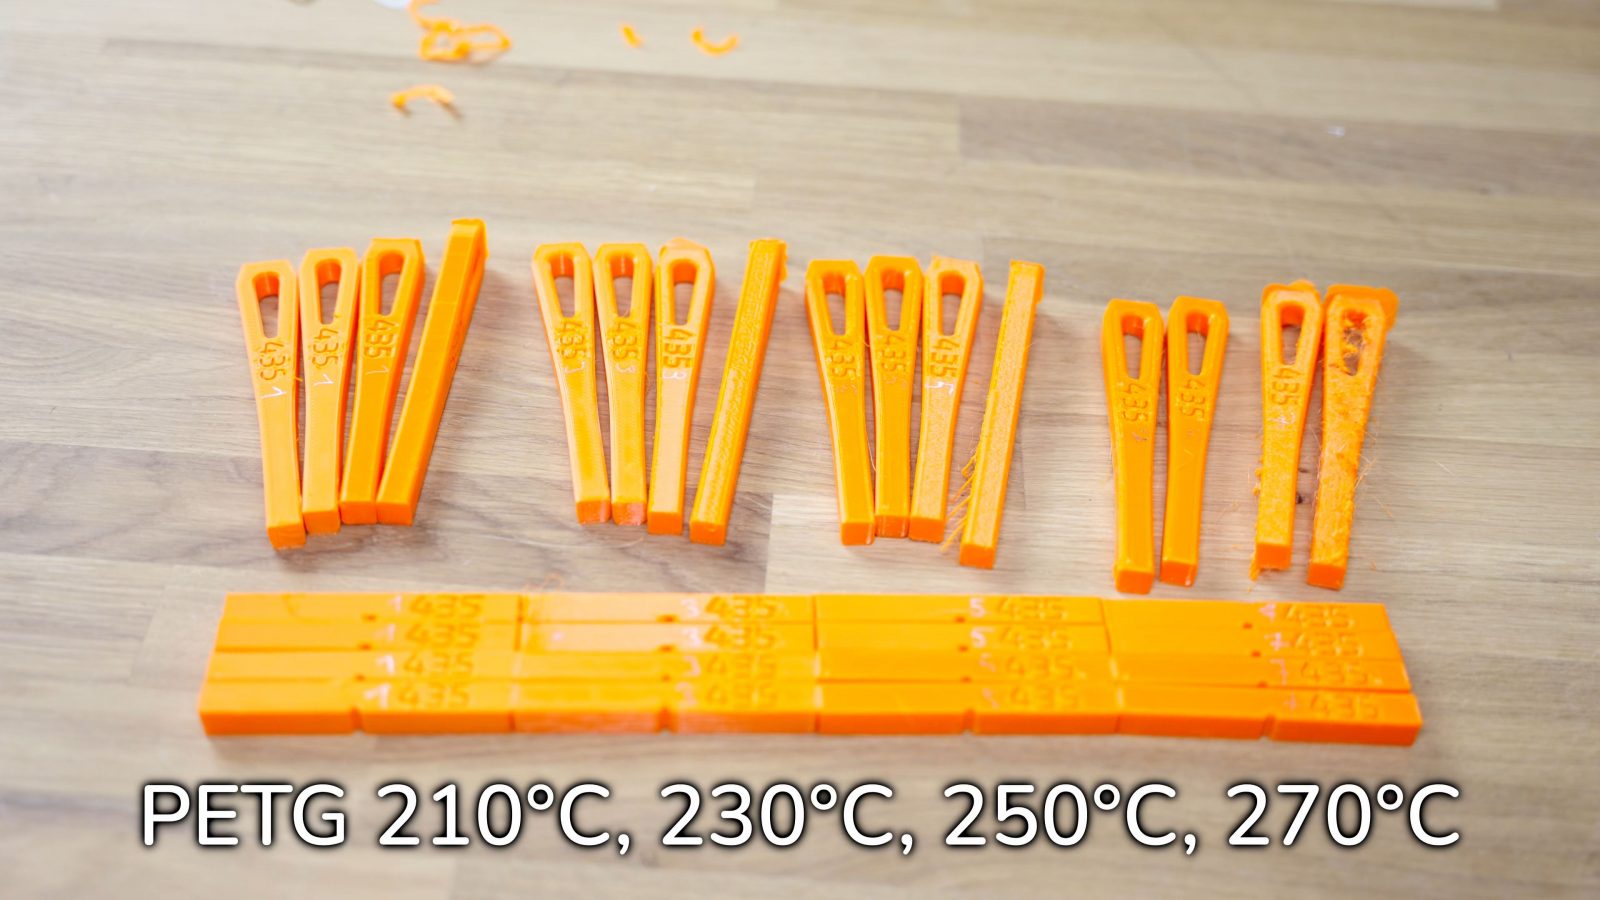
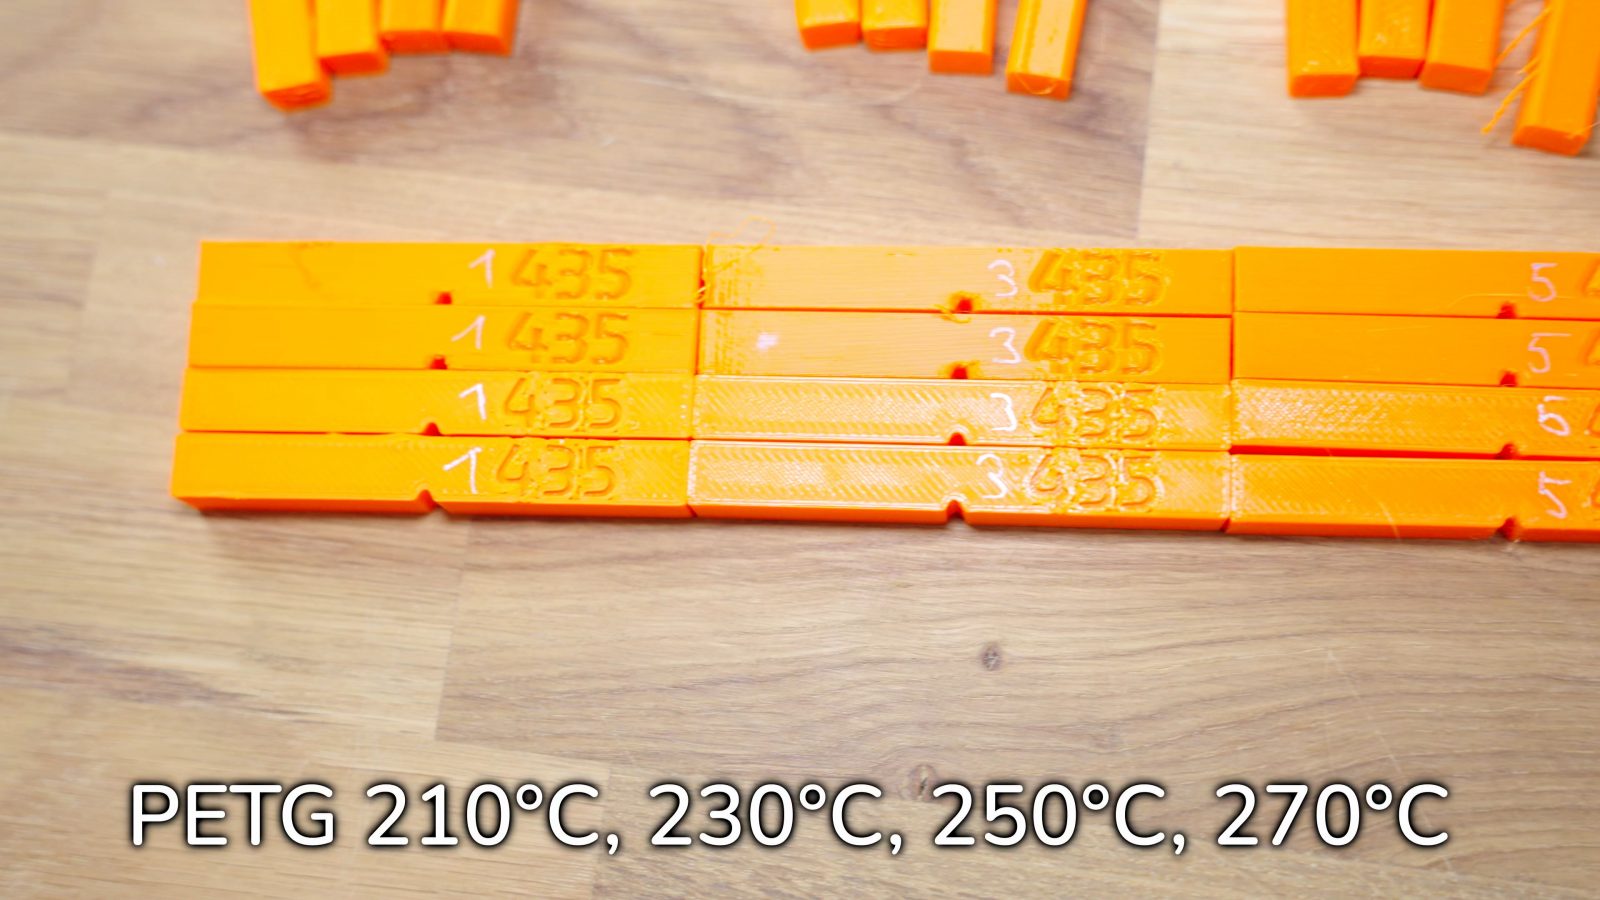
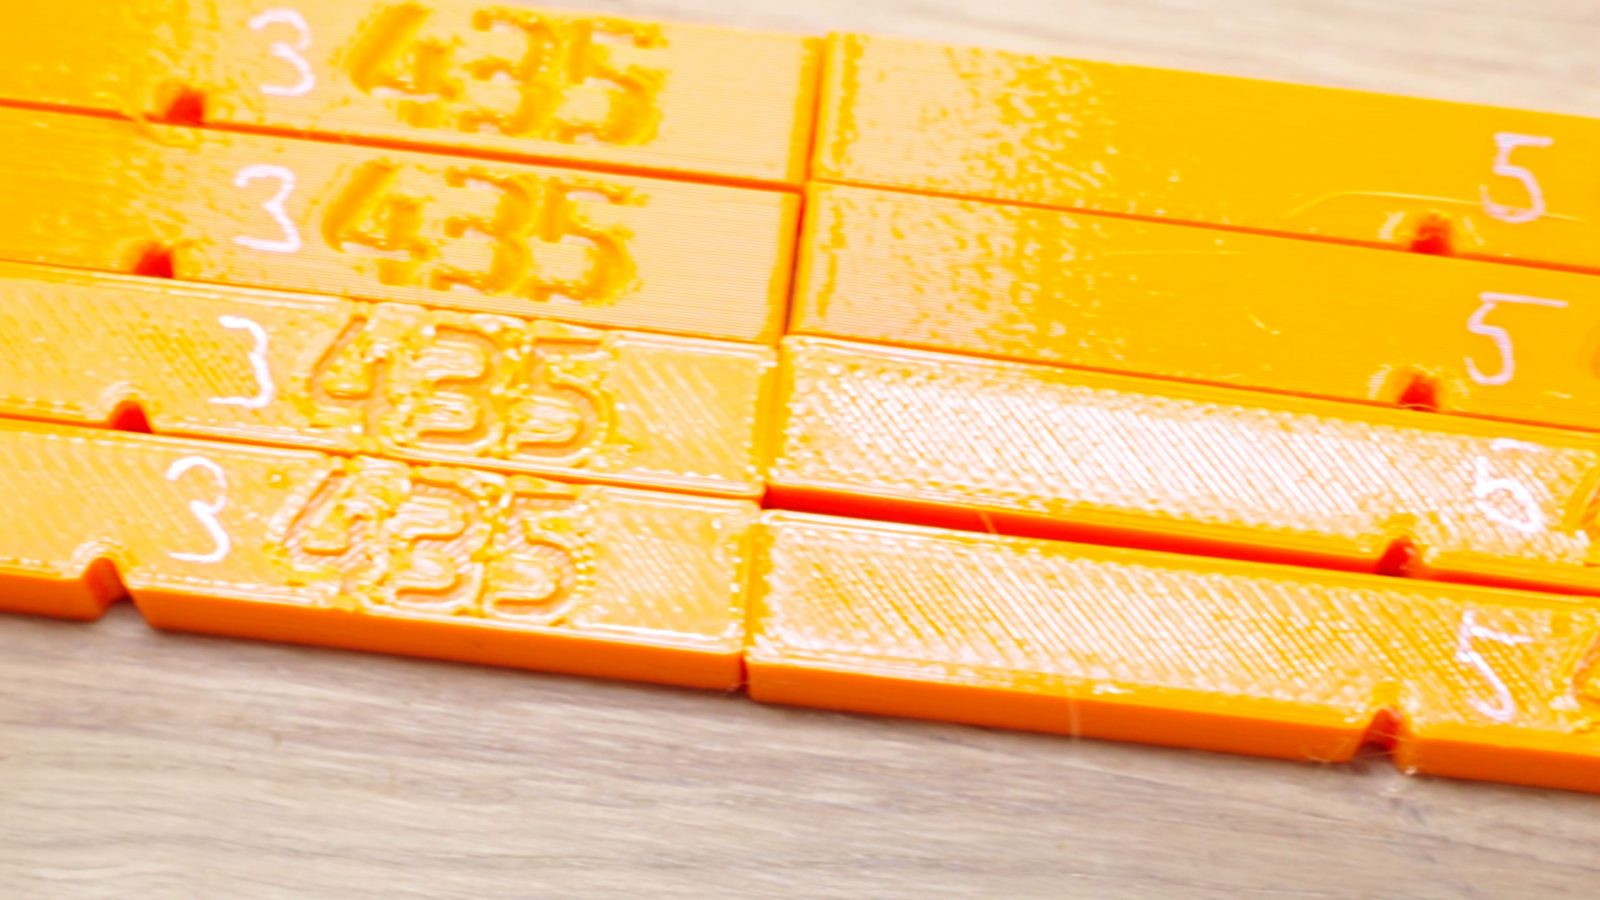
These are prints at 210, 230, 250 and 270°C, and one thing to notice is that the lower temperatures have a surface finish that’s a lot more matte than the higher-temp ones. And also I don’t know if it’s just that extra glossiness that amplifies it, but with the higher temperatures, the surface finish also looks like it’s getting bumpier the more we turn up the heat.
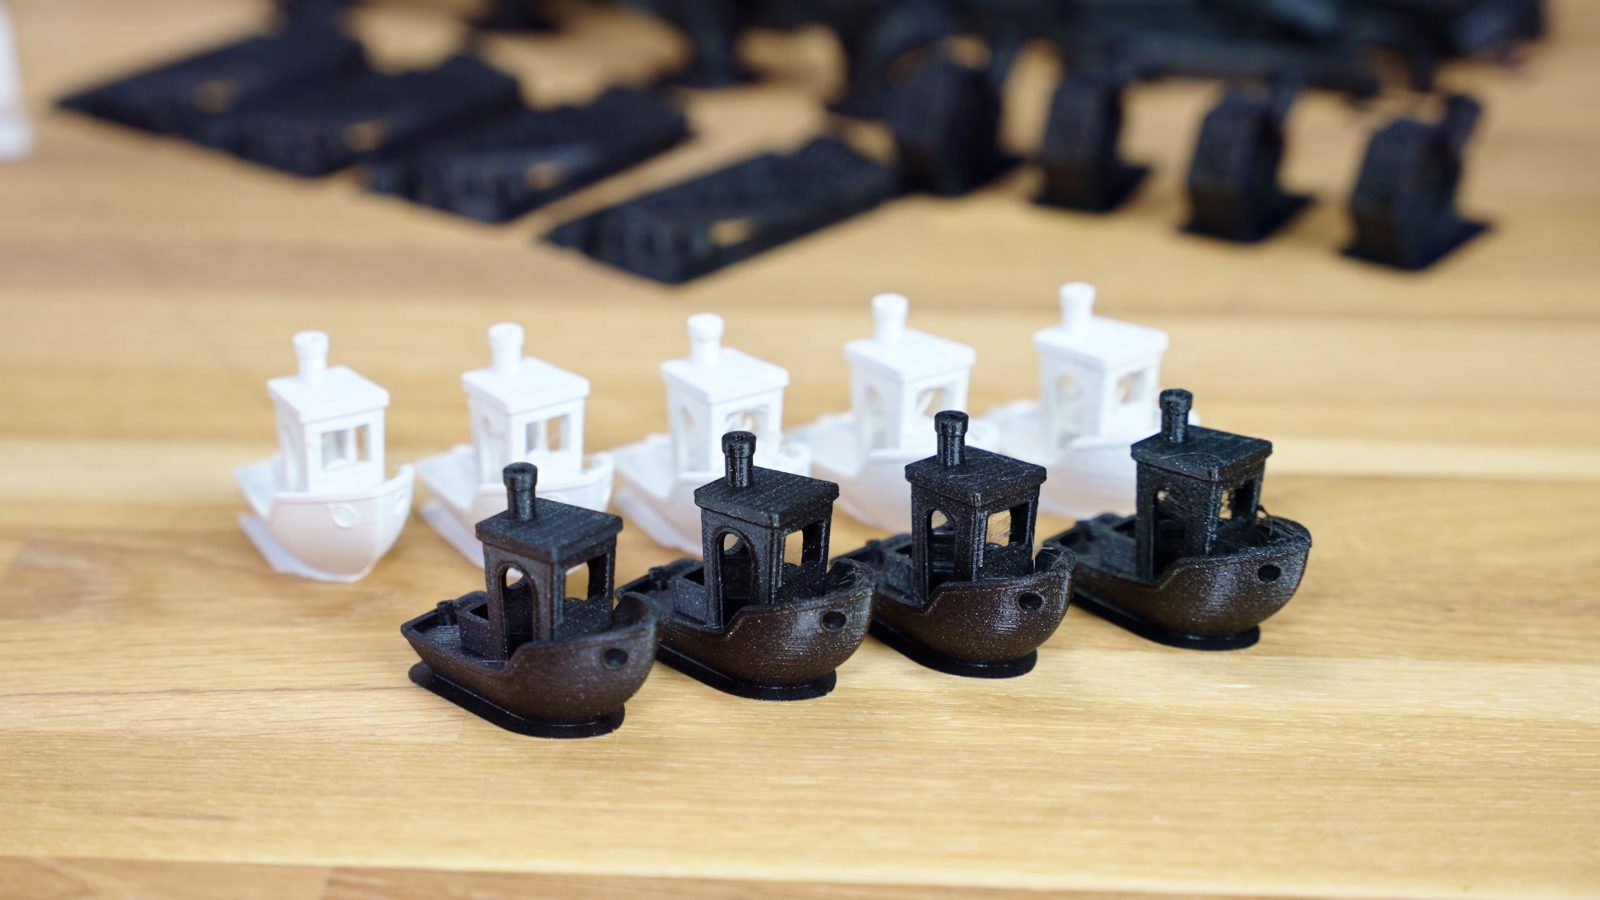
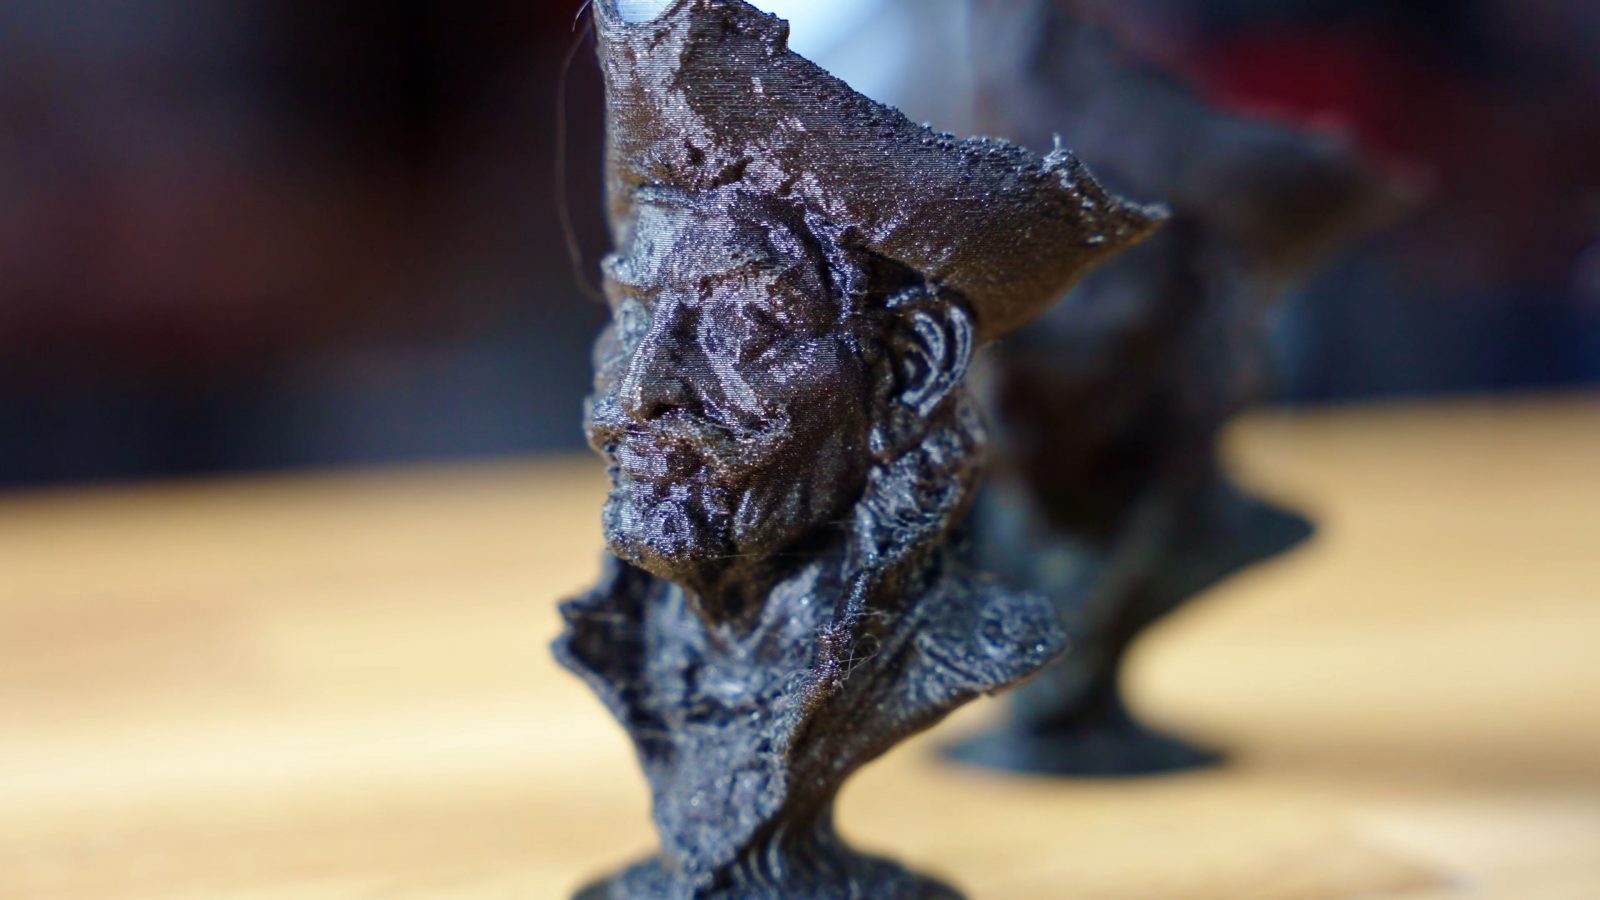
And you can see the exact same thing with PLA, this also is Prusament – it’s basically completely matte when printed at 195°C and then turns more and more glossy with each step to 215, 235, 255, and finally 275°C. Of course, stringing also increased, to a point where the aesthetics test plate became pretty hard to complete at the full 275°C.
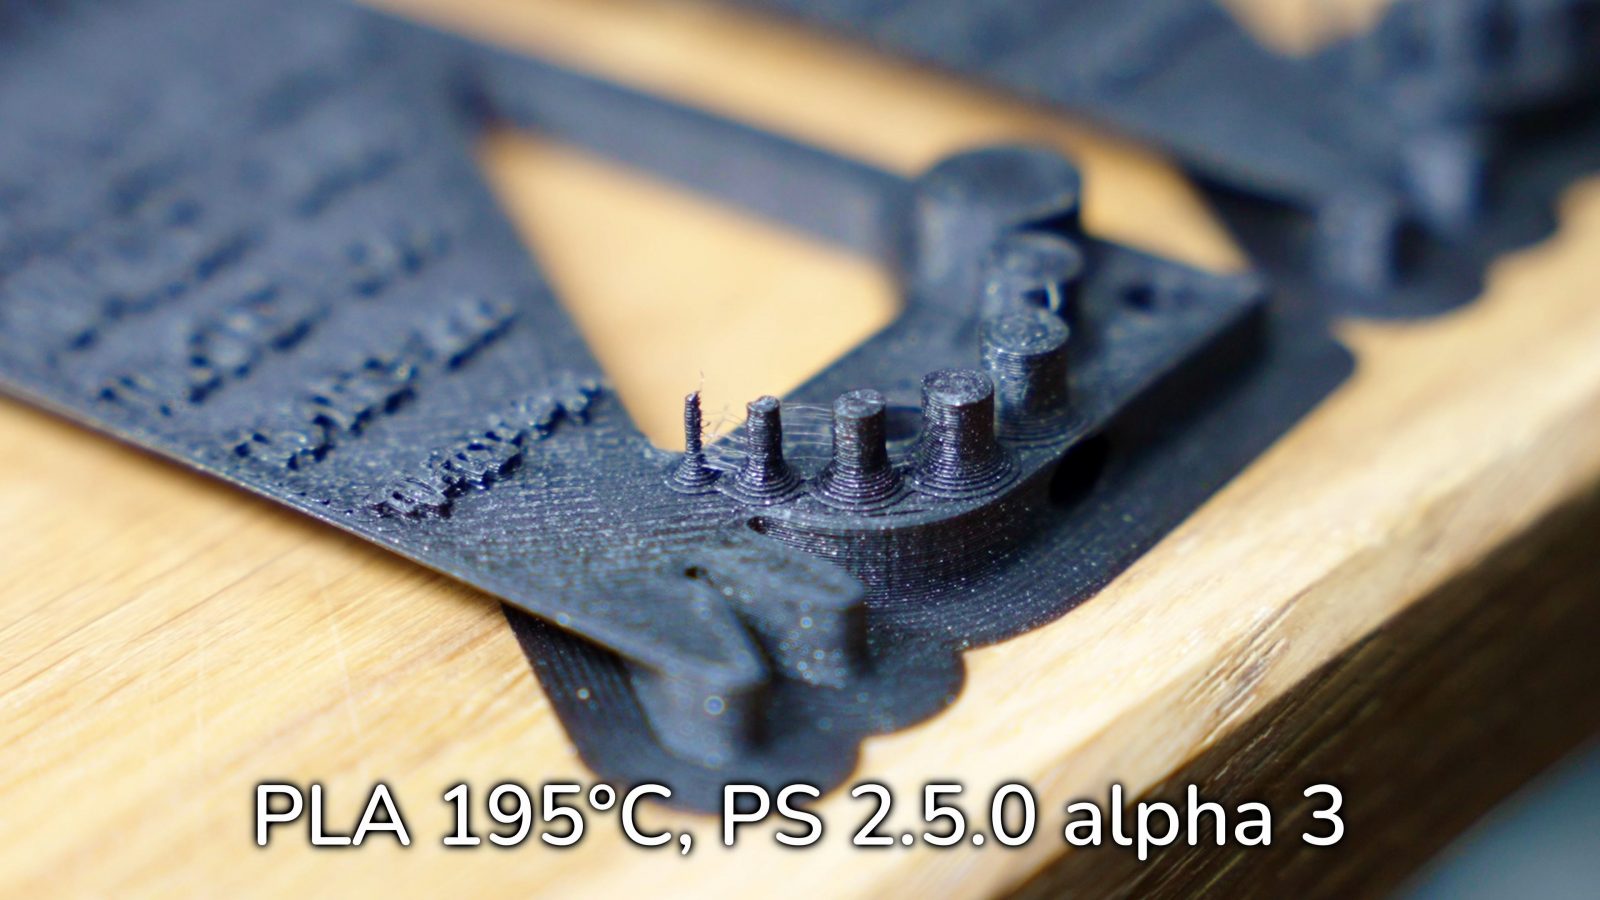
Specifically with PLA, though, the top surfaces also started becoming less and less smooth at higher temperatures, while marginally fine details like the little features on top of the SL1S test model actually printed better at higher temps.
Notably, overhangs all look identical at any temperature, and this time around, now using PrusaSlicer 2.5.0 beta 3, the finest little column on the TomTest printed just fine every single time, while beta 2 from the last video was still having some issues with it. Thumbs up for the improvements!
So from an aesthetic standpoint, I’d say the default print temperatures, both for PLA and PETG, are fine. Other than the matte surface finish, which, honestly, is a legitimate reason to print colder, you’re not actually getting your prints to be “crisper” or anything.
But what about part strength? Well, I’m glad you asked!
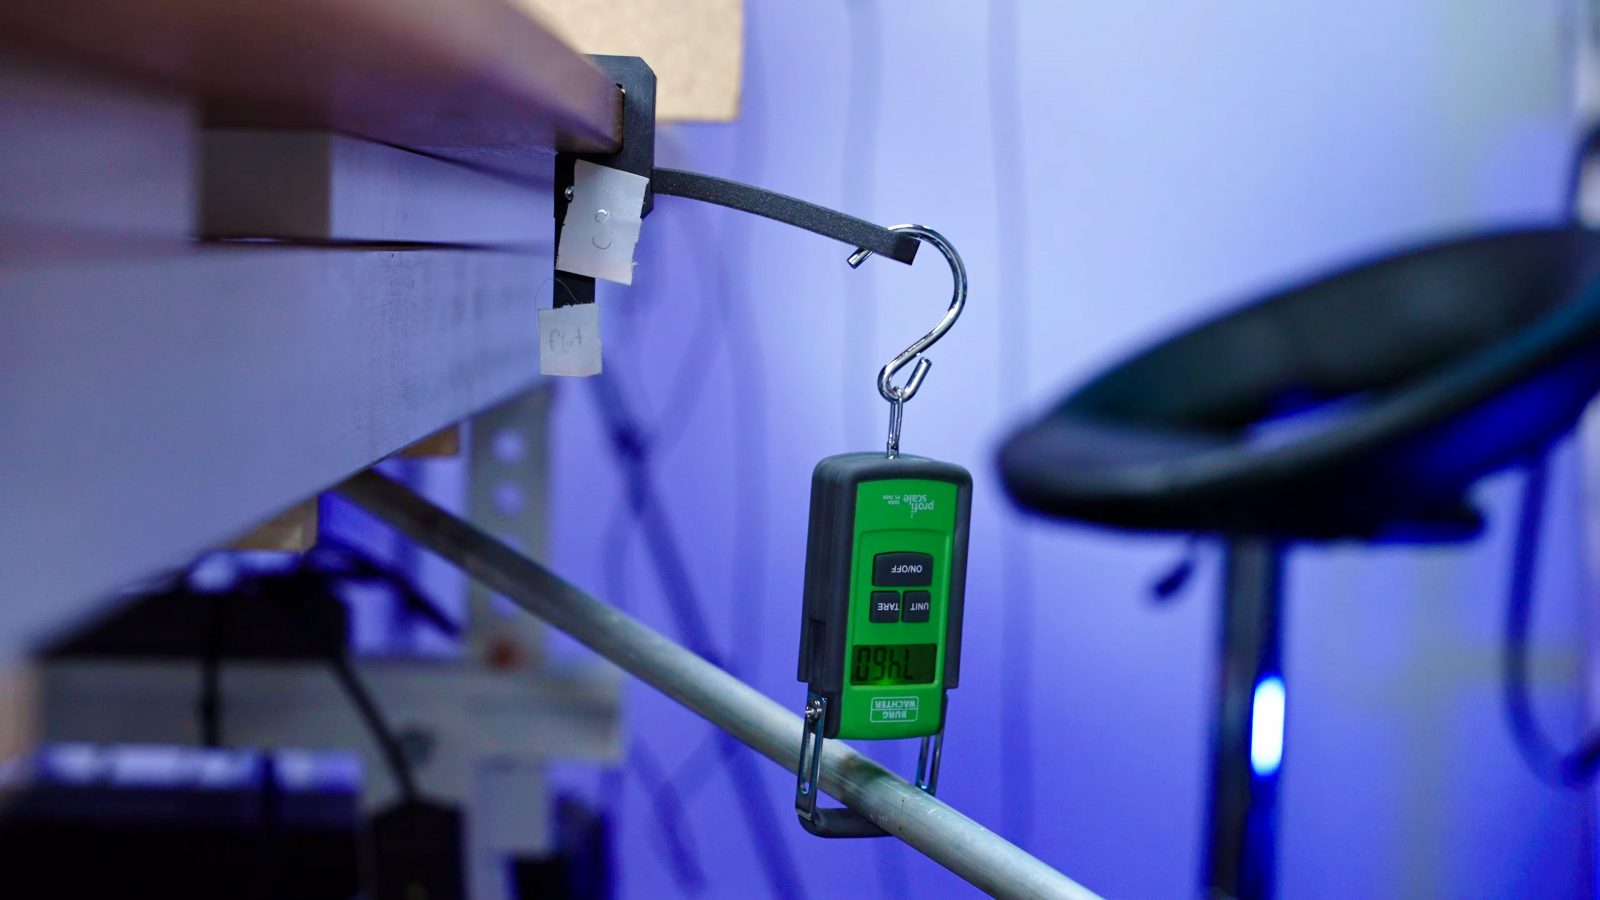
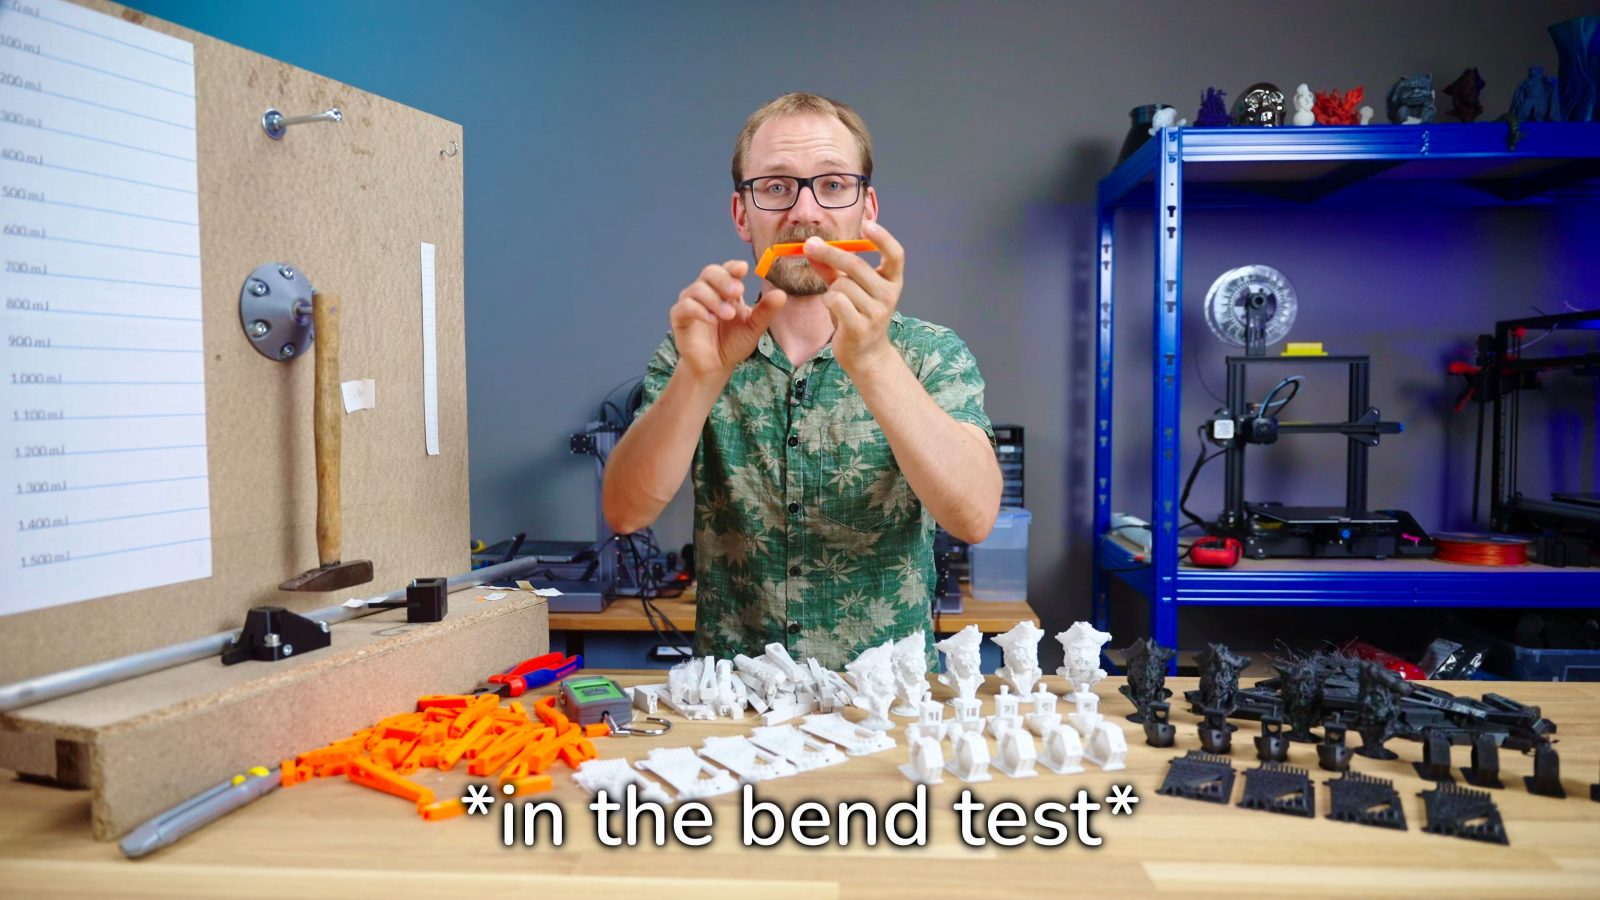
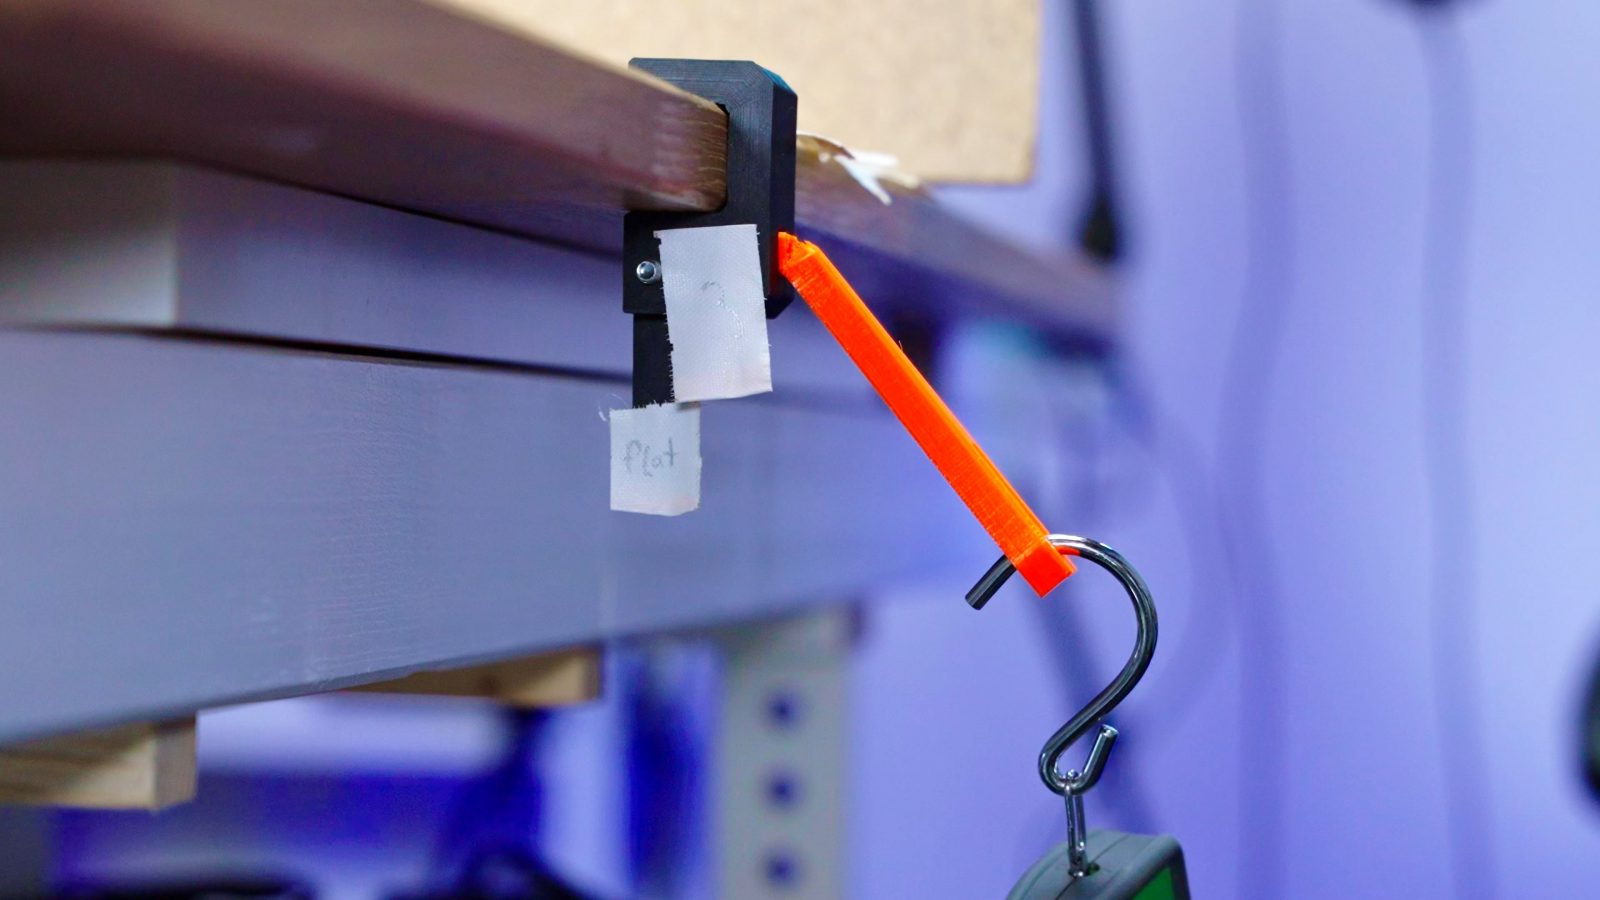
My test parts are the usual Filaween-style ones, for the bend test, they go into a jig, I hook a luggage scale onto them and then I gently pull down on the scale until they break.
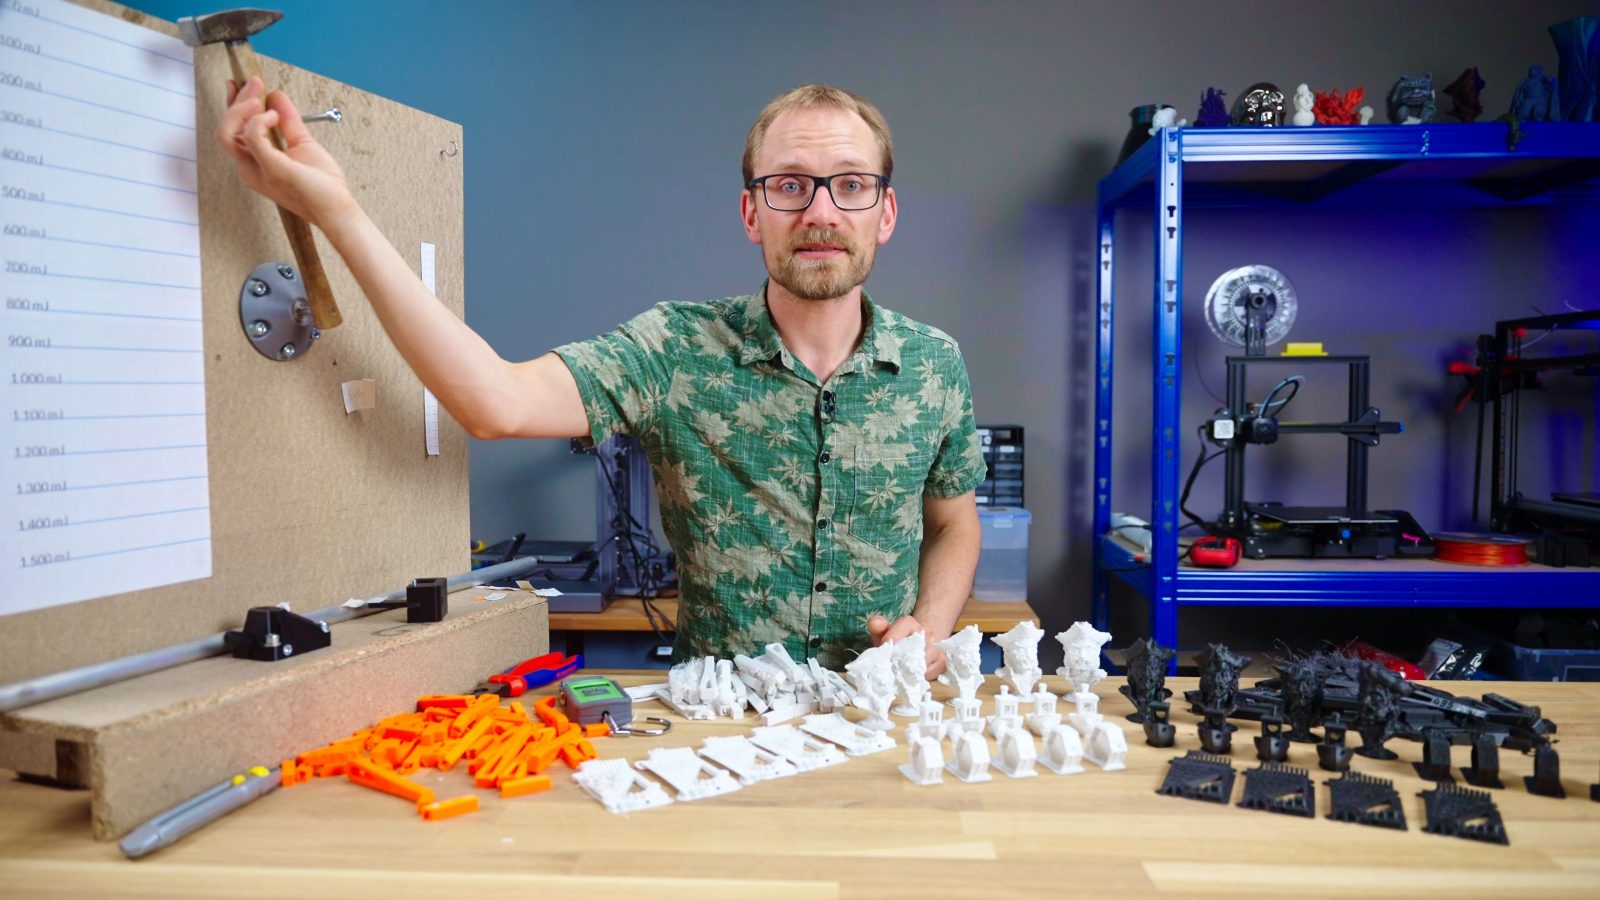
Now, the impact test is a bit different, and here we’re measuring how much energy the parts absorb while breaking. The hammer swinging down always starts with the same amount of kinetic energy the moment it hits the part, and the tougher the material is, the more it slows down the hammer, and the slower the hammer is, the shorter up its swing is going to end. Basically, if it reaches the very top, the part was just too brittle to slow it down, and the less far it swings up, the tougher the part was.
What I immediately noticed is that the lower-temperature parts pretty often got stuck in the jigs. These have a bit of tolerance for the sample to slide in and out, but the parts printed below nominal temperature were even too big for that. I don’t know why that’s happening.
So from this point forward, it was just about breaking part after part. With the impact tests, you can actually hear quite a difference between a brittle part and one that’s tougher and is going to absorb more energy.
Interestingly, all the PETG parts that were printed laying flat broke in a way that’s actually really good for functional parts: Instead of snapping in half, they stretched, pulled, and kinked, meaning they failed gradually.
Typically if you have even slightly moist PETG filament, it’s going to snap off much more sharply because of the hydrolysis I mentioned earlier.
Let’s start with the results of the bend test: PLA’s material strength actually stays pretty consistent across temperatures, with an ever so slight dip past 275°C, and a significant reduction in strength when printed at just 195°C. If we look at the layer adhesion results, we can see why – you’re missing out on a lot of layer adhesion potential when you’re printing that cold.

But layer adhesion or, at least strength in the Z direction, also drops off pretty sharply when we’re increasing temperature. Now, this could be down to the fact that we’re losing material for these test parts in stringing, and the parts themselves actually end up slightly underextruded, or the fact that extrusion control just isn’t great anymore at these temperatures. The parts do end up looking slightly scuffed. In either case, it looks like the default 215°C is exactly where you should be printing PLA. At least at default speeds, there are no gains to be had in strength or in how clean prints turn out by increasing or decreasing your hotend temperature. That’s pretty good.
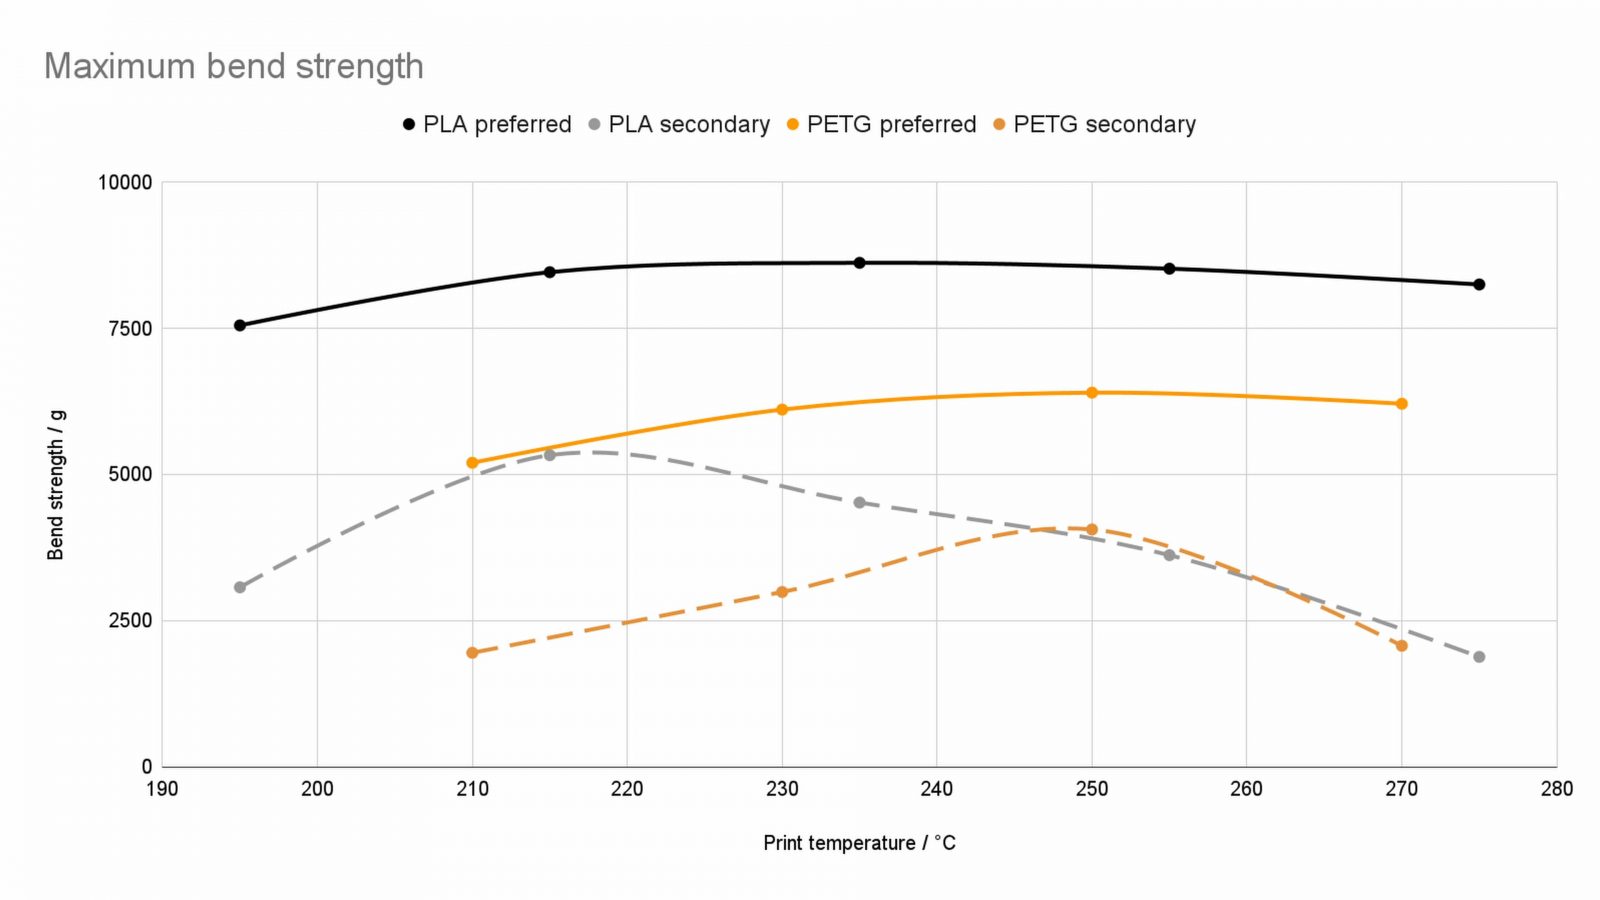
Now, PETG is similar – just at a higher temperature. I should note that the default temperature for Prusament PETG in PrusaSlicer on the Prusa MK3 is 250 Prusa-degrees instead of the normal 230 or 235 that you’ll see elsewhere. But here as well, 250 is where you’re going to get the best performance and where you should be printing this stuff. There is an advantage in how much this PETG is going to string by going down to 230°C, but that already comes at a significant penalty to layer adhesion.
Now, impact strength.
This one’s hard to interpret, especially since the results here have a lot more noise in them. I could have tested several hundred samples instead of a couple dozens to get a wider average of results, but that would have taken an extra couple of weeks to print and days to test. It’s pretty scary how quickly the effort required to do these tests scales up.
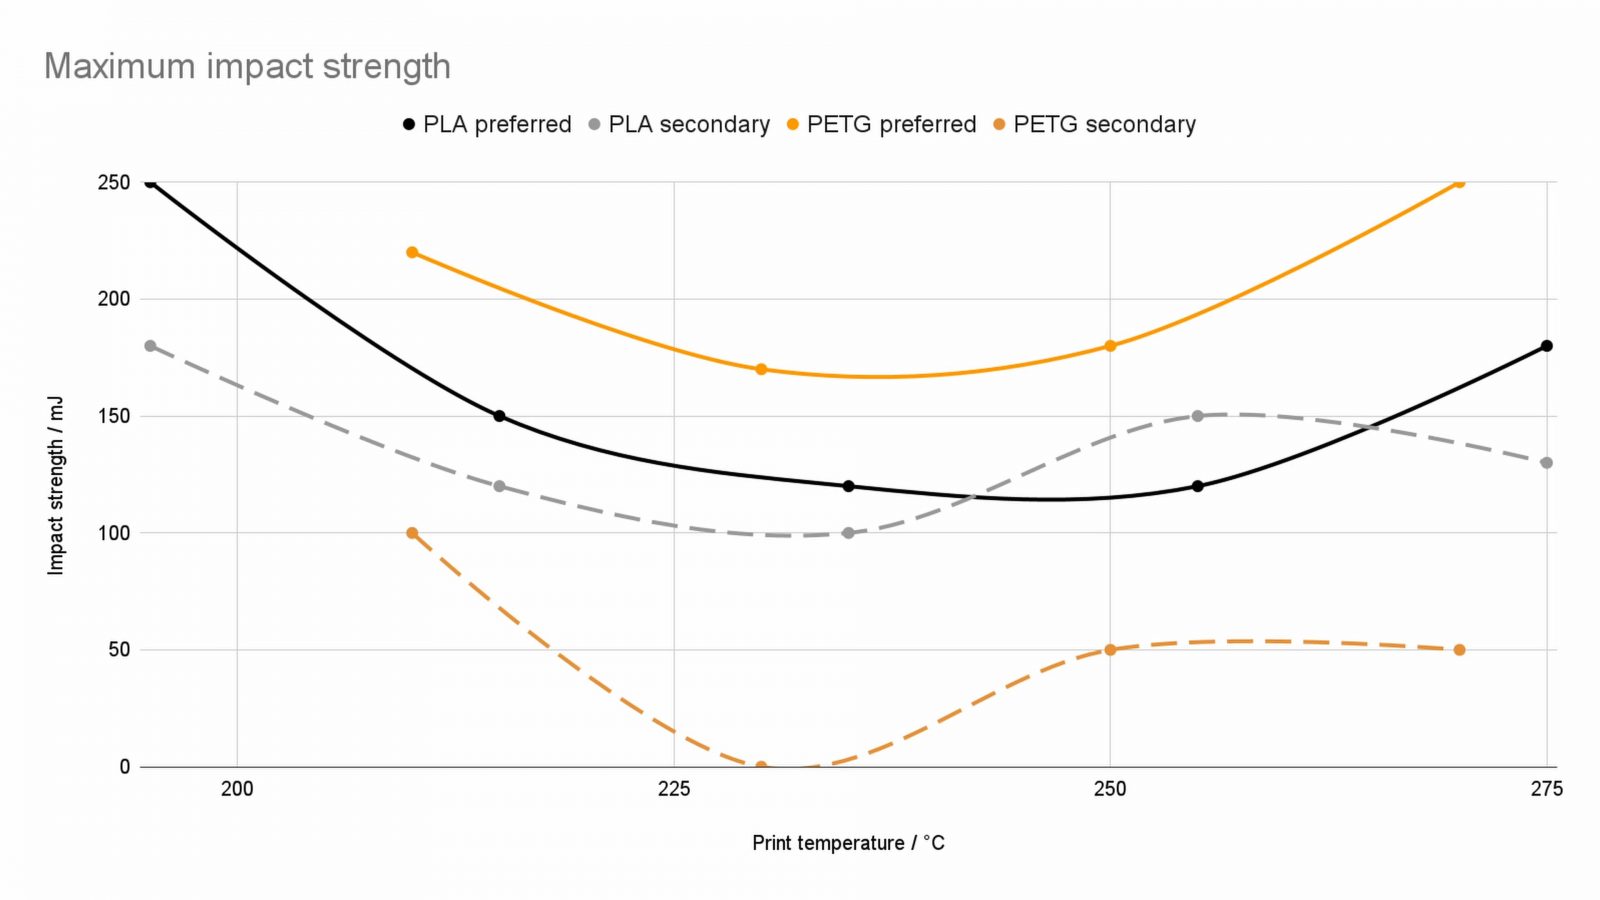
What I’m seeing here is that the impact strength seems to go up with extremely low and extremely high temperatures. Why? No idea. I could see how the high temperatures get the material slightly foamed up, which could get it to break more gradually, but yeah, this is a bit of a mystery and possibly more noise than actual data.
So what did we learn? Well, there’s a reason why we landed on the temperatures that we now usually print at. They give you the strongest parts without degrading the overall print quality. And yeah, print hotter, stronger parts? Not really true, unless maybe you’ve got a hotend that isn’t particularly good at getting heat into the filament. I’ve done testing for that on the Revo, and it’s actually a bit better at heat transfer than v6, but it’s by no means a super-high-flow hotend.
Also, maybe one last note, the temperatures I’m finding here aren’t necessarily the same for all printers across all brands. High-quality thermistors and mainboards will usually have relatively tight tolerances on the parts involved with measuring temperatures, but it’s not at all uncommon to see an offset of + or – 10°C in the actual measured hotend temperature between two cheaper machines.
In either case, I hope you learned something, and hope you enjoyed the video – keep on making, and I’ll see you in the next one!
Relevant products:
Genuine E3D Nozzles & Obxidian or on Amazon
Models shown:
💙 Enjoying the videos? Support my work on Patreon!
Product links are affiliate links – I may earn a commission on qualifying purchases (at no extra cost to you)

Check out my second channel “More Layers” on YouTube for livestreams