
The eternal quest for that one bed surface that perfectly sticks while printing and completely releases when cold. Many have tried to find it, many have failed, but 3DQue have finally done it. Or at least that’s what they claim for the Quinly system, which promises to turn your humble 3D printer into a global-scale production unit by adding a network gateway that controls your printer and that you can use to queue up prints, a lift kit that angles your machine so that parts can slide off once they’re done, and of course, their special bed surface that completely releases once each print is done.
For the same job of keeping the printer running, I’ve previously built a super involved auto-bed-changer system, but this approach seems a lot simpler. Could it really be that easy? Are there any downsides to this? Does it really save you machine time?
So as always, disclaimer, the Quinly kit was provided to me free of charge for the review, I do not need to send it back, but no money changed hands and 3DQue had no say in this review.
Price
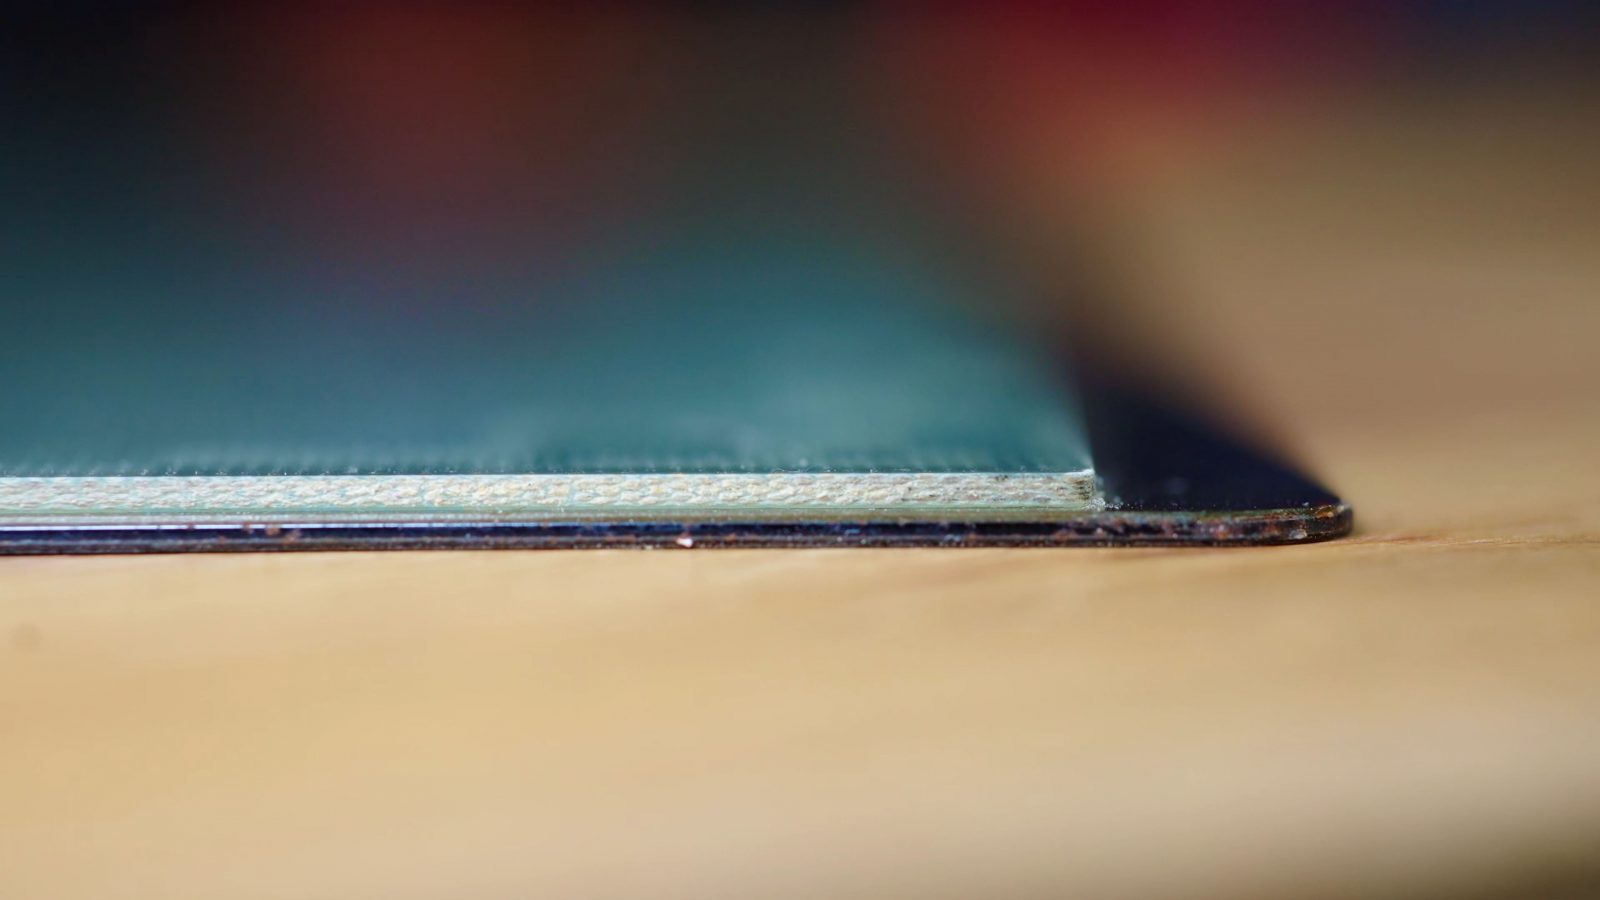
So let’s start with price: What I’ve got installed here is the Quinly for the Prusa MK3 plus the wireless hub, which totals 548 USD. If you skip the Rock Pi and use e.g. OctoPrint with a plugin for queuing your prints, you pay $99 less, but that still makes it 450 bucks for the VAAPR bed surface, a couple of printed parts and some aluminum extrusions to lift the printer. And I’m just going to say it upfront, that is outrageously expensive for what you get. But in the world of ROIs, up-front price doesn’t matter as long as it provides more value than it costs. Of course, the value proposition here is that instead of having to babysit your printer and manually change or clearing its bed after every print, you just load up enough filament, queue up however many print jobs, and without any manual intervention, simply come back and collect the finished parts once they’re done. The core component, of course, is the VAAPR bed, and it looks like it’s a standard FR4 sheet with some sort of coating on it. The instructions are very adamant about never cleaning it with solvents, but only with water and soap.
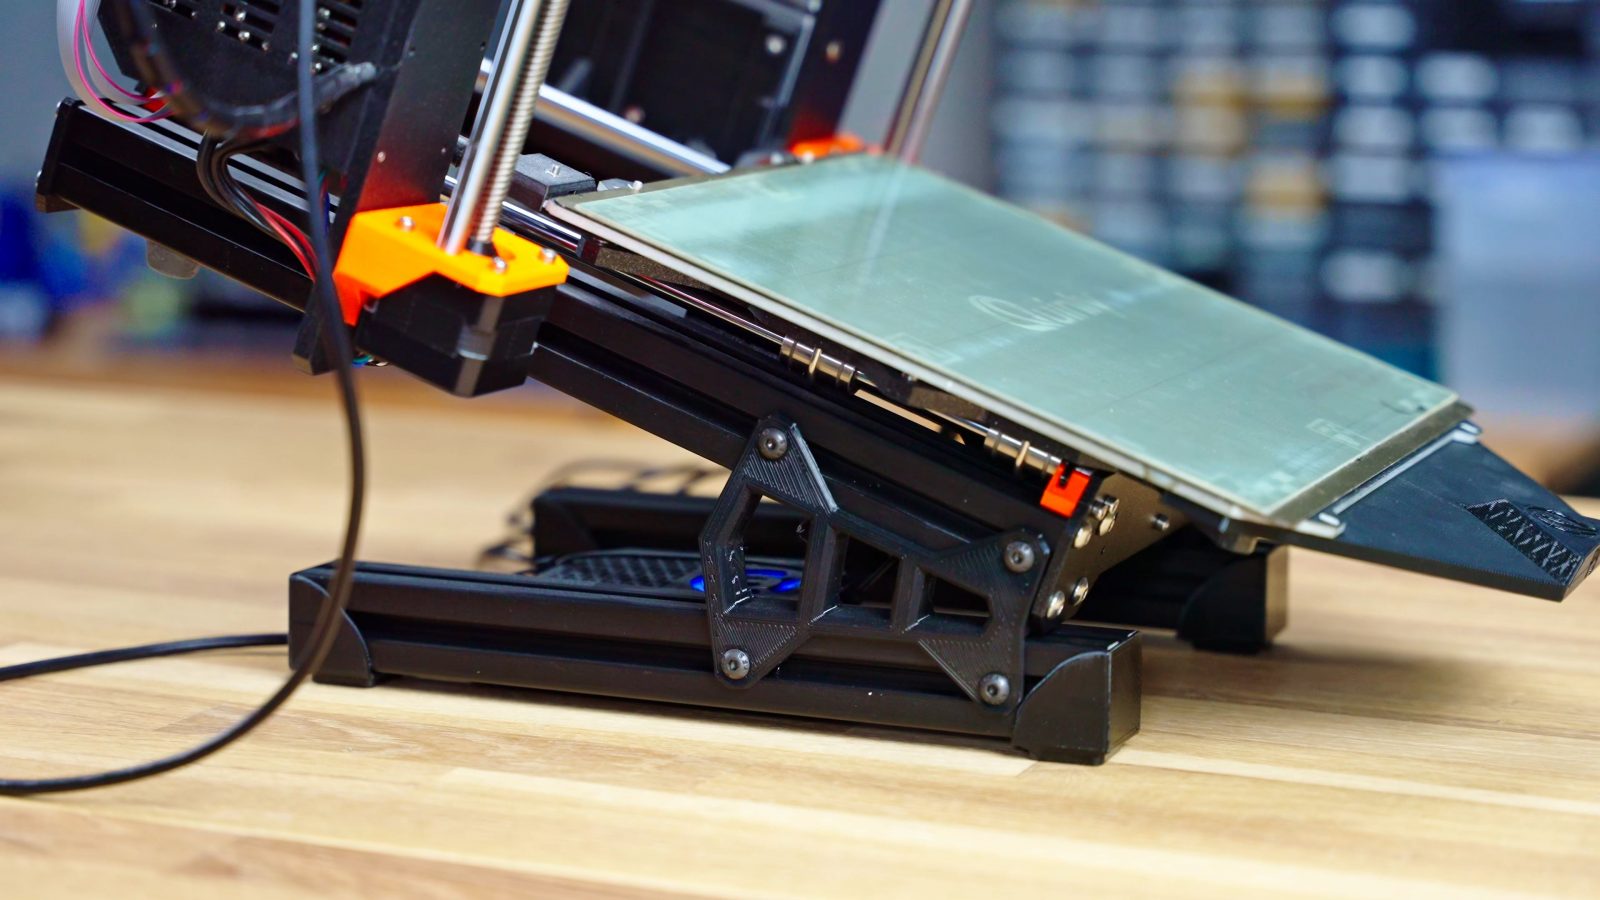
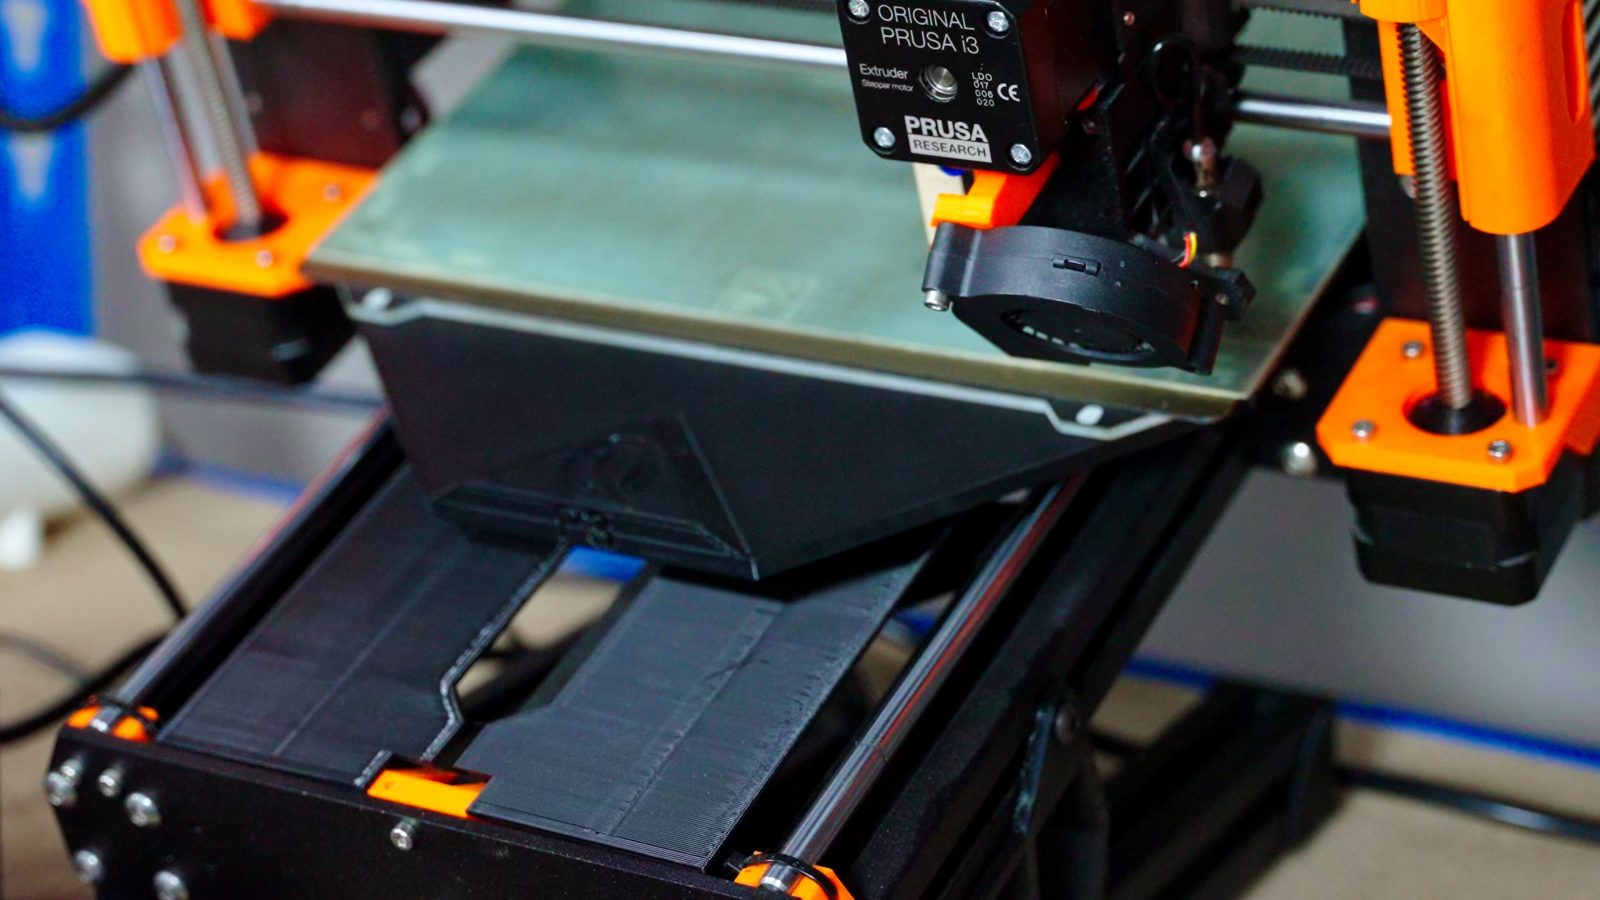
In the case of the MK3, you simply stick it over one of your existing flex beds, adjust the PINDA probe if needed, and you’re off to the races. It would have been nice to not have to take up one of the original flex beds for this, and I ended up sticking it over one of the smooth PEI sheets, which made for quite a thick bed assembly overall. But the PINDA had no trouble reading through the entire stack, auto levelling works fine, all good.
Because you’re propping up and tilting the printer, they also give you parts to relocate the LCD to the top of the machine, which you’re mostly going to be using to swap filament, as the idea is really to use a print host to start and manage prints.
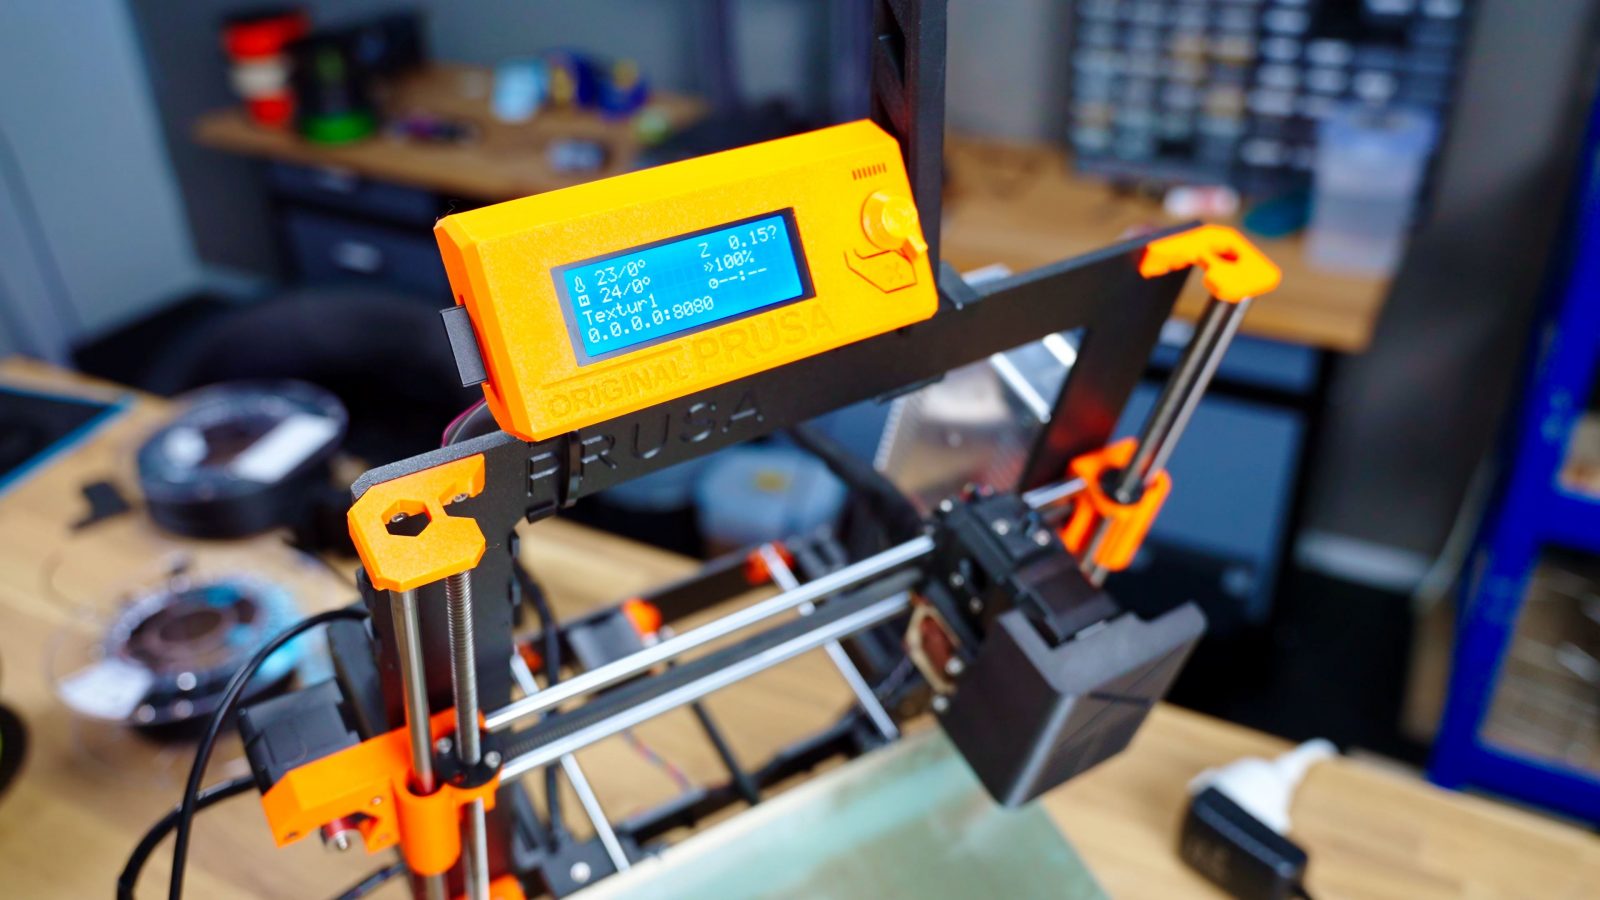
Use of the System
I used it with the Rock Pi running 3D Que’s host software, where you simply upload your gcodes, choose how many copies you want, at what temperature to release, and the rest happens automatically. Between every print, it’s also running a clearing cycle where the head moves all the way down and kind of slides off the parts from the bed. That’s also what this skirting is for, to make sure that parts don’t get stuck in the mechanical bits of the printer as they slide off.

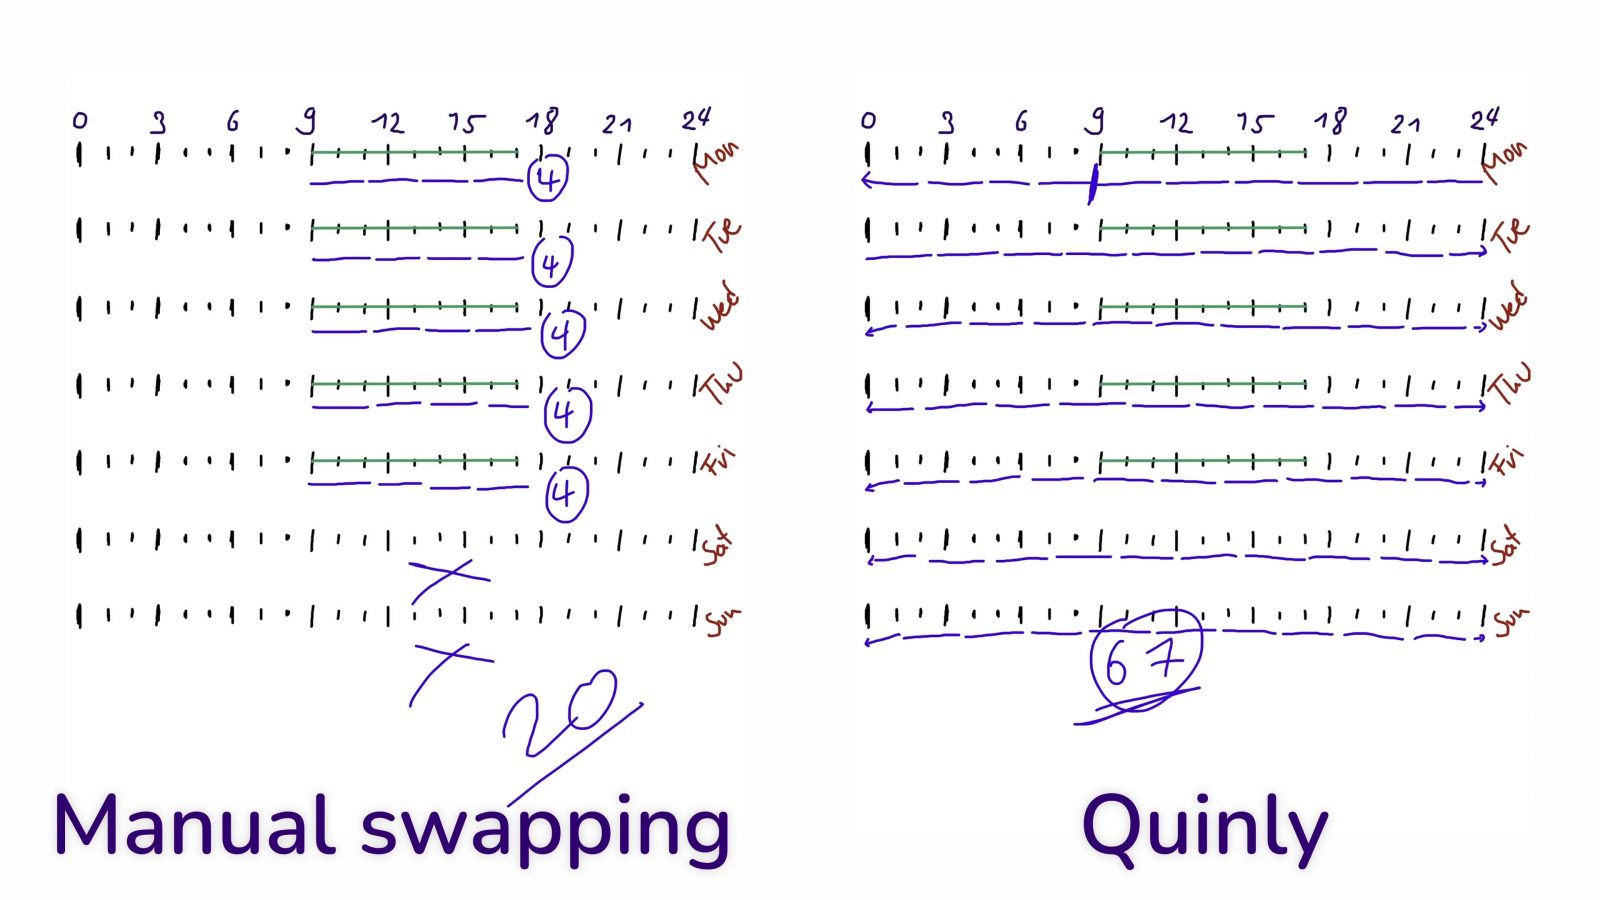
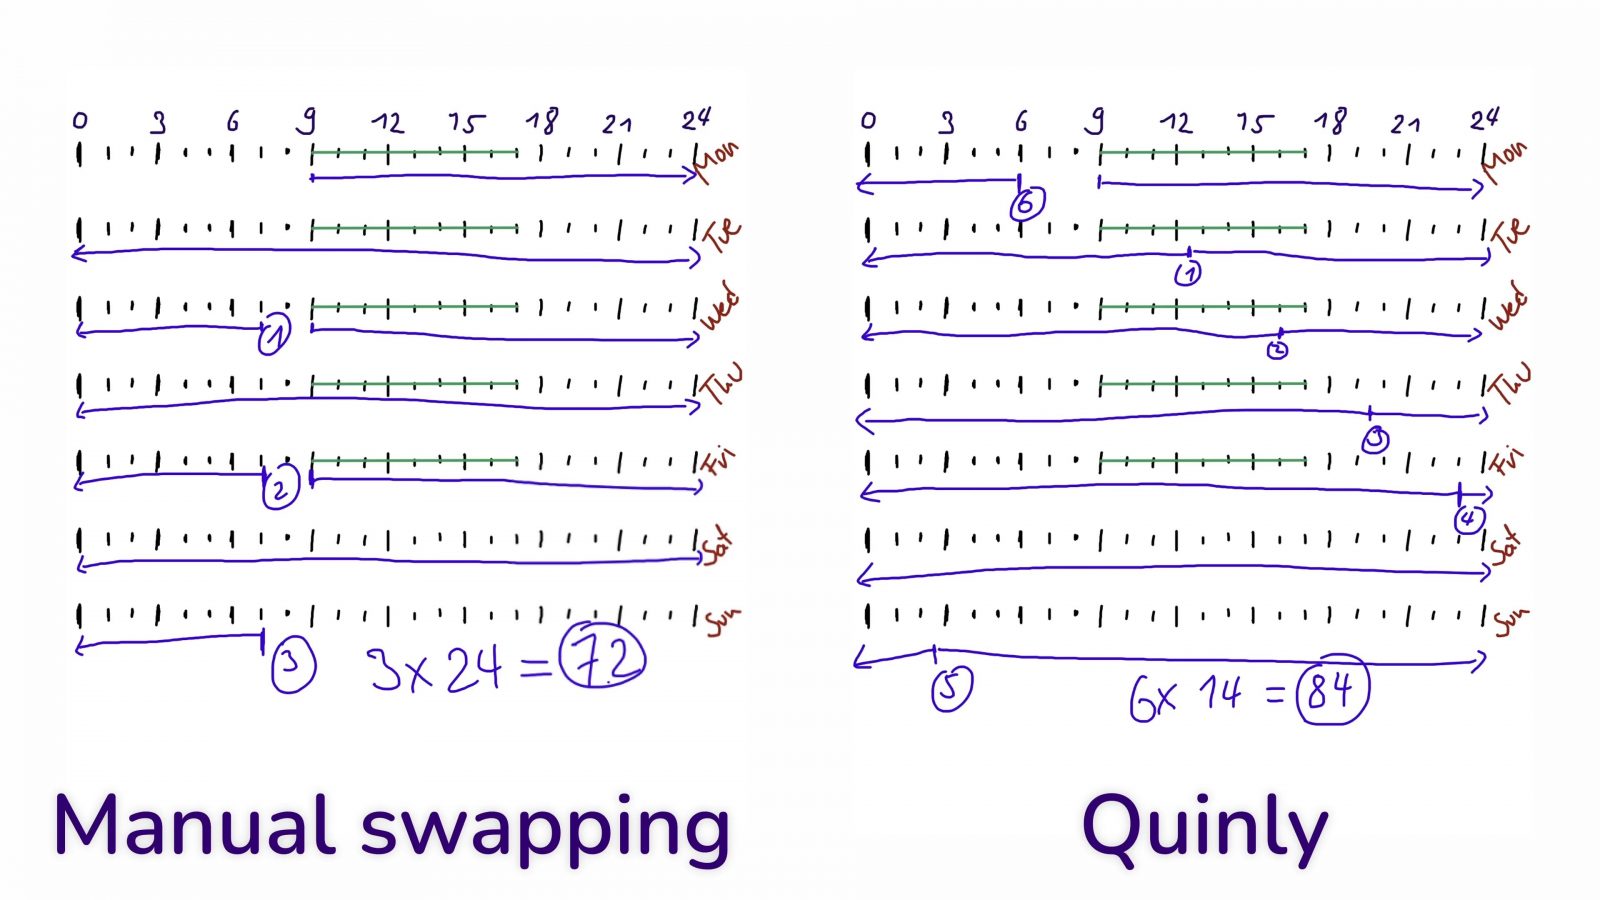
And most of the time, this works 100% of the time! When it does work, here’s how the time savings come out: Let’s assume there’s someone there who can maintain the printer for 8 hours on workdays, between that, there are 16 hours of unattended printing every day, and of course, a weekend as well. Now, manually swapping a bed and starting a new print really doesn’t take any time, but because you’re most likely not going to catch the print right as it finishes, let’s say it’s a five-minute penalty for each print, but you also save some of the heat up time on the next print. Because on the Quinly, it’s not like the next part starts immediately because, after a print, it has to wait and let the bed cool down by itself. There’s no fan or anything to help that, and because the release temperature is pretty close to ambient, that can take a while. About half an hour, roughly. So I did the math for a week of printing, starting and finishing Monday morning, with a couple of different models. For a standard two-hour 3D Benchy, printing each one individually, within one week you’d have printed about 20 when swapped manually vs. 67 when printed non-stop on the Quinly.
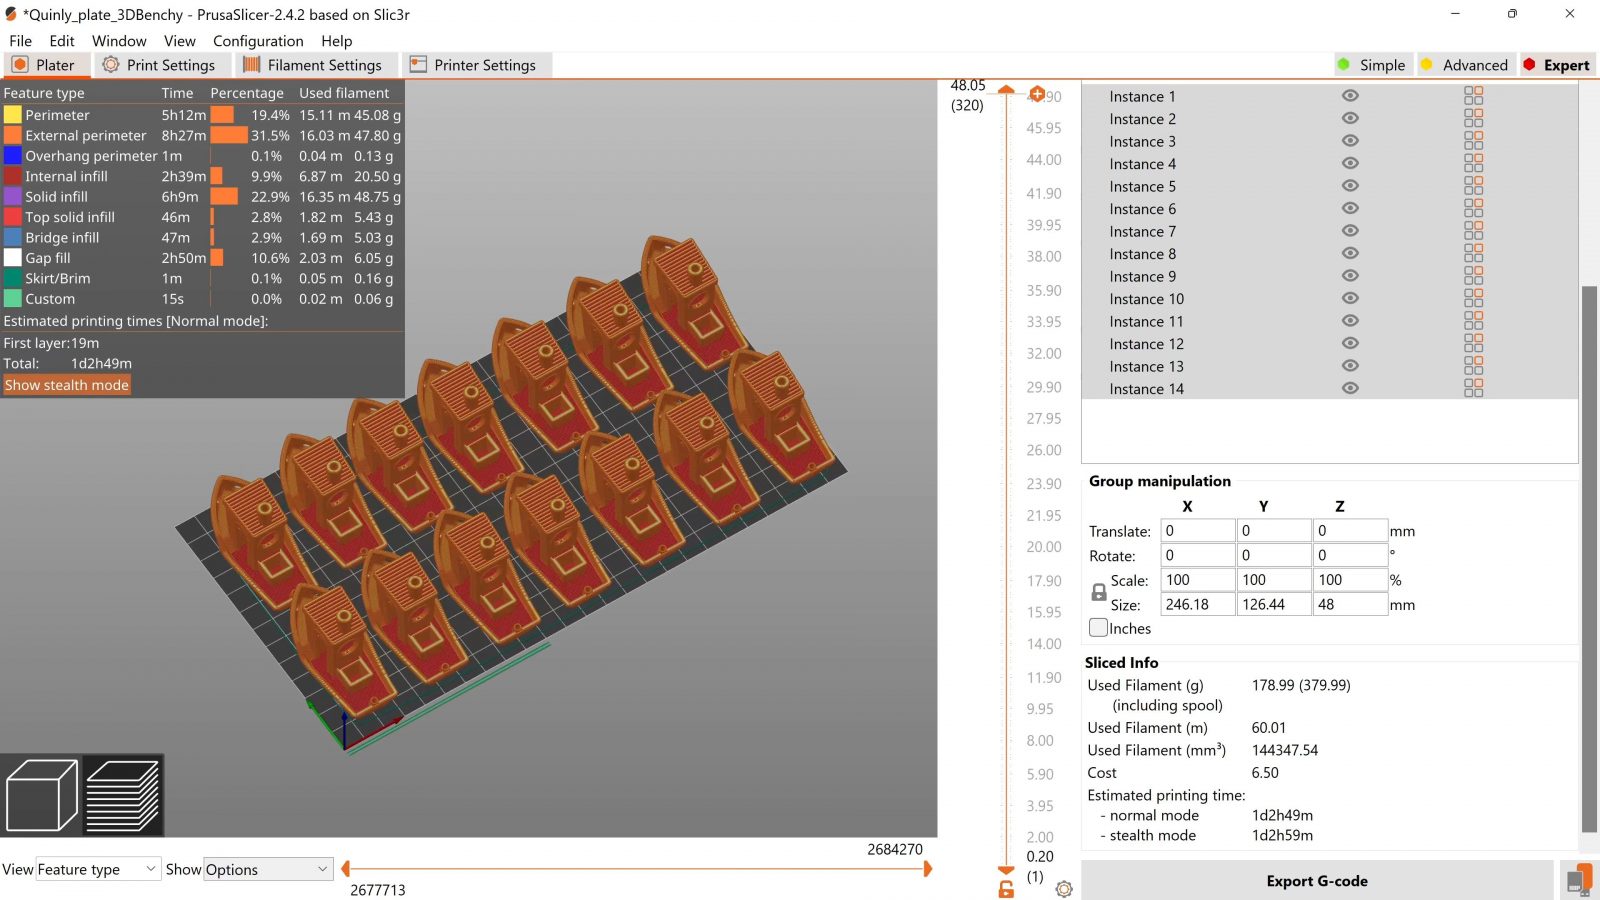
But if you do a full plate of Benchies, it’s not quite that drastic anymore: Because you need to leave some space in the corner of the bed where the toolhead first plunges down to clear the bed, you can fit slightly fewer parts on there, and in fact, you probably also don’t want to print larger parts that would collide with that area. So the Quinly fits 14 Benchies, while a regular bed fits 24. But because the Quinly can auto-clear, you get six beds worth of parts after a week, while you’ll only be able to get 3 when manually clearing. So that’s 84 Benchies for the Quinly and 72 when done by hand.

With a single larger model like Uncle Jesse’s Skull Planter at 120% scale, you’d get 5 parts printed in a week by hand, and an extra one done on the weekend by the Quinly.
Obviously, if you’re clearing manually, you can tweak your print setups so that you’re there when they finish and you can start the next one right away, but with the Quinly you can just chuck parts towards the printer, get consistent times per part, and you won’t have to babysit the machine – when everything works. The great thing about using a stock surface on a printer and having profiles from the manufacturer to go with that is that all you have to do is load up your model, choose what you’re trying to do, and you’re going to have a pretty good time. Again, that’s why I usually gravitate towards using my Prusas for most of my printing, even though I have flashier, faster, bigger printers, but I know this one is just going to work. But once you slap something like the Quinly bed surface on it, it’s a whole new puzzle to figure out.
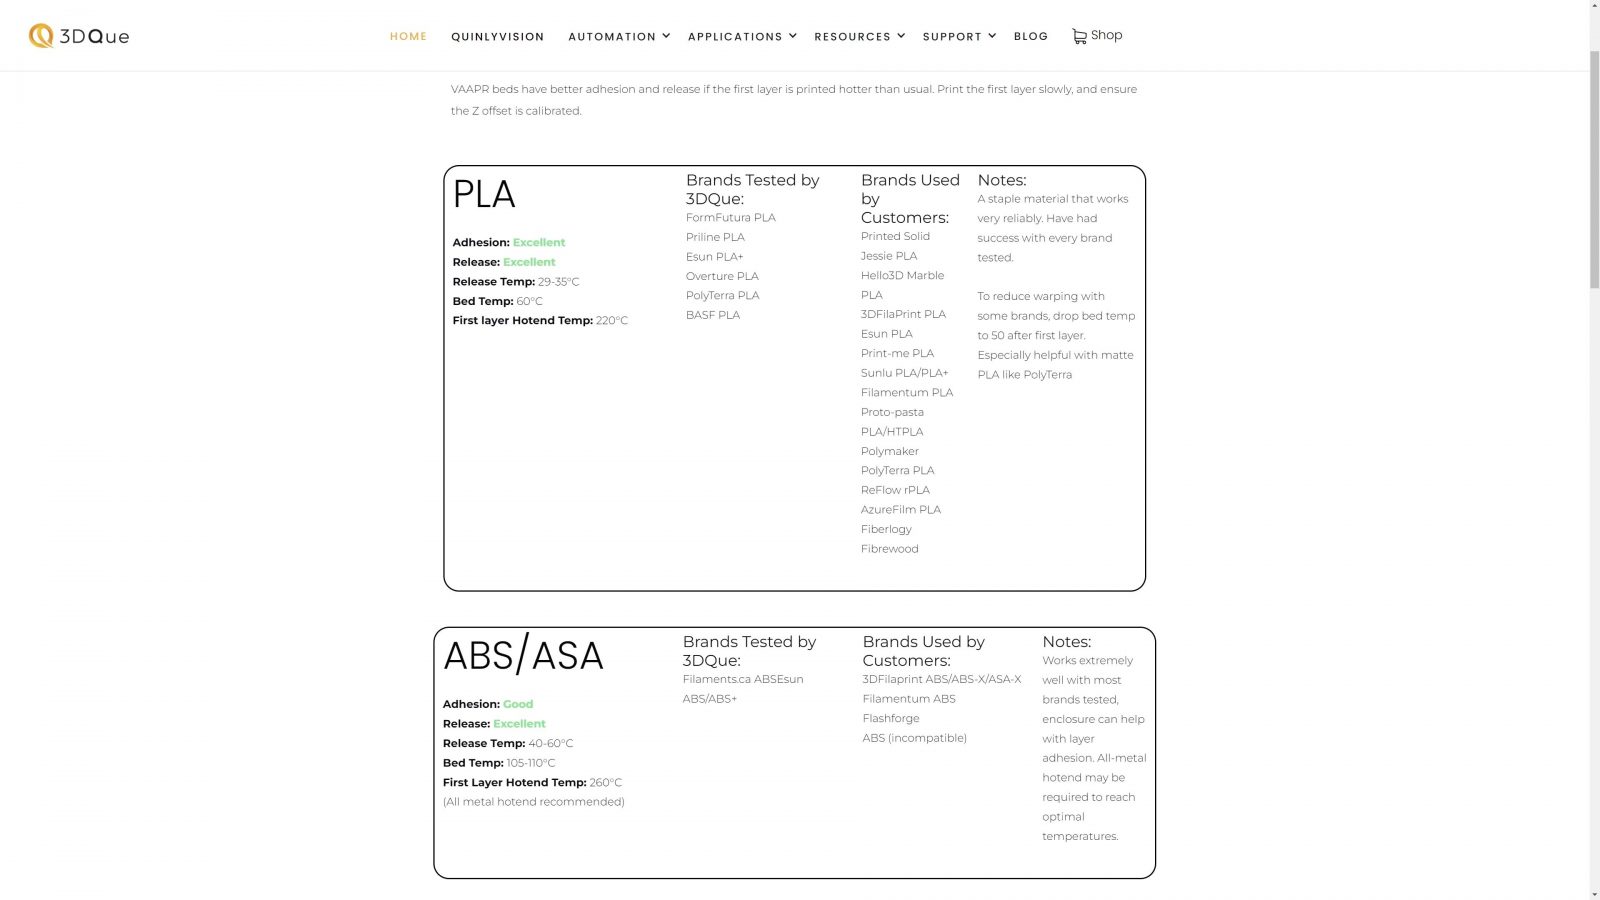
There is a table online that tells you what should work and what probably won’t, but you will have to meticulously tune in every new material you use. And I don’t just mean going from PLA to PETG, no no, every brand and possibly even every color of the same material requires completely new tuning. So the first prints I did were Prusament PLA, and those required a little extra bed temperature to stick well enough. Next up, I printed extrudr XPETG in matte black, and those worked really well at stock temperatures, without any changes.
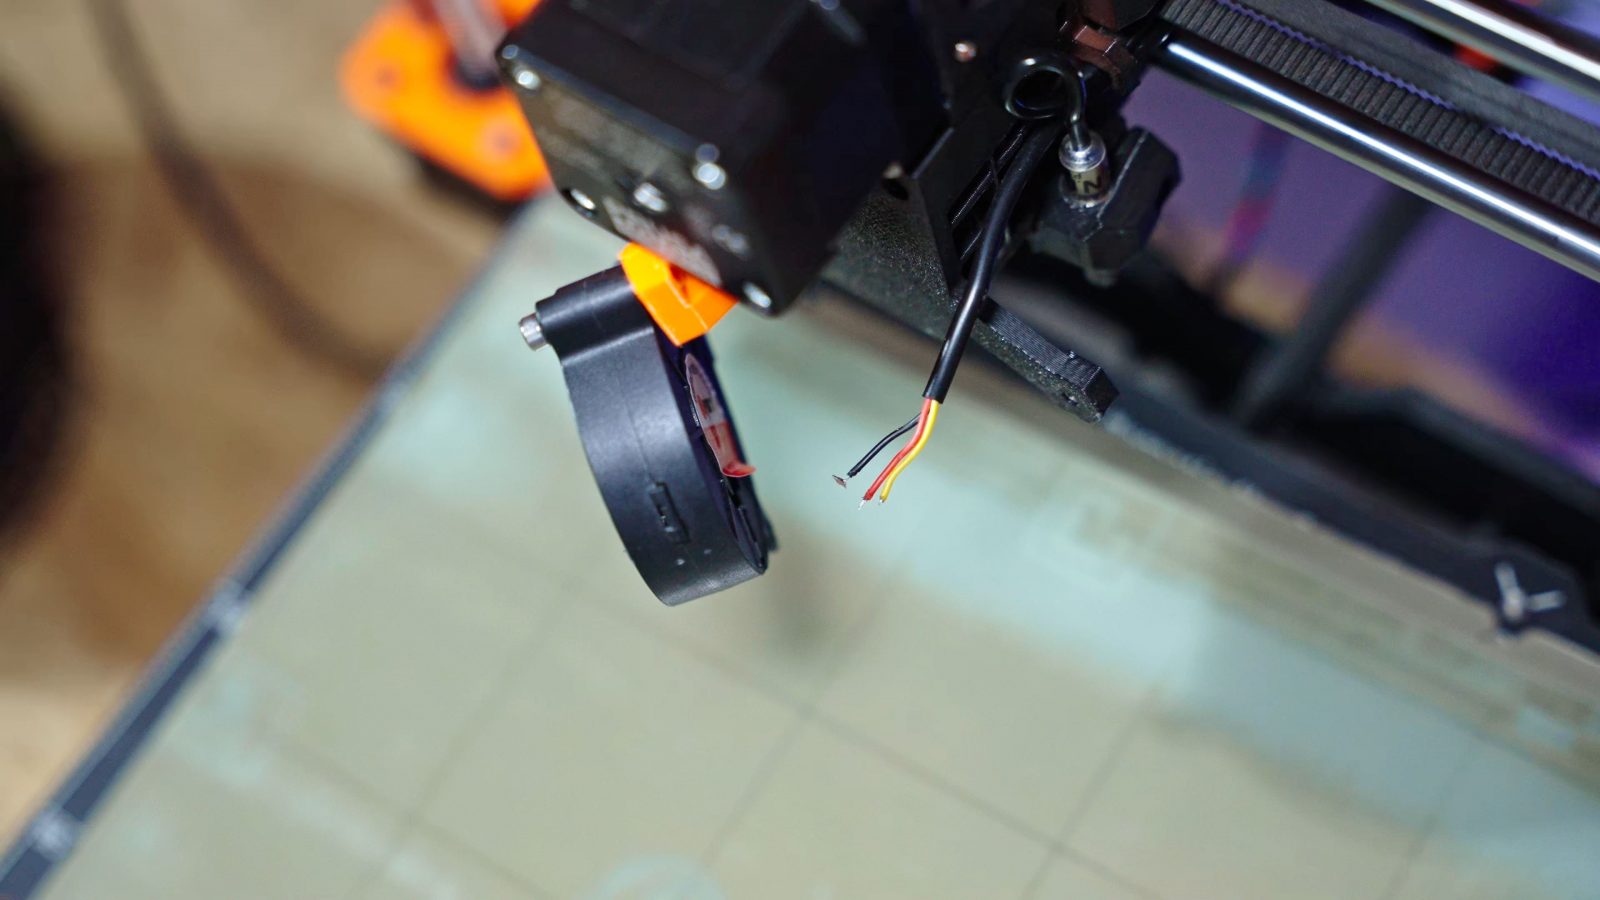
Then I switched over to extrudr NX2 PLA and that stuck so well, that when the clearing cycle ran, it twisted the printer’s part cooling fan out of position and ripped its wires off. Printer down!
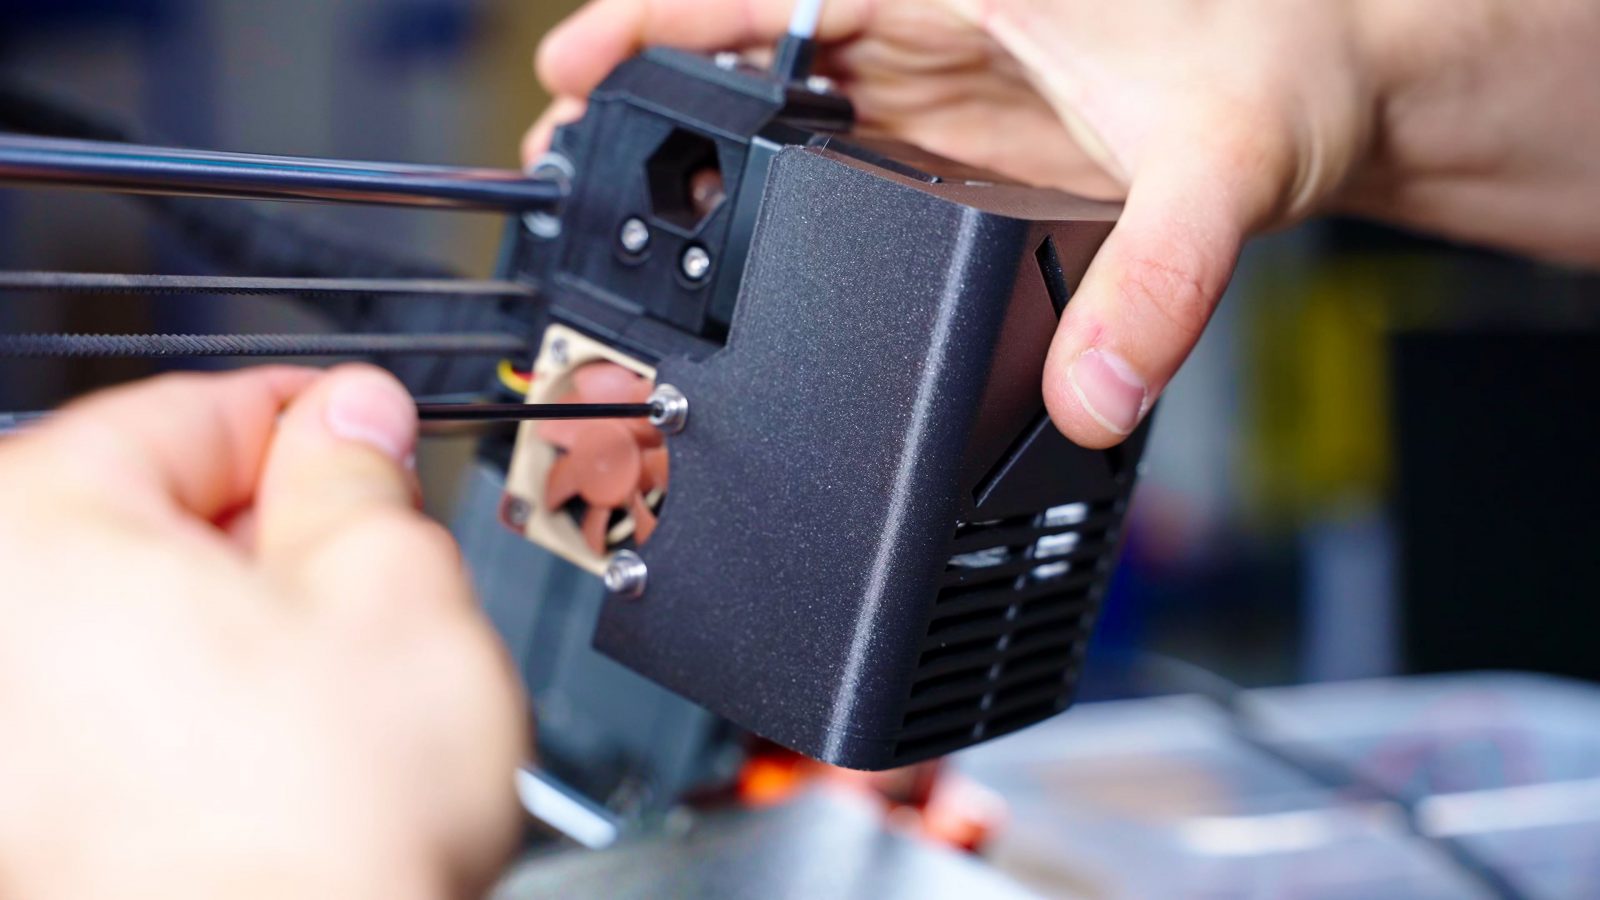
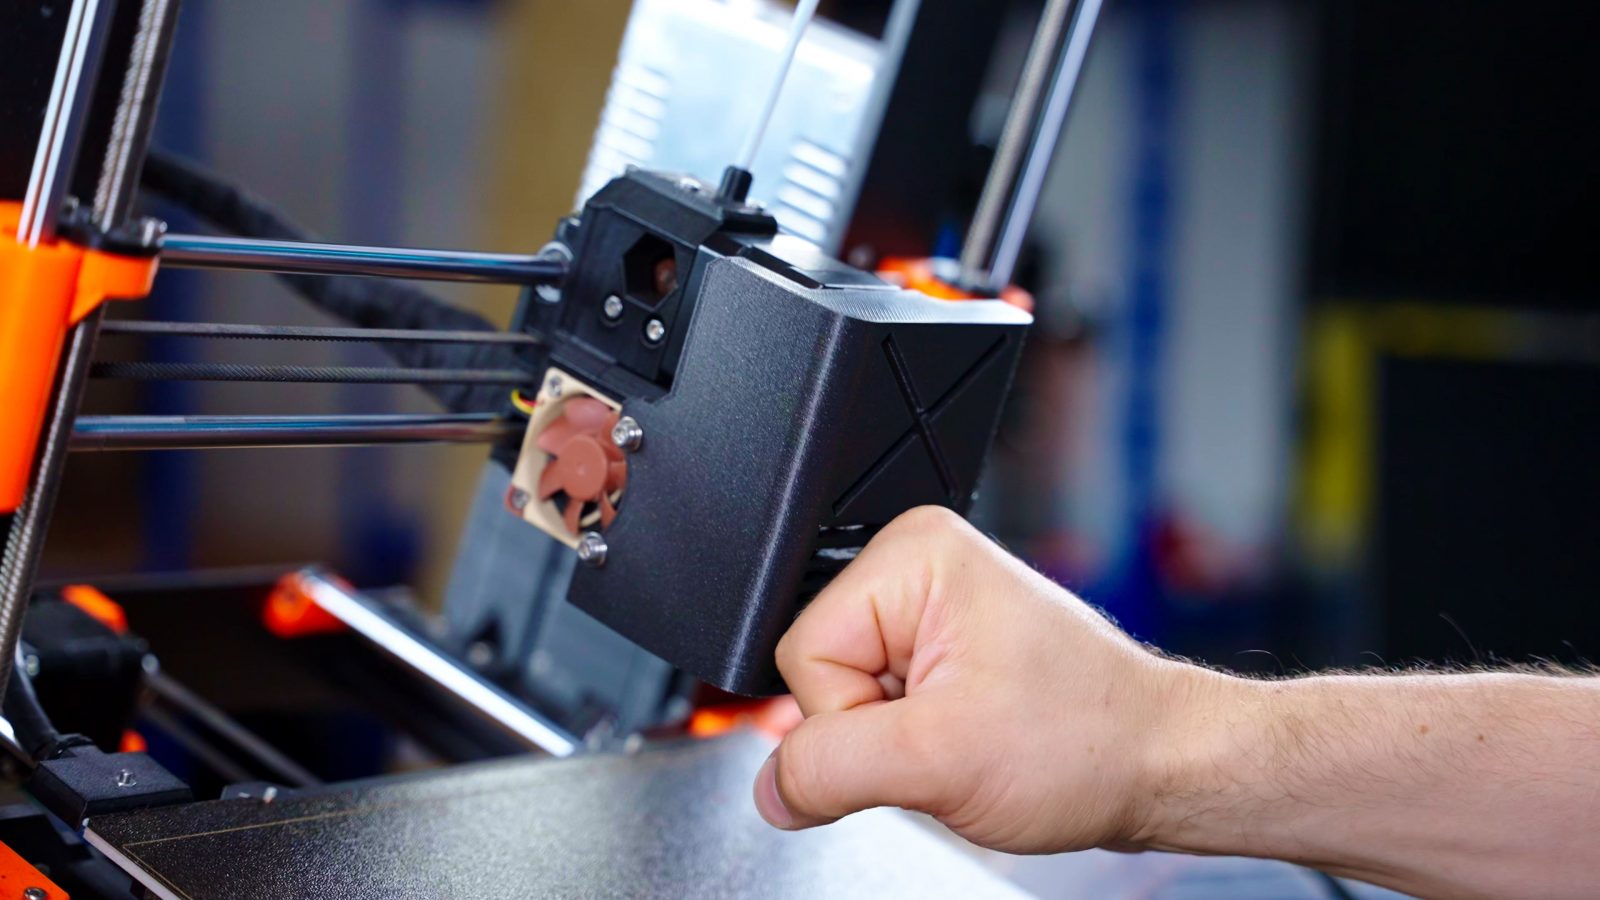
I grabbed the last 5V fan I had, off of my other MK3, and soldered it back in. I also designed a guard that would protect the parts on the toolhead from this sort of abuse, and I wanted to print that in Prusament ASA, as it’s pretty close to the bed and I didn’t want it to soften and warp.
On the Quinly’s VAAPR bed, that part just came loose a couple of layers into the print. So I tried the same gcode again on a standard textured PEI sheet, which worked great. Then, with the ram shield fitted to the printer and everything back in working order, I switched back to the VAAPR bed, and went to the basic DAS FILAMENT PLA, and that immediately worked perfectly without any tweaks or any issues at all. There wasn’t even a temperature bump needed as with the Prusament.
So I’ve had the full range of experiences between parts sticking not at all, just perfectly, or way too well. With this surface that’s supposed to grip well at high temp, but completely release when cool, you’re riding a really thin razor’s edge of having to get all the parameters right. Regular surfaces can err on the side of “too high” adhesion, but here, even seemingly insignificant changes can have a huge impact on whether the adhesion is sufficient or not.
What is the best use for it?
So where I think this can really shine is if you have, like, production runs of the same part, with the same material, just over and over again and you can tune that in really well once, and then just print with those exact same parameters for the next thousand parts. But if you always have new parts or new materials that you’ll be printing, I think you’d actually be better off just using a regular, high-adhesion flex bed, skipping the tuning phase, and removing parts manually – which can actually be faster for one-off parts because you get to skip the mandatory half-hour cooldown phase on the Quinly.
If you don’t get the print settings dialed in, you’re just abusing your printer – none of the components on here were made to ram parts off of the build plate, and even with the ram guard that I added I wouldn’t want to have the toolhead crash into parts like that.
The software running on the Quinly wireless hub supposedly can deal with the printer’s crash detection triggering, which didn’t work too well for me, so I ended up disabling crash detection entirely as per the instructions. Which I’m told are out of date, so you’re still supposed to leave it on, I guess.
You’re also going to have to make sure your parts don’t get too heavy. With the Y-axis now having to move up a roughly 15° incline, it’s sometimes already struggling to make it up on its own, and with an extra kilogram or more worth of printed parts attached, you’re past what I’d consider a 24/7 reliable setup.
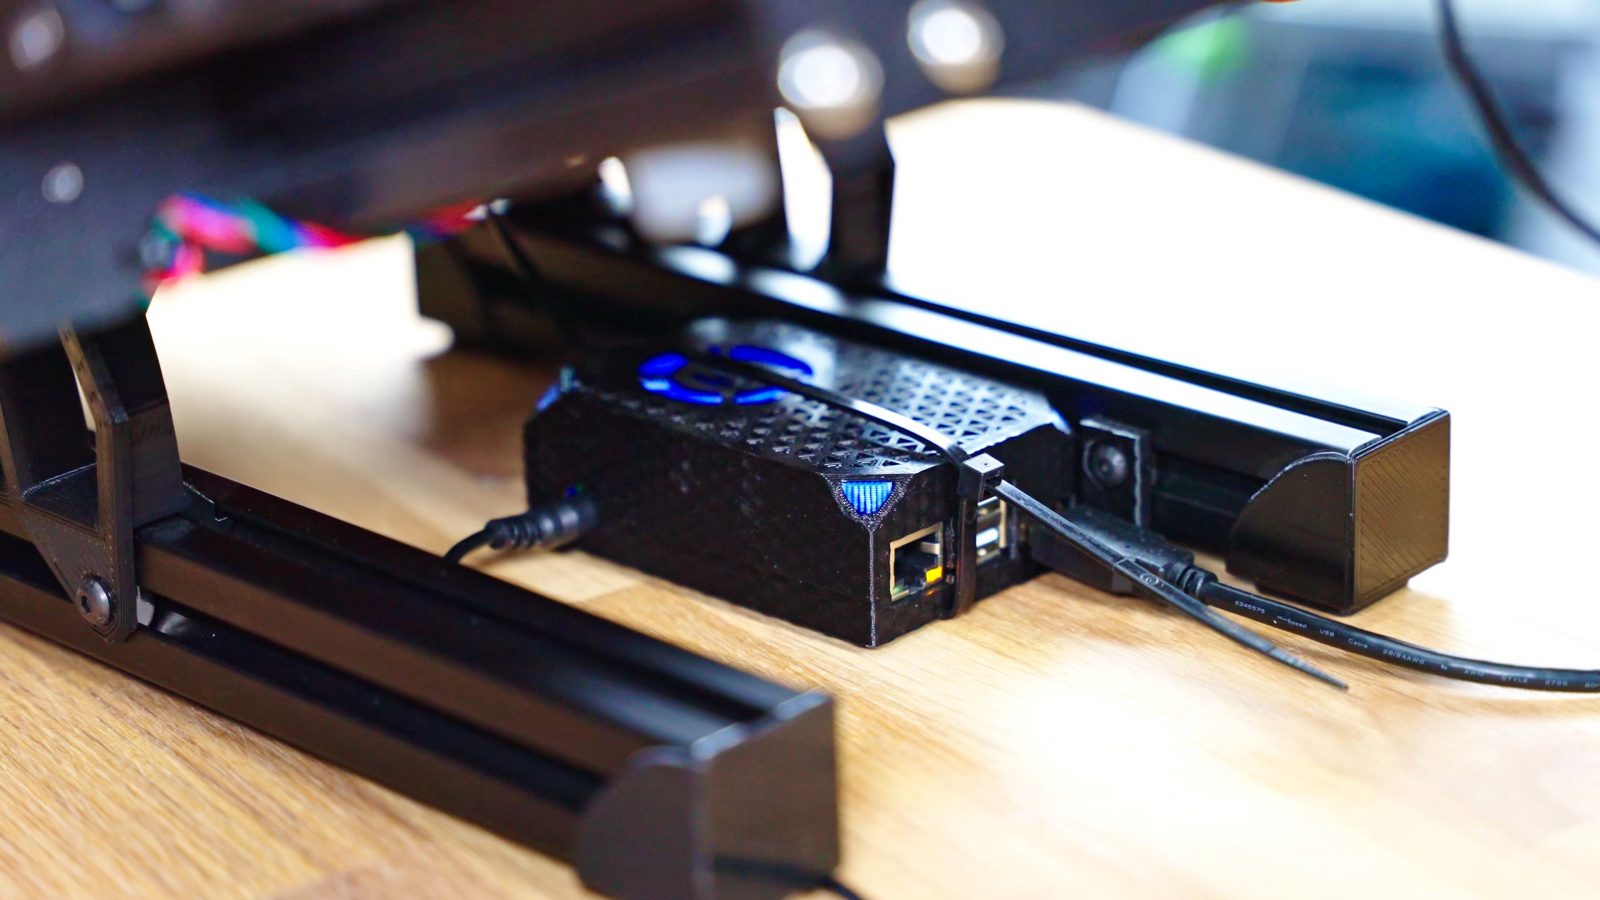
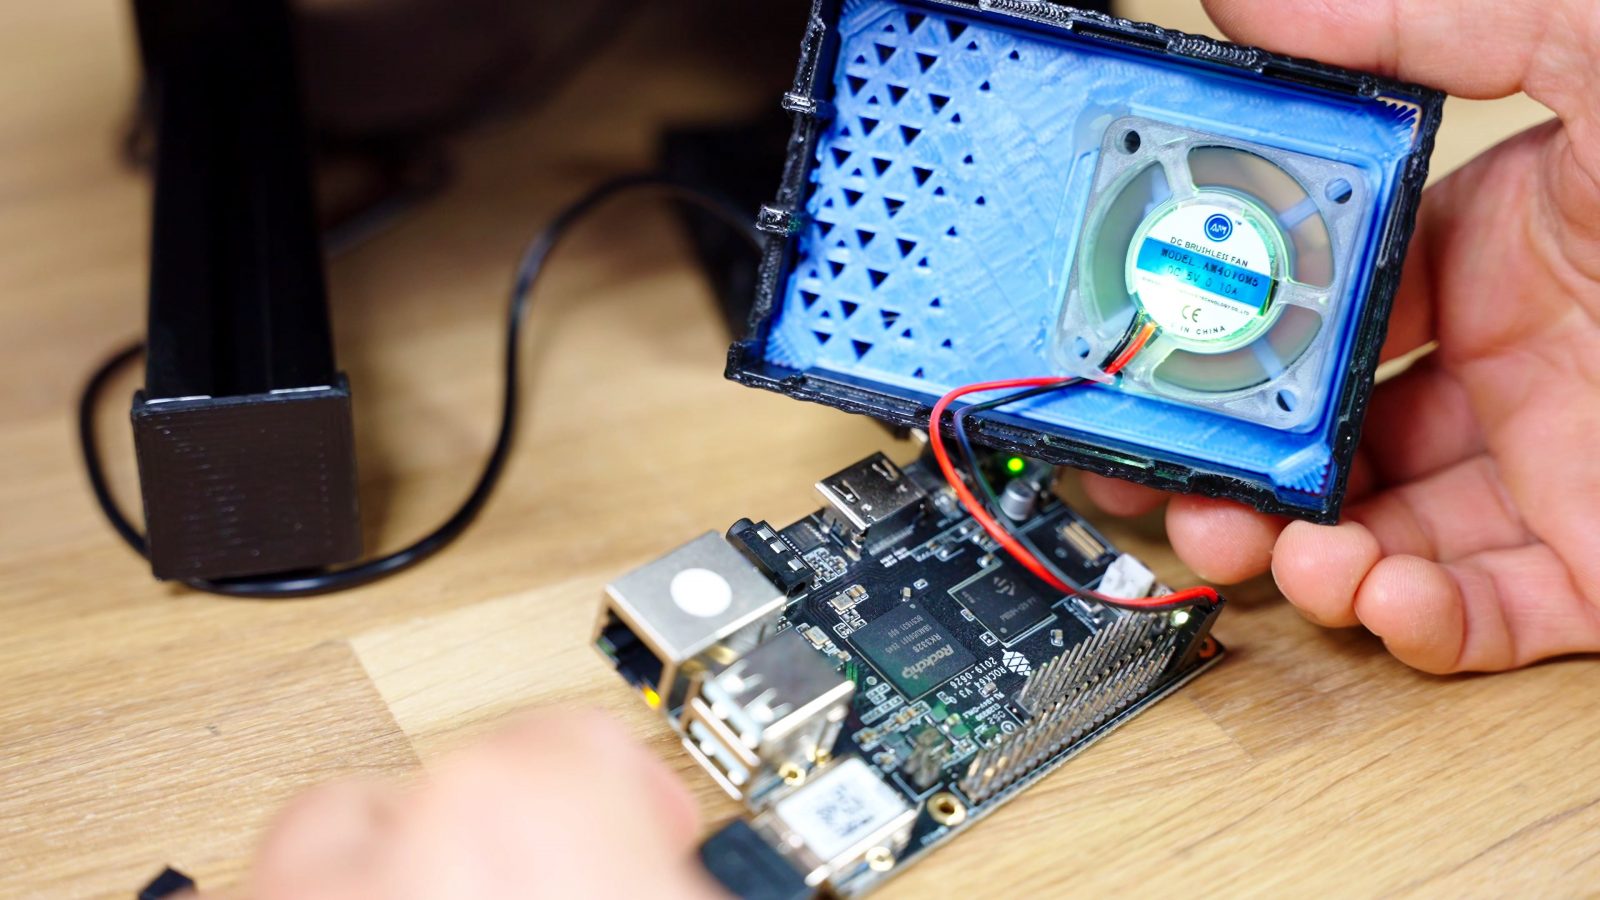
Wireless Hub, WiFi Stick and Custom OS
The other part of the Quinly system is the wireless hub, which is a RockPi, a WiFi stick, and a custom OS running on it.
This was the most frustrating part of the entire review. I’ve had so many occasions where I’d need to power cycle it to get it to connect to the printer at all, it’s got a queue system built-in that you can add jobs to and pick how many you want, but I pretty much always had to add the job twice because the first one just disappeared without printing anything, and during a two-day print job, apparently it rebooted in the middle of the night and left me with a half-finished print and a confused MK3. All while hooked up to a UPS, that is.
I really think that OctoPrint with some queue plugin would be a superior solution to this in every way. Maybe if the Quinly wireless hub had some standout features, like being able to remotely connect and not just from the same network, or some sort of central management for print farms where you’d run multiples of these, but it doesn’t, it doesn’t even have the basics of features like user authentication, being able to sort files by upload date or reprinting an already completed queue job.
My Conclusion
There’s obviously lots of room for improvement still. The core of the system, the VAAPR bed, when it works, it works great, everything built around that still is a bit rough. If your application fits that narrow beam of light where the Quinly system works out, then you’re going to have an amazing time with it, but honestly, for everyone else, skip the hassle, skip the cost, and just stick with your regular bed surfaces.
And that’s my take on the 3DQue Quinly System!
Huge thank you to my awesome patrons and YouTube members for making it possible for me to run my YouTube channel like this, if you want to join in too, you can find the links right under the video. But even sharing the video or just getting subscribed helps a ton, too.
Thank you for watching, keep on making and I’ll see you in the next one!
Get the 3DQue Quinly for MK3
Filament used:
Models shown:
Hanging Skull Planter by Uncle Jessy
💙 Enjoying the videos? Support my work on Patreon!
Product links are affiliate links – I may earn a commission on qualifying purchases (at no extra cost to you)

Check out my second channel “More Layers” on YouTube for livestreams