
It’s chocolate! Fresh out of a 3D printer! That’s kind of amazing, but I’ve got questions, like: Can the mycusini 2.0 provide more than just amazement? Will it fall apart like the mycusini 1.0 that I unboxed? Is it actually practical to 3D print with chocolate? How expensive is it to run?
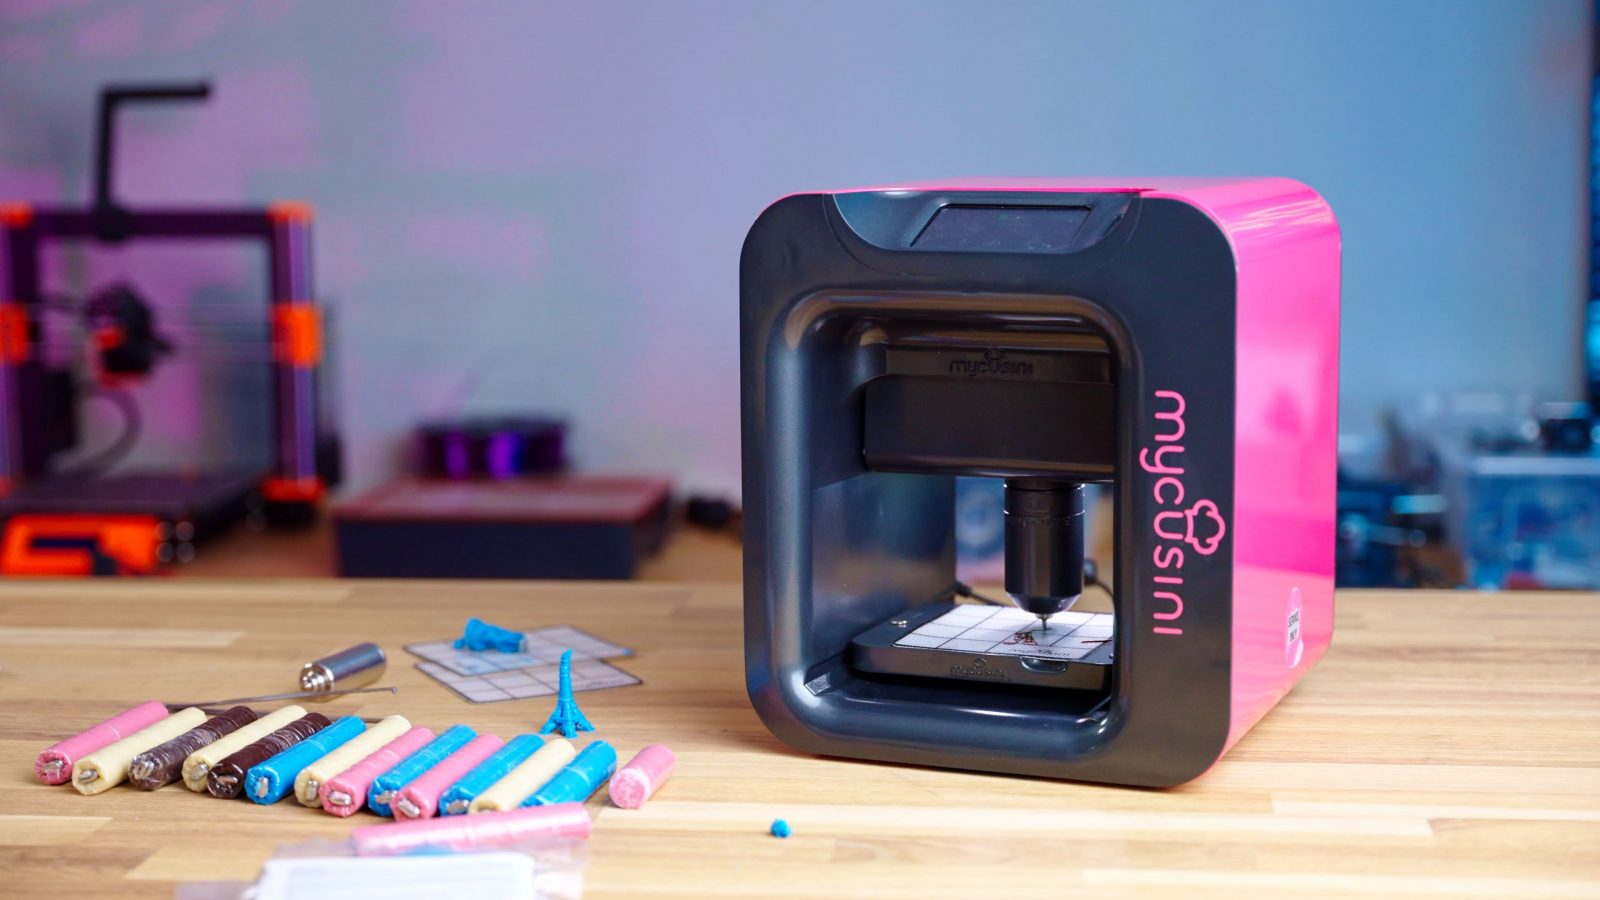
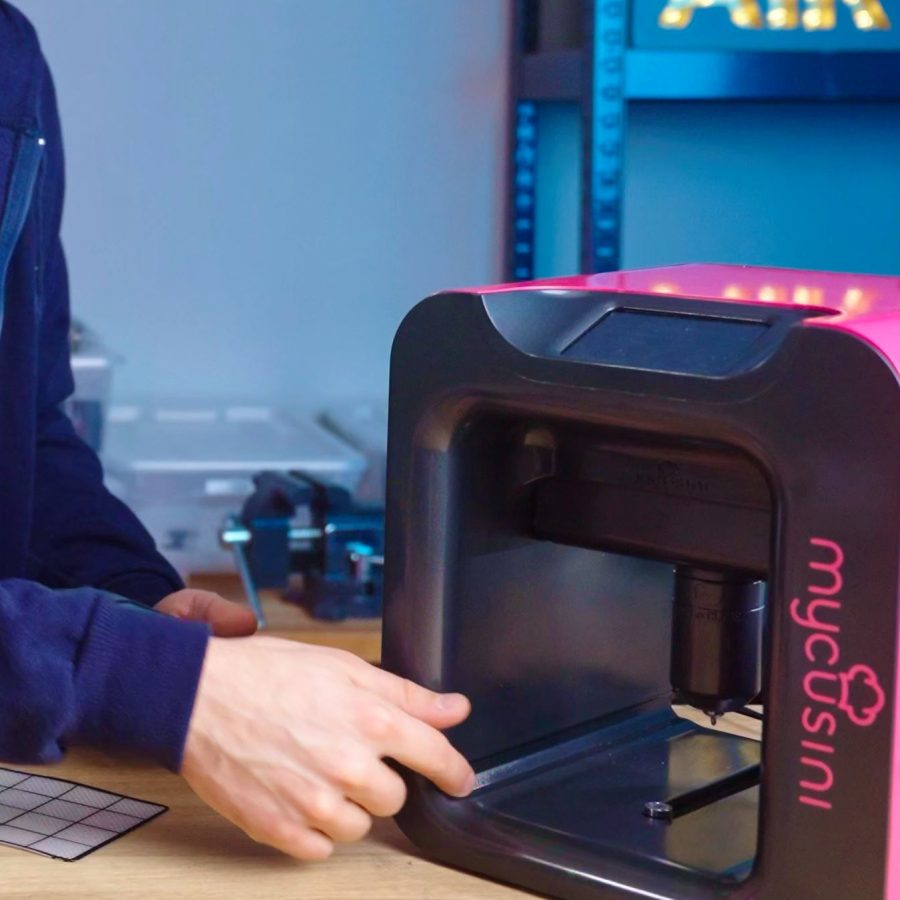
So this is the mycusini 2.0 from Print4Taste GmbH, a German company that’s actually less than an hour away from me. They’ve been around for a while. At first, they’ve been making “prosumer” or “professional” level machines with the “Procusini” lineup, which they still make and they’re on Gen 5 of their Printrbot-esque platform, it actually used to be real modified Printrbots, but those don’t exactly exist anymore, so they’re now making their own. But what the mycusini is, is a venture to home and, let’s say, pastry enthusiast users with a machine that has a stronger focus on ease of use and, of course, a lower price.
Let’s start with the disclosure, Print4Taste sent me this machine and the materials for review, they didn’t charge me anything for it, but I will need to send it back when I’m done testing it. As always, no money changed hands, there’s no requirement for me to cover the machine at all, and Print4Taste is not getting any influence on the content I do make on the mycusini.
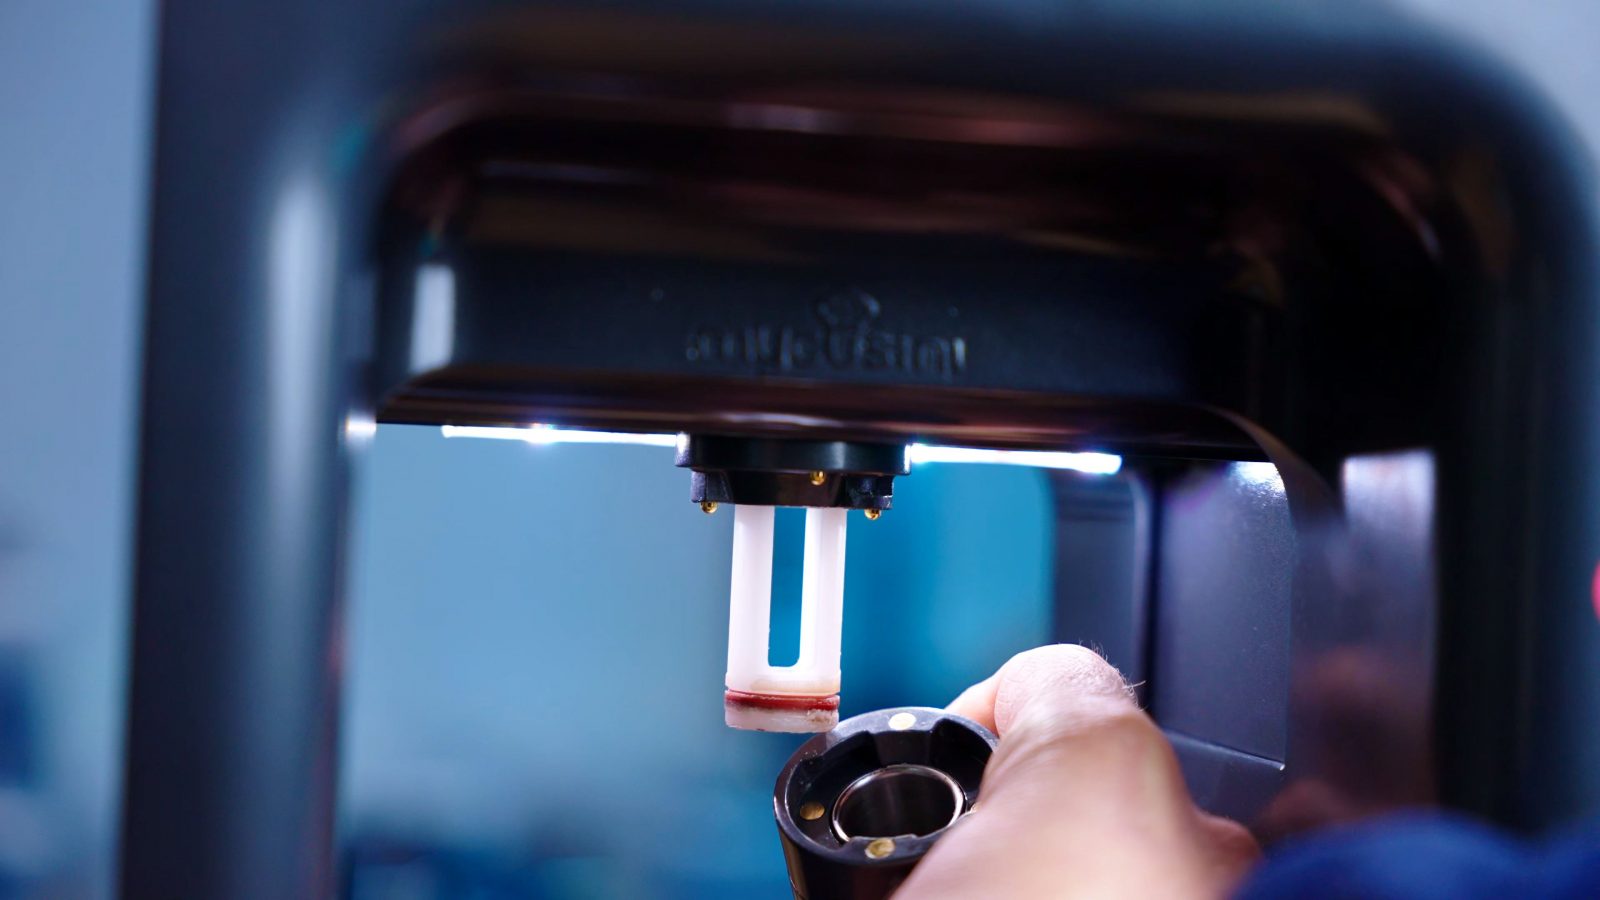
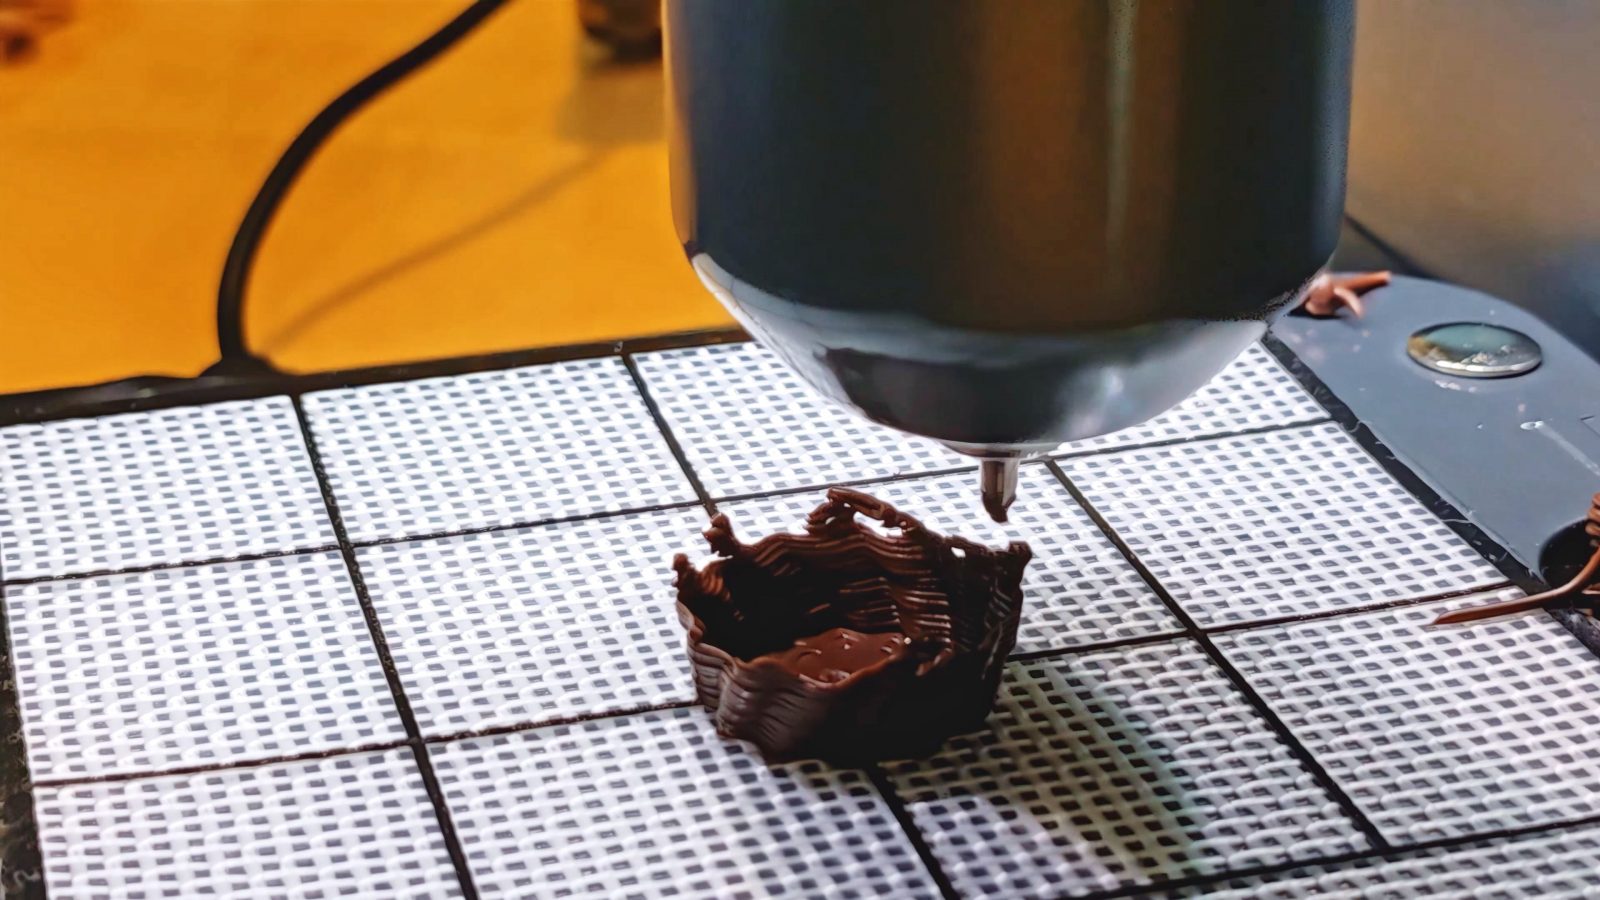
The way the mycusini and Procusini work is with these plastic-wrapped “Choco” sticks as your print stock.
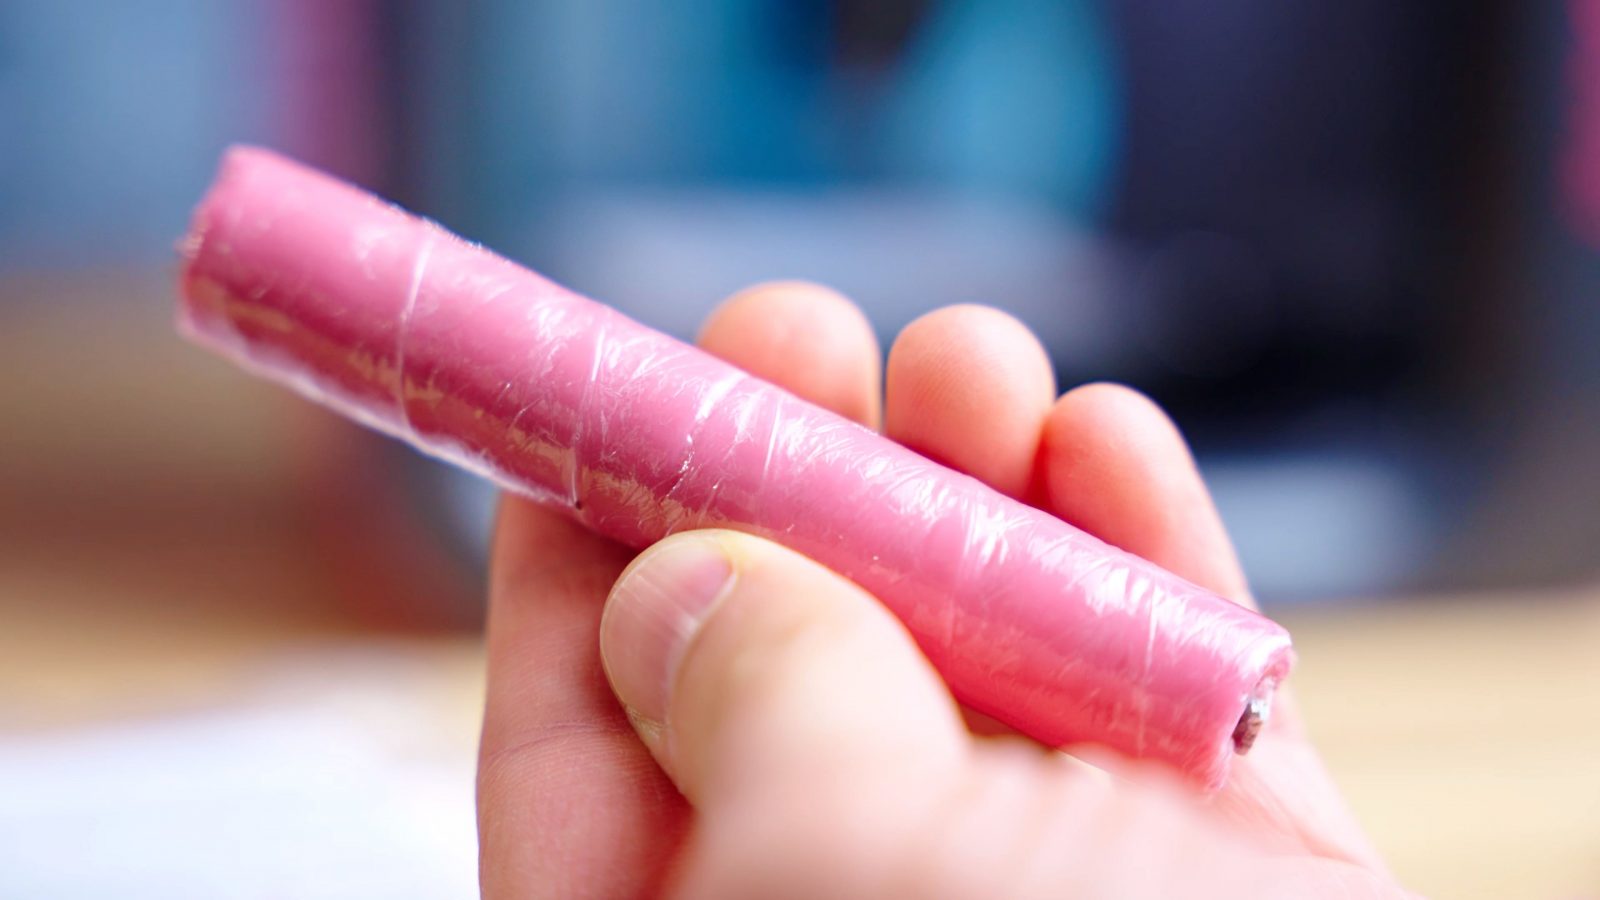
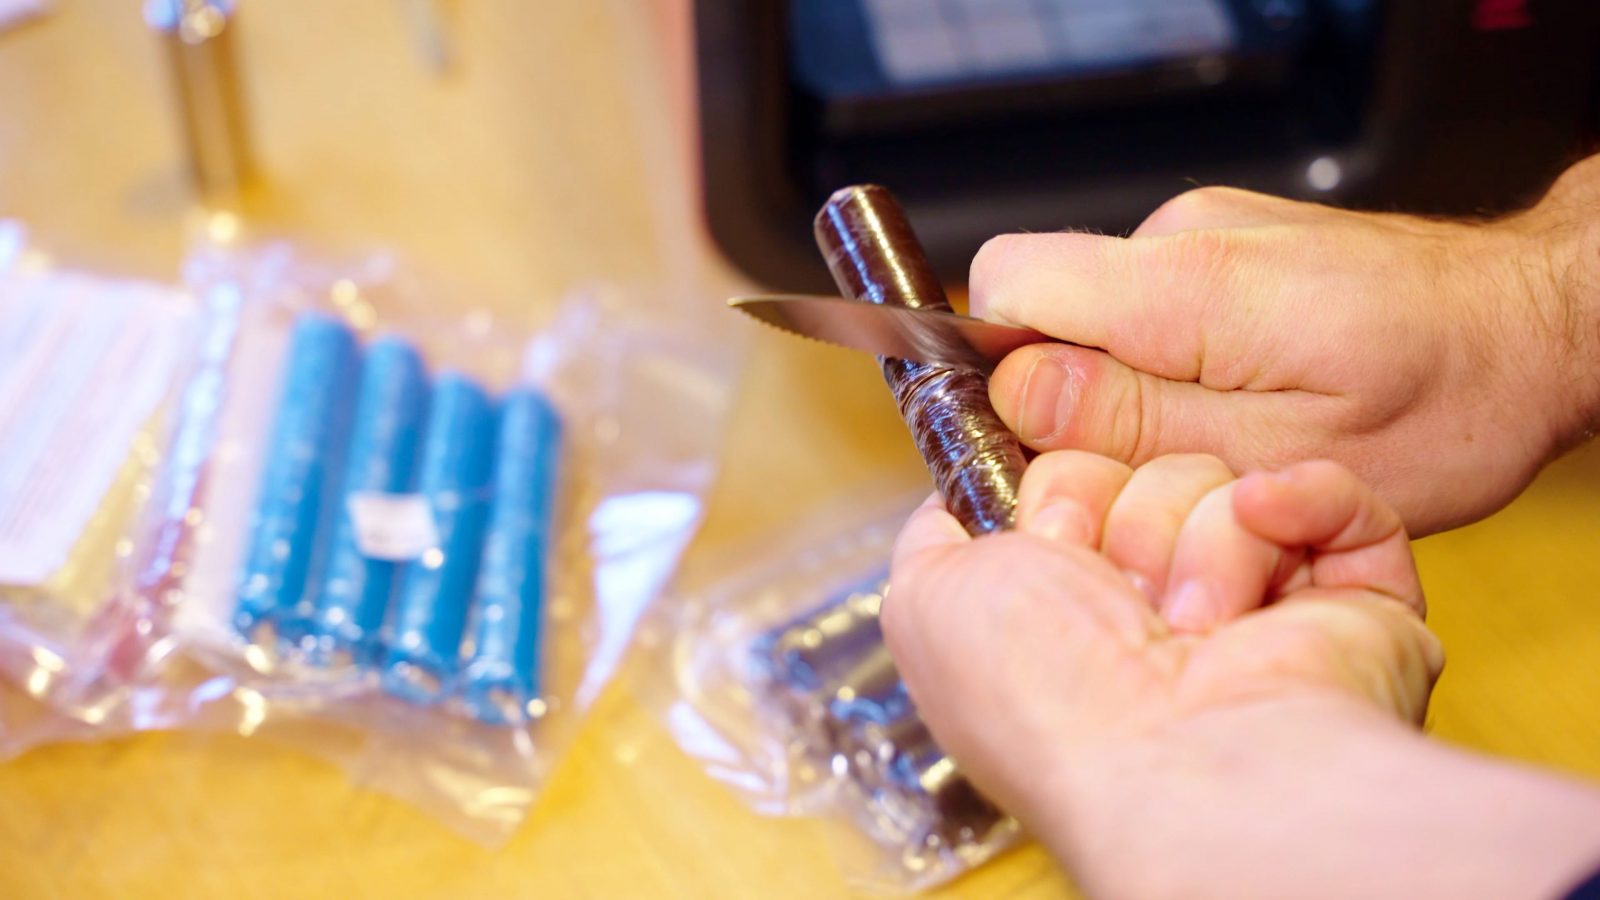

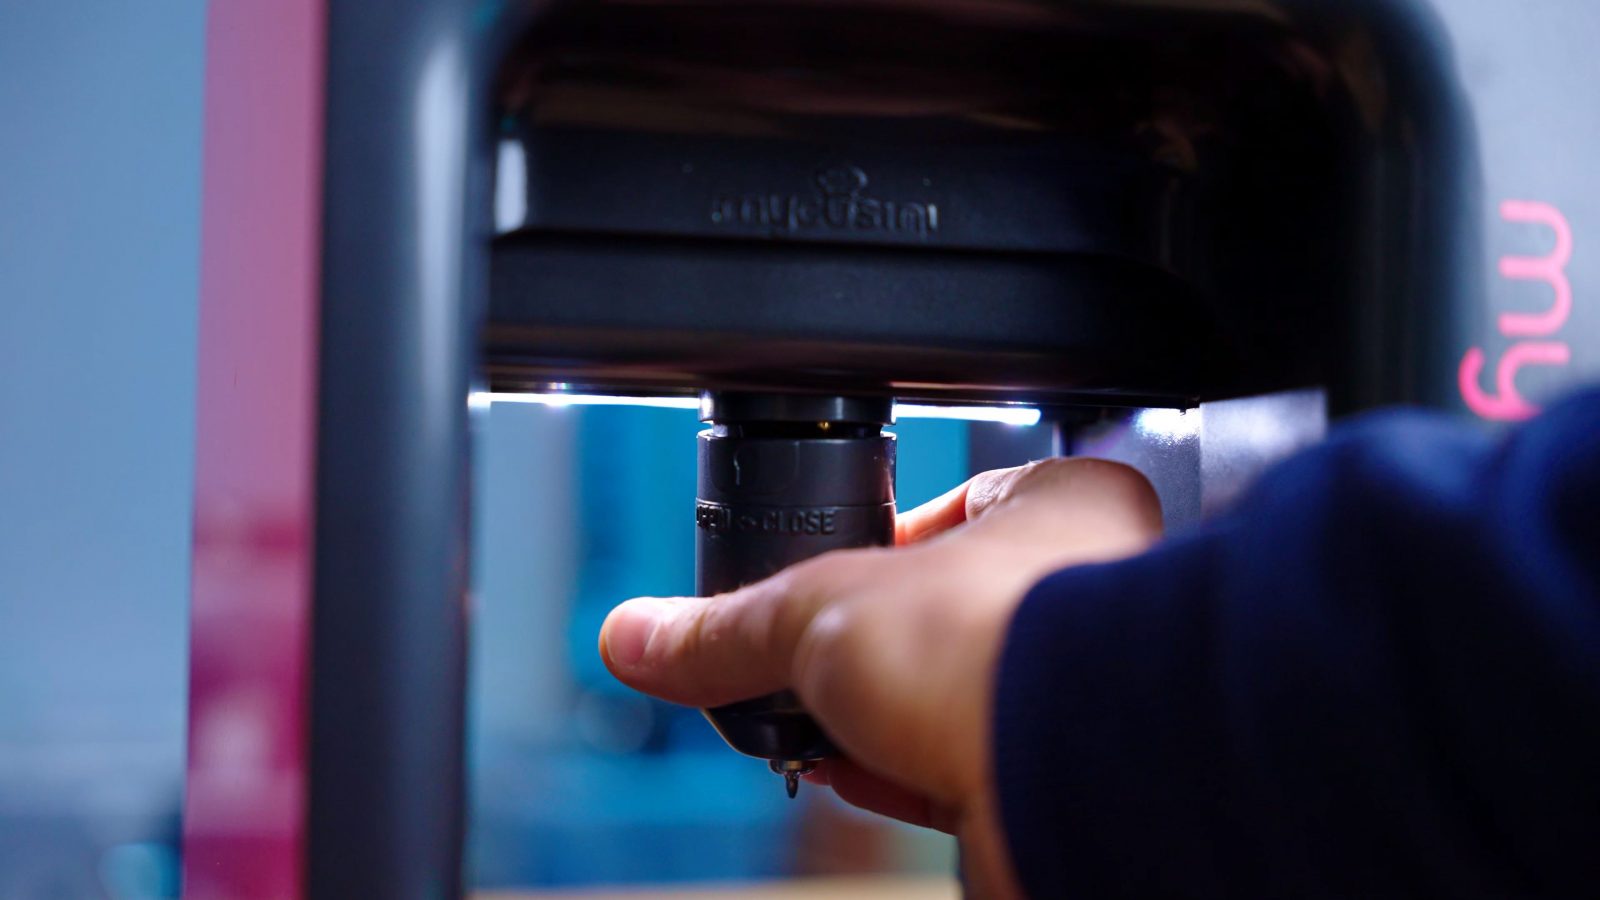
They make them in dark chocolate color, white, blue, and pink, for the Mycusini you cut the sausage packs in half and slap them into this stainless steel syringe shell, which then goes into the heater element, and that gets coupled to the printer itself. So in here, the only thing that your chocolate material ever touches is the very bottom of that stainless syringe core, further up, you’ve got a plastic plunger that presses down, but because you leave the plastic wrapper around the Choco sticks in place, that creates an additional barrier, and ideally, once it’s used up, you can just pull that wrapper clean out, plop a new half-pack in and you’re ready to go again with minimal cleanup.
Unlike in a filament-based, plastic printer, where you’re only heating a very minimal amount of your feedstock right before you use it, in the mycusini you’re always heating up the entire load to an even temperature before you can print with it.
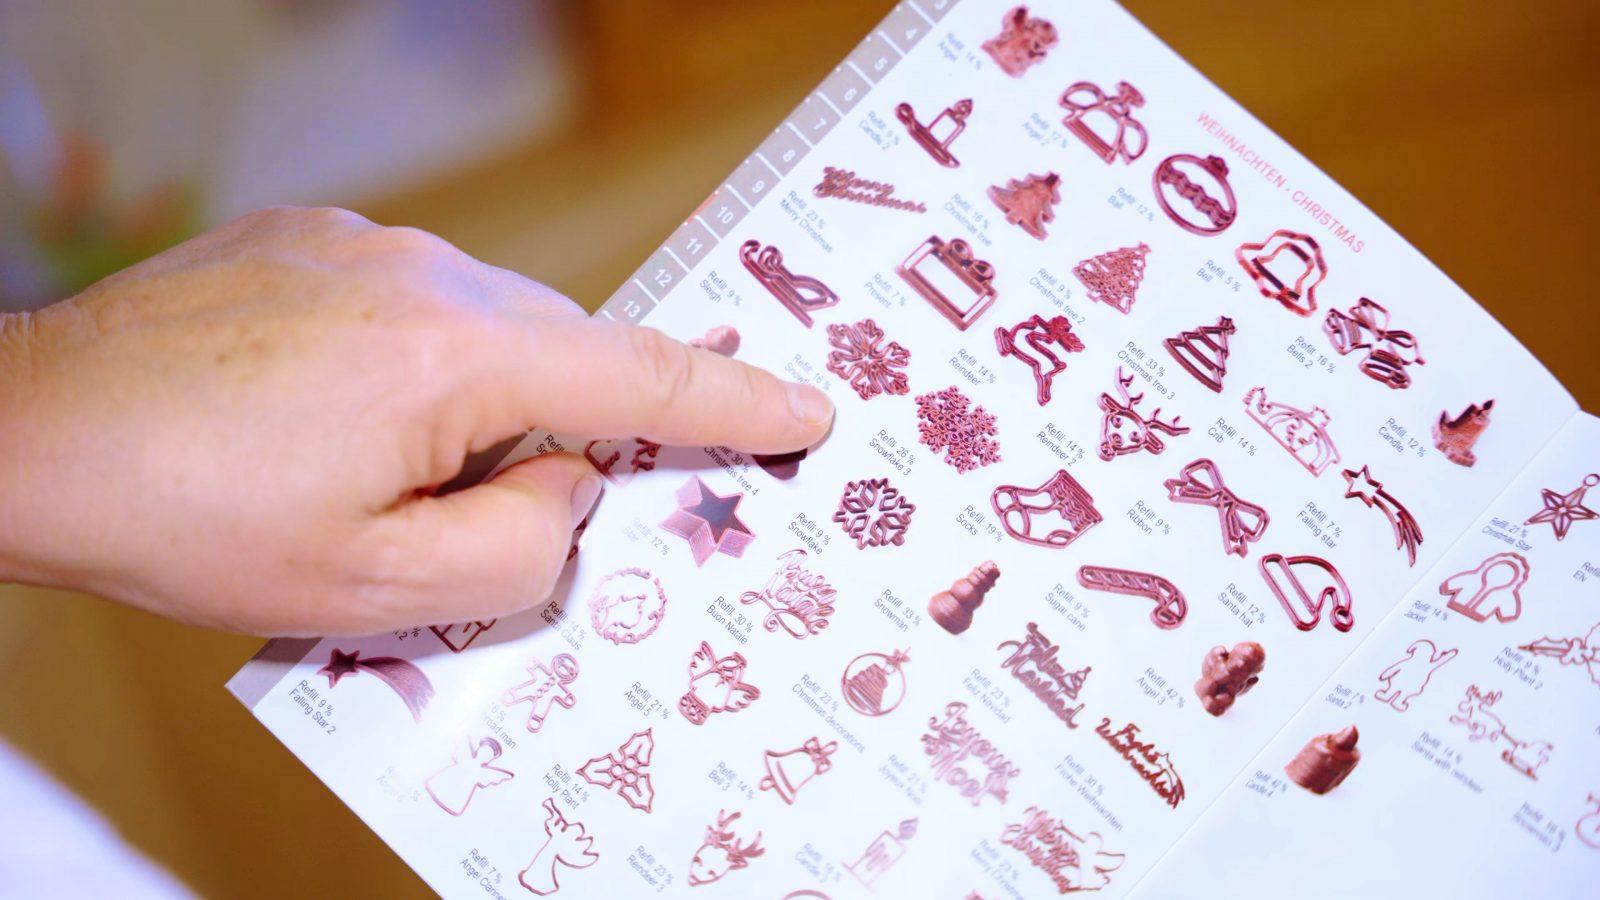
For the actual printing, the machine comes with over 1000 pre-sliced and pre-tested files on the included SD card – the extra booklet is a really nice touch, these are all real photos of those prints and it’s just a lot nicer to browse through that and pick out a file than having to click through the touchscreen menu.
You can absolutely slice and process your own files for the mycusini, not only are all these files totally standard gcode, so you could super easily create your own slicer profiles, but there’s also a set of simple online tools that let you generate your own letterings or slice 3D files like with any other 3D printer. It’s all web-based, so you don’t need to install anything to your system, but it’s also very toned down to just the bare essential settings and tools to get prints done. It works and it’s pretty easy to use.
The rest of the printing process is actually super simple, too – you wait for the cartridge to heat up, then prime the nozzle, and then there’s no leveling or anything, it just prints. You get these silicone baking mats to print onto, and they’re both tacky, so “bed adhesion” like in normal 3D printers isn’t a problem at all, but also, they’re flexible, so removing the rather fragile prints without breaking them is totally possible, which I don’t think it would be with a rigid bed surface where you’d have to chisel them off.
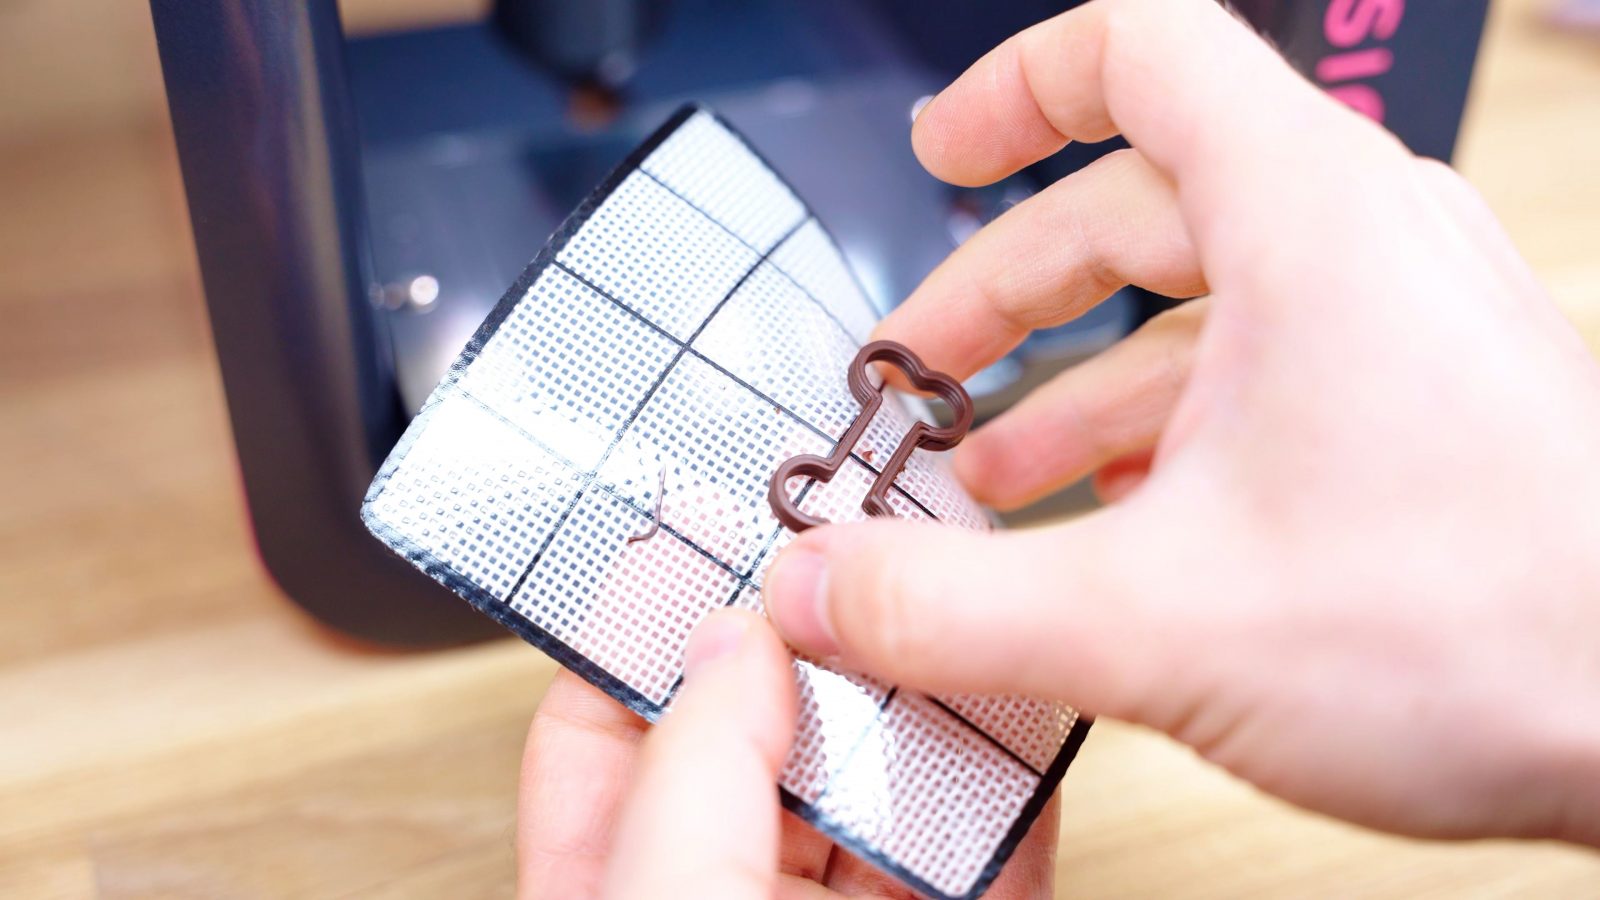
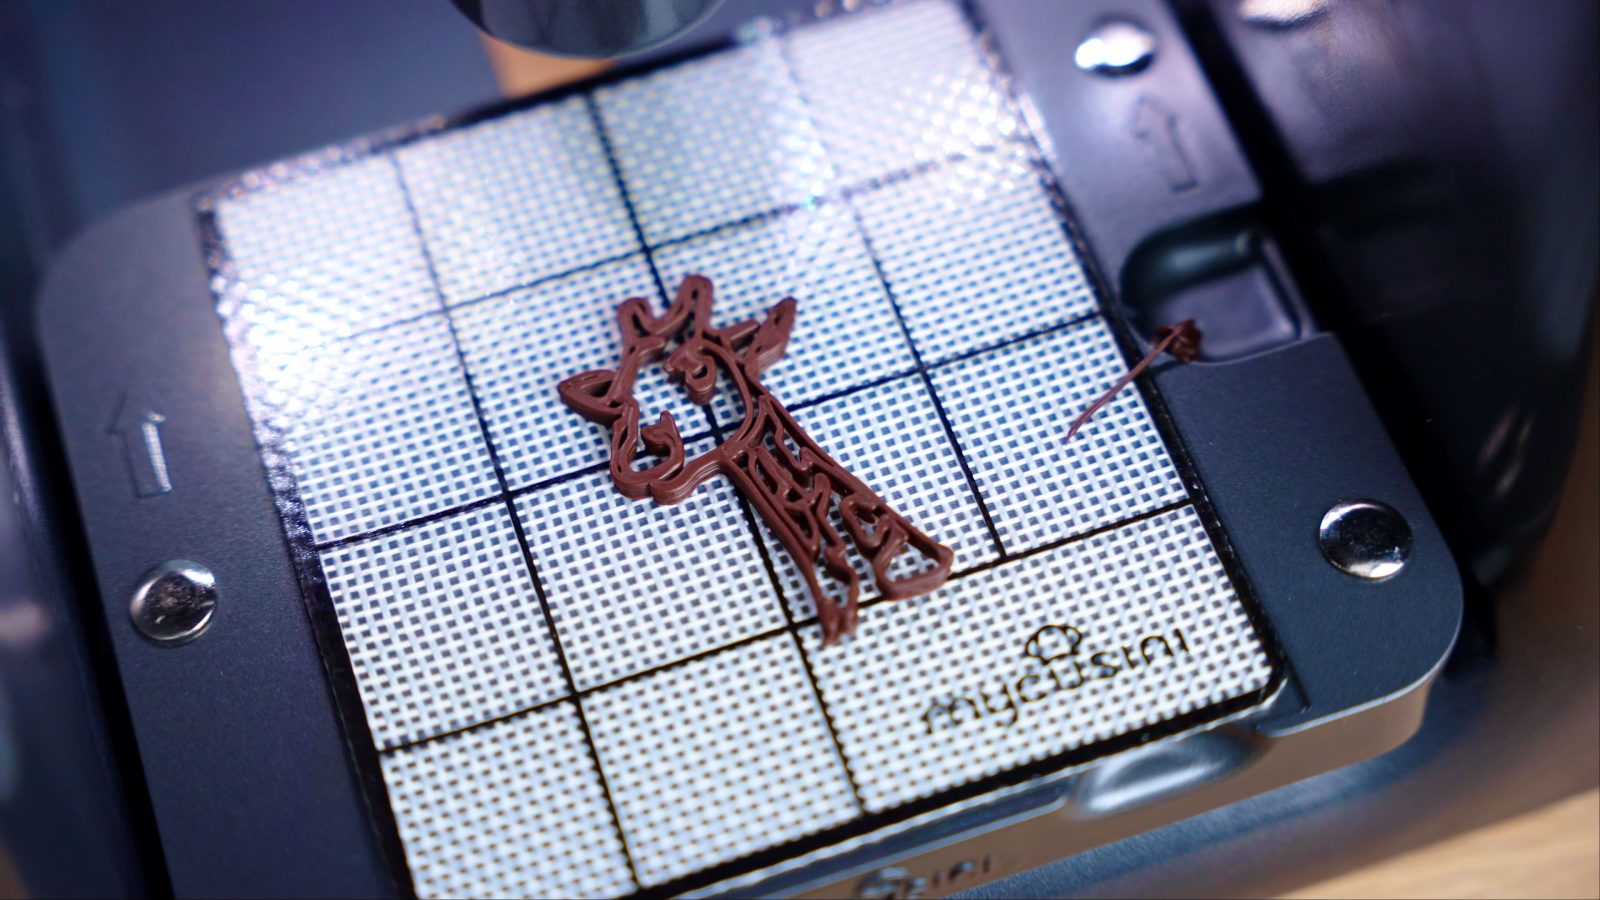
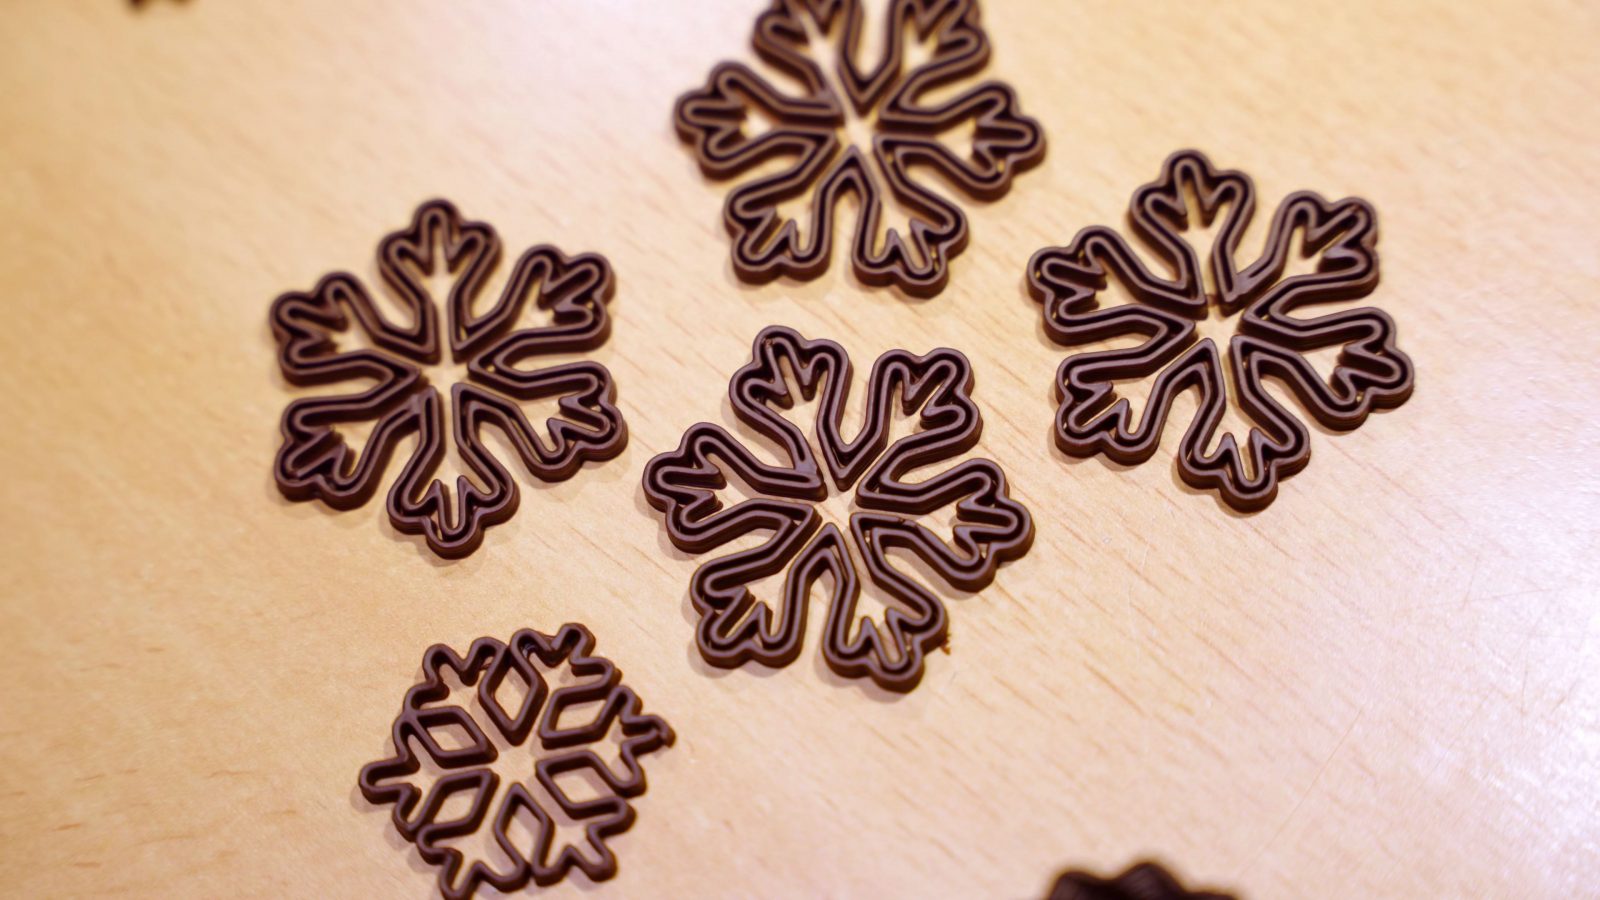
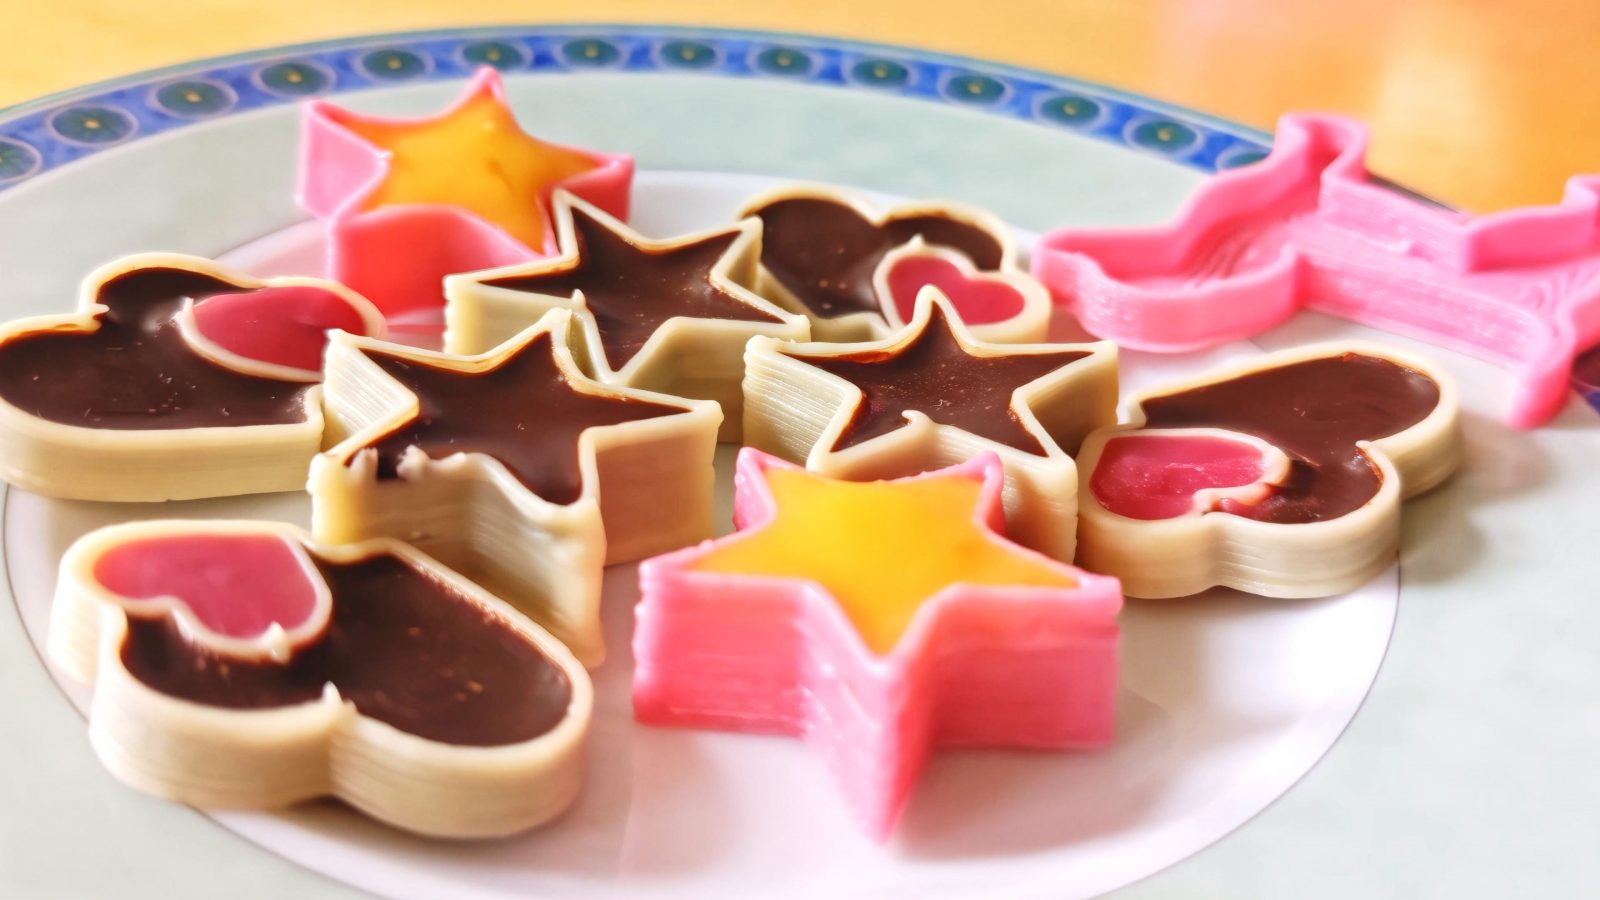
So, prints? They’re pretty good! For what this is, with a syringe-style extruder and a 1mm nozzle, I think the parts come out rather nicely! Look, I tried to grab as many video clips as I could before the parts got eaten, but you know, that’s kind of their purpose, so I don’t have too many prints left to show off on the bench today.

We’re going to get into the print quality and what it can and can not do in a bit, but I first want to get into usability a bit coming from both my perspective of someone being quite familiar with the tech and my mom’s perspective, who watched the unboxing live stream and immediately went “mine, mine, mine”. So she’s not quite as tech-savvy, but still knows her way around stuff pretty well, so the feedback I got from her intensely using the mycusini 2.0 over Christmas was really valuable.
The bottom line here was: It’s a great tool, it does exactly what it says it does, but… there are a lot of super obvious things that just could be better and would make using the mycusini more efficient, easier, or just more fun.
I’ve got a couple of points that fit the “this is great, but” scheme, so let’s do that.
Interface and touchscreen
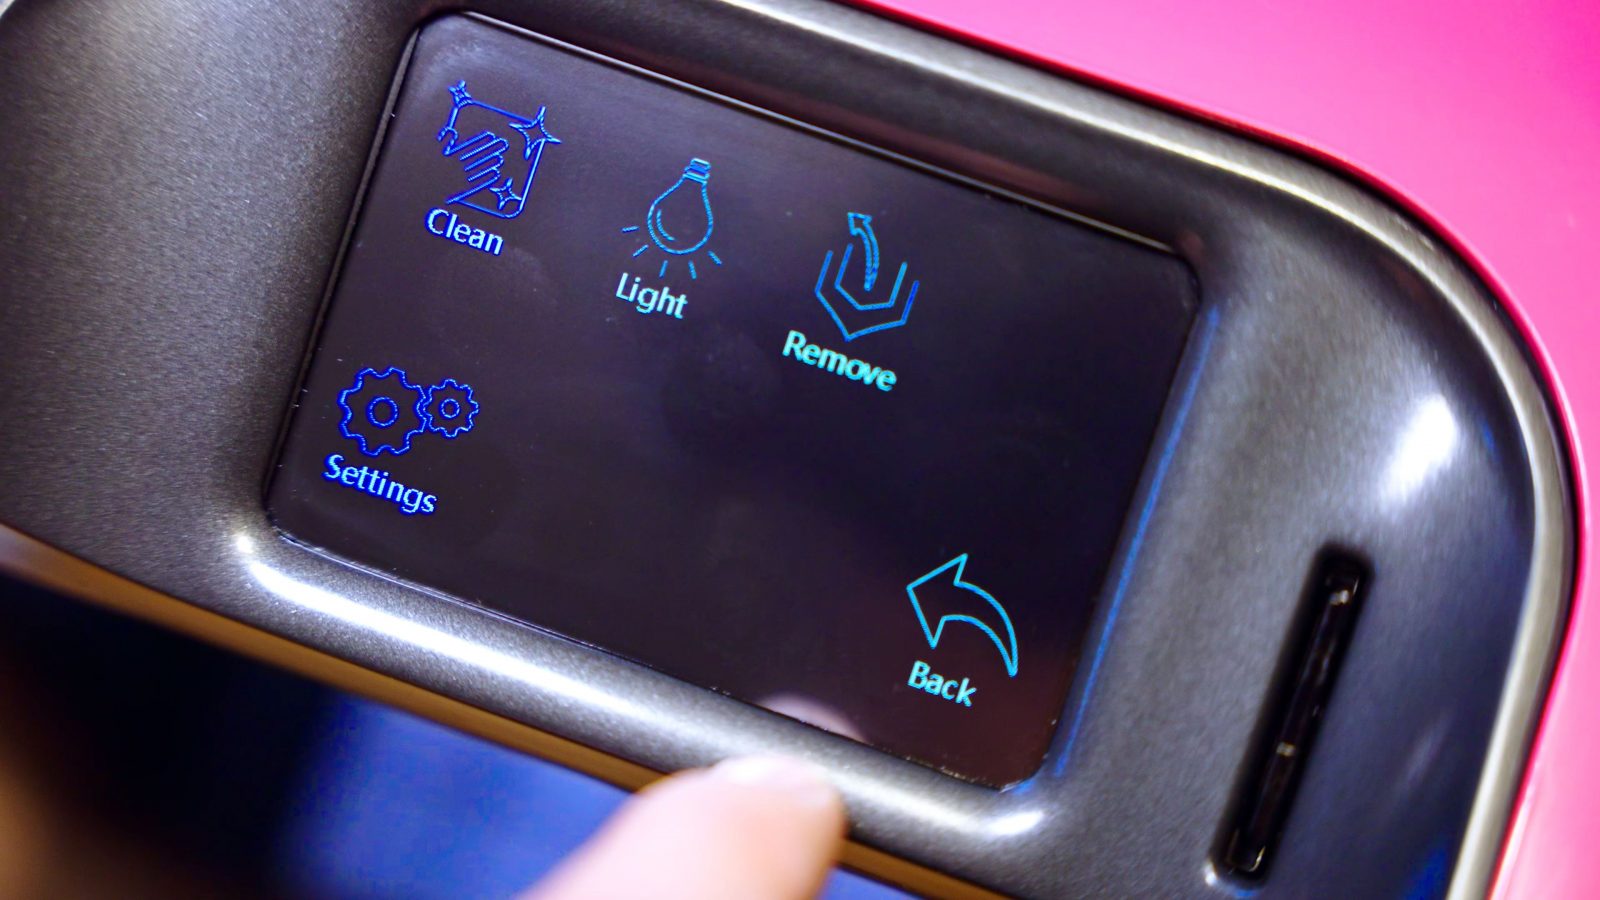
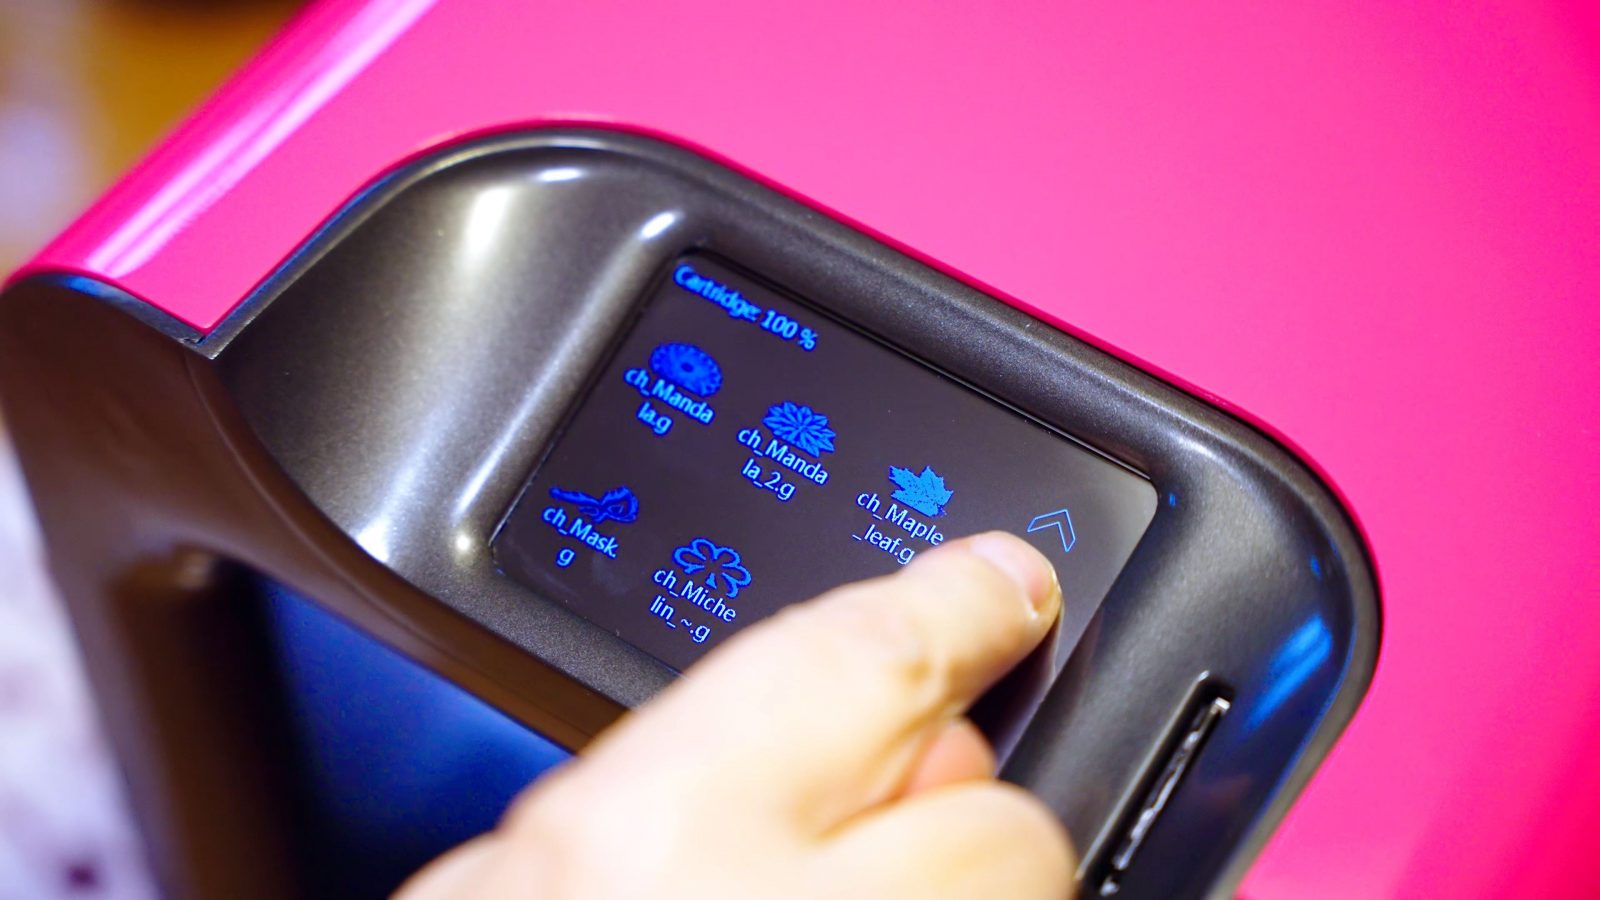
Starting with the new interface with a touchscreen and print previews – this is a lot better than the click wheel and text LCD setup they had in the previous mycusini 1.0. And it does a great job of giving you just the tools you need to run the machine and leaving out everything else, but it’s super obvious that this isn’t a very polished interface yet. Scrolling through print folders with the 1000 pre-sliced parts is tedious, especially since there is no quick “reprint” button after a print has finished, and all the files print one part at a time instead of a full plate. And details like priming the nozzle before a print are mildly confusing as it’s not clear whether you’re supposed to tap the prime button or hold it, and then because the firmware has a command buffer, there’s a noticeable delay between you doing something and the printer responding, it can be quite confusing to understand what you’re actually doing on the printer. Oh, and the touchscreen menu also randomly froze a couple of times, requiring a hard reset – it never affected a print, but that’s something that shouldn’t happen in a finished unit.
Hardware
Then, the printer’s hardware. The mycusini 2.0 is a massive step up from the 1.0. It now feels sturdy and intentional instead of being a super generic plastic cuboid. The extruder mechanism was working well for me, and the machine even has some nice touches like the easily removable print platform that slides in the frame itself and is coupled to the Y-axis motion with a magnet.
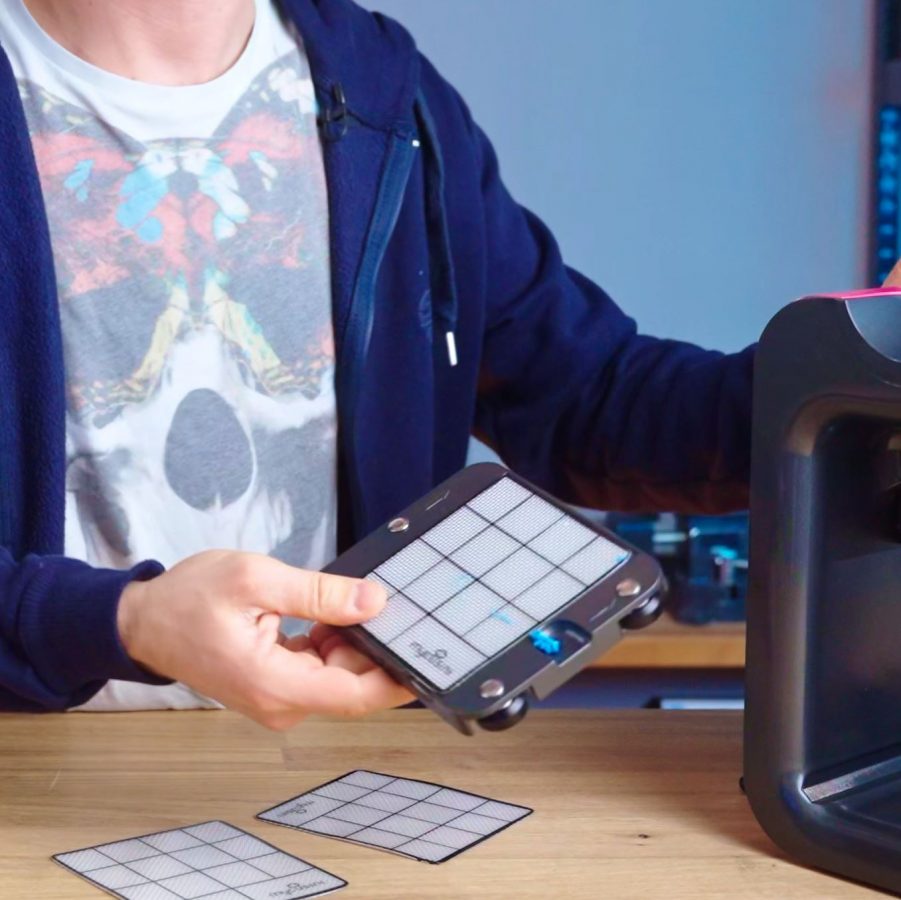
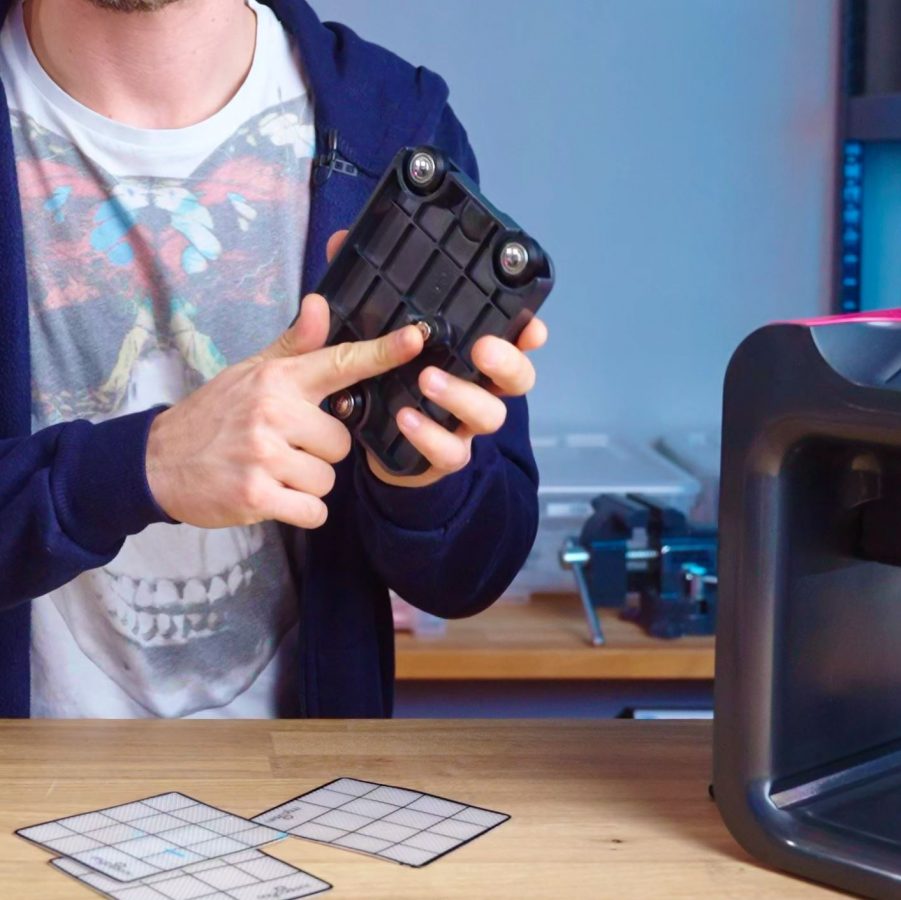
Makes cleaning a lot easier, though you probably still shouldn’t drop the platform into your dishwasher as the bearings of the OpenBuilds-style rollers won’t quite be the same after that. And as far as the hot pink outside goes, I like this color, but it’s also available with a more muted black or grey shell if you don’t love this look.
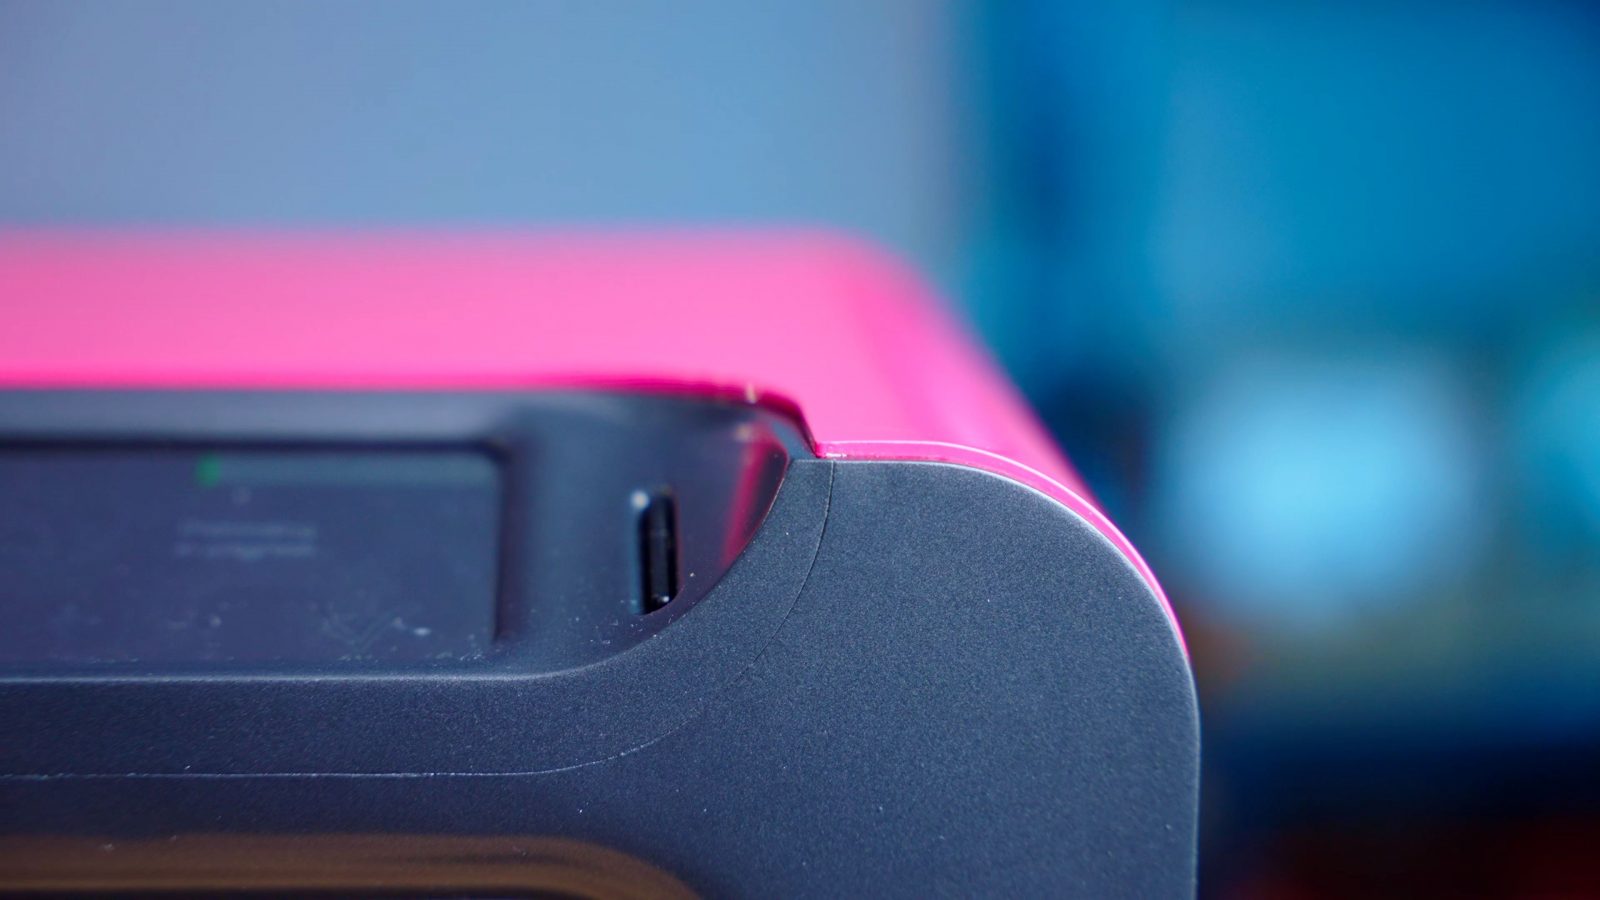

But the new hardware isn’t perfect – the fitment on the individual plastic panels is not spectacular, and honestly, that isn’t a huge deal, but what I find is a huge deal is this power plug that uses the same power supply with an inline switch that the older mycusini was using, but then it’s got another power switch in the machine itself, which, to me, is also wired backward, where you press in the side that does not have the power LED to turn the printer on. The real problem, though, is that the power plug is not locking, and on more than one occasion I’ve caught it just before it fell out. If you move around the machine or the cable at all, this plug will work itself loose and sooner or later ruin a print. My solution was some simple gaff tape, but this just shouldn’t be necessary.
Chocolate extrusion
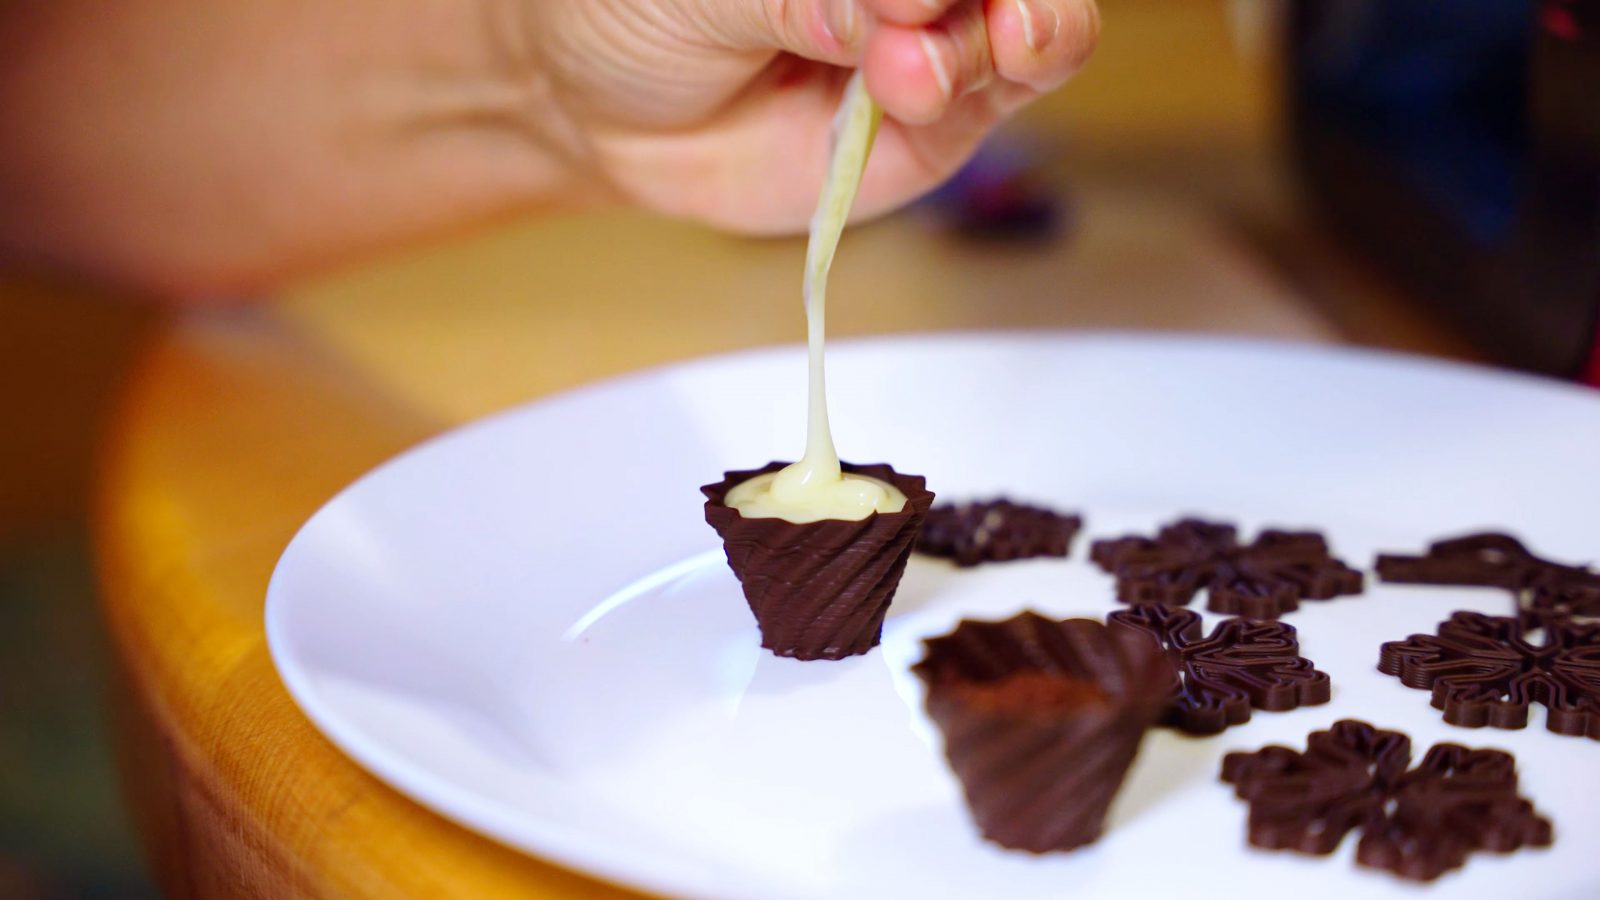
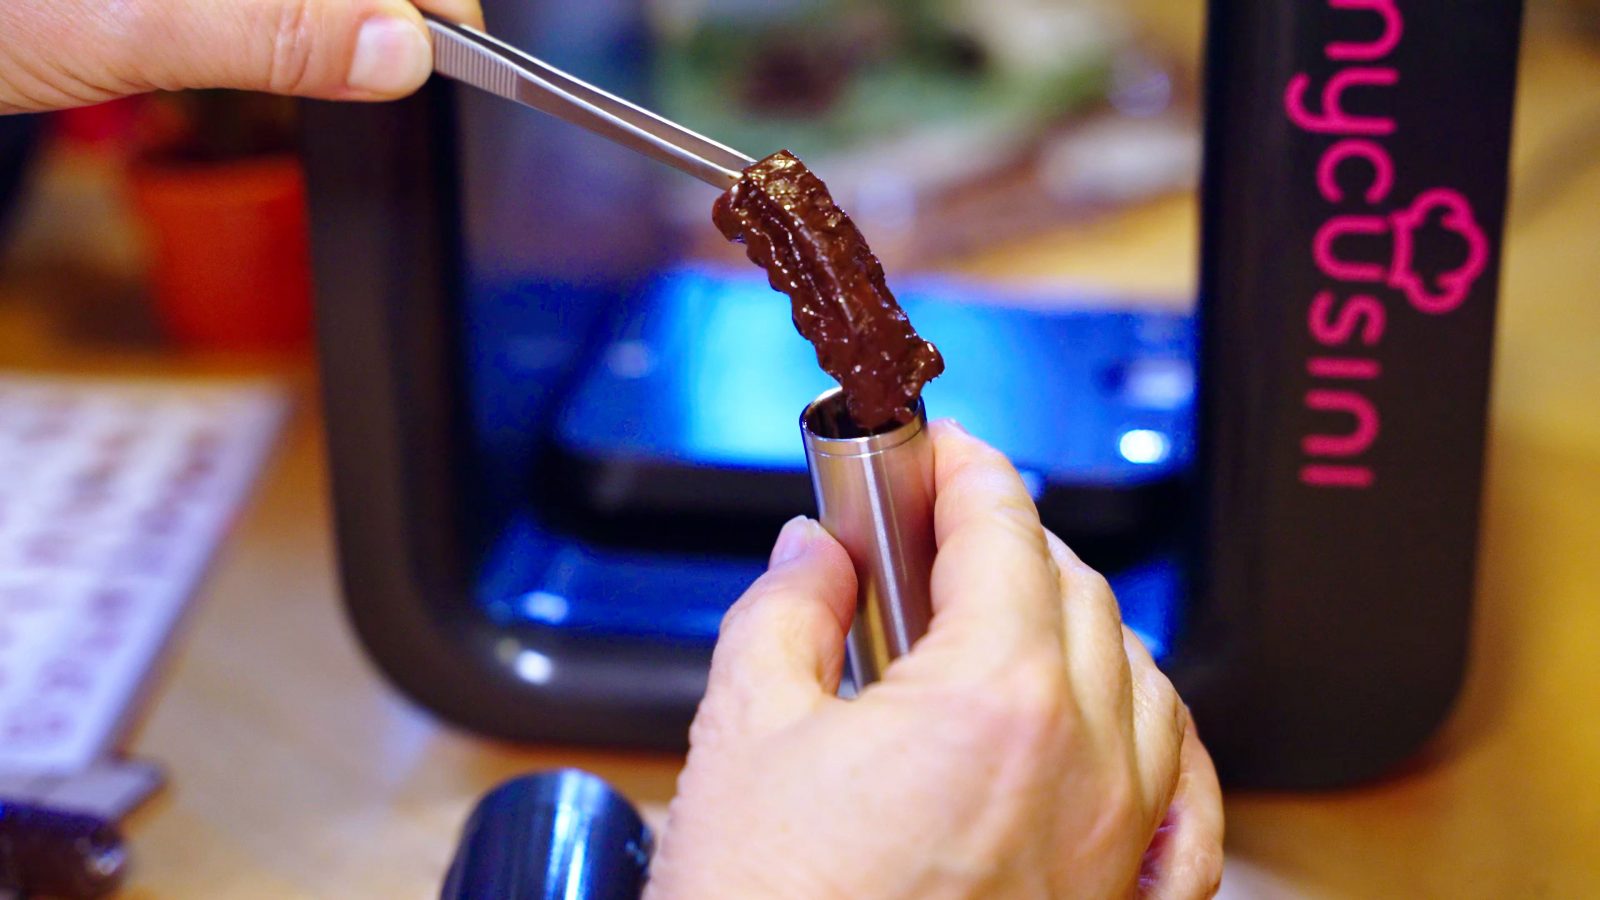
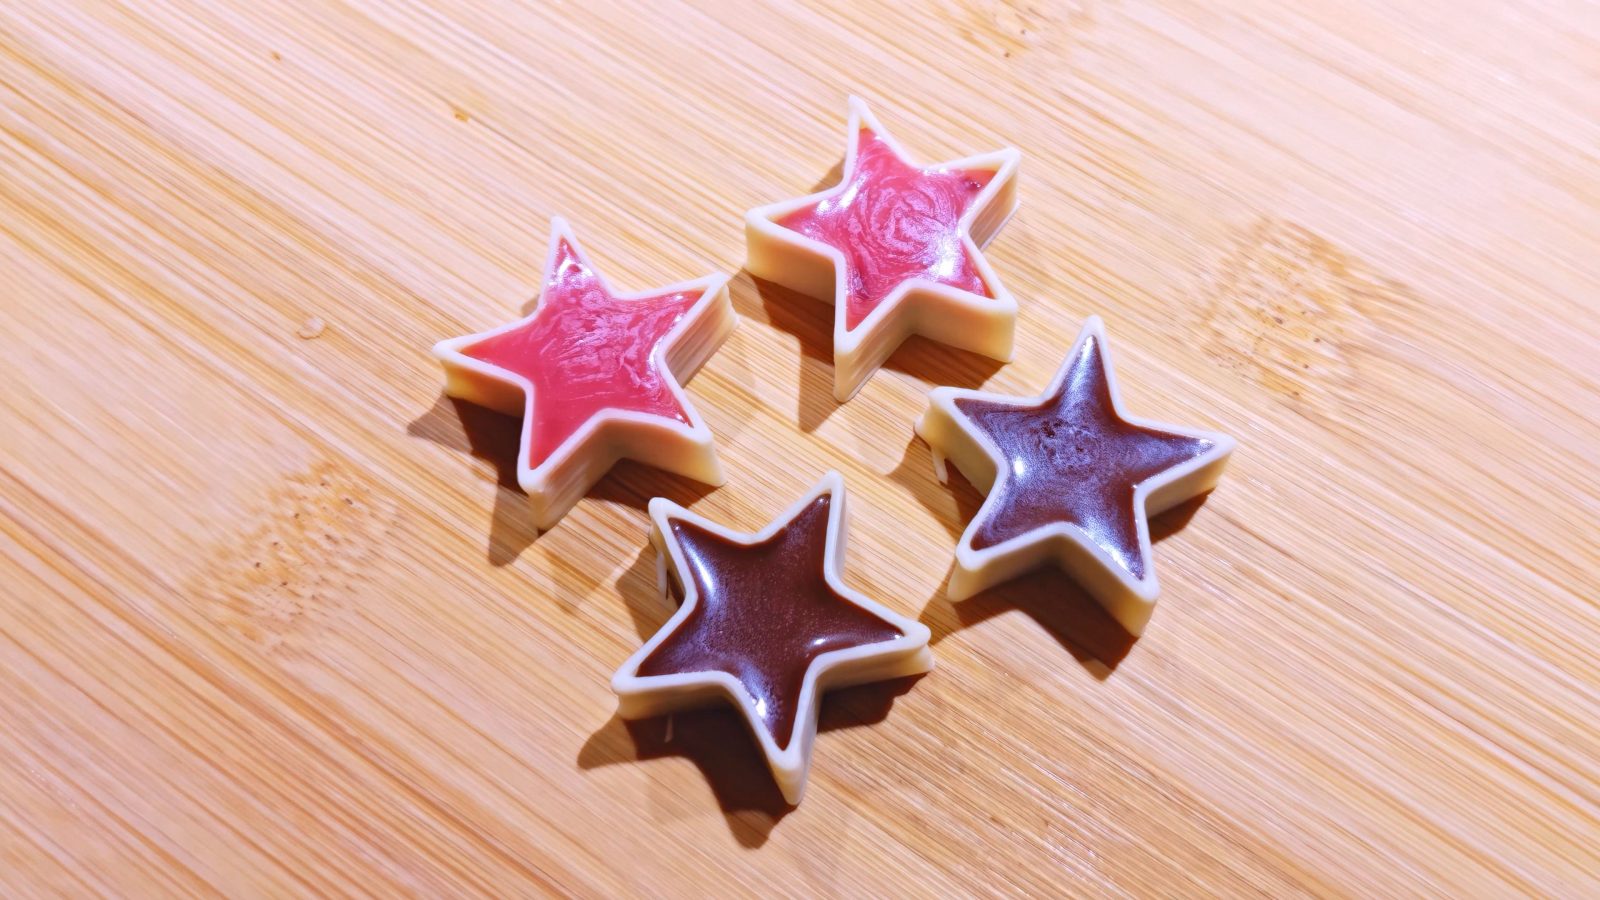
Then, the chocolate extrusion system. Or, I guess technically, the “fat glaze”, “Fettglasur” extruder, since the “Choco” sticks do contain cocoa powder, but no cocoa butter, so technically, they’re not actually chocolate, but when used as intended, you’d be hard-pressed to notice the difference. Like, you’re not going to take a bit straight out of the refill stick, it’s always going to be used as fine, printed text as decoration, or in another way where you’re not going to be eating it by itself.
But back to the extrusion system – I think it’s a good setup! All but the very basic printer package include an extra one of these syringe sleeves, so you can keep two different materials loaded up without having to take out a partially used sausage pack, or you can chuck one in the dishwasher while you use the other.
Remember, these and the removable silicone baking mats are the only things in this printer the “Choco” material touches. The way you load new material is by taking one of these sticks, cutting them in half, and them slugging one half into the syringe sleeve. The “Procusini” printers take a full stick as far as I can tell, but the mycusini have a smaller extruder that can only take half of that. You leave the plastic foil on, and once the stick is used up, that’s all that’s left to be pulled out of the syringe sleeve. What I did run into as a downside of using half sticks is that there is no mid-print refill option at all. The printer will tell you how much of the stick you have left and how much material a specific print will use, but when it uses up a stick mid-print, it just aborts, so there’s no way to complete a print that will use, say, 15% of a half stick when you’ve only got 12% left, you’re going to have to throw out those 12% and load up a completely new half stick. Also, when you want to print something larger, that uses more than the half stick you can load at a time, you just can’t. You’re going to have to split that part into multiple separate prints.
Print Quality
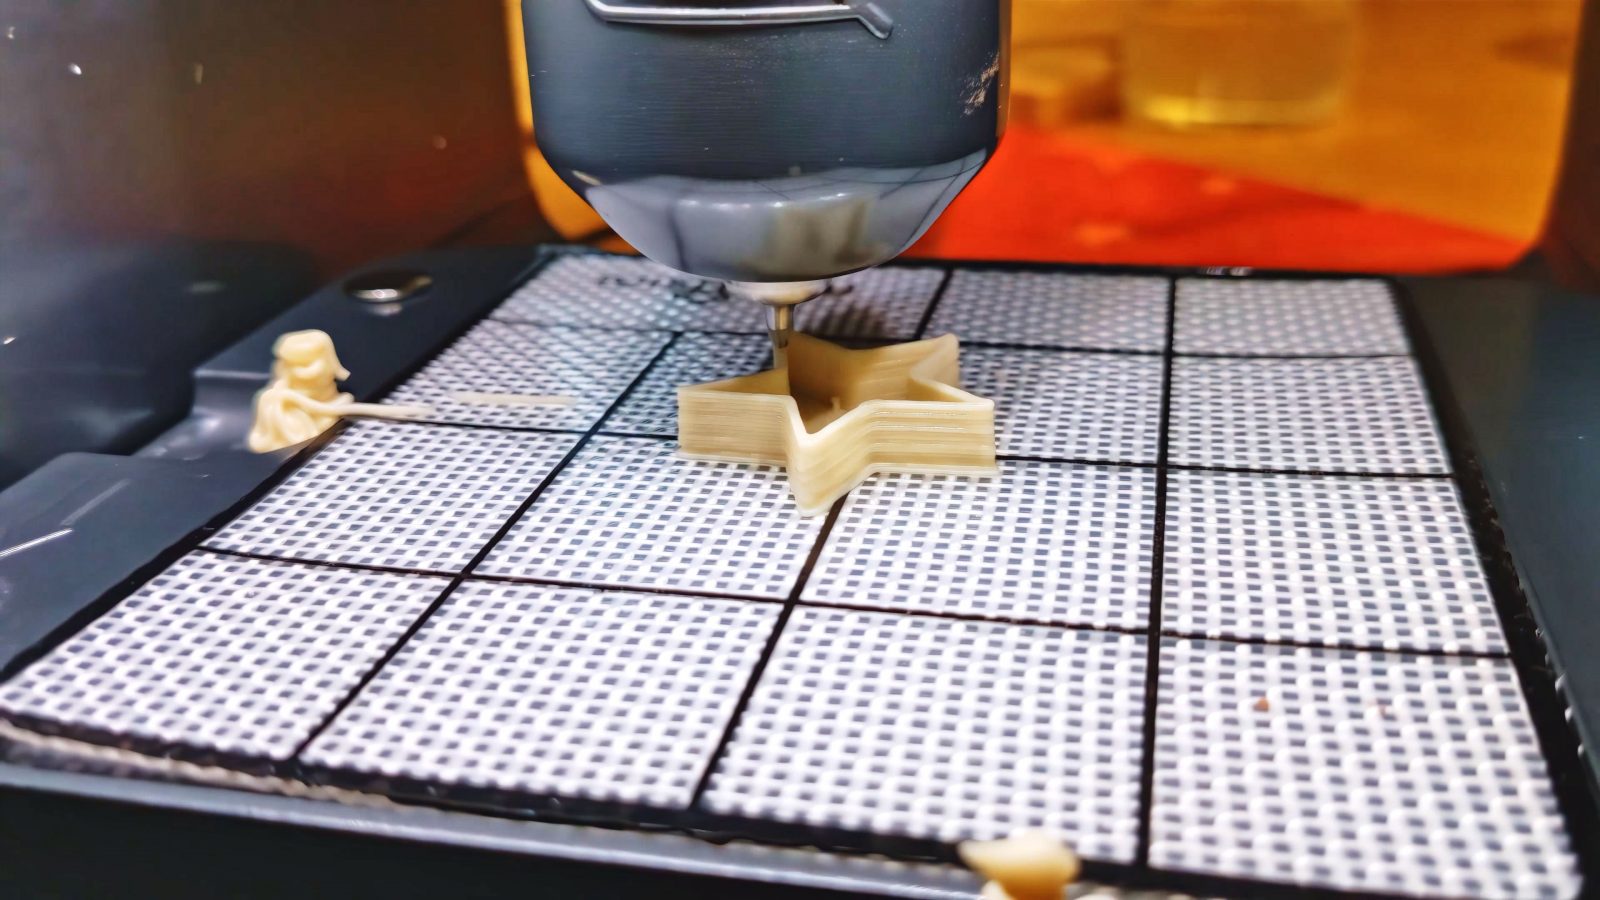
What you get as far as print quality with this, or at least, visual appeal of printed parts is quite impressive to me, I guess because they do look the right amount “imperfect” and organic for being foodstuff while still being faithful and accurate to what you’re intending to print. The motion system is pretty good, too, and super snappy on travel moves, so stringing isn’t much of a problem, but as you may have guessed, flow control out of a syringe extruder like this isn’t the best, so parts with lots of small details are still going to be quite a bit of a challenge. Because the Choco doesn’t need to heat very far to become printable, the nozzle tip and the finished print are always safe to the touch, you’ll never get burned if you touch or handle any of the parts, but what is definitely missing on the printer is some sort of a part cooling fan – especially given that the mycusini comes with files that are impossible to print without one or without some other form of cooling.
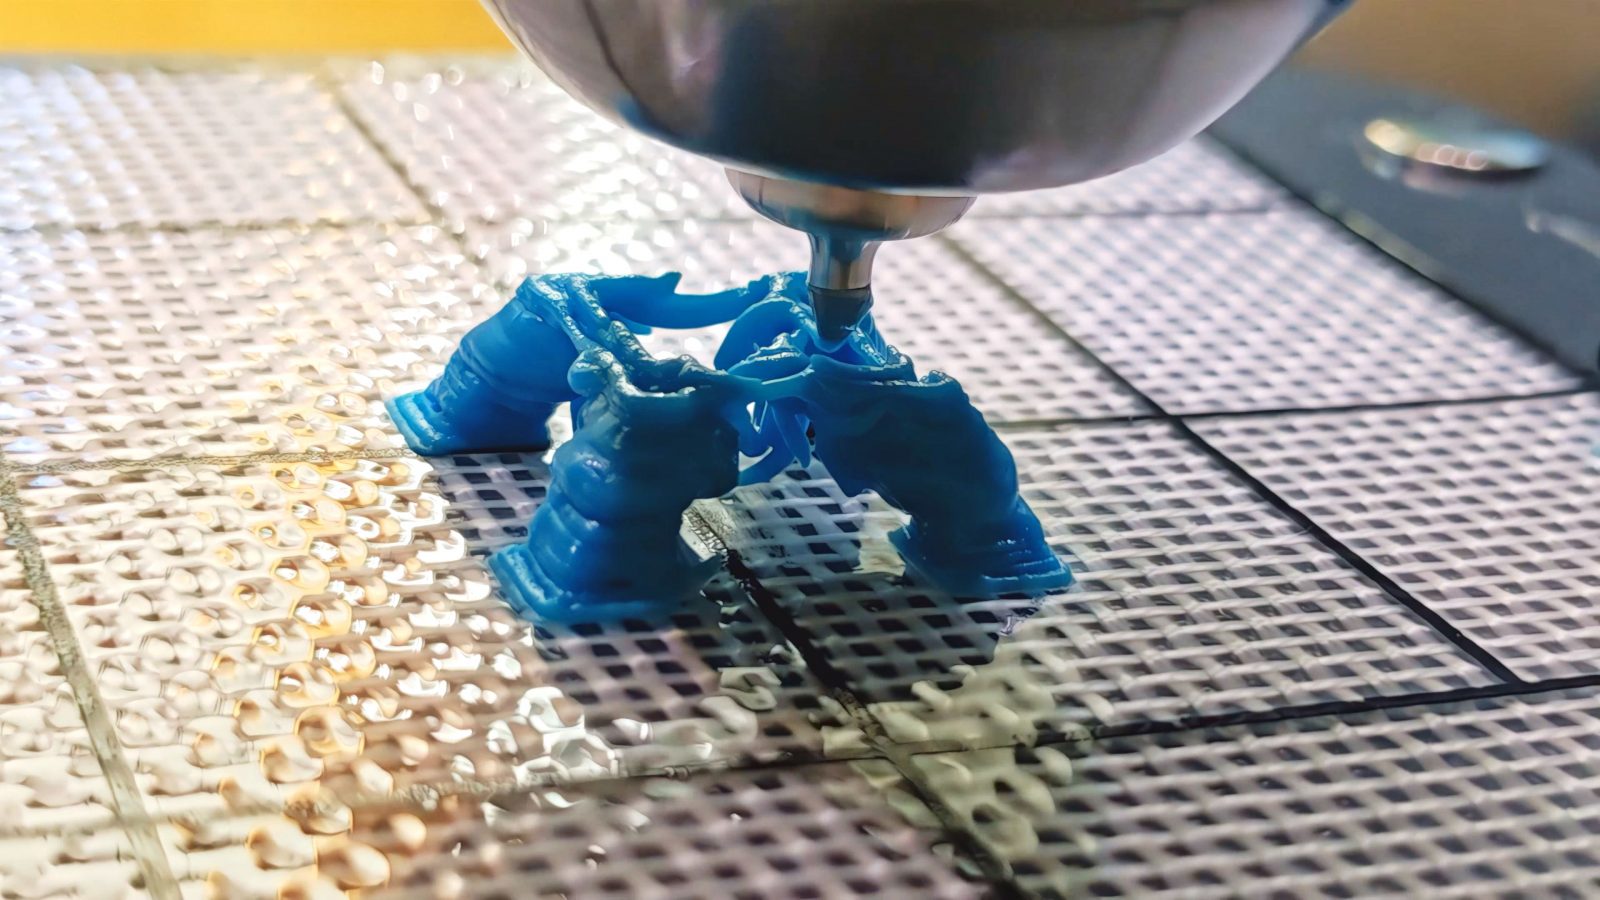
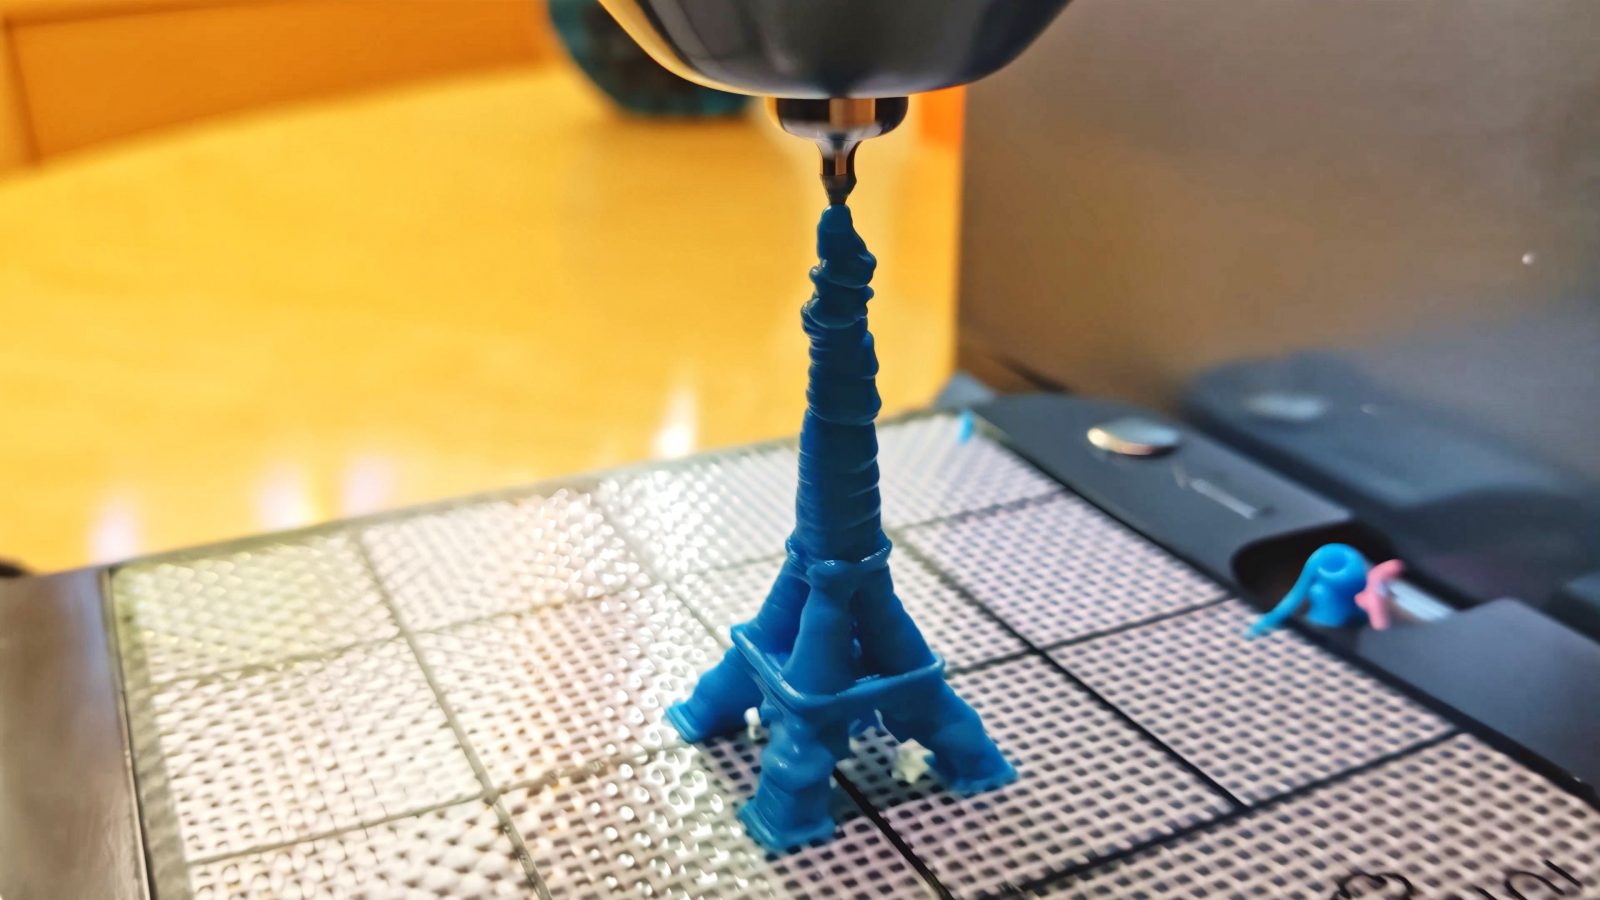
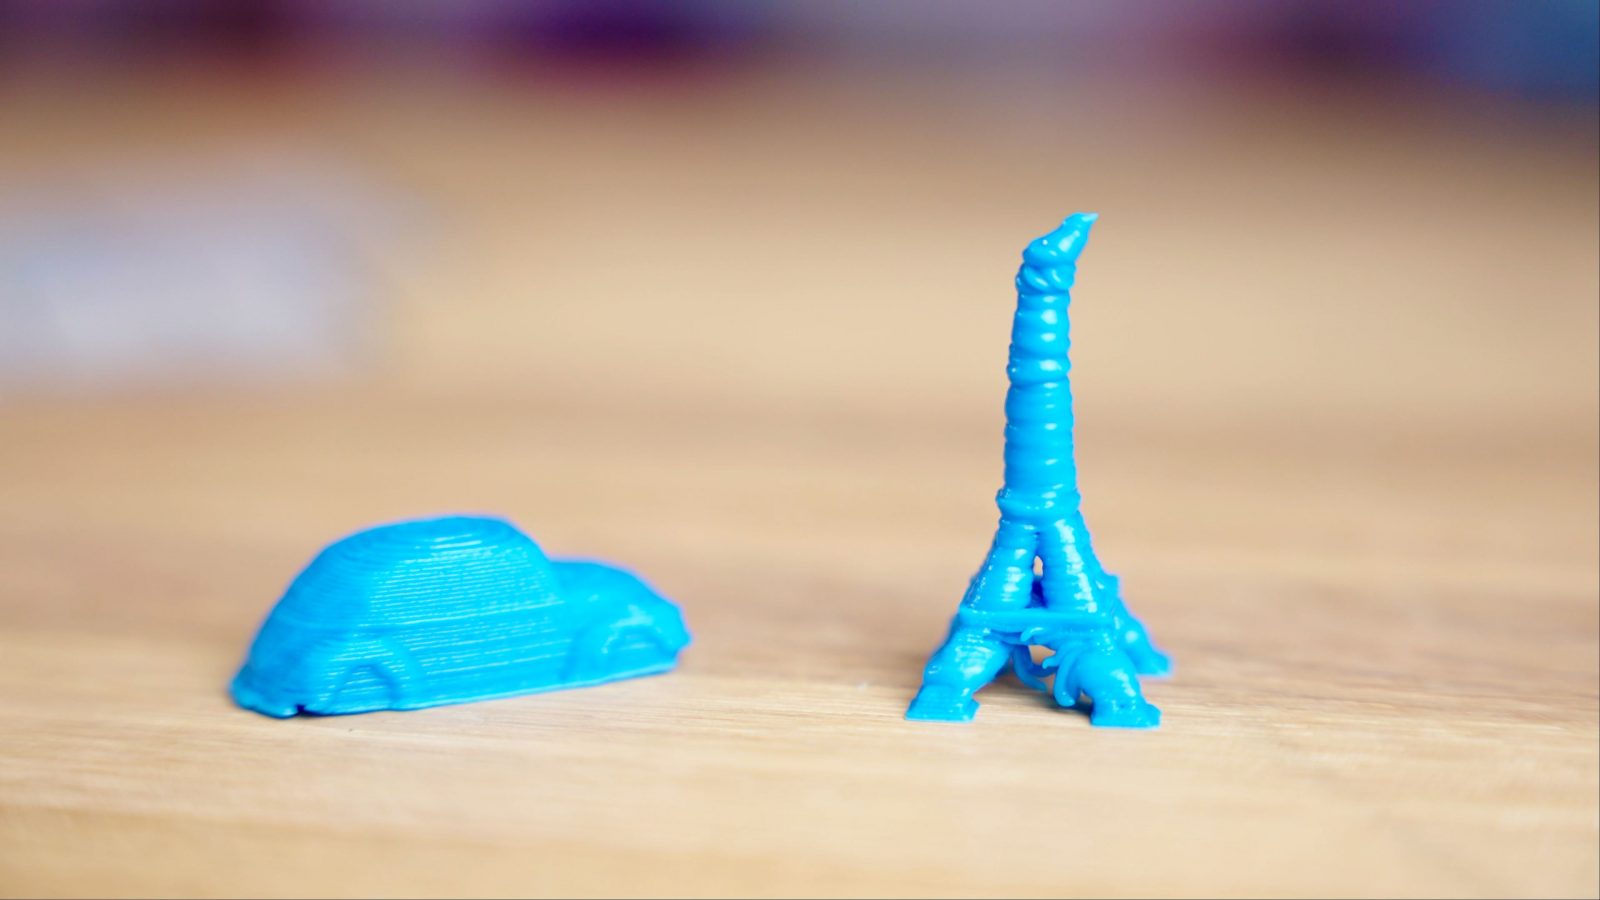
The Eiffel Tower, I guess, is the classic example for that, and while with a bit of imagination you can still make it out, it’s not exactly a faithful reproduction. One cool thing though, is that the entire printer needs no bed leveling or anything. As far as I can tell, there’s no sensor for that, it just comes pre-leveled from the factory, and because it uses a rather large nozzle and that slightly textured silicone mat, it doesn’t matter if the nozzle is a bit closer or a bit further away on the first layer, the print still comes out great. But, if needed, there’s a service hole on the side that still allows for adjusting the nozzle distance.
The only reliability issues I’ve had were with the “Dark Choco” sticks, which repeatedly had underextrusion problems, while the white, blue and pink were all perfectly fine.
I’m willing to write this off as a bad batch of material and I don’t think this is something that everyone will run into, but as always with reviews, I never want to just sweep stuff under the rug, because hey, maybe somebody else has the same issue and then we’ve already got two data points.
Now, while all this about the machine might sound a bit rough, if we come to the core questions of “does the mycusini 2.0 work?” and “is it fun to use?”, I’d go with a definitive “yes”. Sure, there are plenty of rough edges and bits that feel unfinished, but when it comes to the core functionality and the core use cases that you’ll actually be using this thing for, it totally works!
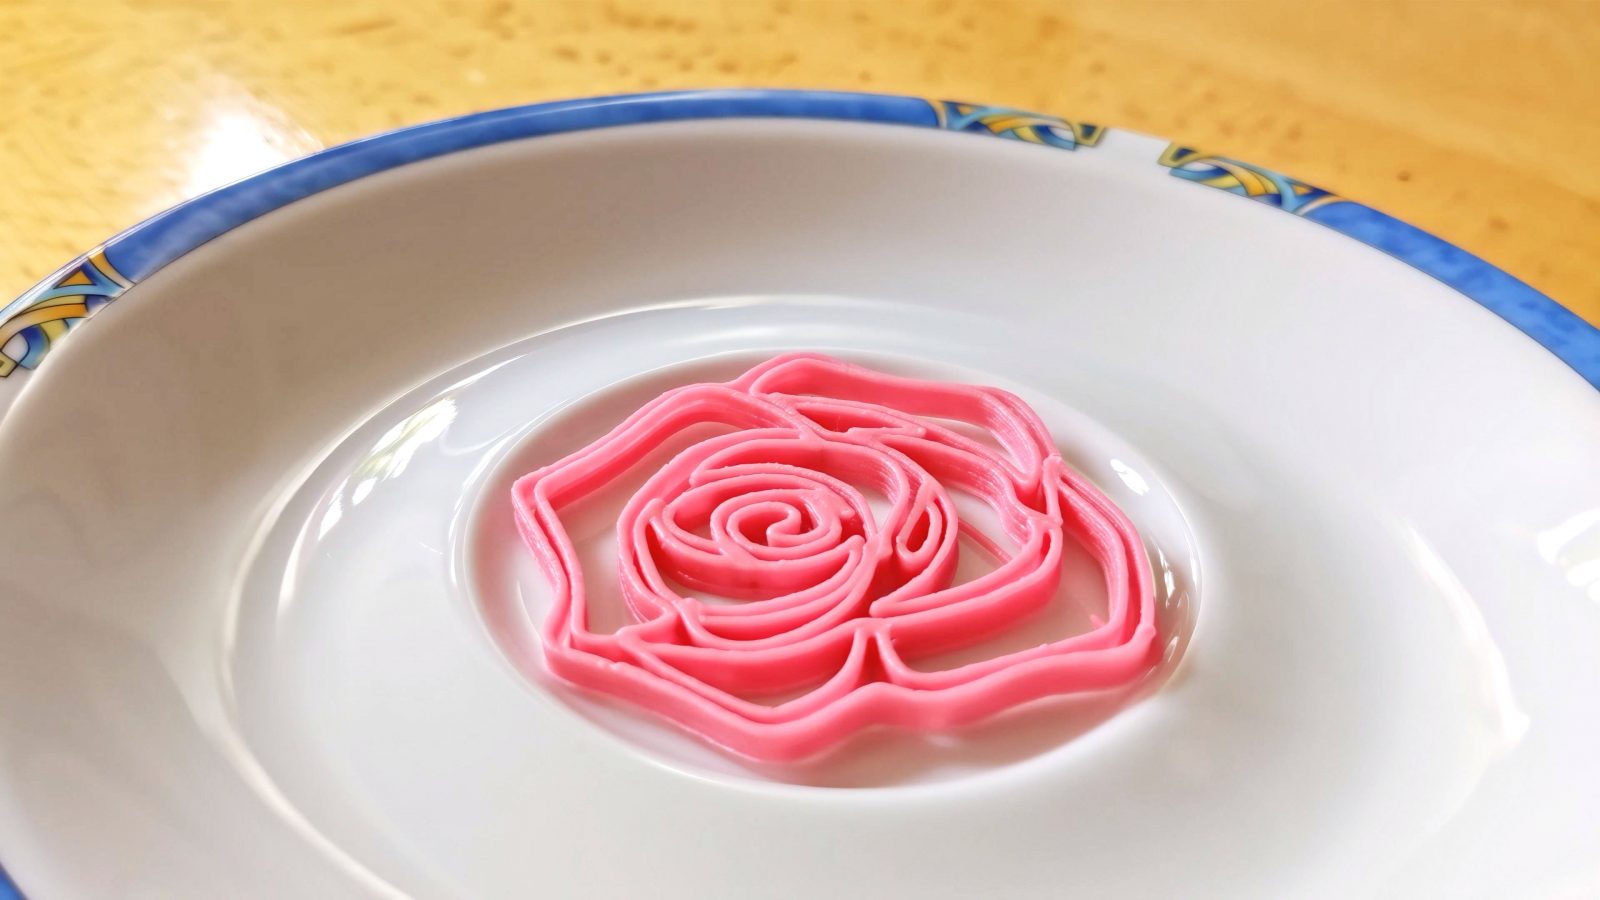
And that took me a while to realize – you’re not going to use the mycusini for the same types of prints as you would one use a machine that prints with plastic. So here, even though the mycusini is advertised as being able to do fully 3D parts like the Eiffel Tower or other intricate decorations, I think its strength and actual use case is going to lie more in the realm of making simpler 2.5D decorations or letterings, maybe some praline shells, which mycusini actually make fillings for, but rarely, I think, would you actually be doing full 3D parts, which is where the mycusini does struggle. So it’s really about knowing what you’re intending to do with it, and if the use case fits, it does work great.
Price and costs of consumables
Lastly, a quick overview of what this entire experience costs as far as the machine and the consumables go: The printer itself, depending on which package you get with extra materials, is between 800 and 900€ with tax. And then the choco consumables are around 5€ per 100g. And yeah, none of this is exactly cheap, but I also don’t think it’s unreasonable. You’re not getting this to print customized chocolate sprinkles for your morning cereal – I mean, you could, and if you want to do that, I totally support you in that, but reasonably, this is something for special occasions, special projects, or small jobs you’re taking on, and for that, I think the mycusini 2.0 is an already a good solution as-is, even though there is still lots to be done to make it a great one.
That’s it for this one, I hope you found the review helpful or at least interesting – if you did, I’d appreciate a thumbs up, get subscribed if you want to see more like it, and if you really love what I’m doing, maybe consider supporting the channel through Patreon or YouTube memberships. Thank you all for watching, keep on making, and I’ll see you in the next one.
💙 Enjoying the videos? Support my work on Patreon!
Product links are affiliate links – I may earn a commission on qualifying purchases (at no extra cost to you)

Check out my second channel “More Layers” on YouTube for livestreams