
Okay, you all know how 3D printing works. You start out by creating a 3D model, export that as stl or 3mf, then import that into a slicer, which then creates the gcode that the printer understands. Except that it doesn’t have to be that way.
Enter Full Control GCode.
This is actually the result of a research paper by Dr. Andrew Gleadall, and it lets you skip modeling and slicing and instead provides you with a scripting interface that controls every single printing move. You get full control. And that lets you do some incredible stuff that would be nearly impossible to model first, but it also allows you to specifically craft and optimize functional parts to make maximum use of the specialties of filament-based printing.
2h print time 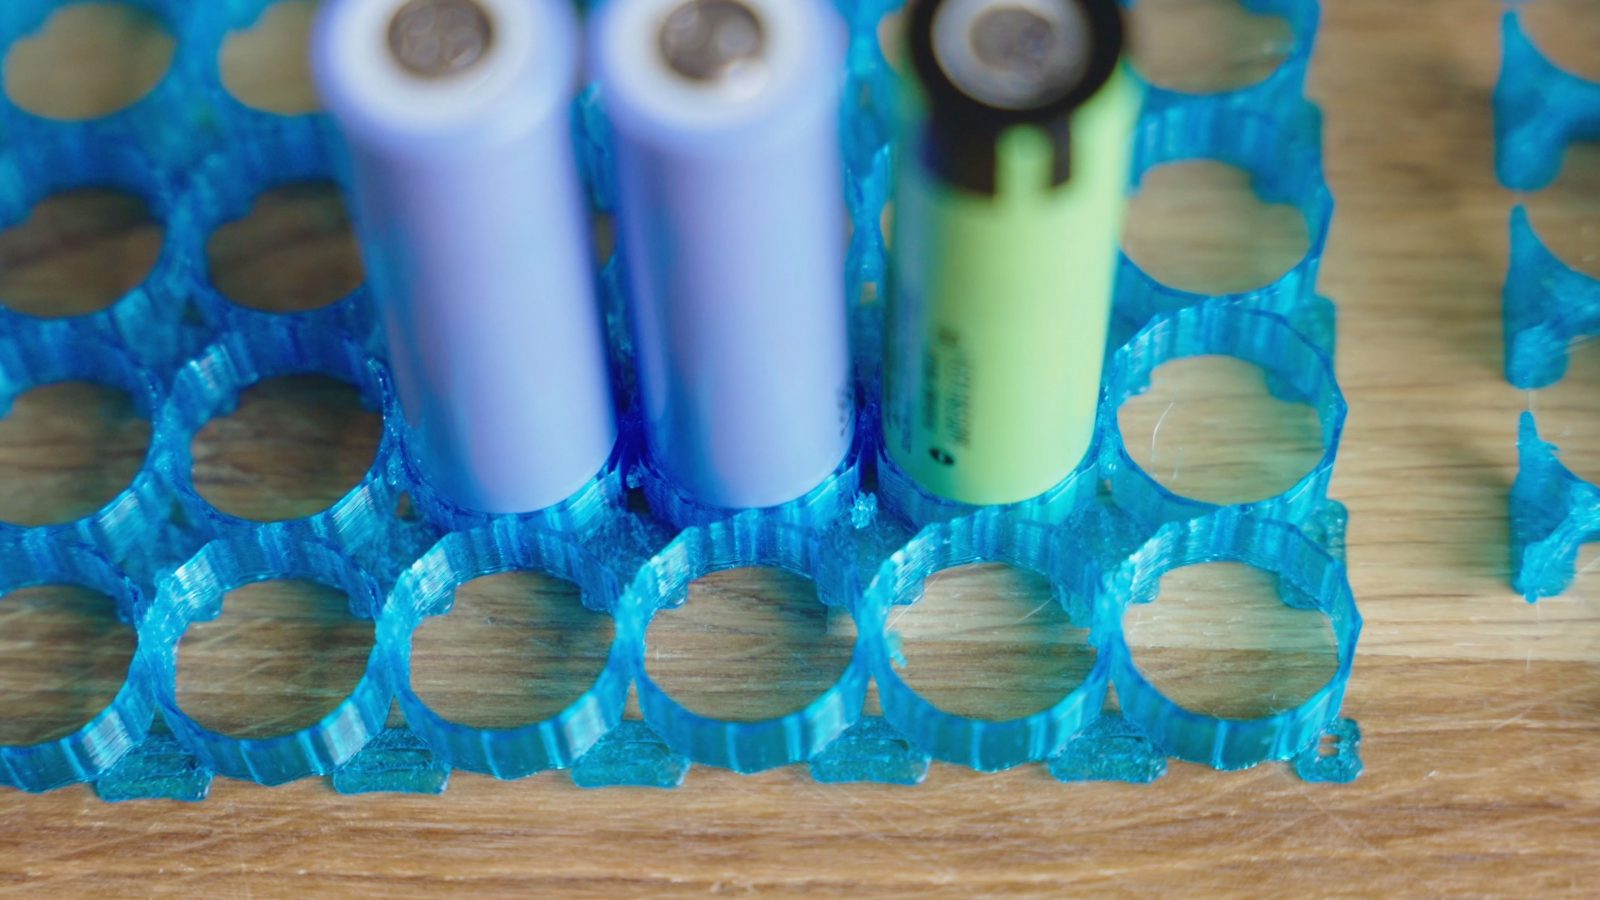
30 min print time in Full Control GCode
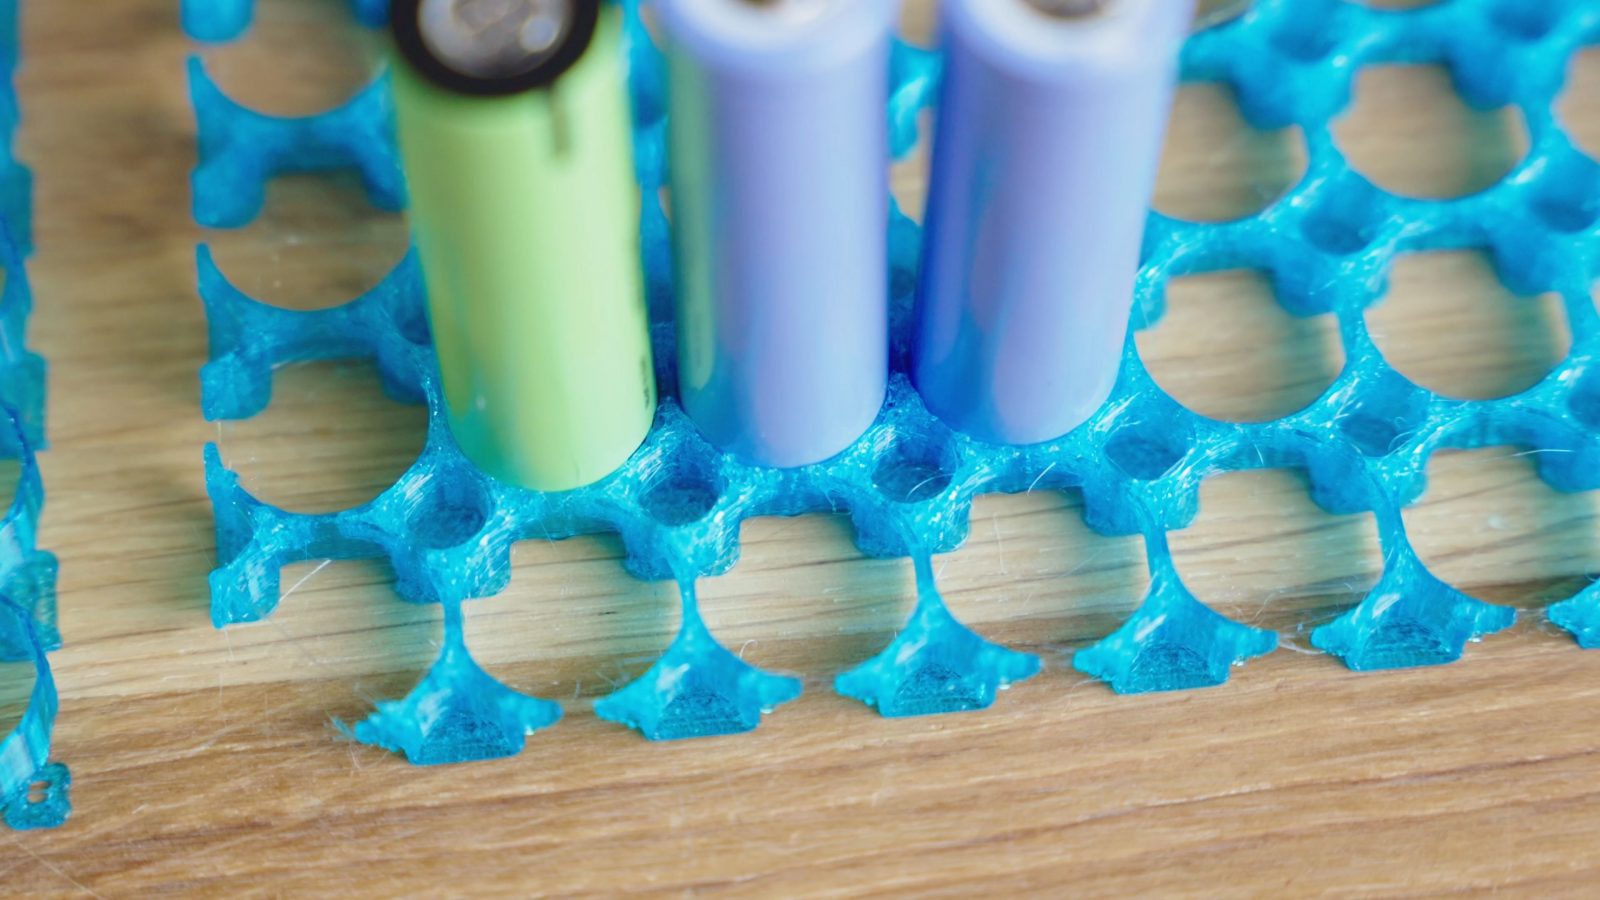
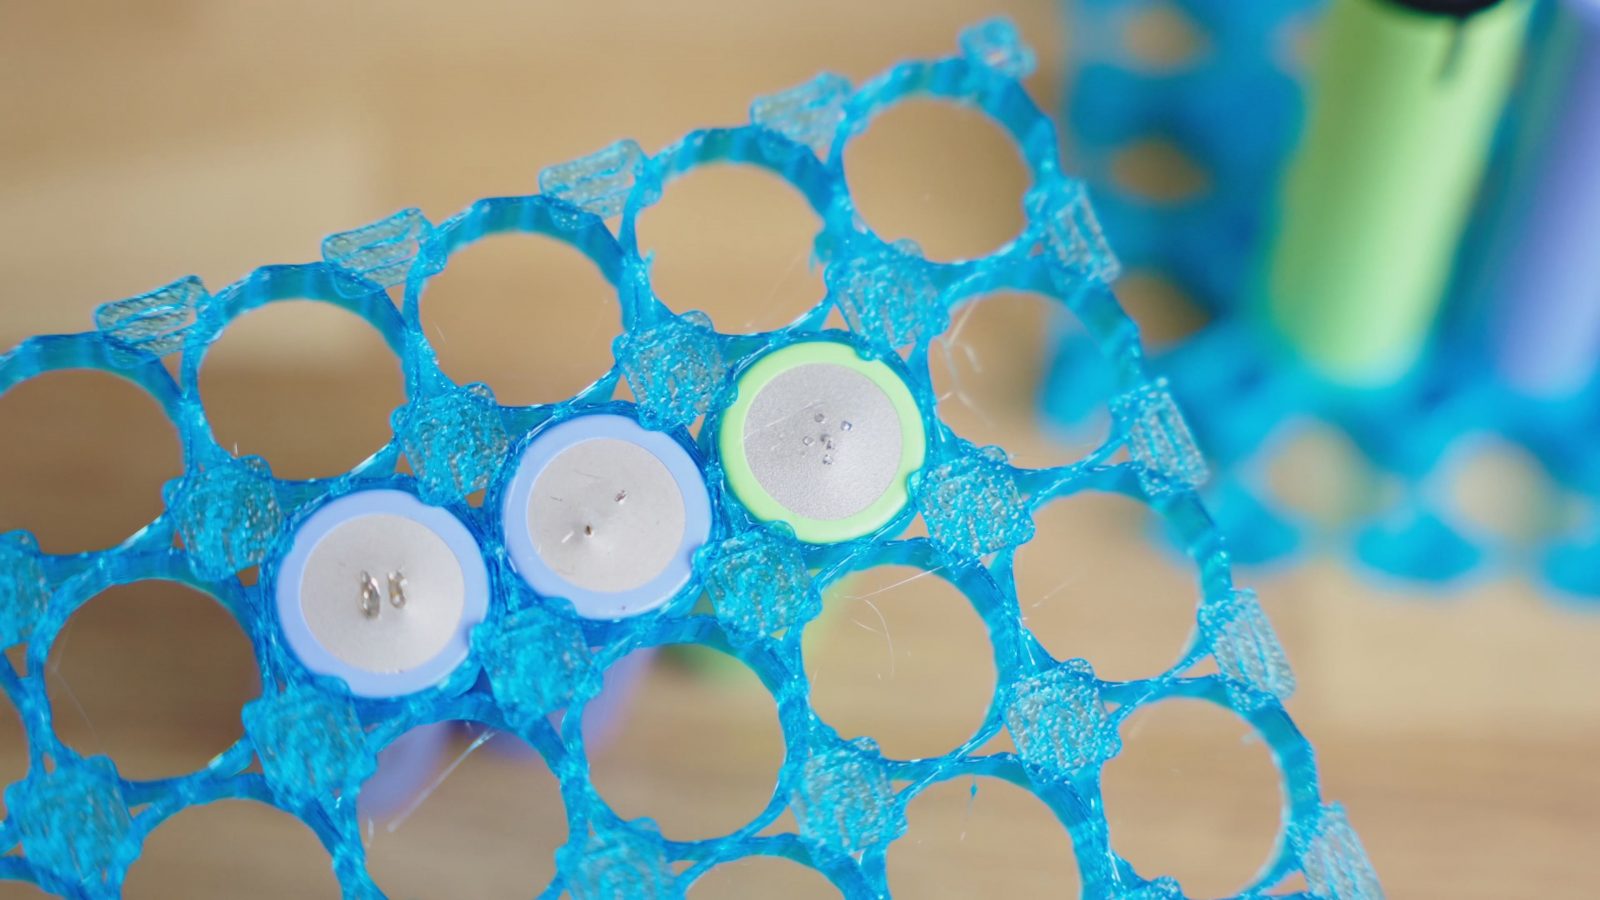
This part is a battery mounting plate for standard lithium-ion cells that I need to print 24 of, and I managed to get it from two hours of printing down all the way to just under 30 minutes with a functionally identical version crafted in Full Control GCode – and that is without cranking up the print speed. So let’s check out Full Control GCode, what it does, how it works, and what you can’t quite do with it yet.
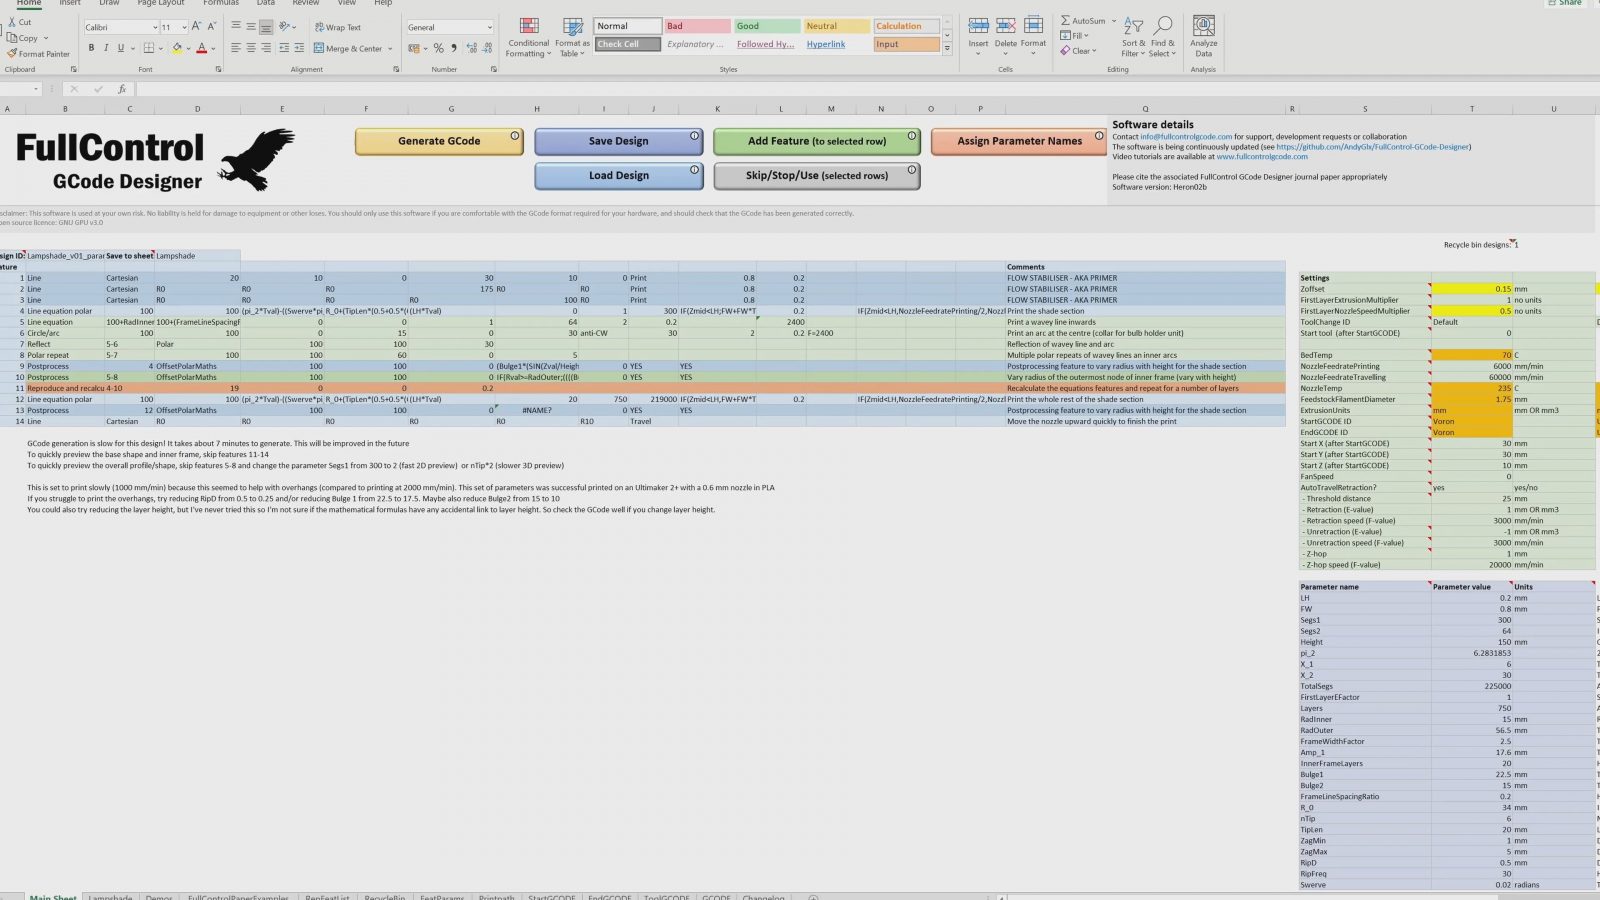
If anyone ever tells you “you need to learn how to work with spreadsheets”, and you just go “boooooring” – don’t. Knowing even some basic spreadsheet stuff has come in handy for me so many times already and in the case of Full Control GCode, it’s actually the only thing running the show. Full Control GCode is written entirely in Microsoft Excel and its Visual Basic Macros functions.
I signed up for the Microsoft office 30-day-trail because this absolutely does not run in the free LibreOffice, or in Google Docs.
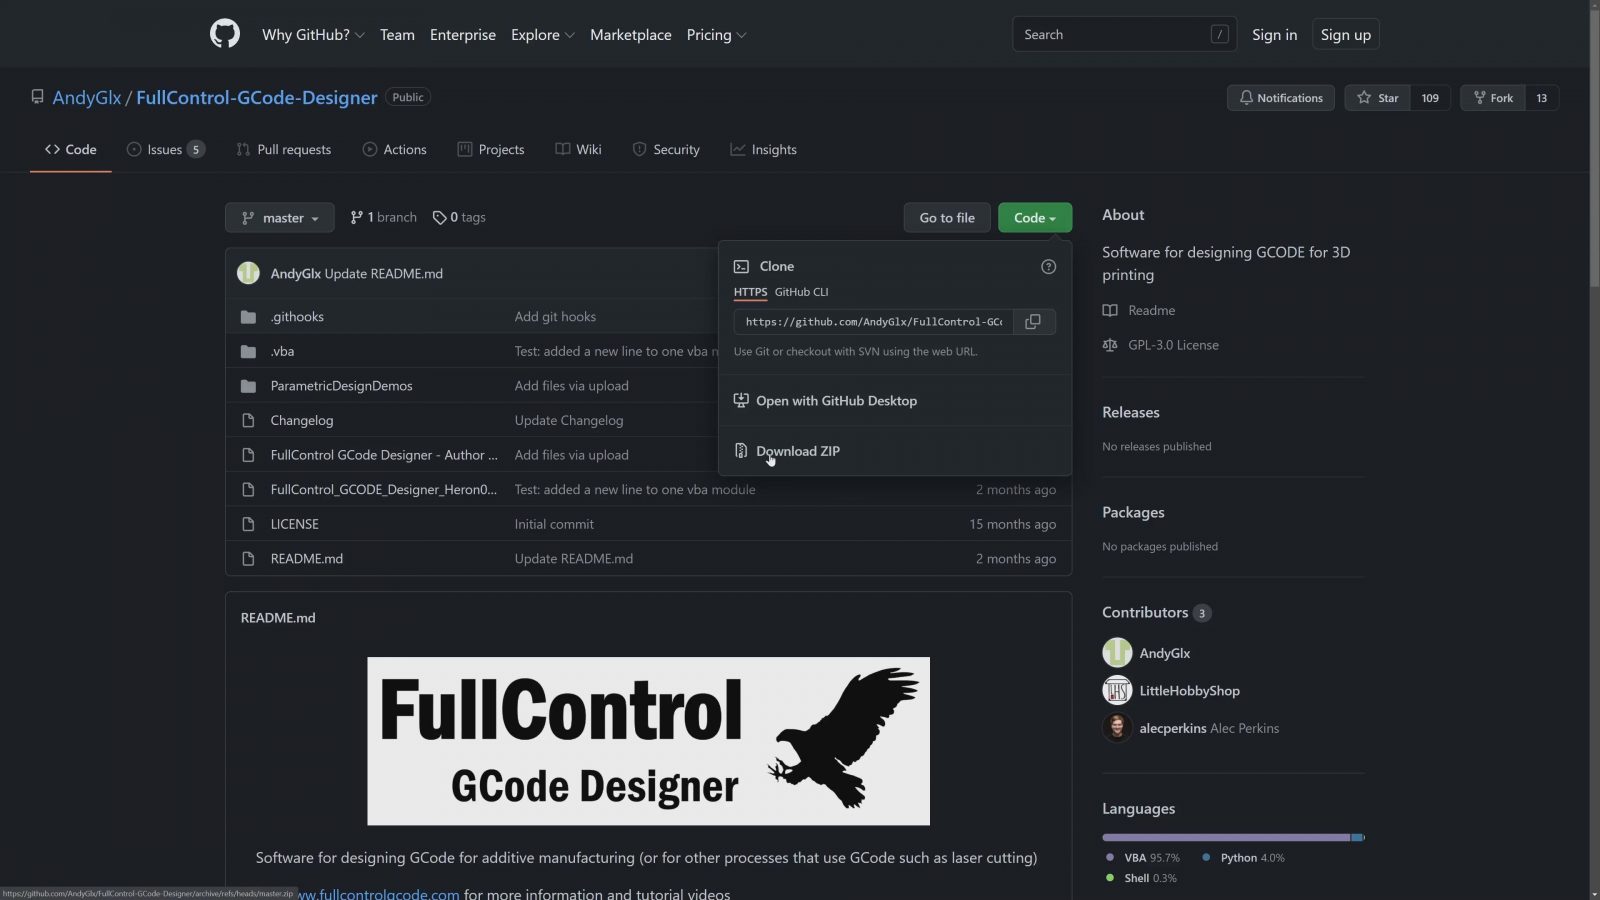
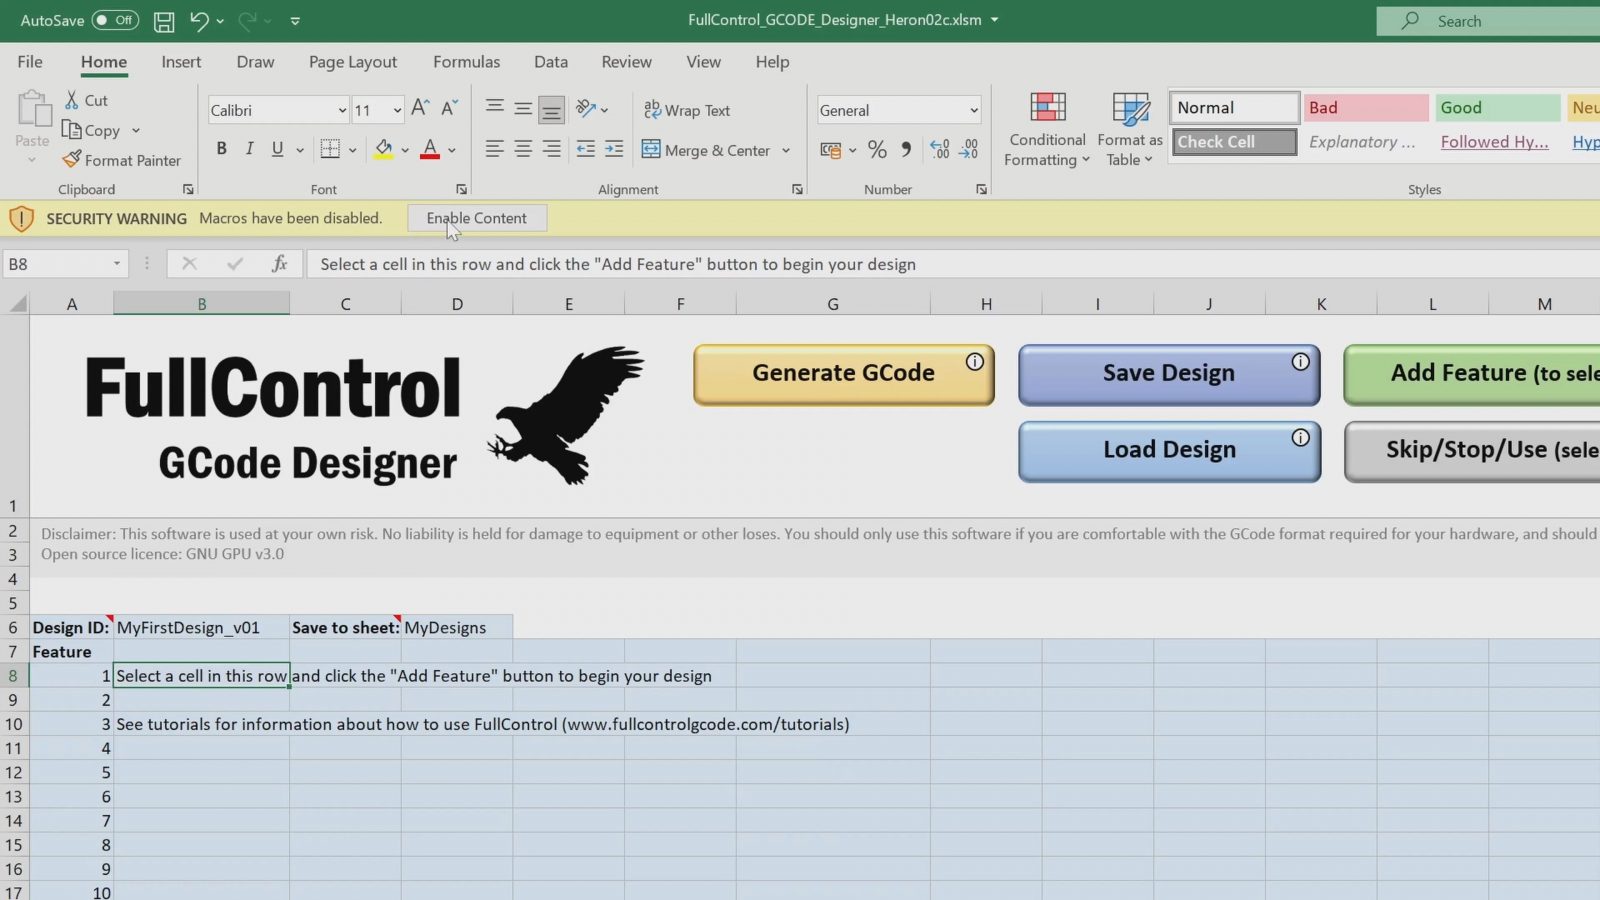
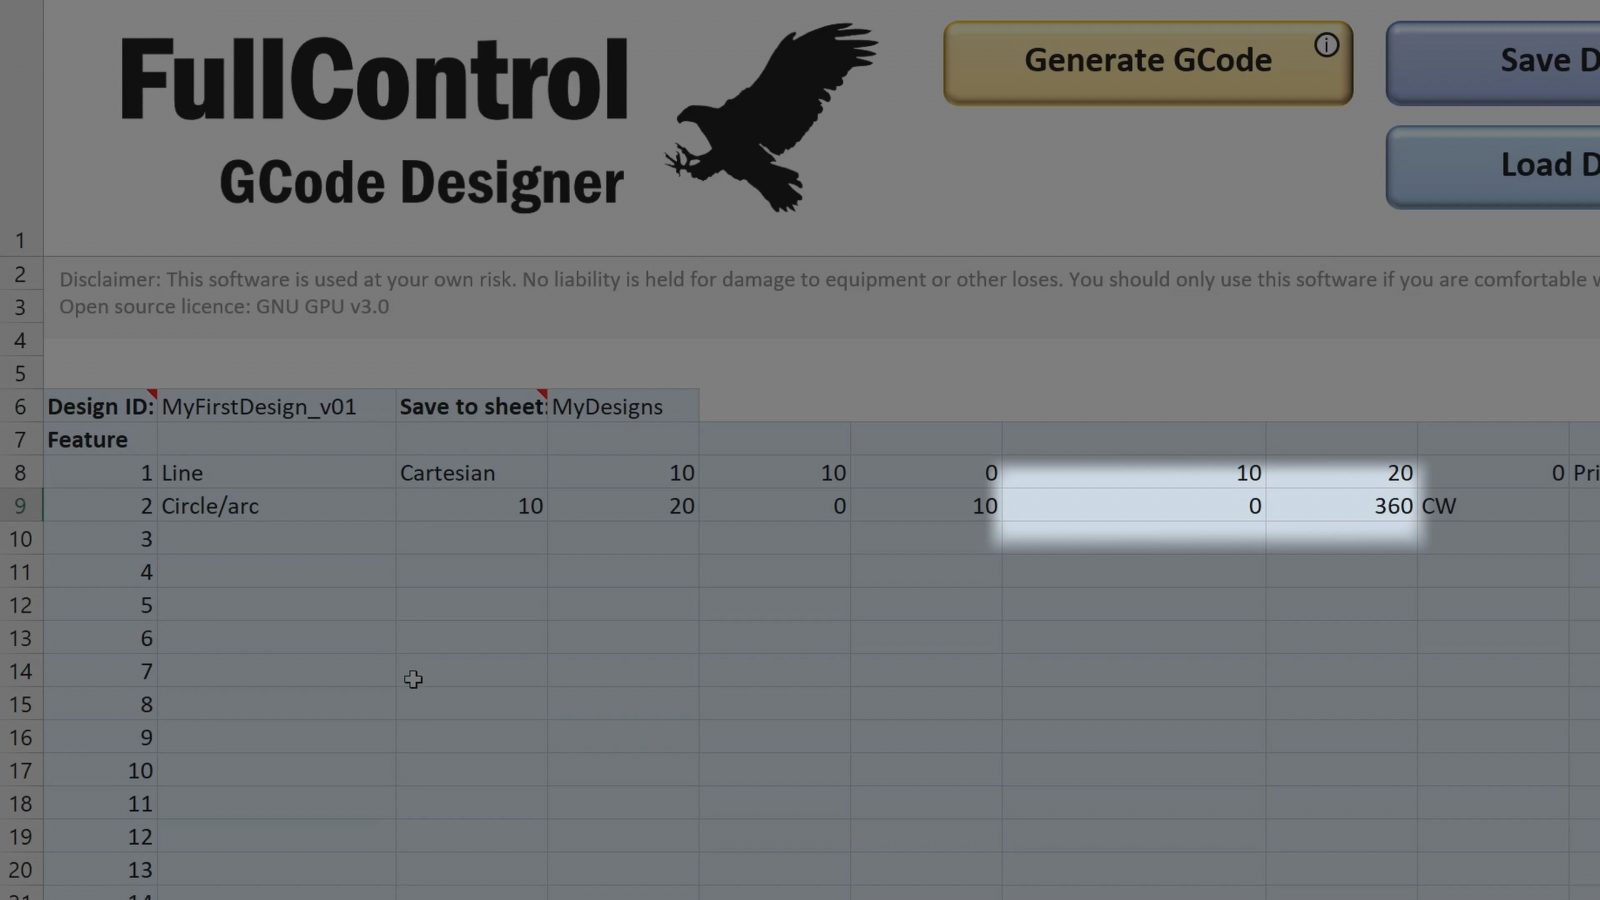
So basically, you just download the Full Control GCode Excel sheet, open that up, enable macros, and you’re off to the races. Now, the closest thing this reminds me of is programming a CNC using the built-in features of something like a Heidenhain controller, but in the case of Full Control GCode, you don’t need to know any actual gcode to use it, because the generation of the gcode itself all happens based on the features you set up.
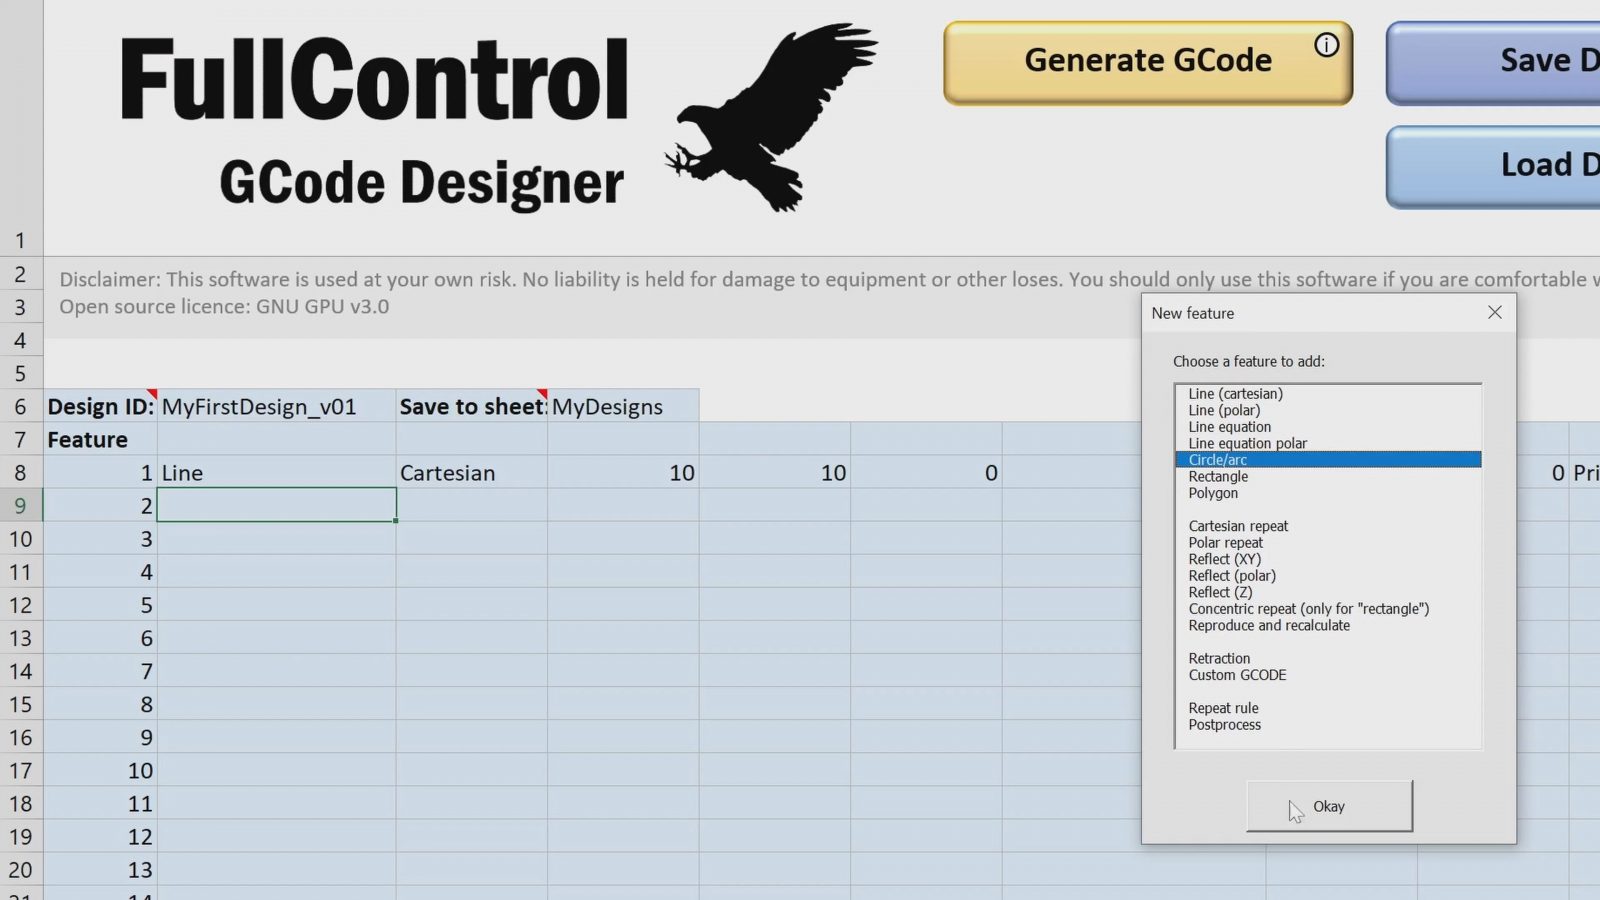
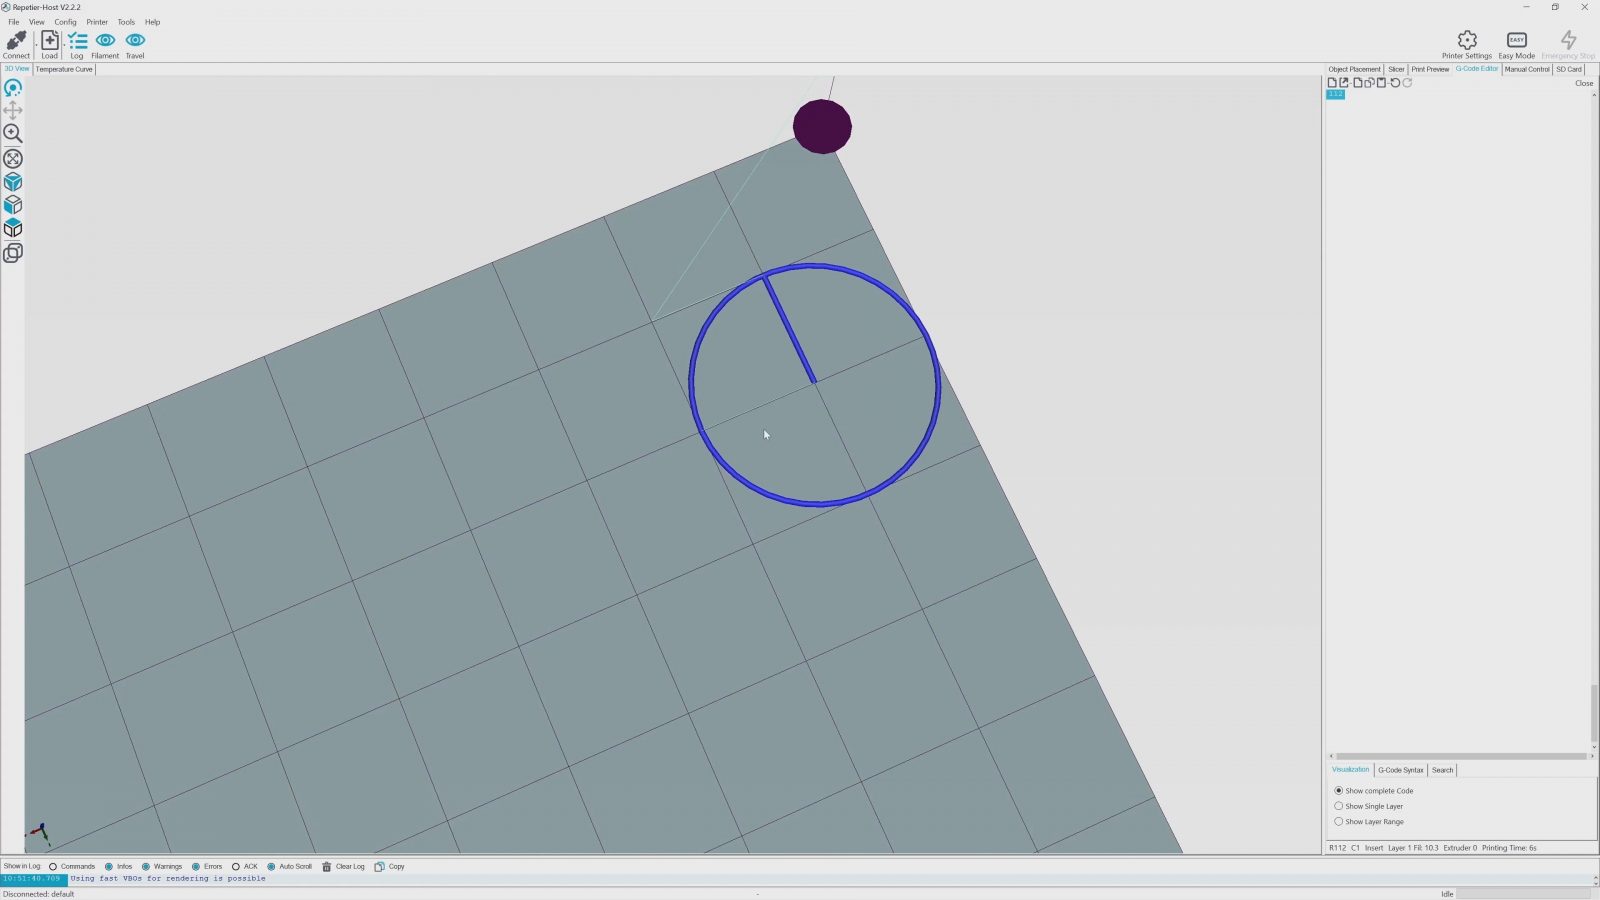
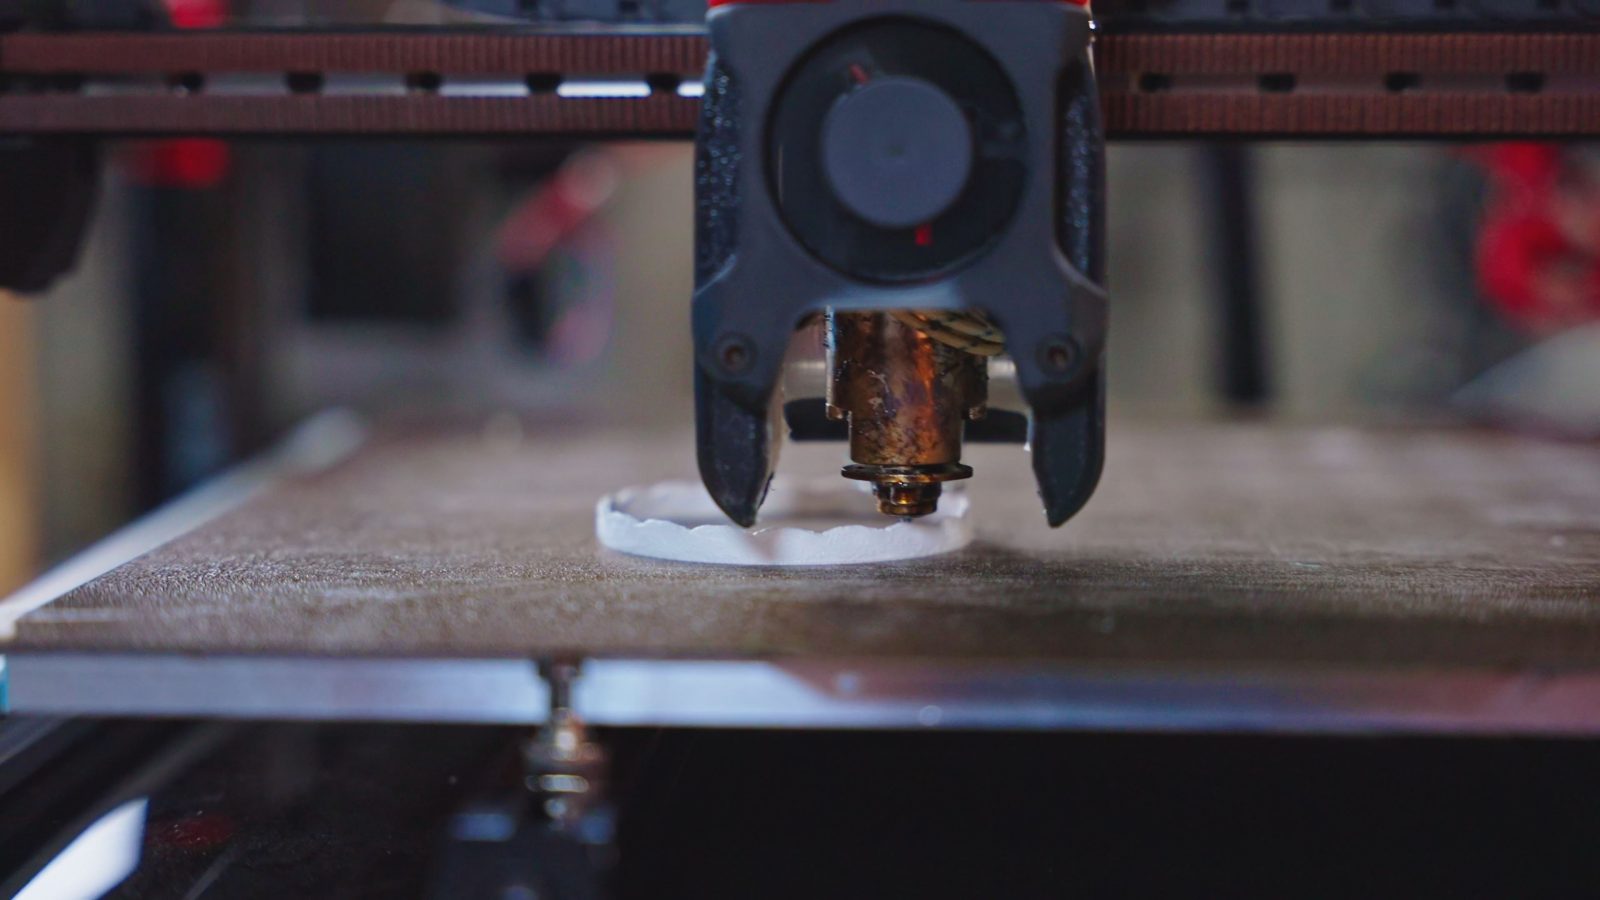
So, let’s start with the simplest example, let’s make a line. What it needs is the start position, end position, and how wide and tall your extruded track should be. Full Control GCode automatically calculates how much filament should be extruded for that and if we paste the generated gcode into Repetier Host, there’s our line.
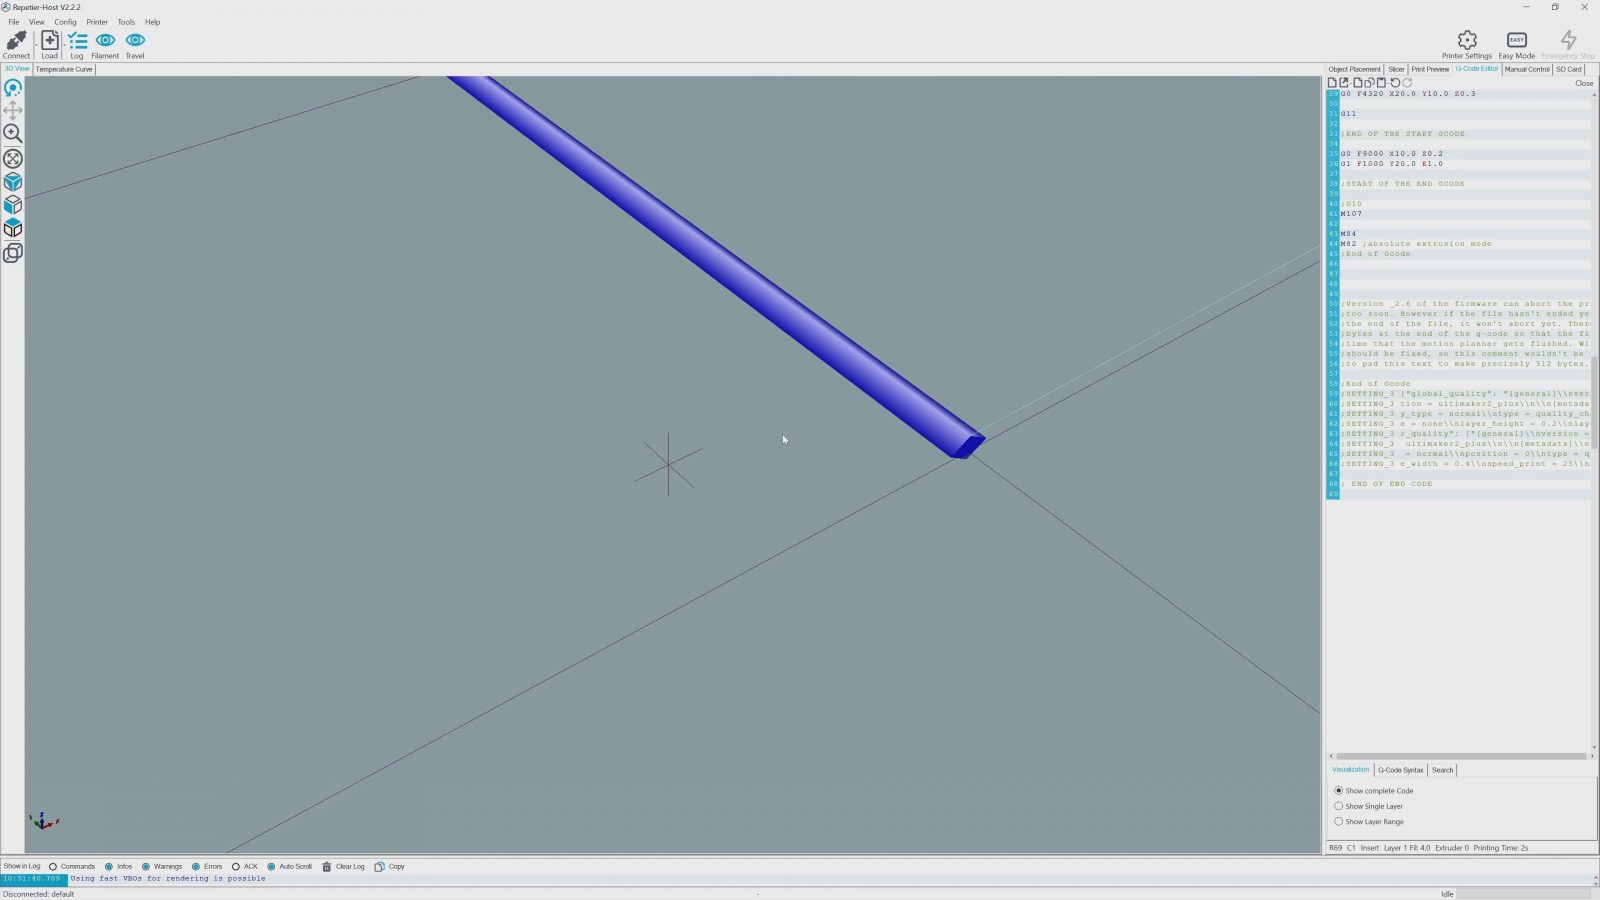
I usually don’t use Repetier Host much, but because Full Control GCode delivers the generated gcode by copying it to the clipboard, being able to just paste it right into Repetier Host is perfect for previewing what it’s doing.
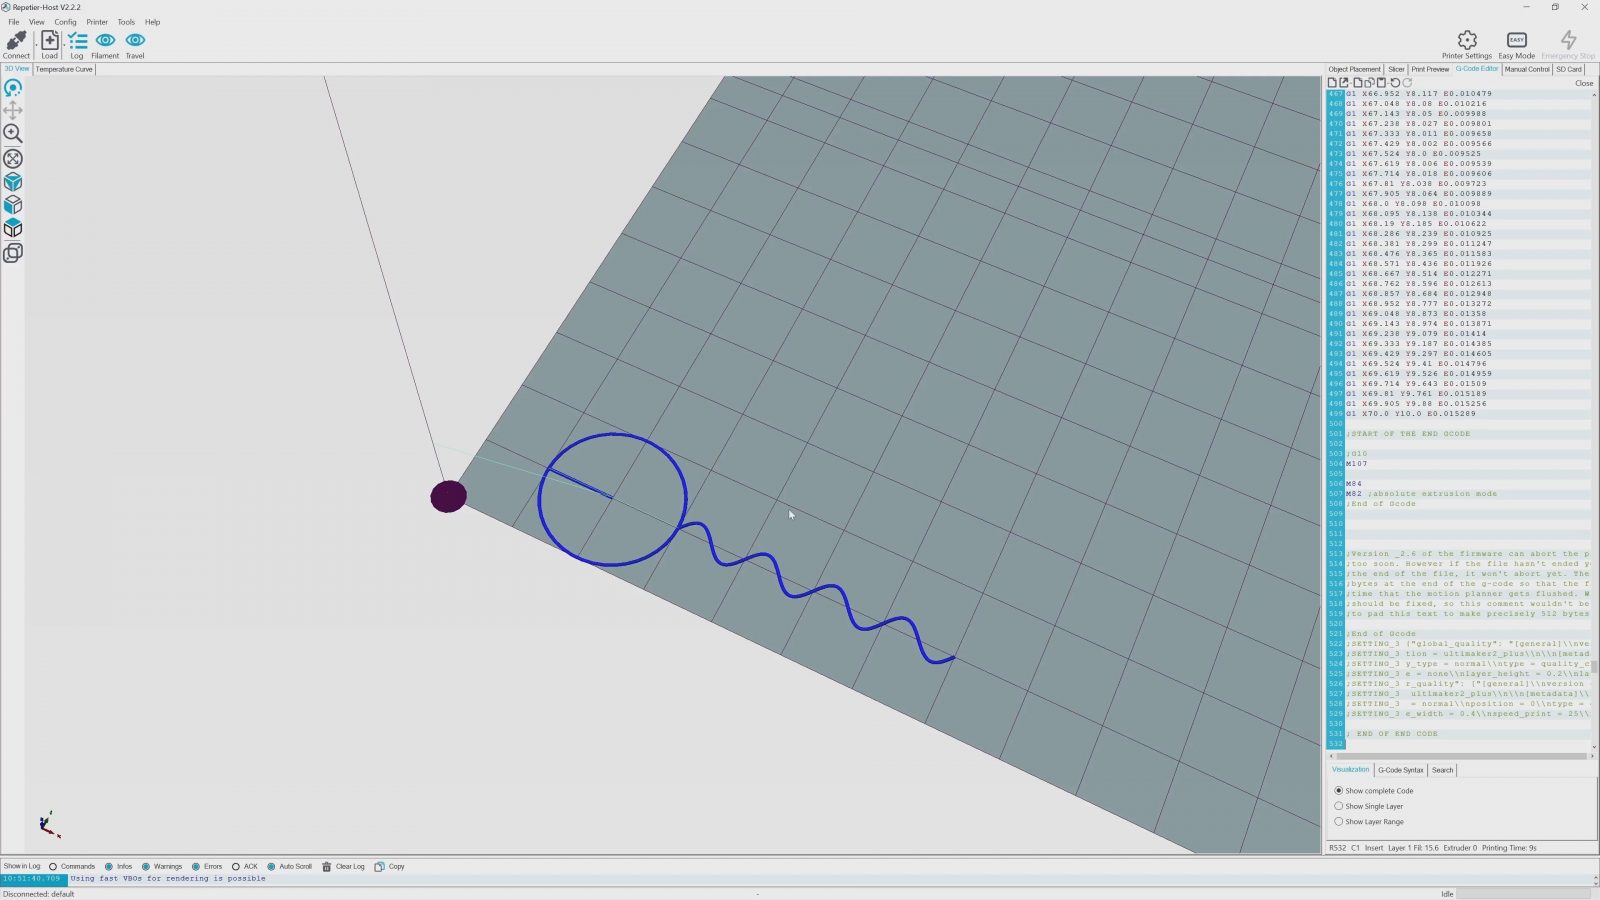
Now, of course, just generating a line isn’t anything special, you could just as well do that by typing out the gcode by hand. What’s not so easy to type out are arcs and circles. In Full Control Gcode, that’s just another feature. You set the origin, the radius, and where your circle should start and end, and that’s it.
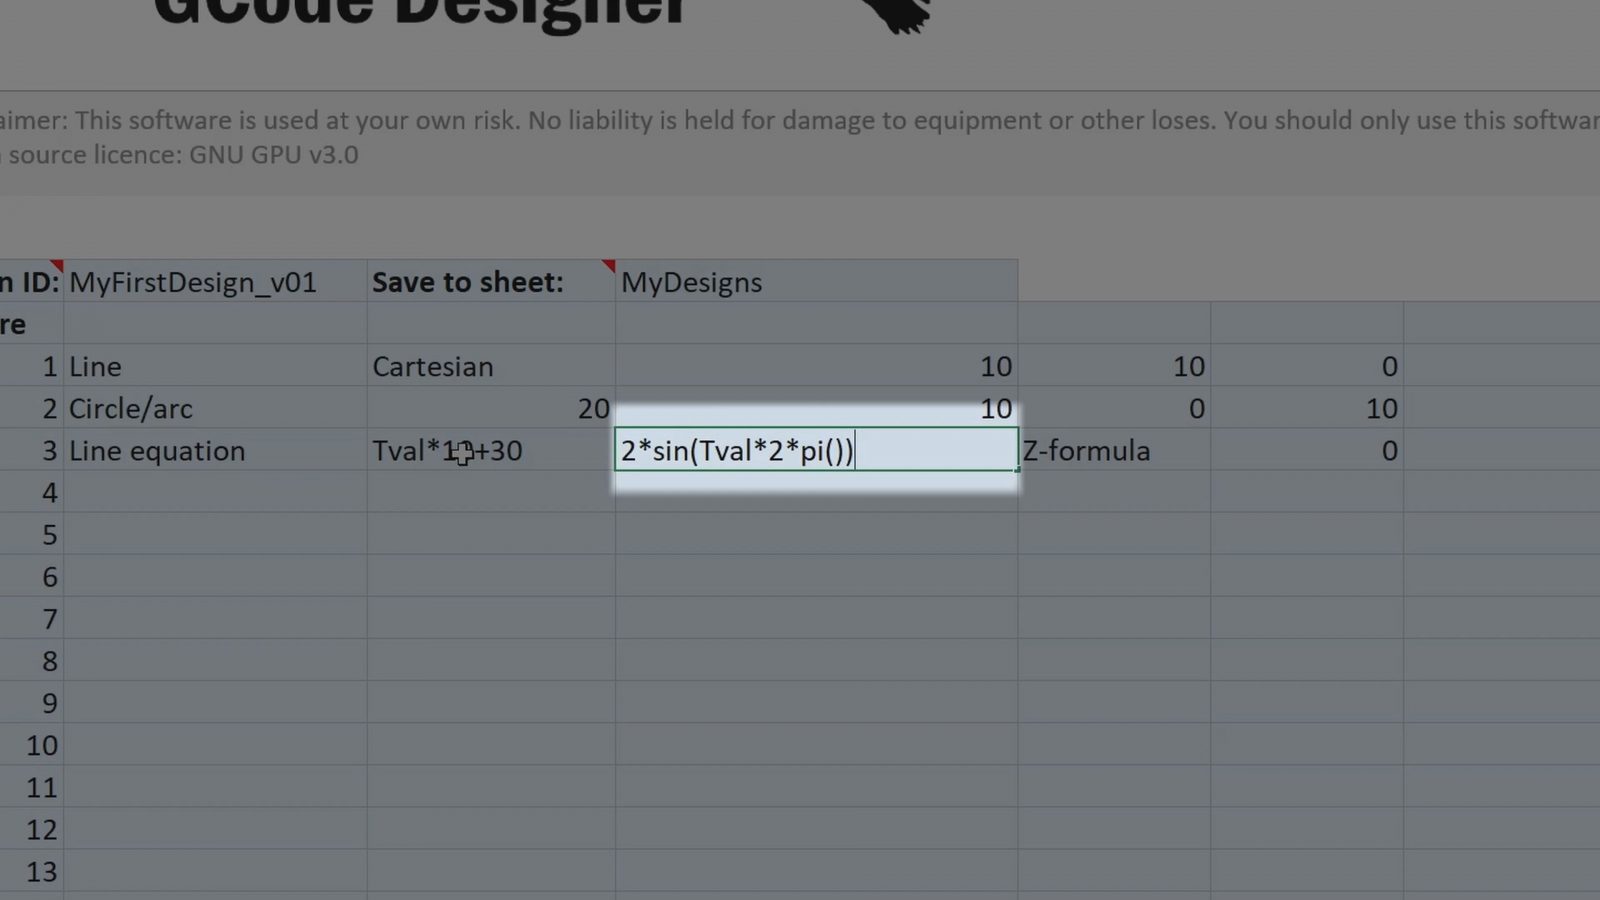
All the math happens in the background. The real power move, though, is being able to use any mathematical function, in fact, any function that Excel supports for doing math inside of a cell, to describe and define your extrusion paths. So for example, if we want to create a squiggly line, we say X just progresses linearly, but on Y, we can use a sine function for the position. This is one of the most powerful ways of defining geometry that I’ve seen so far.
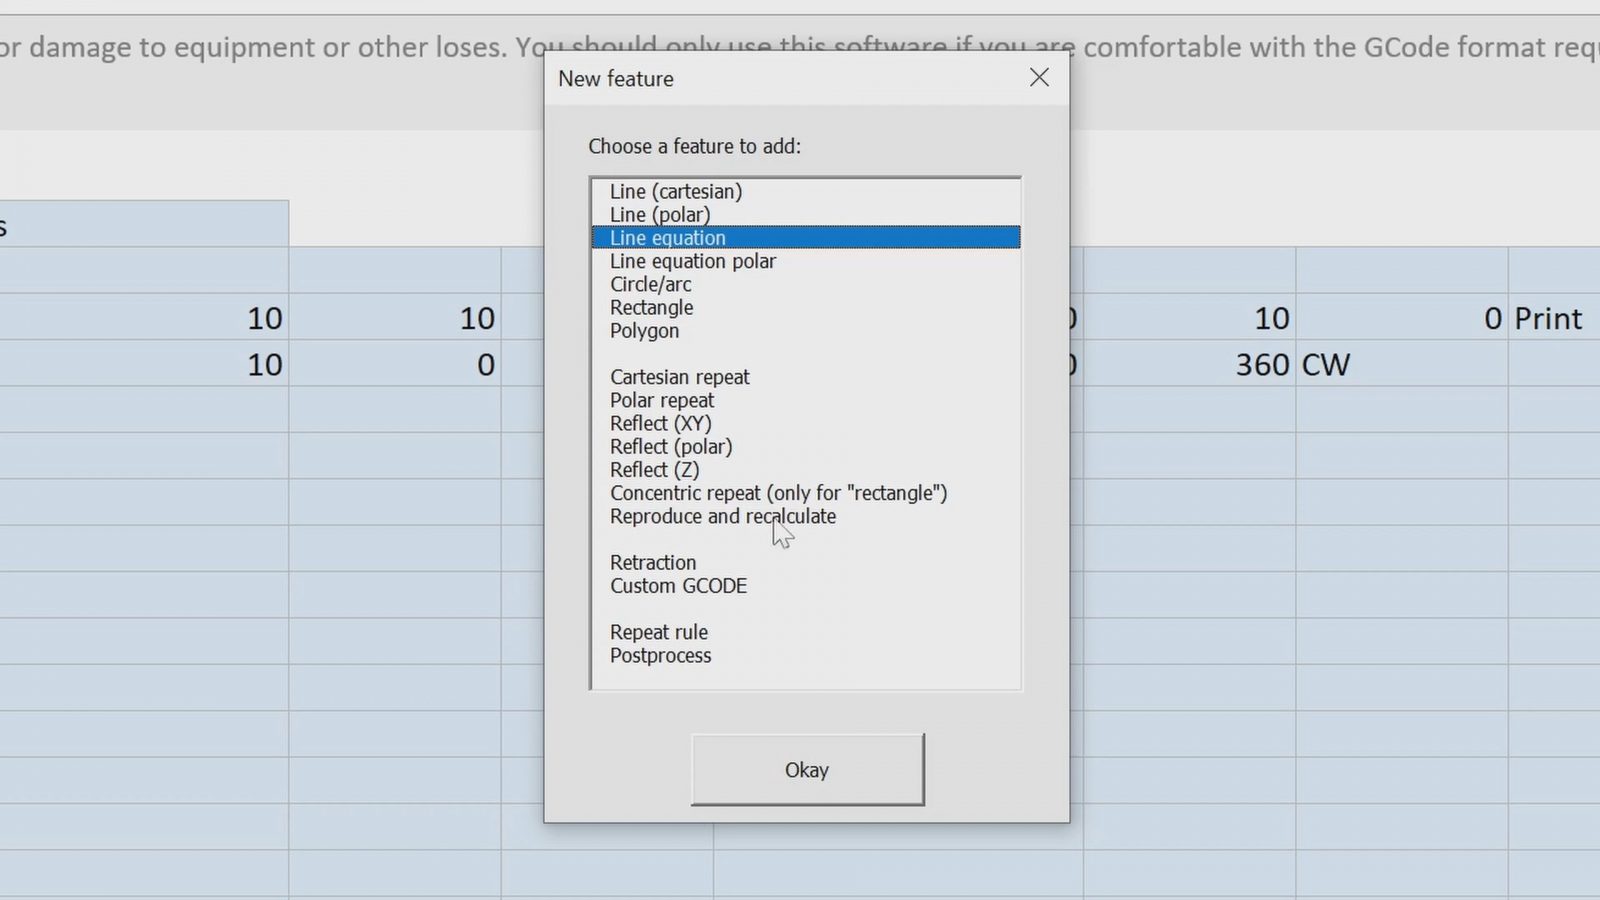
And it doesn’t end there. Probably the most useful feature here is that you can create repeats, so an array of the same feature. Let me show that with the battery tray as an example, because this is basically just 80 copies of the same geometry. So of course, the main thing is a circle, which I’m copying 9 additional times along X, then I’m copying the original circle and the 9 copies along Y another 7 times, and then, to give it some height, all that gets copied 25 times along the Z-axis.
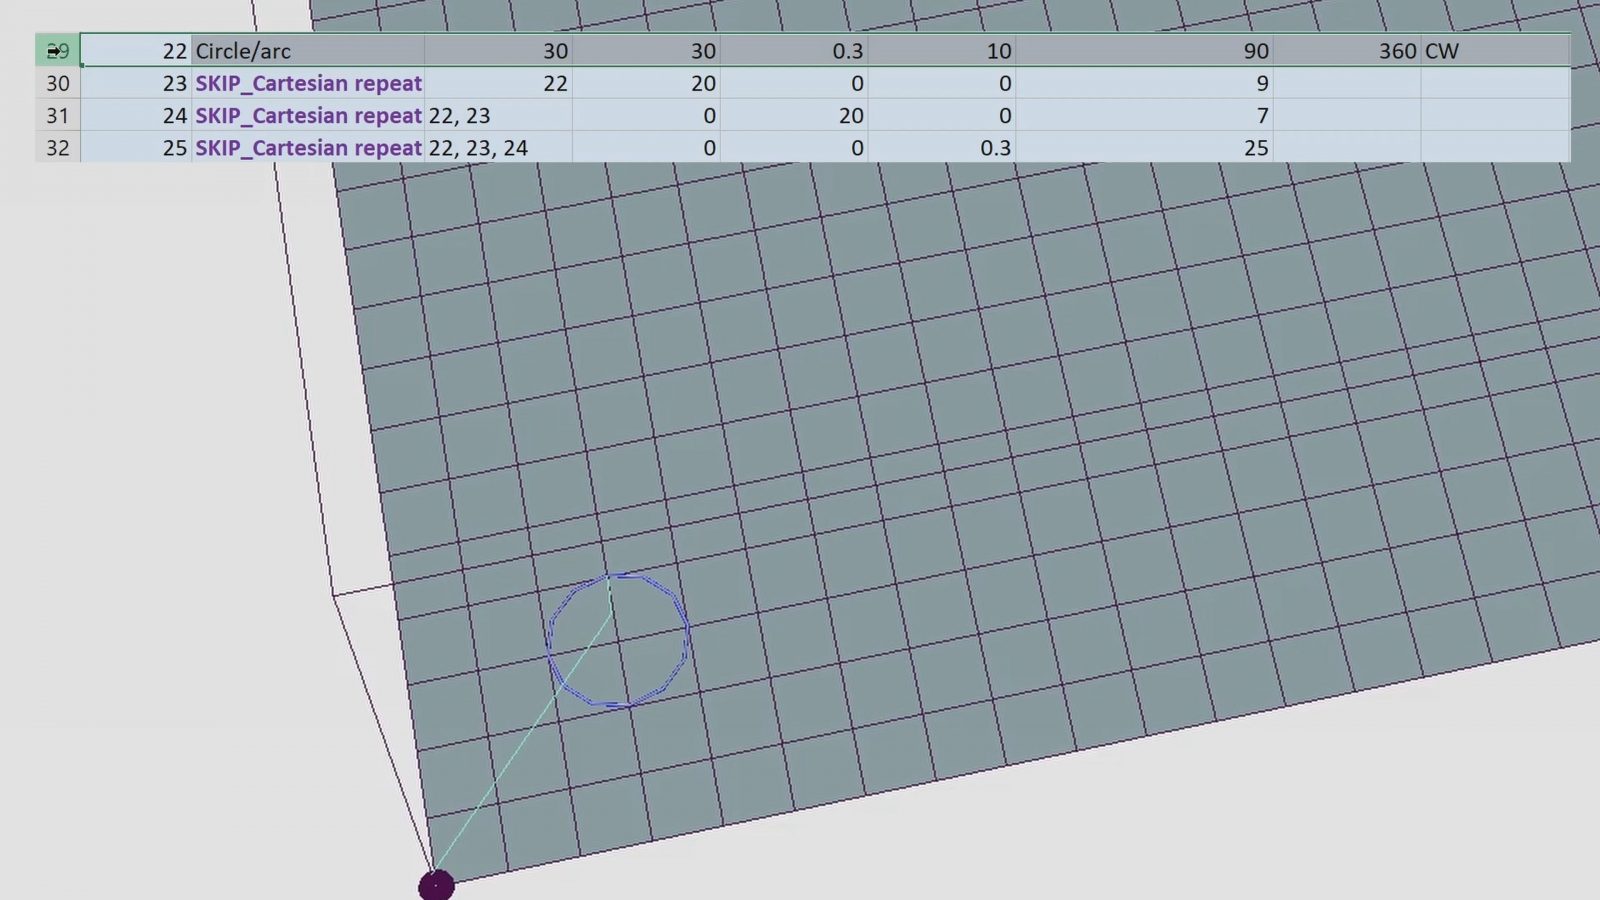
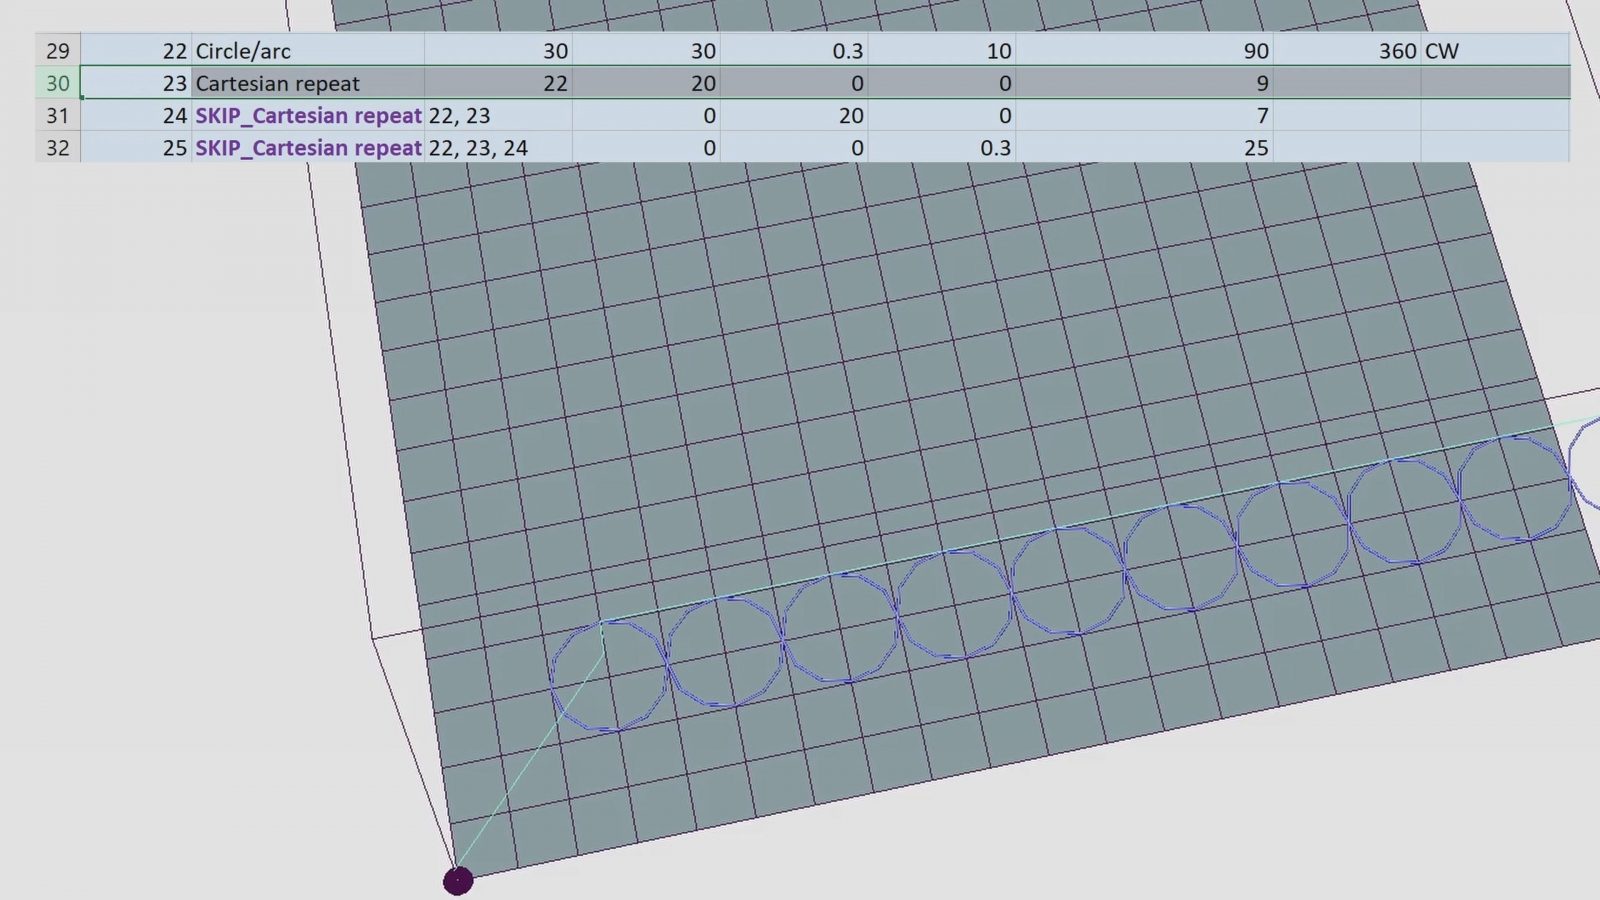
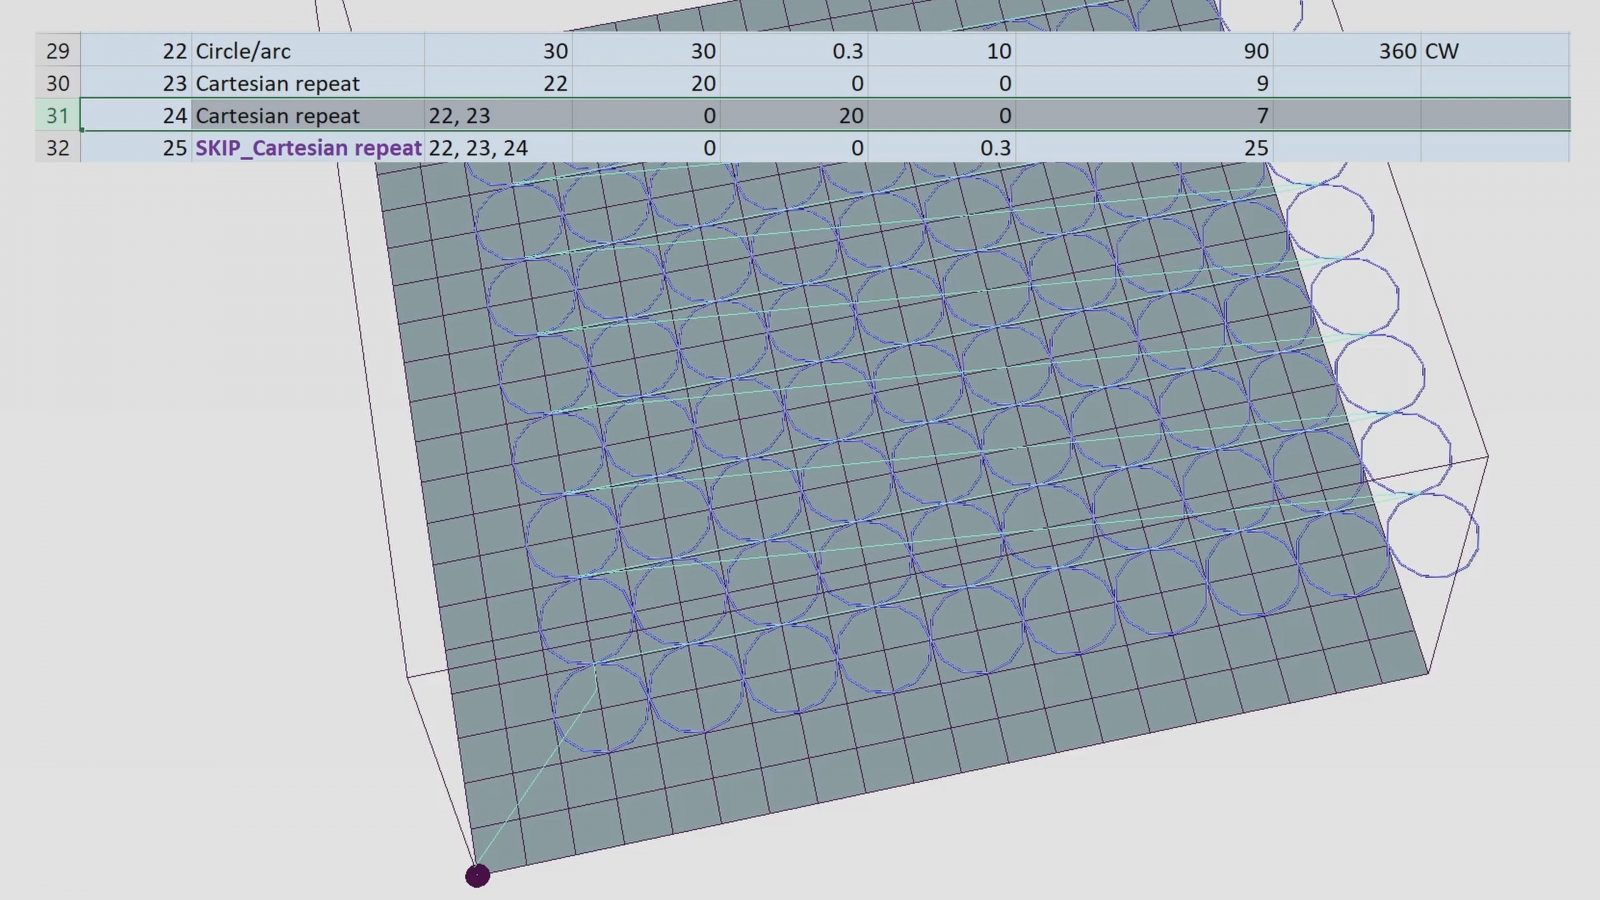

And of course, the order that we’re copying in does matter – if we first copied along Z, and then along X and Y, the printer would print one full circle in its full height and then crash as it tries to print the next one right beside it.
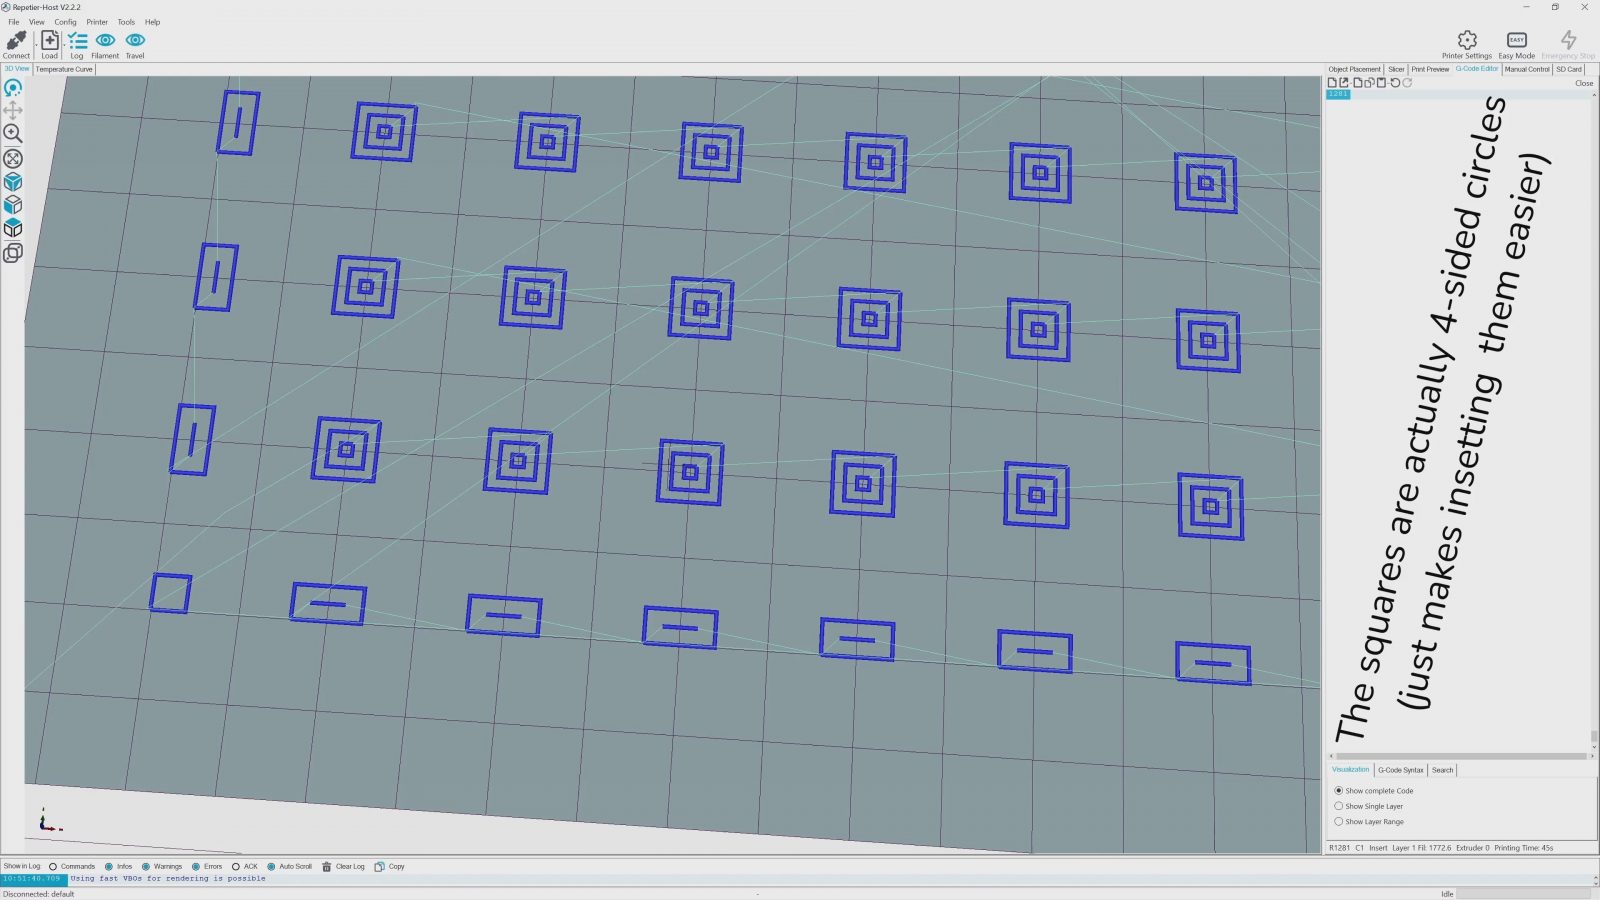
The rest of the battery tray are three different types of rectangles underneath the cylinders that tie them together and create little lips that keep the cells from just falling through. Because Full Control GCode knows nothing about infill patterns, I created each rectangle feature three times and inset it a bit each time.
So why is this print so much faster than the “traditionally” sliced one? Optimization, and cutting out everything that isn’t absolutely necessary.

The bulk of the print time is taken up by the actual cylindrical cell holder part, and for the print done with Full Control GCode, all that needs to be printed is one single cylinder move. But if we look over to the sliced part, yeah, we have that same perimeter that’s being printed, but then you always also need a second perimeter on the other side, and where the circles from two adjacent positions overlap, you always get some weirdness where they meet.
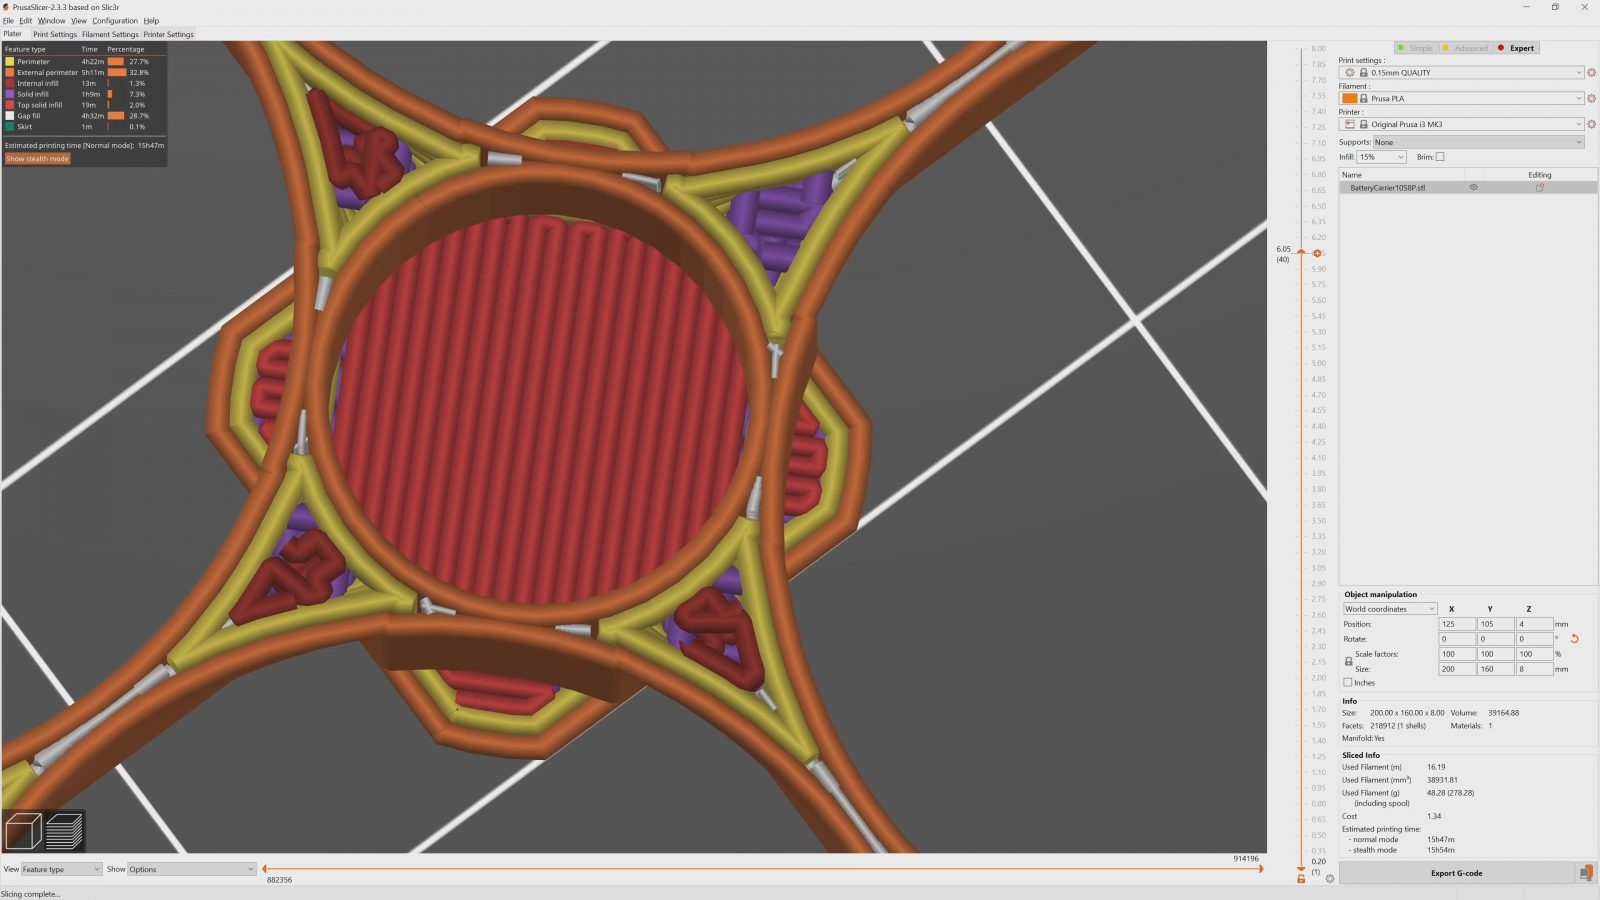
And what really slows down prints is all the tiny gap infill that the printer needs to do to “perfectly” reproduce the part. Sure, you could model your part perfectly to work with the “thin wall” printing feature or turn off infill, but that can cause some really nasty problems elsewhere.
What I’ve also done with the Full Control GCode version of the part is that I reduced the number of faces that the circles are being generated with – that doesn’t help with print speed, but it automatically creates a nice spring-loaded grab on the cells. And I’ve also aligned the printing direction and start-stop point of each circle towards the top so that the printer can smoothly move from one circle to the next and it avoids crossing over the inside of each circle, which means it doesn’t even need to retract on the way. That is nearly impossible to do this cleanly in a traditional slicer.
And it doesn’t end there. Remember how I showed you how Full Control GCode lets you use any mathematical formula to calculate your toolpaths? Well, that doesn’t just work for X and Y, it also works for Z – in two ways. First, you can use Z as a parameter for how each layer’s toolpath gets printed, so this print is just one line in Full Control GCode, but it uses the current nozzle height as a variable, too. So with each layer, the way the toolpath is being calculated slowly changes and it morphs into a different shape. Oh, and this is also a vase mode print – it’s actually just one long move where I’m slowly increasing the Z value.
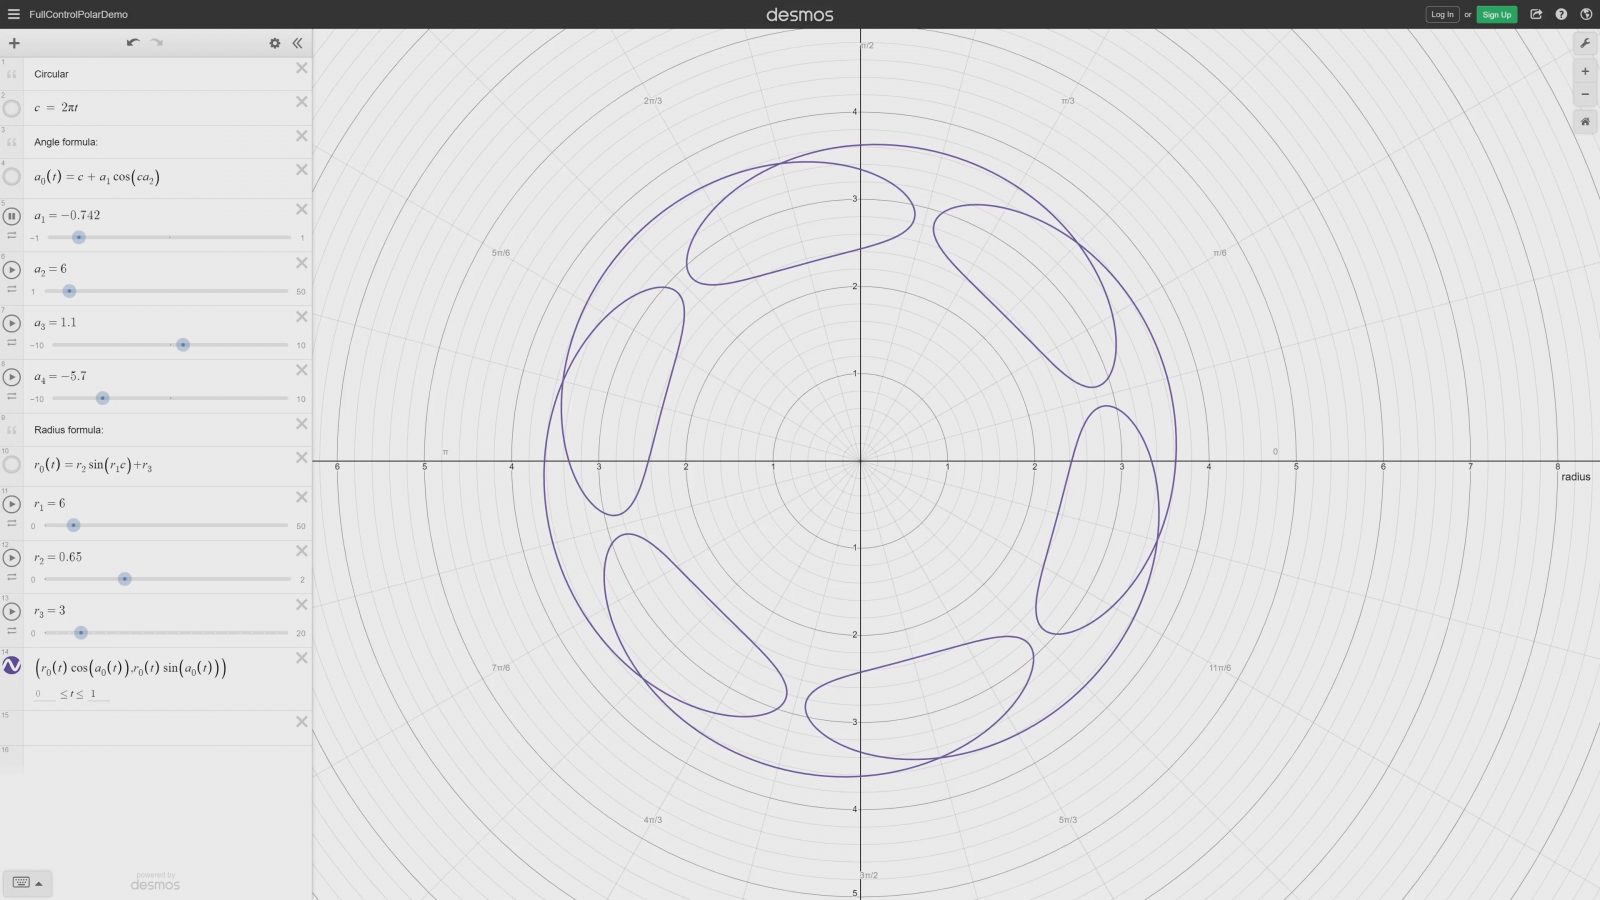
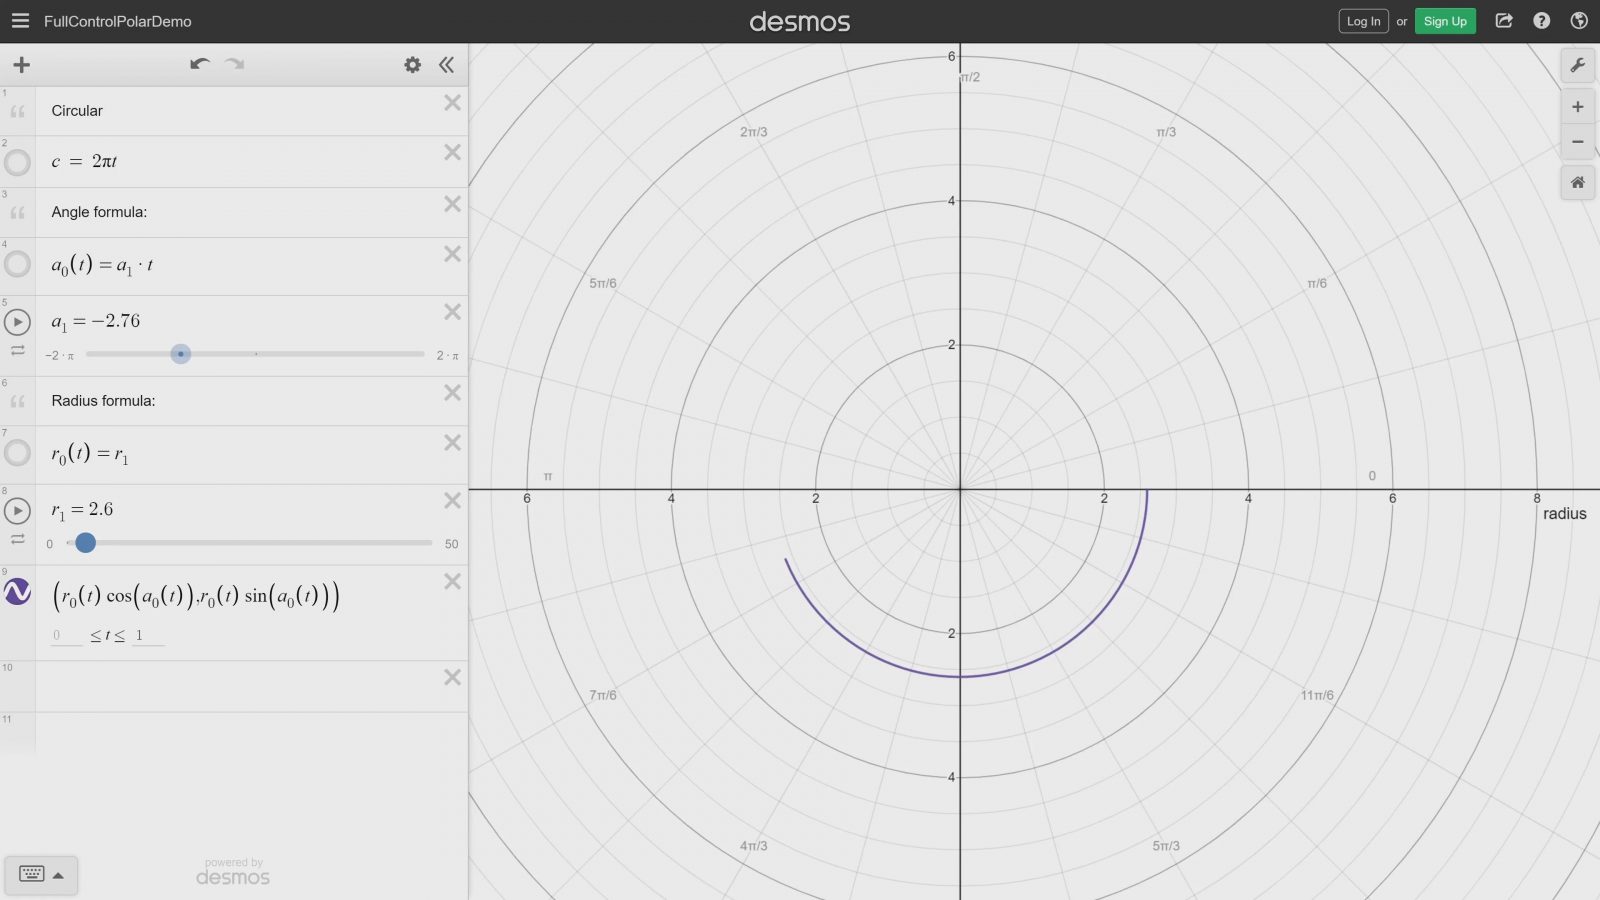
For playing around with what sort of shapes you can generate without having to fully generate them in Full Control GCode every time, Dr. Andrew Gleadall has shown that you can use the web-based tool “Desmos” for that, and it does work really well, you just have to then translate the functions you found from the clean formula representation in Desmos to the somewhat convoluted Excel format.
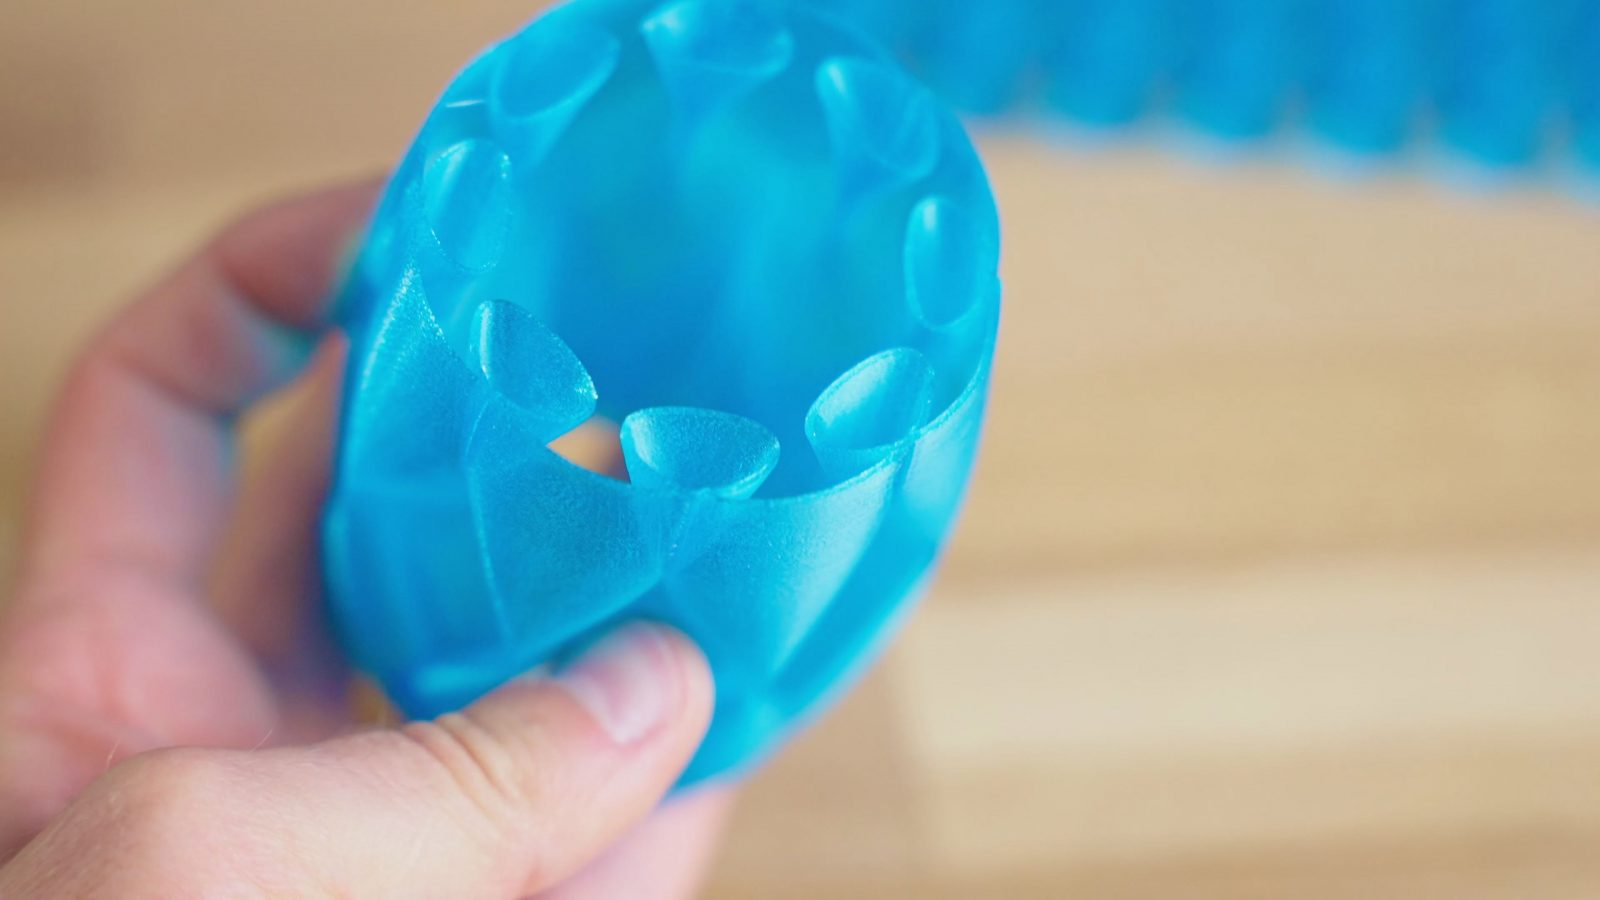
So the other thing you can do with the Z-axis is, of course, non-planar slicing. The Z-axis position is just another variable that you can leave static for each “layer”, or, just like X and Y, fill with whatever functions your heart desires – as long as your printer can handle it, of course. I don’t have one of those super long and pointy airbrush nozzles at hand, so I’m kinda limited in how steep and how tall I can go in each layer, but still, I managed to print these two parts – one that does little printed Z-hop bridges over free air, which I guess might work better with PLA instead of PETG and with optimizing print settings a bit more, and the other one again using “vase mode” and a period variation on the z-height that fades in over the first couple of layers.
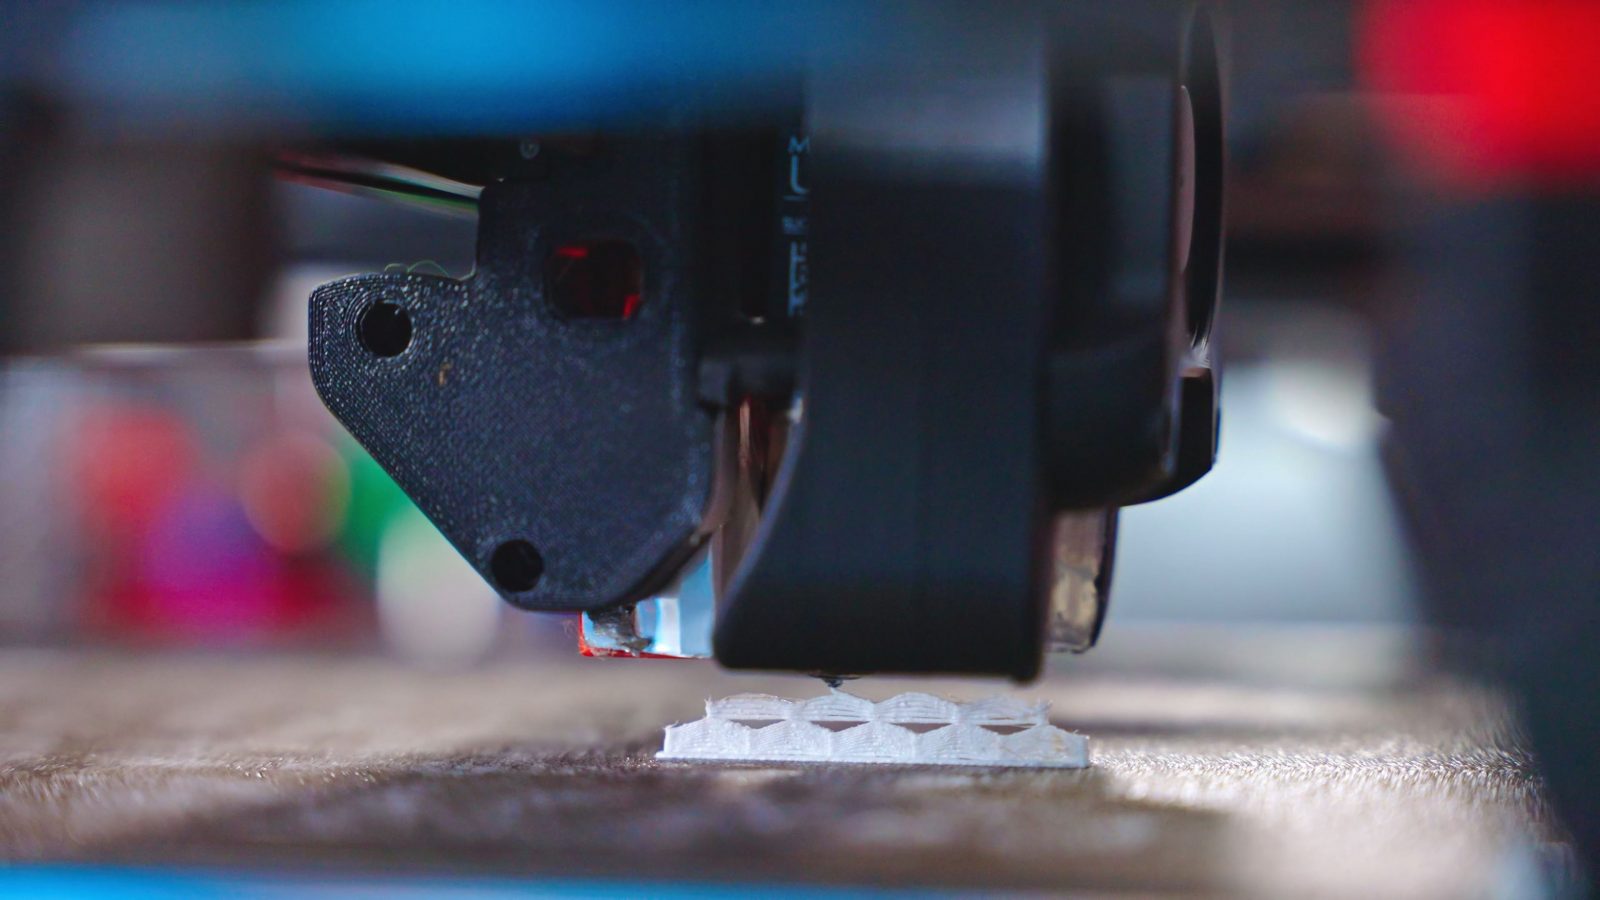

The effect is a lot more dramatic in the preview, but being able to manipulate how the Z-axis moves during each printing move is one of those things that will come in incredibly handy at some point.
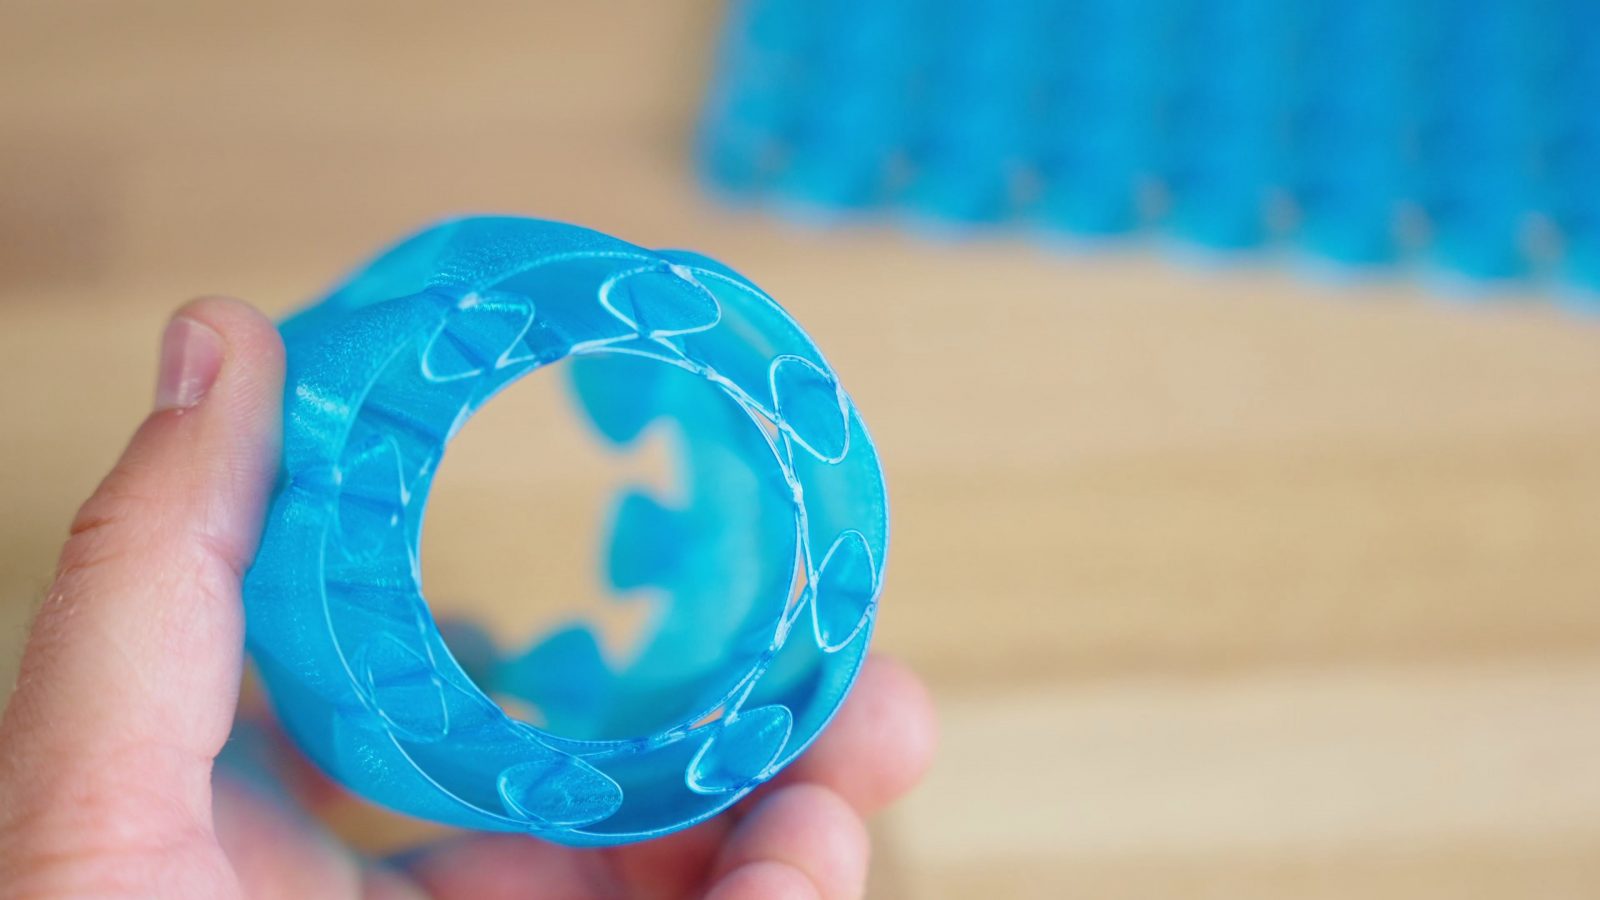
And the list of features in Full Control GCode goes on – instead of using the cartesian XY coordinates, you can use radial coordinates where you use angle and radius to define positions, and then after 360°, you’re back at the start, which is great for doing anything that’s round, really.
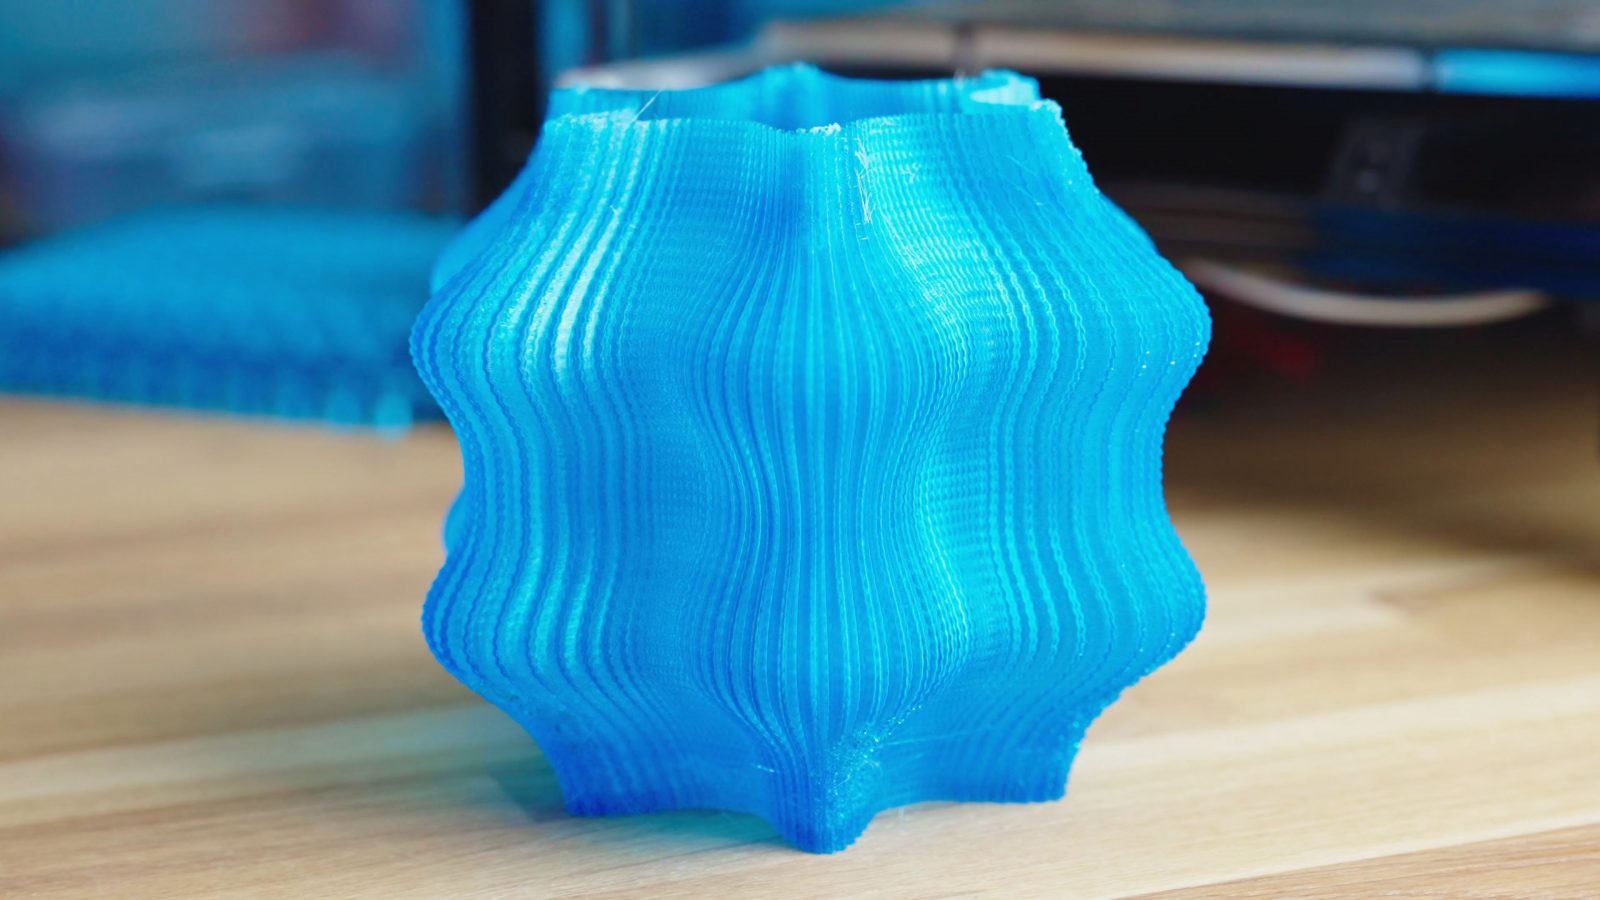
Vases and such, for example. This lampshade generator is one of the most popular use cases of Full Control GCode and you can get a huge range of patterns out of it by changing the settings around a bit.
You can also add modifier features to previous features, you can do mirror patterns, circular ones, you can use parameters to define your entire design, the possibilities are endless. Almost, because there are still some fairly severe limitations to Full Control GCode.
First off, it’s pretty slow. This lampshade takes about 6 or 7 minutes to process, which means for any changes you’re trying out, you’re going to have to wait that long before you see what your changes actually did. And then, there’s no way to say for example, “exclude this region”, so when you need some sort of cutout or space for an insert, you’re going to have to craft your code around that from the start.
Now, I don’t blame you if you’re kinda going “eh ok, but how is this all useful?”. The thing is, Full Control GCode is a tool, like anything else, and by itself, it doesn’t do all that much. Sure, there are a couple of really cool examples like the lampshade generator that you can play around with and create some interesting shapes with, but as with any tool, it’s most useful when you start to wrap your head around how Full Control GCode works and your brain starts making those connections of “oh, I could design this in Full Control GCode if I use that feature with this one…” and so on.
So what I would recommend is to check out the tutorial series by Dr. Andrew Gleadall over on his channel – it doesn’t cover all the features, but you get a really good idea of how Full Control GCode can be used, and hey, it might just be something that can expand what you can do with your 3D printer.
Lampshade prints on Reddit by Flashlightpic5-3218
Filaments used:
DAS Filament PETG B-Stock
Prusament Galaxy Black PETG
💙 Enjoying the videos? Support my work on Patreon!
Product links are affiliate links – I may earn a commission on qualifying purchases (at no extra cost to you)

Check out my second channel “More Layers” on YouTube for livestreams