
E3D just announced their new Hemera toolhead. Naturally, I’ve been using it for a few weeks, and my first impressions are that it’s quite a beast of an extruder. And yes, it’s now called the Hemera. Apparently some INTERNATIONAL company was concerned about the HERMES brand and “kindly asked” E3D to change the name. So it’s now the E3D Hemera, other than the name, it’s the exact same toolhead.
This video is sponsored by E3D, let’s get to it.
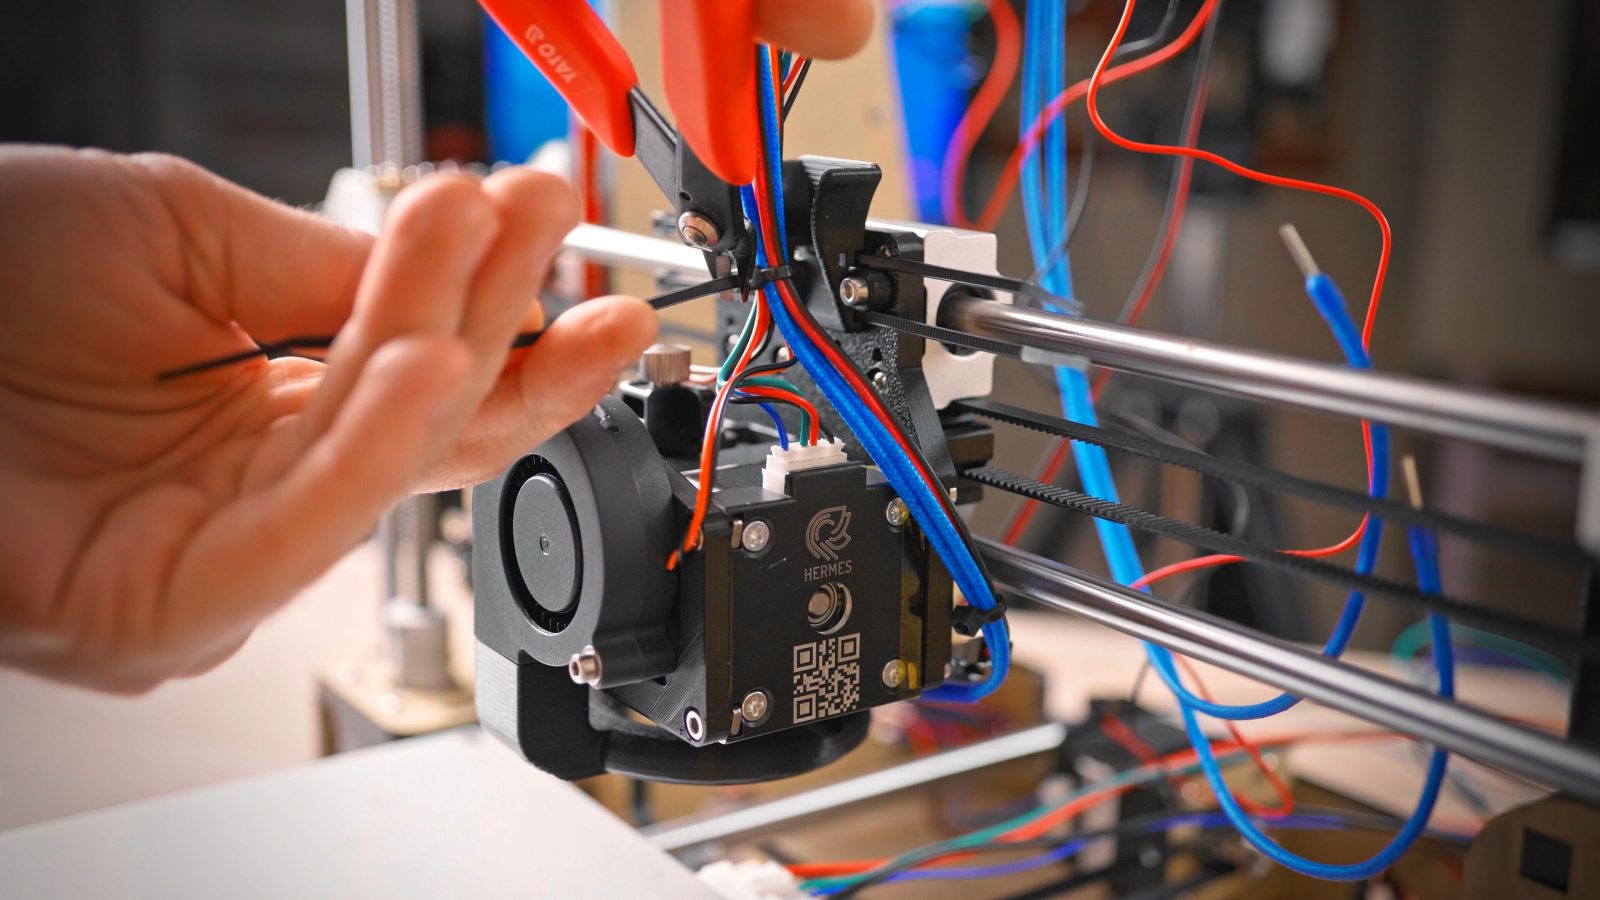
It’s still got dual drive gears, a roughly 3 to 1 gearing ratio and a semi-integrated v6 hotend, this is basically what their Titan Aero should always have been. It’s also very affordable at 90 GBP, so just over 100€, for the extruder with a full v6 hot side and the stepper motor included. If you’re thinking about getting a genuine v6 hotend, really, just get the whole Hemera kit. They’ve also changed how the extruder is mounted, and the fact that there’s nothing sticking out from either side does make it pretty convenient and very universal to mount. I’ve already put it on the Raptor 2.0 with a Supervolcano because the stock hotend and extruder were absolutely useless on that machine, and I’ve also put it on the Anet A8 because E3D reached out and wanted to sponsor a conversion guide for that. So that’s what we’re going to do today, the A8 is getting the Hemera upgrade, and while we’re at it, the printed upgrade parts I’ve designed will also be fixing the crooked belt path, add strain relief to the extruder wiring and because we’re adjusting the firmware anyways, let’s just upgrade that to Marlin 2.0 with all the safety features in place.
The upgrade parts also retain compatibility with the original part cooling fan shroud and most of the ones that you can download as upgrades for the stock A8 and it should also allow you to keep using the bed leveling sensors that mount to the back of the carriage.
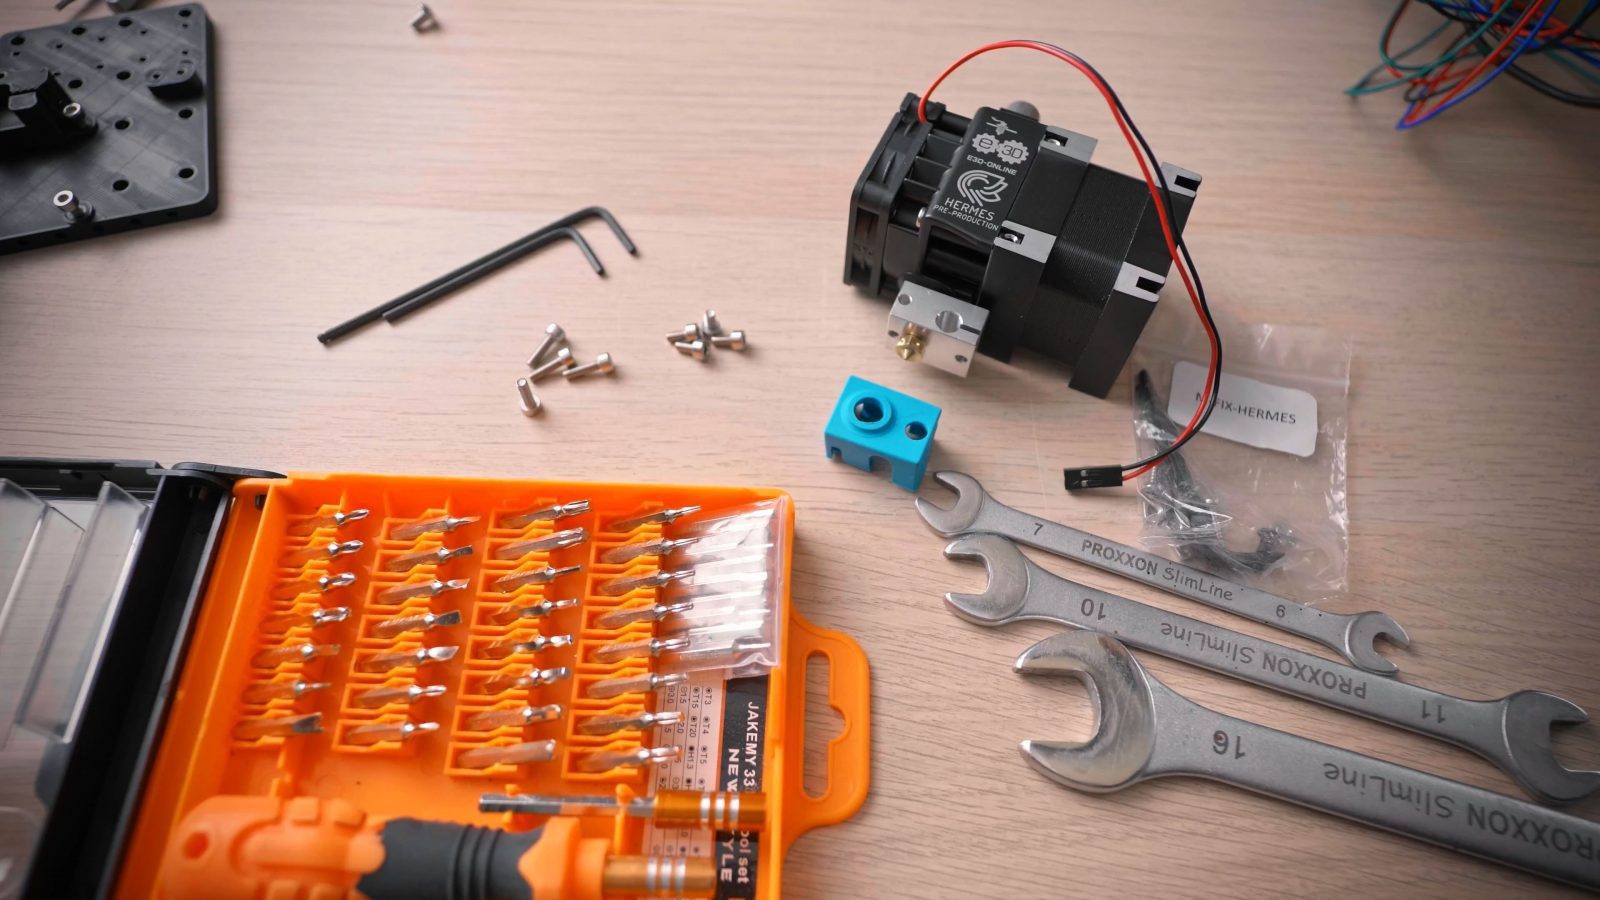
For this upgrade, you’ll need an Anet A8, a Hemera kit, four M3x5 or M3x6 screws and either a soldering iron or a spare three-pin Dupont connector housing. You’ll also need a Phillips 2 screwdriver, a 7mm, 10mm and 16mm spanner and a few hex keys.
First, let’s disassemble the original toolhead. Undo the locking nut on the original heatbreak and remove the screw at the bottom that’s holding the extruder body in place.
Unplug the motor, we will be reusing the original motor cable.
Also remove the part cooling fan, but we will be reusing that, too.
If you have any bed leveling sensor mounted to the back of the carriage, unscrew that before unbolting the carriage from the bearing blocks. Once that’s loose, clip off the zip ties holding the belt in place and you should be free to remove the stock carriage from the printer.
To prepare the Hemera mount kit, break the little support rings loose from the new carriage. All the other parts should be ready to use straight off the printer.
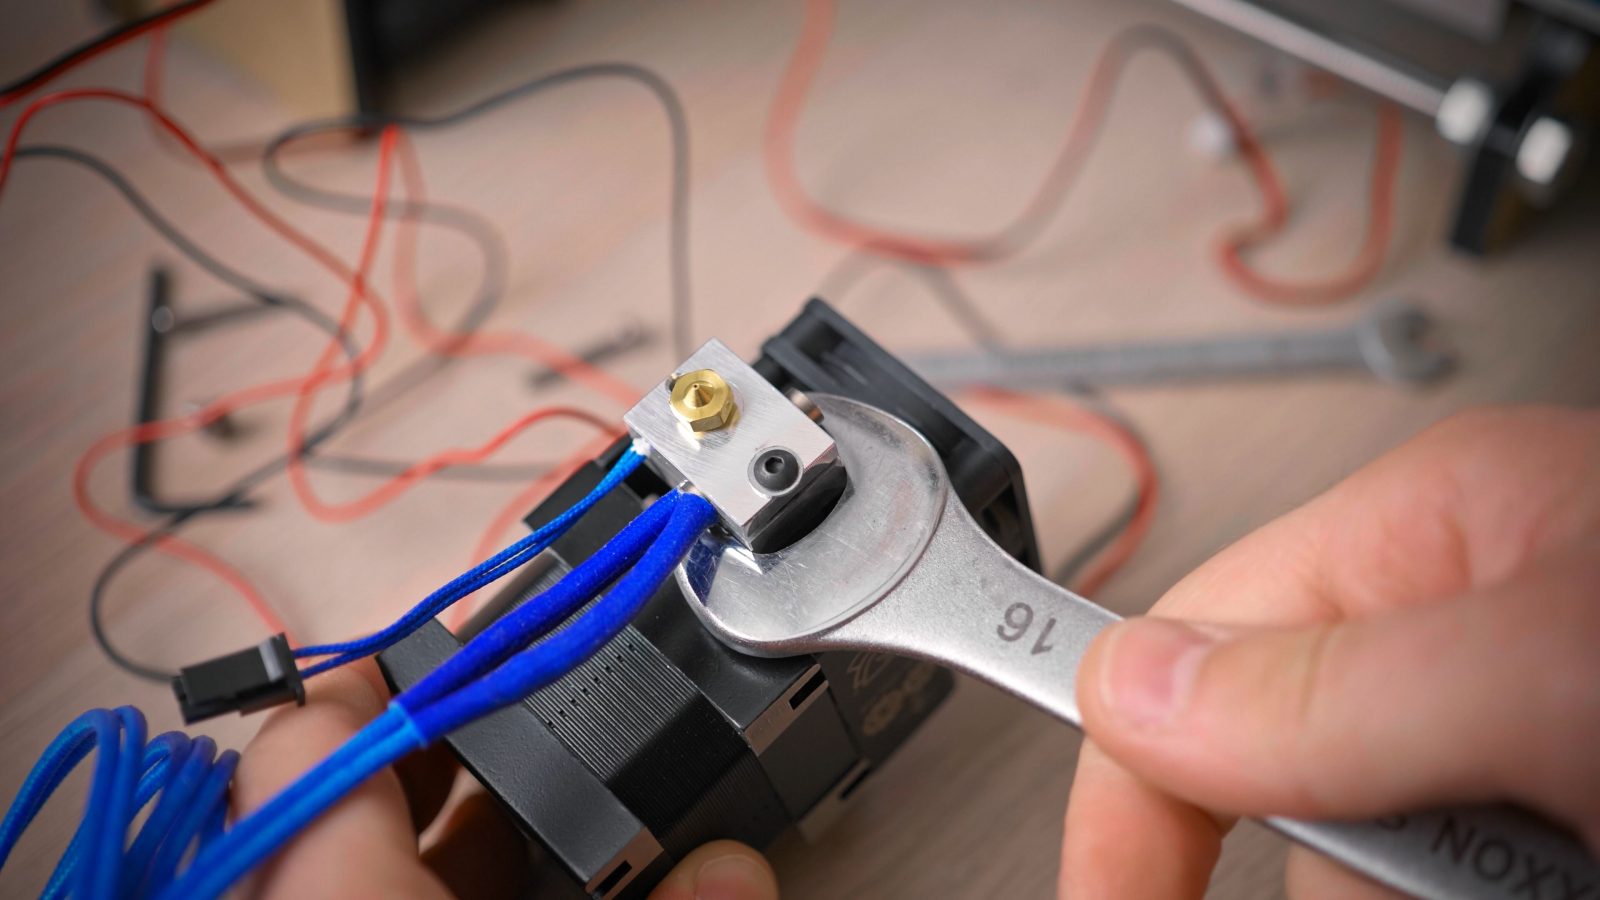
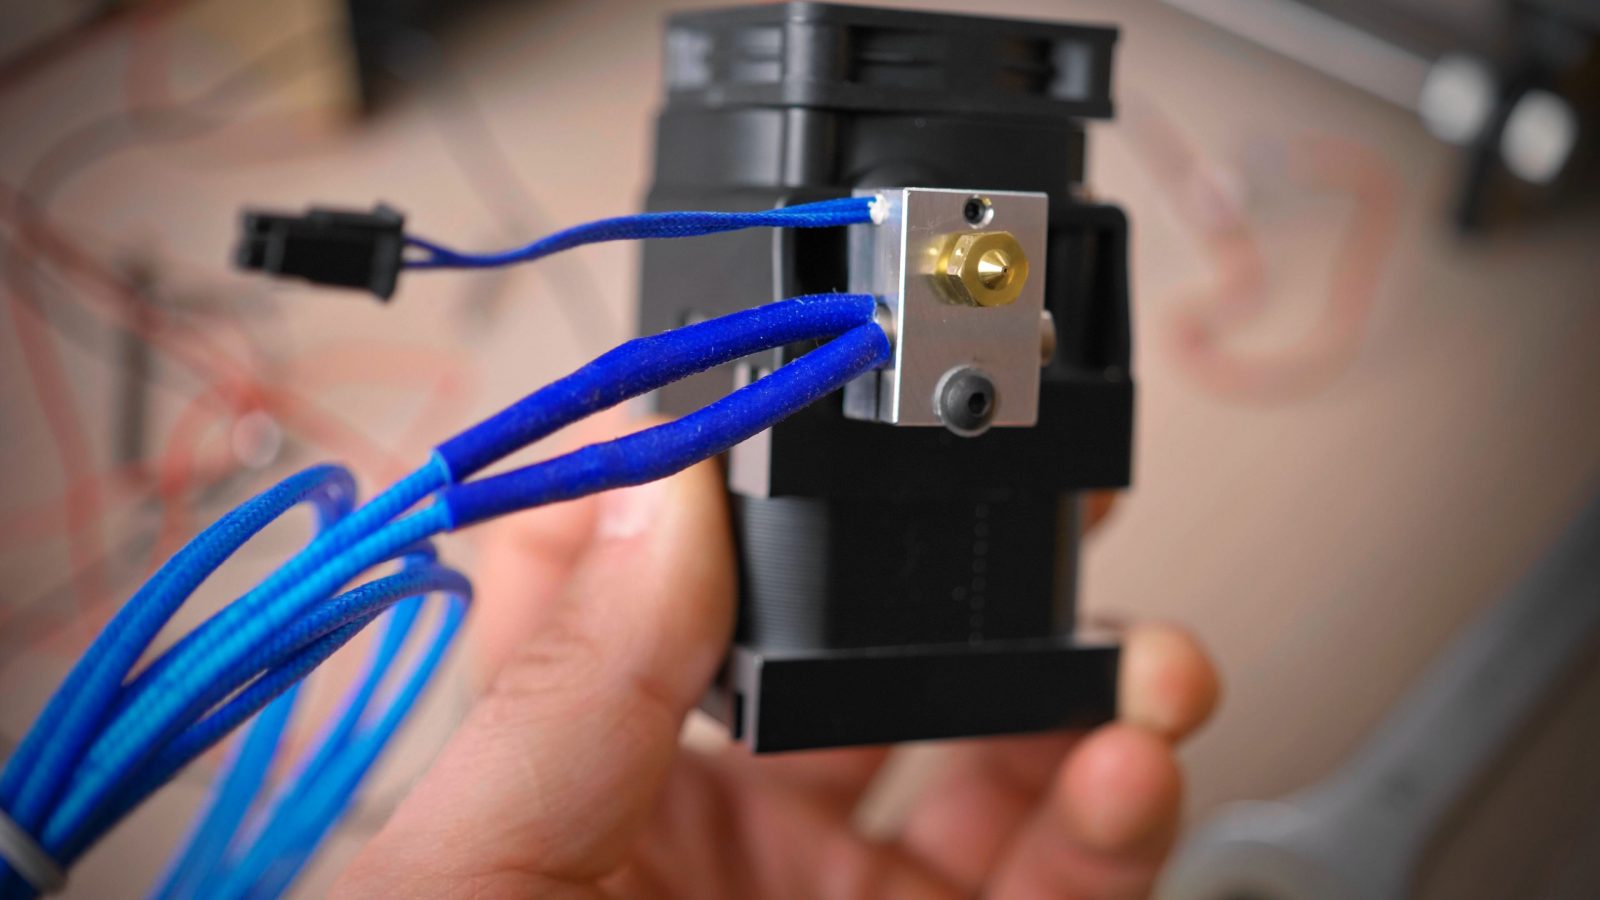
For the Hemera itself, rotate the heater block 90°, with the long side facing the stepper motor. We need this to maintain compatibility with fan shrouds made for the A8. To rotate it, grab the heater block with a wrench and slightly unscrew the heatbreak from the extruder body, then unscrew the nozzle half a turn, making sure you don’t put any bending stress on the heatbreak. Then rotate the block and tighten up the nozzle against the heatbreak by holding on to the heater block and screwing down the nozzlen, and finally lightly tighten the heatbreak back into the extruder body.
Now we’re ready to start mounting the Hemera to the printer. Start with the new printed carriage and bolt it down onto the bearing blocks using the original screws. Lightly thread in each screw first, then tighten all of them down.
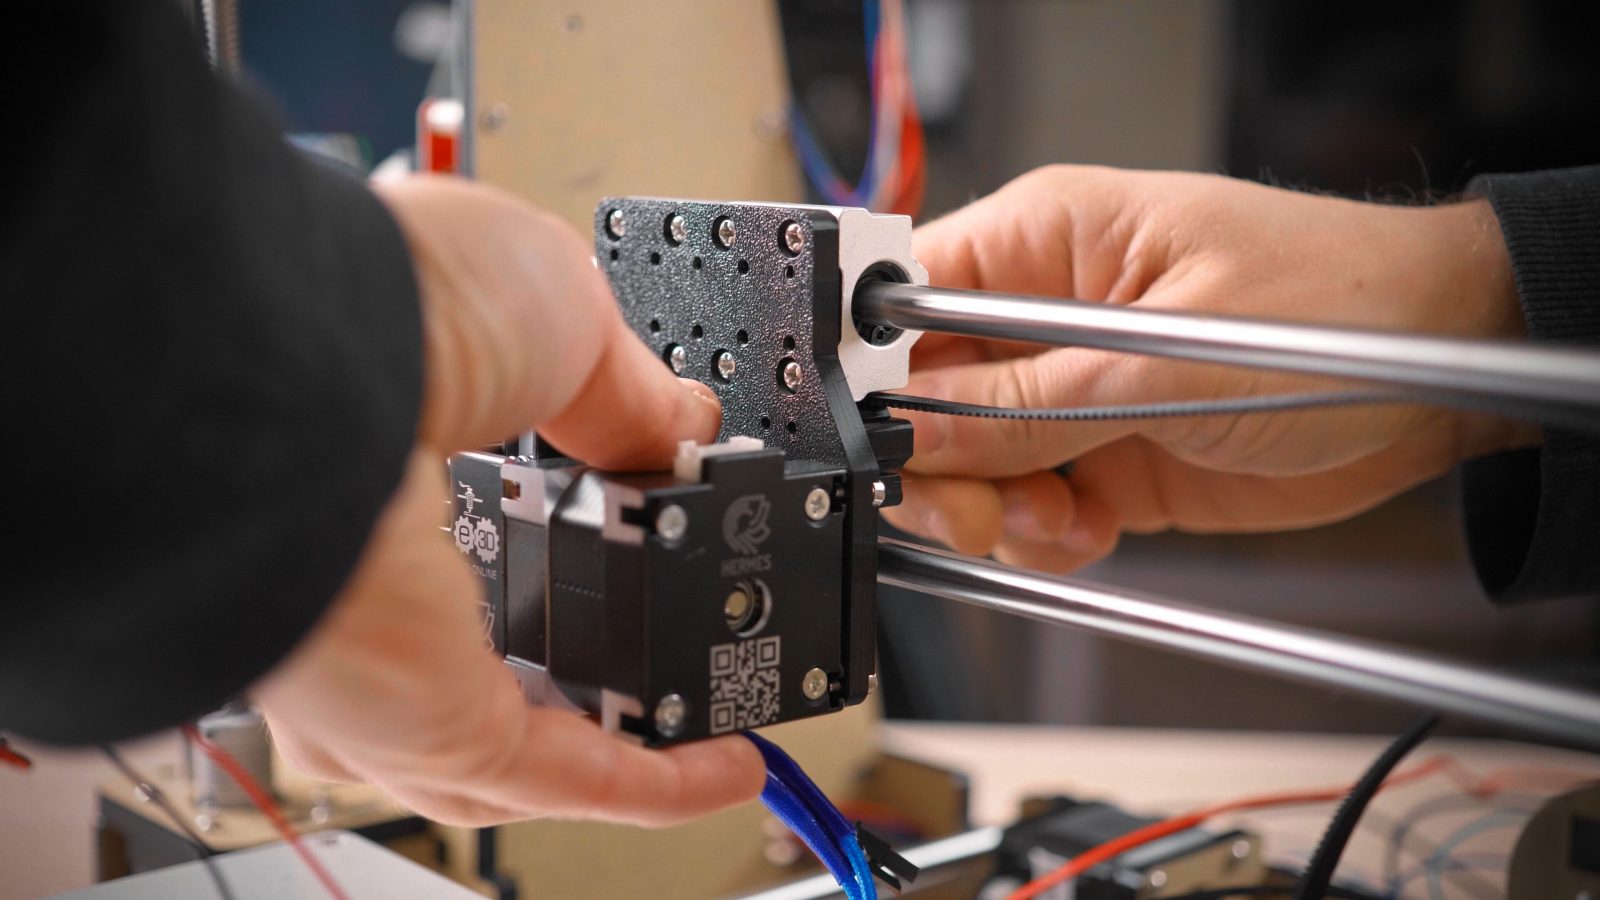
Next, we can mount the Hemera to the carriage. Grab the included M3x8 screws and insert two of the square nuts into the slots of the Hemera’s end plate. Then screw the Hemera to the carriage from the back. If you’re having trouble with the square nuts falling out, you can easily put a piece of tape over the slot.
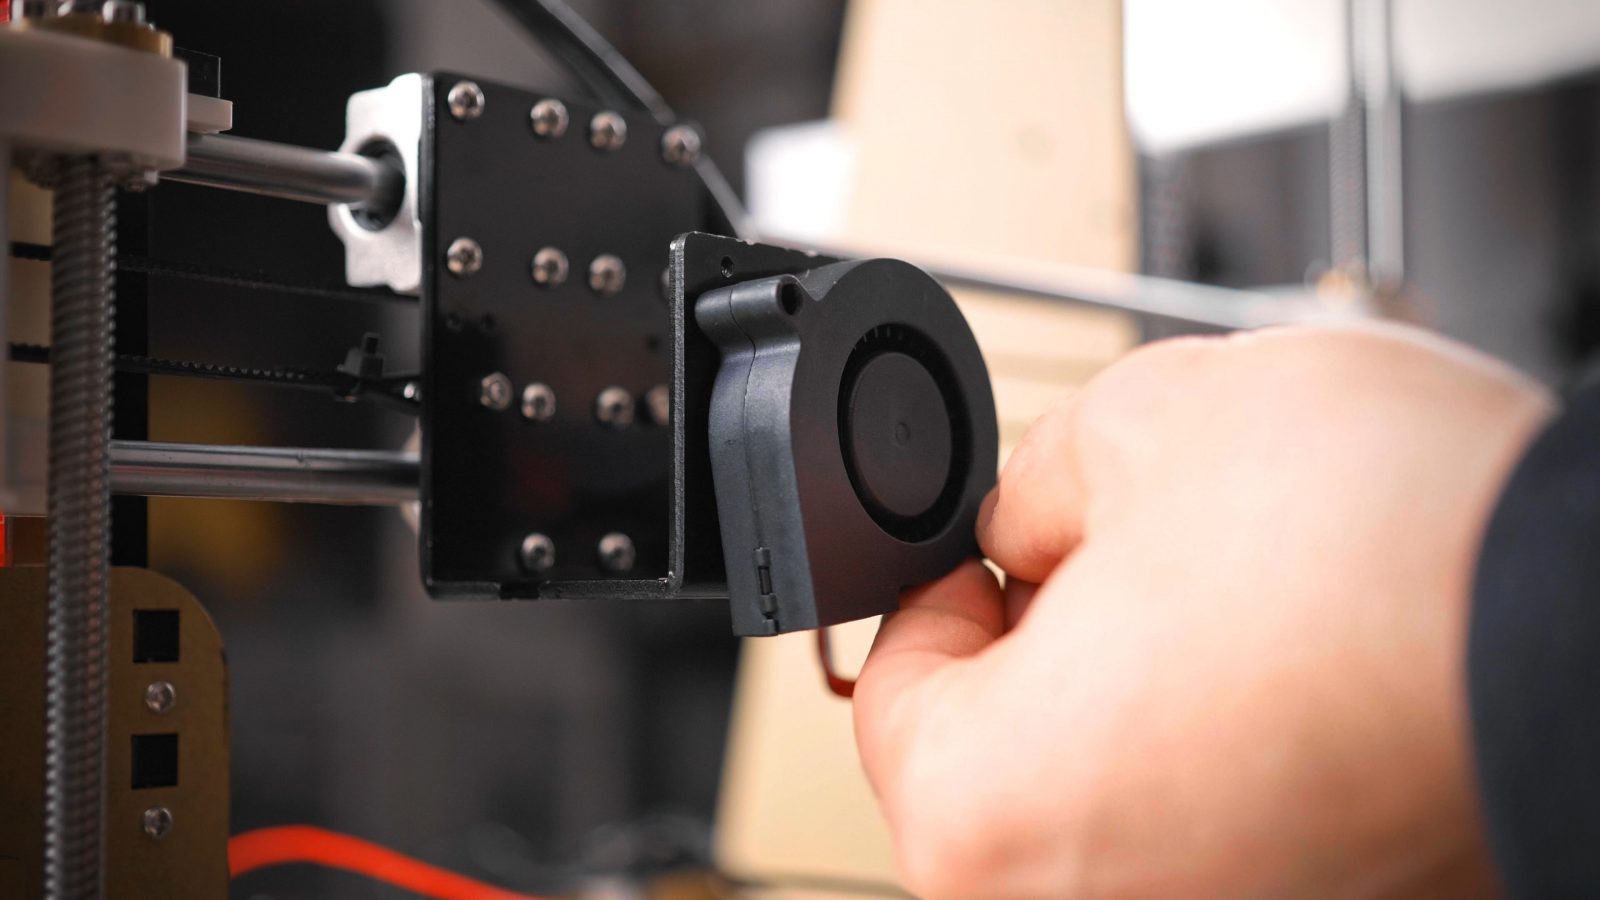
Next, mount the fan adapter plate onto the front side of the Hemera. Use two more square nuts and shorter M3x5 screws.
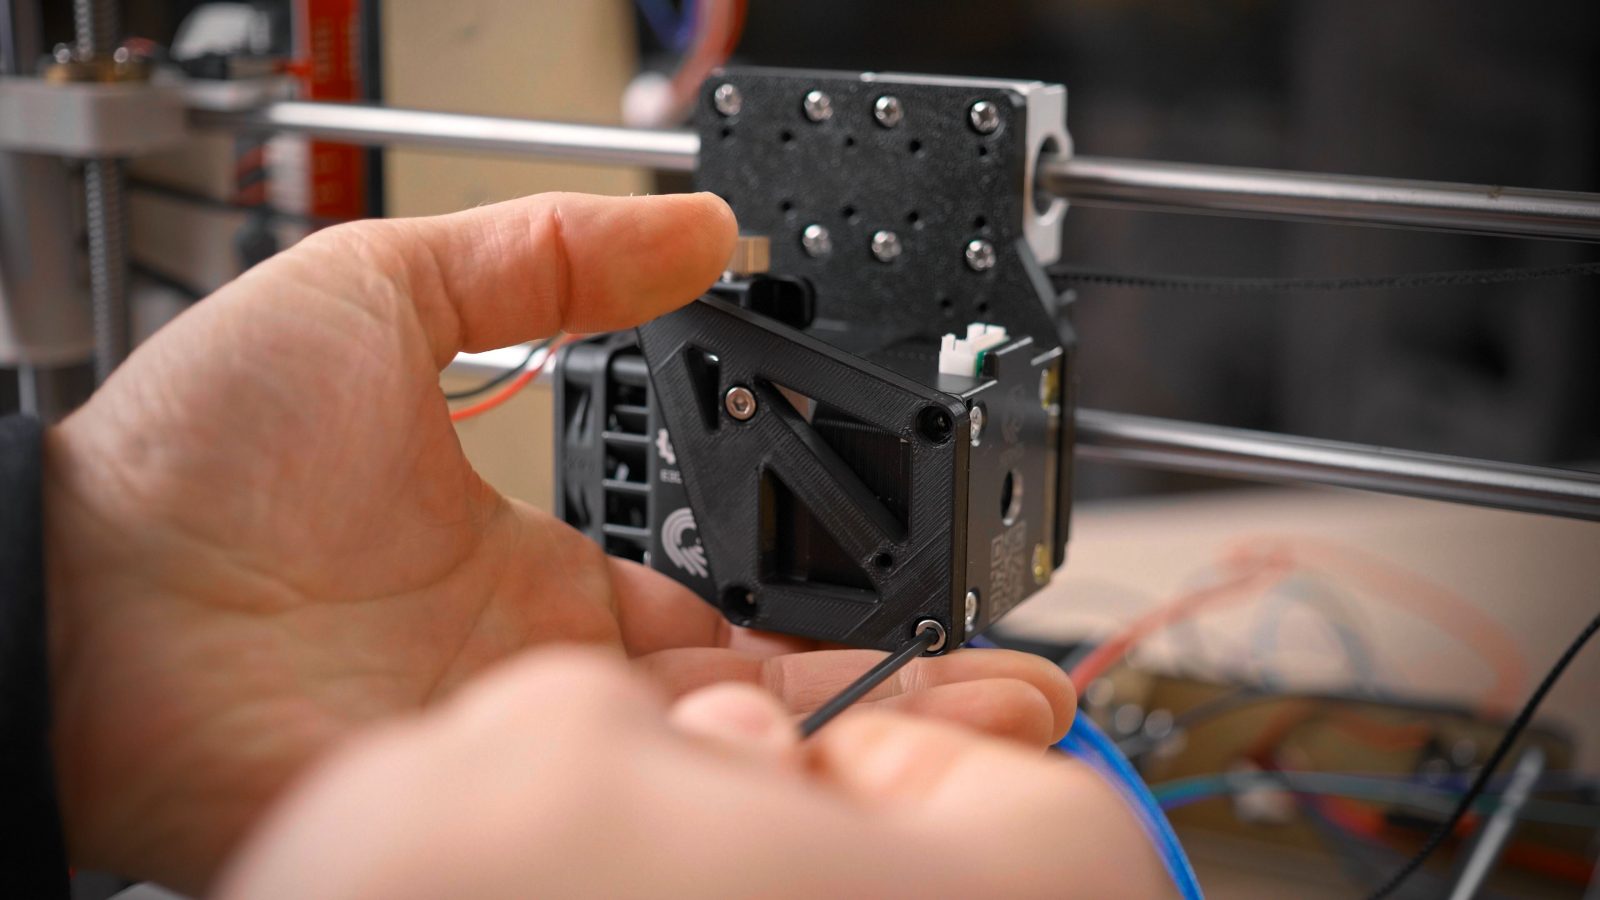
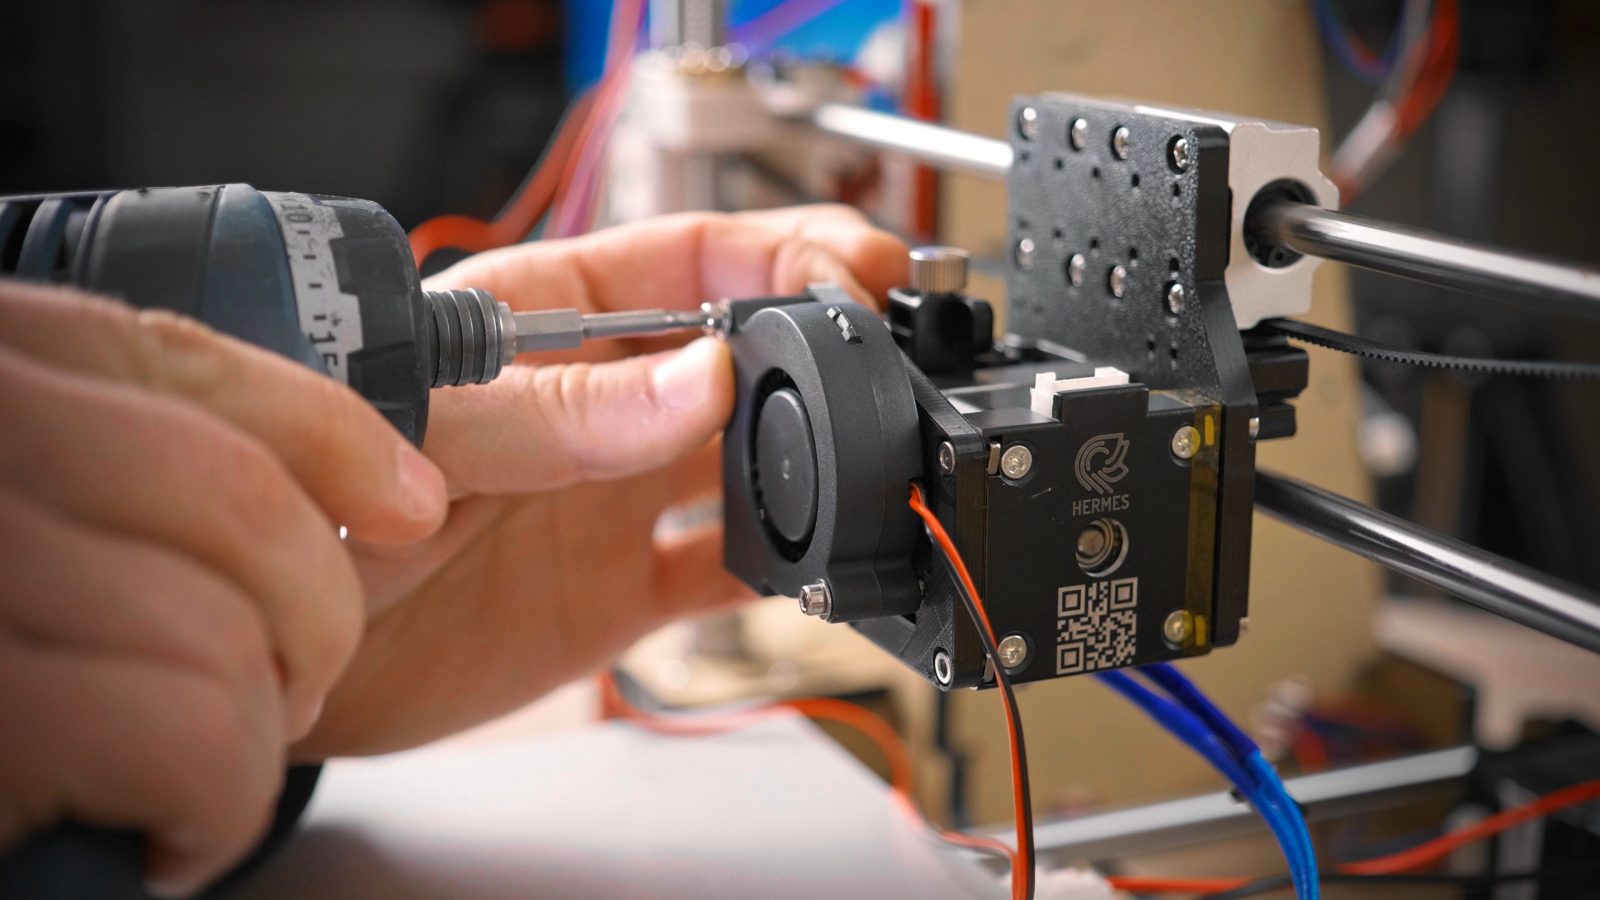
Then use the original fan screws and mount the fan to the adapter plate. You may need to push a bit to get the thread started.
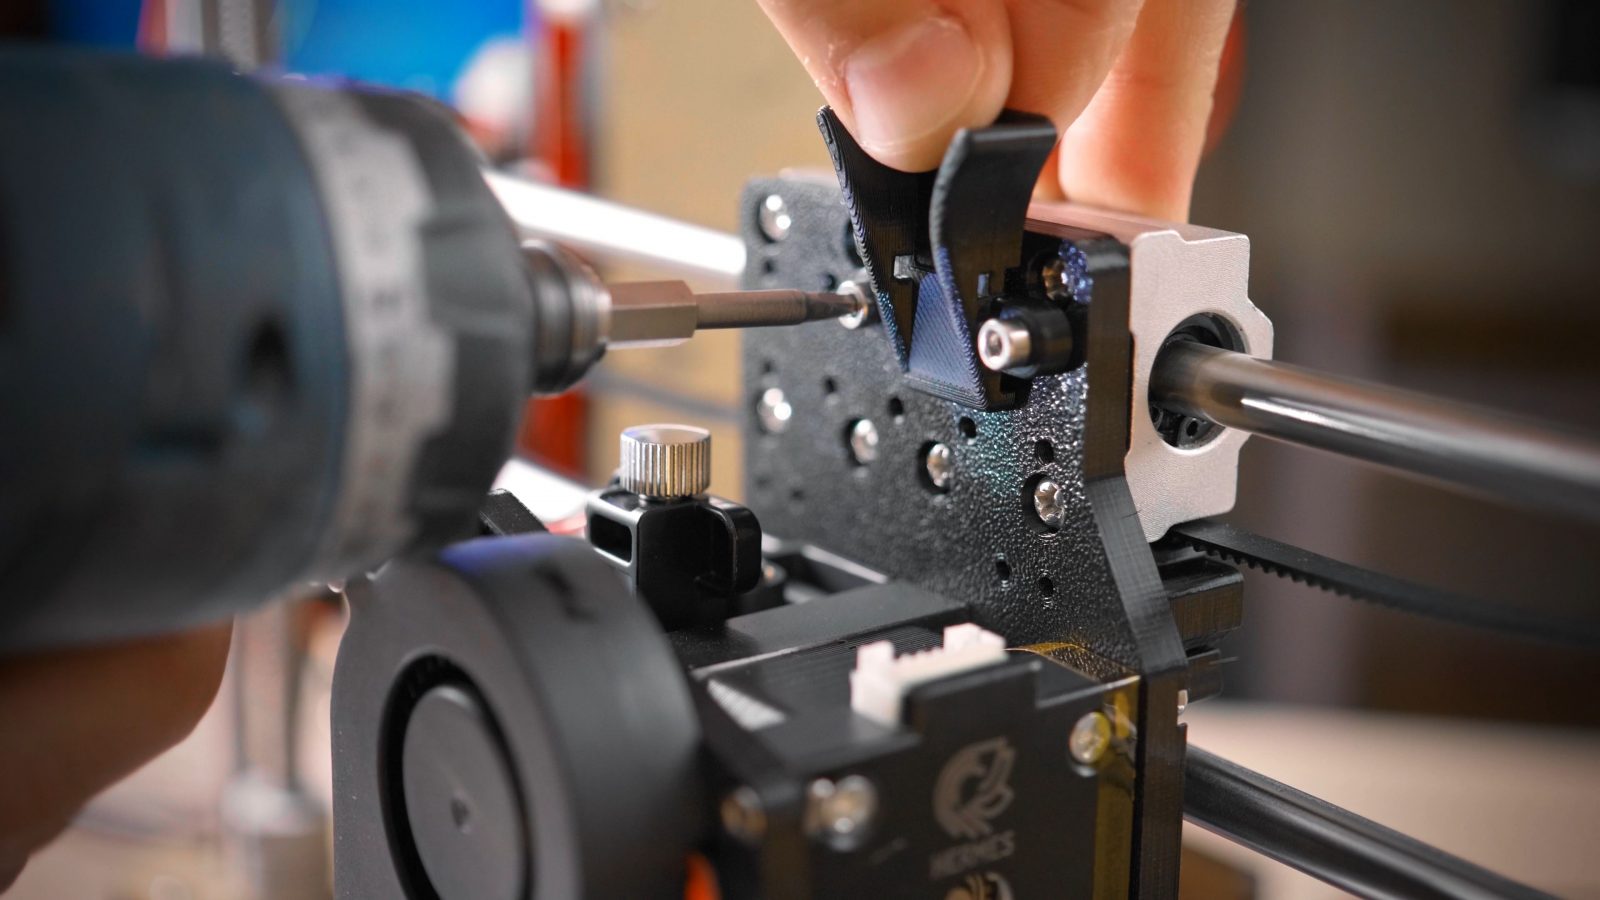
Lastly, let’s mount the strain relief wire guide. This can attach to any of the grid points above the extruder if your wiring is different, but I’ve found it to work well all the way to the right.
Use two M3x10 screw or any other screw that fits and bolt it down. By the way, there’s also a few extra grid points on the bottom edge of the carriage plate if you feel like mounting stuff there.
And that’s the carriage assembled! Let’s get it working!
For motion, we need to attach the belt. This is a screwless mount, simply slide the belt in on one side, then grab a pair of needle-nose pliers and slide in the other side under slight tension.
Next up, wiring. We’re reusing the original motor connector and part cooling fan, so they can stay wired in. The hotend heater can use the same terminal as the stock one. The Hemera comes with ferrules around its wires, which makes this a really clean install. The hotend cooling fan is fairly simple, too. Carefully pull off the white connector shroud from the board, then plug the connector on the Hemera fan into the pins, making sure you get the polarity right by matching the red and black wires to the orientation of the part cooling fan’s wires.
For the thermistor, you have a few different options. If you have a three-pin housing for these “Dupont” style connectors, you can remove the wires from the supplied two-pin housing by bending up these tabs, and insert them into the two outermost spots in the three-pin. Then peel off the connector shroud on the board and plug it in. Polarity does not matter here.
Alternatively, you can also cut the connector off and solder on the stock thermistor’s connector.
Now, to get the wires in order, pull two zip ties through the strain relief guide and tie down the wire bundle from the hotend after you’ve wrapped it with the spiral wrap.
At this point, you could start up the printer and start cranking out parts, but it would severely underextrude and the temperatures would be off. So because the A8 could do with a few more firmware fixes anyway, I’m providing a fresh setup of Marlin 2.0 beta that not only is ready to go for the Hemera and v6 hotend, but also enables all thermal safety features. You can compile and upload the firmware yourself and you can make any changes you’d like, like enabling autoleveling etc, but the easiest way to get going is to flash the provided .hex file. Some A8 printers have a bootloader, which means you can flash it with the built-in tools in the old Cura or I think Prusa Slicer, too, mine didn’t have a bootloader, so I flashed it with an Arduino as ISP. There are plenty of guides for that already out there.
For slicing settings, as always, any default profile should work. You should be able to slightly reduce the retract length and your extruder is not going to be the limiting factor for flow rate anymore. While the firmware does account for the slightly changed XY nozzle position, you should still adjust the z-axis endstop and level the bed before you get printing, though.
And that’s it! Check the links in the description for the official shops carrying genuine Hemera extruders and for links to the mounting parts and the new firmware. If this video was too fast for you, you can also find the text version of this guide on E3D’s wiki, and I’ve got one last favor to ask – I see that over two thirds of you who are watching this content aren’t subscribed. So if you’re enjoying this stuff and apparently you do because you’ve watched this video all the way to end, maybe just click that subscribe button. And YouTube is now giving you pretty good control over what notifications you want to get for a channel with that bell menu – none, algorithm recommended or just straight up all of them, just pick the one that suits you best. Obviously, all, right?
So if you want to keep going with upgrading the A8, the internet has guides for replacing the electronics, frame, linear rails, belts, display, power supply, wiring, you know, every part of the printer. But first of all, make sure the wiring especially for the heated bed is safe and won’t break over time.
💙 Enjoying the videos? Support my work on Patreon!
Product links are affiliate links – I may earn a commission on qualifying purchases (at no extra cost to you)

Check out my second channel “More Layers” on YouTube for livestreams
