
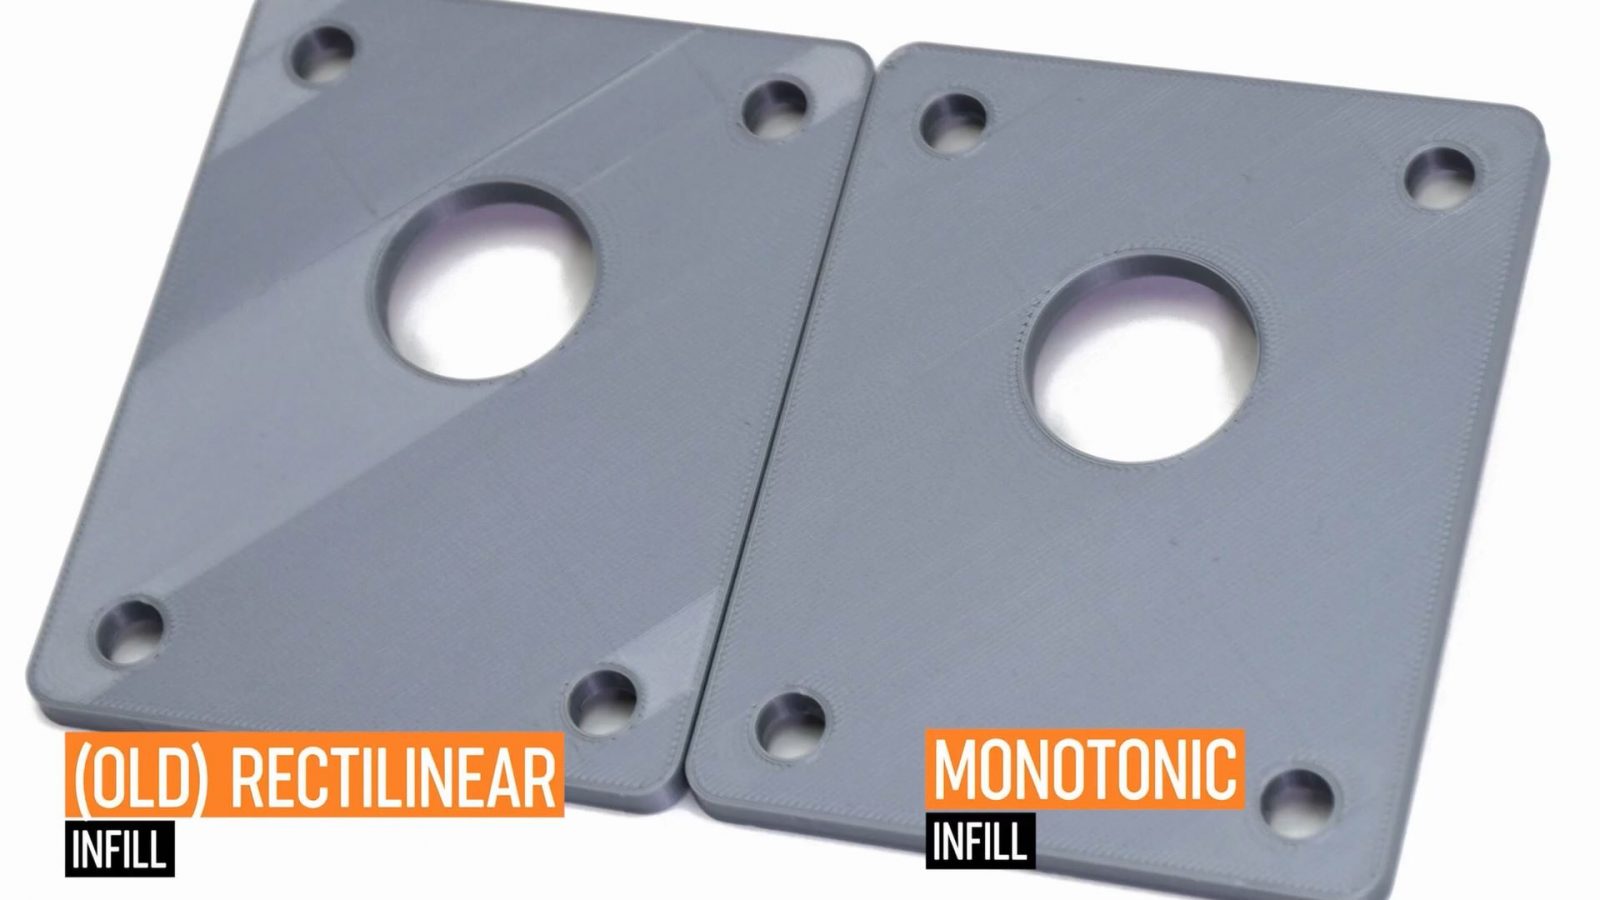
PrusaSlicer 2.3 is out! At least, by the time you’re watching this video (or reading this article ;-), it should be out, and it comes with new features like monotonic top infill, ironing, paint-on support material, and automatic variable infill patterns.
Here’s the thing, though – PrusaSlicer and all the features it comes with are not exclusive to the Original Prusa 3D printers. In fact, Prusa actually reached out and asked if they could sponsor this video where I show you how to set up the new PrusaSlicer for basically any 3D printer. It’s free and open-source software, so this is basically a free upgrade for the printer you already have.
Download and Set Up
Let’s get right into it!
Step 1: Download and install PrusaSlicer from prusa3d.com, you can get the stable versions right from the site, or, if you want the absolutely newest, unstable version, you grab that straight from the linked GitHub page.
Step 2: Run the configuration wizard. PrusaSlicer 2.3 is integrating a lot more ready-made community profiles, and chances are you’re going to find a ready-to-go profile for maybe the exact printer you have or one that is similar enough. For example, the Ender-3 profile is going to be a great starting point for the Ender-3 Pro, too, as well as the Ender-3 v2 and basically any other printer that is built like an Ender-3, which is… almost all of them, actually.
Hit finish, and that’s it – PrusaSlicer is now ready to use for your printer. Thanks for watching, happy holidays, and I’ll… No, just kidding.
Custom Printer Options
I mean, this is a perfect option if your printer is already in there, but let’s go through the “custom printer” option, and the changes I usually make, just to make my life a bit easier. Also, we’re going to steal some profiles from the Original Prusa machines.
So, in the configuration wizard, which you can get to through the “Configuration” menu, the first thing to do is to actually enable a profile for an Original Prusa printer, for example for the MK3S with a 0.4mm nozzle. We’re going to need that later.
Then, of course, the next step is in the “Custom Printer” menu. First, choose a printer name, then for the firmware, you’re probably going to want to choose “Marlin”, but some printers, especially when they’re running weird, proprietary firmware, might need RepRap/Sprinter selected here in case they act up with the “Marlin” setting.
Next, for bed shape and size, just plop in the usable print area of your machine. Then, in “Filament and Nozzle Diameters”, the default of 0.4mm for the nozzle and 1.75mm for filament are correct for 99.9% of printers out there, and then, for temperatures, I like to go with a basic 210°C at 60°C for PLA. Now, this will create a new, very basic filament profile, but since I’m going to show you how to snatch profiles off of the MK3S, what you put in here doesn’t matter much.
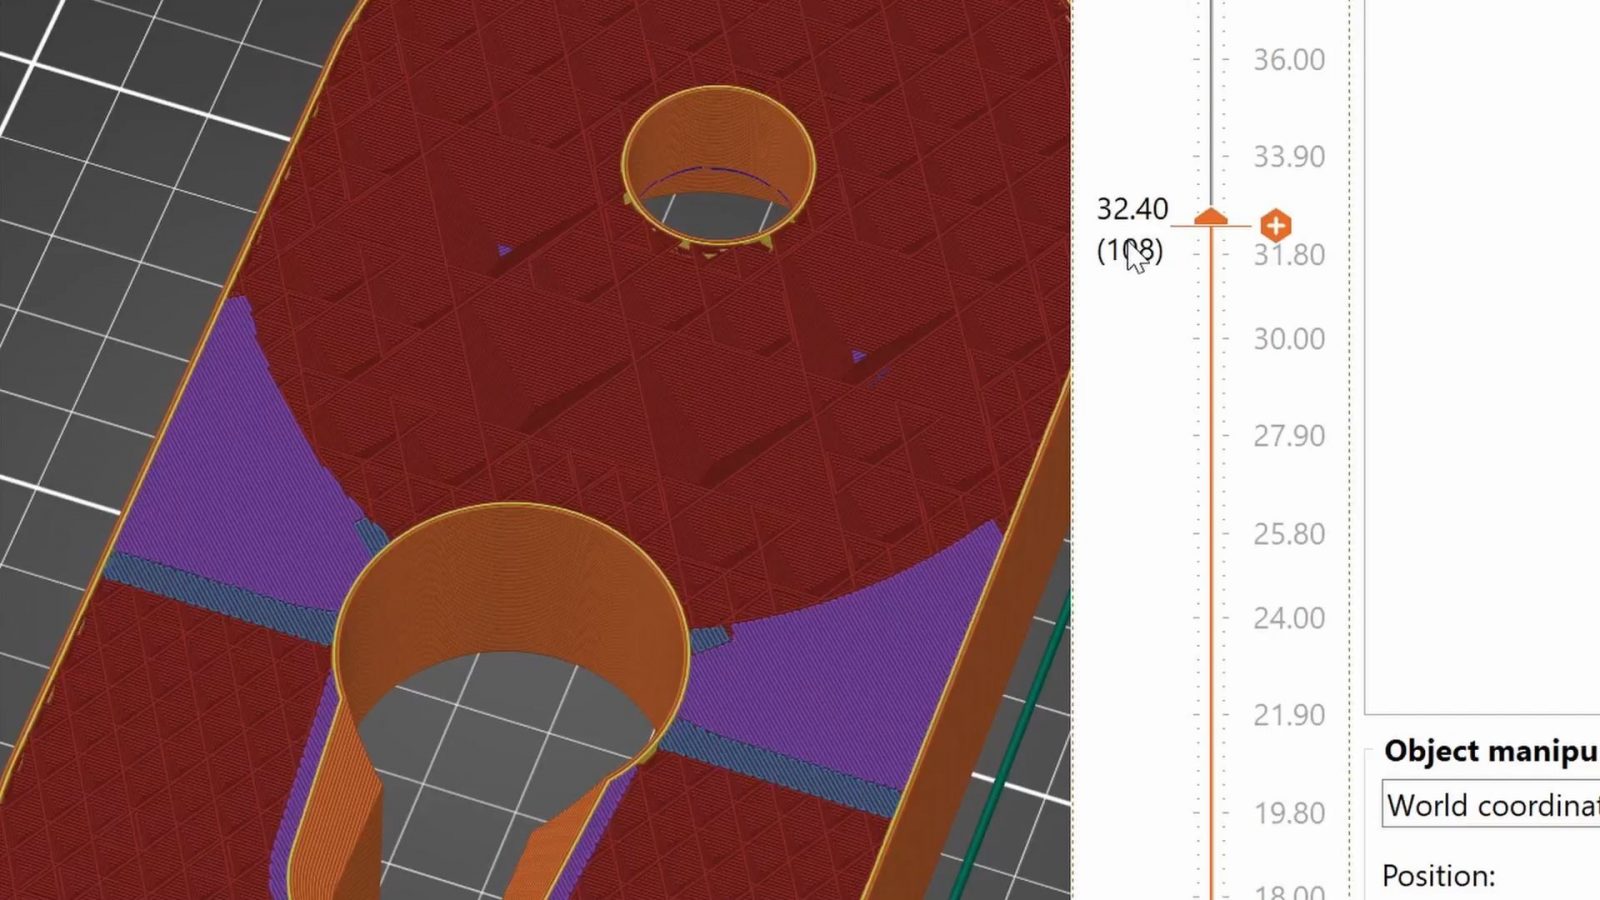
For now, hit “Finish” and you’ll have new profiles for print settings, filament, and the printer. And you can totally use those or make tweaks off of them, for example, I would recommend reducing the layer height from the 0.3mm that comes set up as default, as well as tuning down speeds a bit, as they’re about 50% faster than what is usually considered “safe” speeds to get good prints on most machines. But those adjustments won’t get used when you use a different print or filament profile – however, the “Printer” profile is one that we’re going to keep, so let’s get this one dialed in. First things first, switch to the “Expert” view mode, which is going to show you all the settings available. Once we’re done setting everything up, you can always switch back to “Basic” or “Advanced” mode to hide the settings you’re not going to be using anyway. You don’t have to, and actually, shouldn’t mess with a lot of these settings, but here are the ones that are important. In the “General” tab, set the maximum print height to the height your printer can safely reach.
Then, in “Custom G-code”, we’re going to adjust the start and end gcode, that is the commands the printer always runs before and after the actual print. For the Start G-code, first of all, if you have a bed probe on your printer, you can run an auto-leveling pass by adding a line with “G29” right after G28, which is just homing. Then, if you want the nozzle priming line that the printer does at the front edge of the bed before it starts the actual print, you’re going to need to make sure everything is preheated before it tries to do that and that the printer then runs the actual priming line. And that looks like this.
I’m also putting the full start and end gcode in the video description so that you can just copy and paste it.
Now, for the end gcode, there are two things to add, first, for some reason, by default it’s missing the command to cool down the bed, that is M140 S0, and then, if you want the printer to move the print bed towards you when the print finishes, that’s G1 Y200 F9001 – if you have a moving bed on your printer, that is, otherwise, this is going to move your toolhead back, which is fine, too, I guess.
Next, “Machine limits”, my recommendation here is to change these to “Use for time estimate”, because otherwise, some limits already set in your printer may get overwritten, which can cause issues with reliability.
Lastly, in “Extruder 1”, you’ll find the “fun” settings, specifically for retraction. The default length is 2mm, but for a direct-drive extruder, I’d recommend 1mm or less, for a Bowden, you probably want around 4mm.
Enabling “Lift Z” with a lift height of 0.5mm is also a good idea unless your printer’s Z-axis is super extra slow, but generally, this cuts down on stringing a bit, keeps the nozzle from knocking over the print, and doesn’t really impact print time.
It’s kind of the same with “Wipe while retracting”, just check the box, it makes your prints a tiny bit nicer, and doesn’t harm anything.
So, about the other two components of the PrusaSlicer config – the tabs called “Print Settings” and “Filament Settings”. Like I said, the settings in there right now are usable, but PrusaSlicer comes with better profiles that, by default, are marked as only being compatible with the Prusa 3D printers. But we can actually tell PrusaSlicer something like “you know, that thing about these profiles being made for specific printers, they’re not made for specific printers”.
Keep in mind, though, that while filament profiles work pretty much universally, the print settings profiles could need a bit of adjustment depending on your exact printer setup. Generally, though, they should be a bit more refined than the default profile that generates with a custom printer setup.
So, to grab a profile from the MK3S, let’s start with the print settings: Make sure to have the MK3S selected as your current printer, as well as the profile you want to copy. Then go into the print settings tab and all the way down at “Dependencies”, click “detach from system preset”, then yes, and pick a new name, something like “0.15mm Quality Universal”. Then, make sure the new profile is selected, which it will be by default, and check “all” for compatible printers, and delete the line for compatibility conditions. Now, if you choose your custom printer again, you’ll see that you can now use the copied profile for that machine as well.
It’s similar for filament settings, again, make sure the MK3S is selected, then go to the filament profile you want to copy, click detach, choose a new name, and then for the new profile, make sure both checkboxes are clicked to “all” and the text boxes are empty for the compatibility conditions.
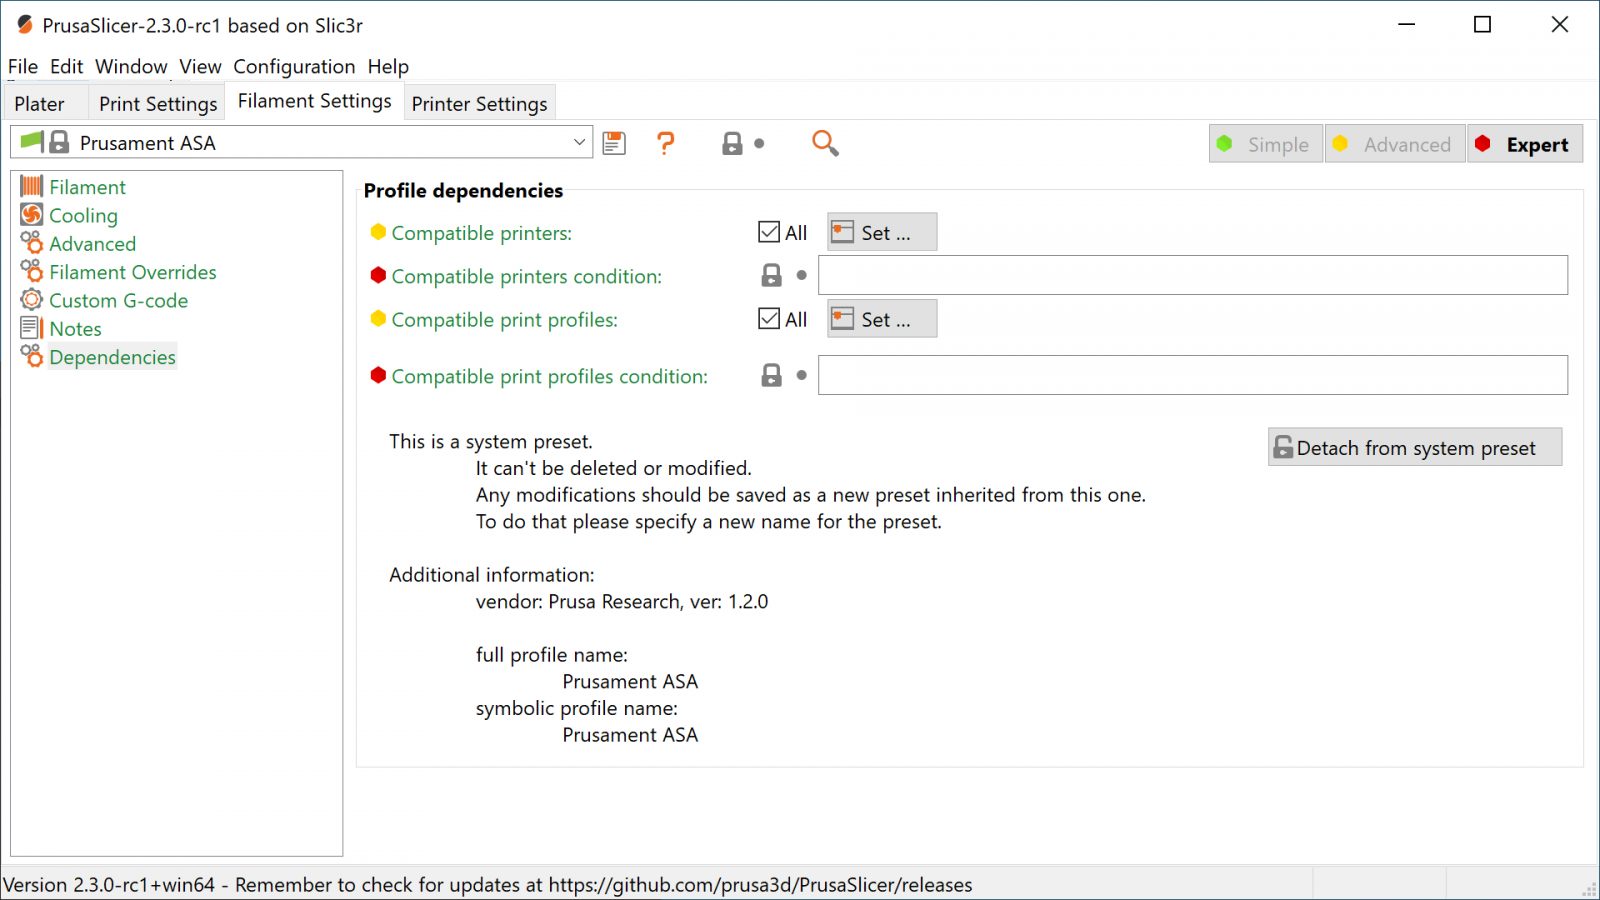
You should also check that in the “Custom G-code” settings, both boxes are empty – these settings are specific to the MK3S in this case. And also, for the “Filament Overrides” settings, these temporarily change some of the options in “print settings” when you have this specific filament profile selected. It’s a feature that can be very useful, but the settings in there right now are set up for a direct-drive printer, so if you’re using a Bowden printer or a printer where you think these overrides won’t work, you should probably disable these.
And there you go – you’ve got PrusaSlicer set up for your own printer with, what I think, is a really good, universal set of print settings. Now, again, these might still need some tuning for your specific printer. The one thing I like to do is to fatten up the first layer to make it less sensitive to bed leveling errors, you can do this in “Print Settings” by increasing the first layer height to about ¾ of your nozzle size, so around 0.3mm, and also making the extrusion track wider in the “Advanced” settings under “extrusion width”, “first layer”. I found that 1mm works great here.
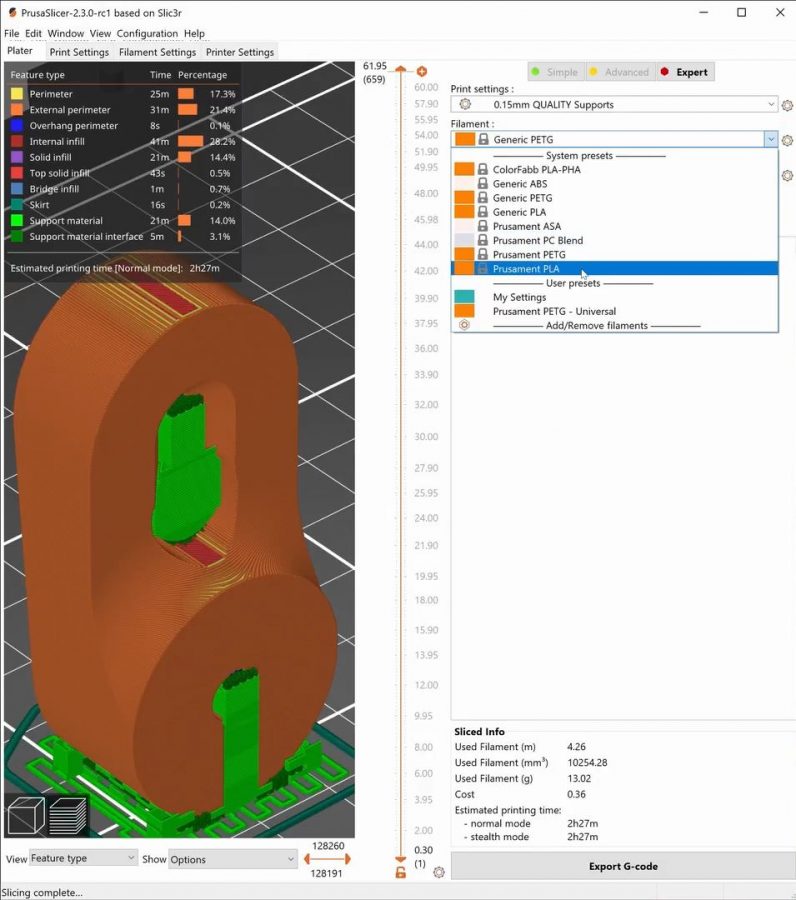
So what do you actually get, now that you’re set up with PrusaSlicer? Here are some of the features that I find super useful. First, what you already saw, the separation of print settings and filament settings. So you can have your profiles for fast printing, printing with supports, vase mode, etc, and then an independent set of profiles for printing with PLA, PETG, ASA, wood fill, etc, without having to create a separate profile for every possible combination of specific print settings and a filament.
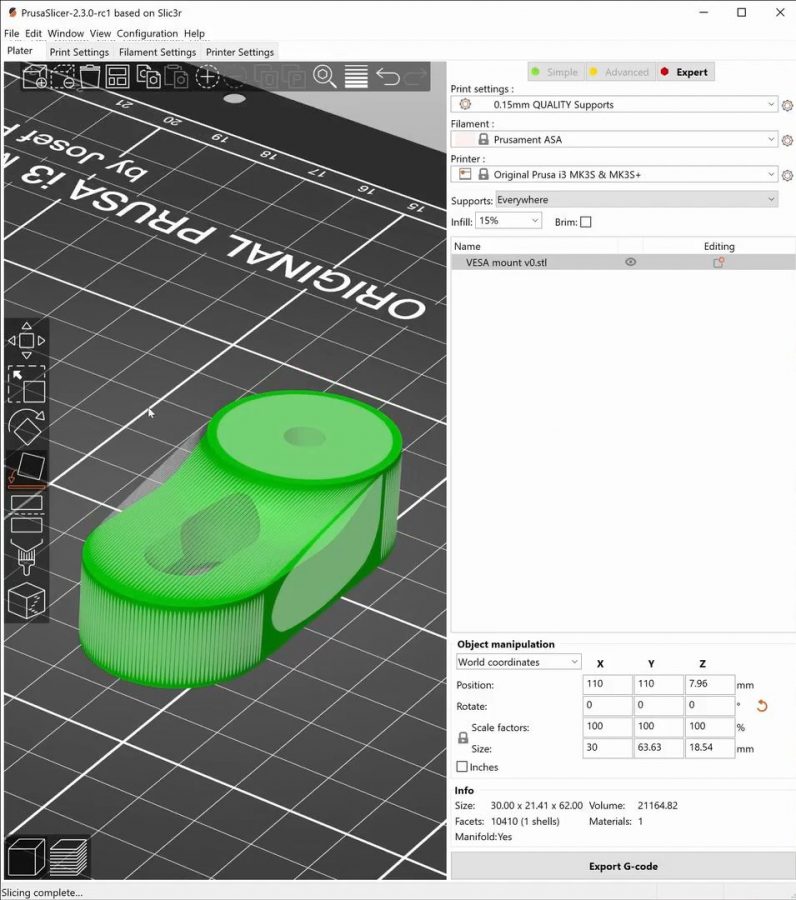
Then, in the plater, the absolute best timesaver is the lay-flat tool, you can find it on the toolbar on the left here, and from there it’s literally just a single click to rotate your part into the perfect orientation for printing. That’s so much better than messing around with rotation handles. Which… you can still do, but why would you?
What I also use is “Background processing”, which you can enable in Configuration – Preferences, which makes seeing what the different settings do a whole lot faster. By the time you click back to the “Plater” tab, usually, your part is already going to be sliced and ready with your new settings.
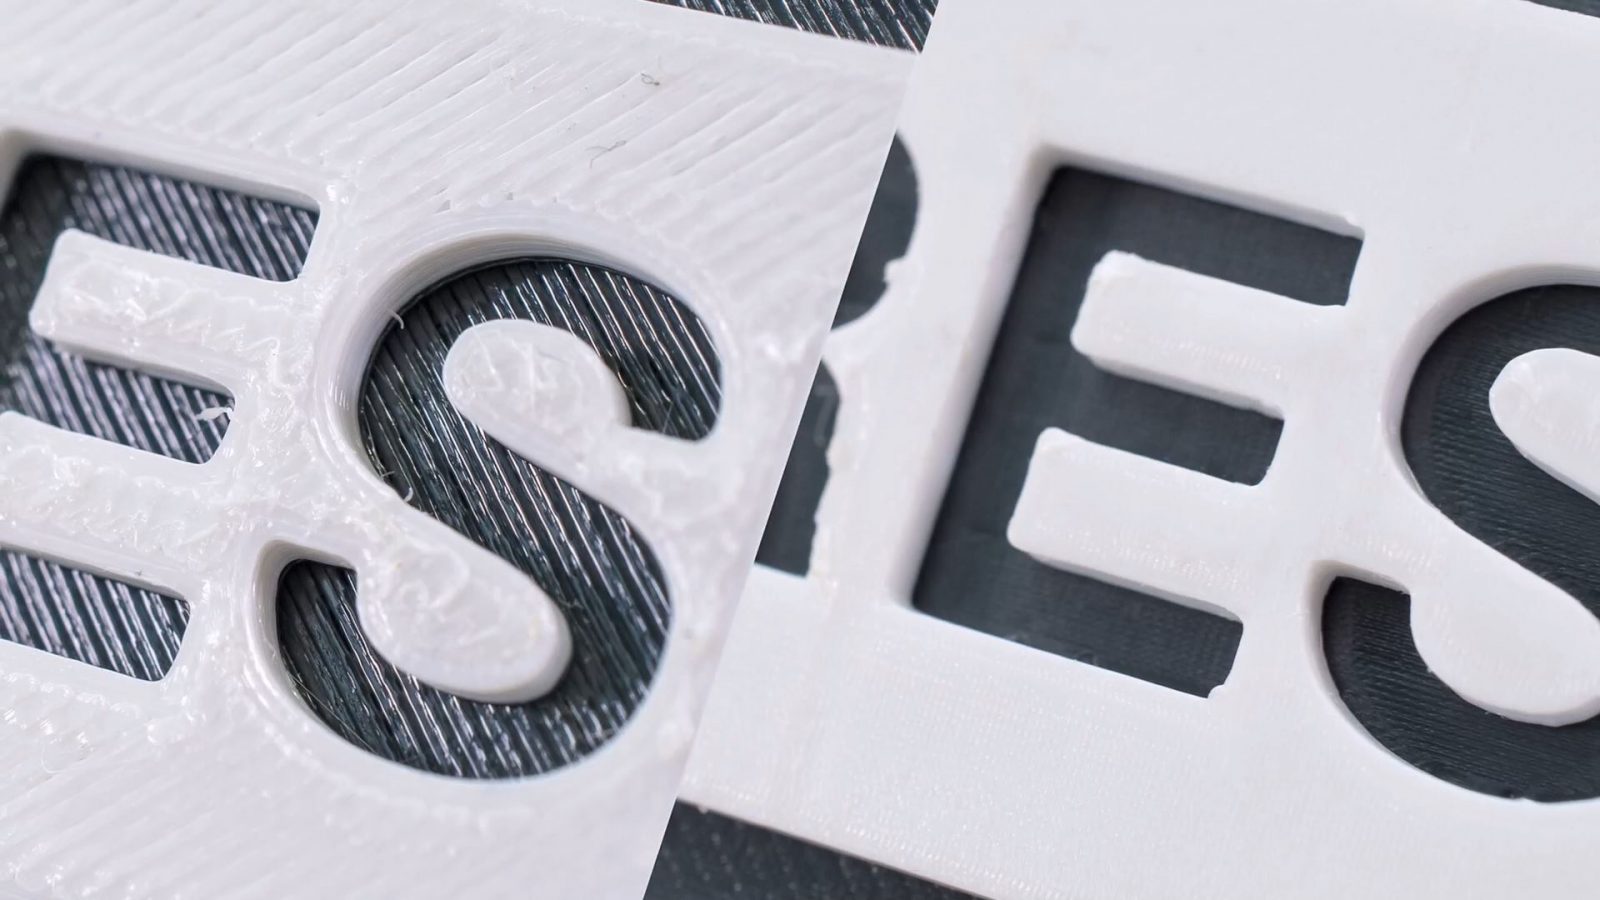
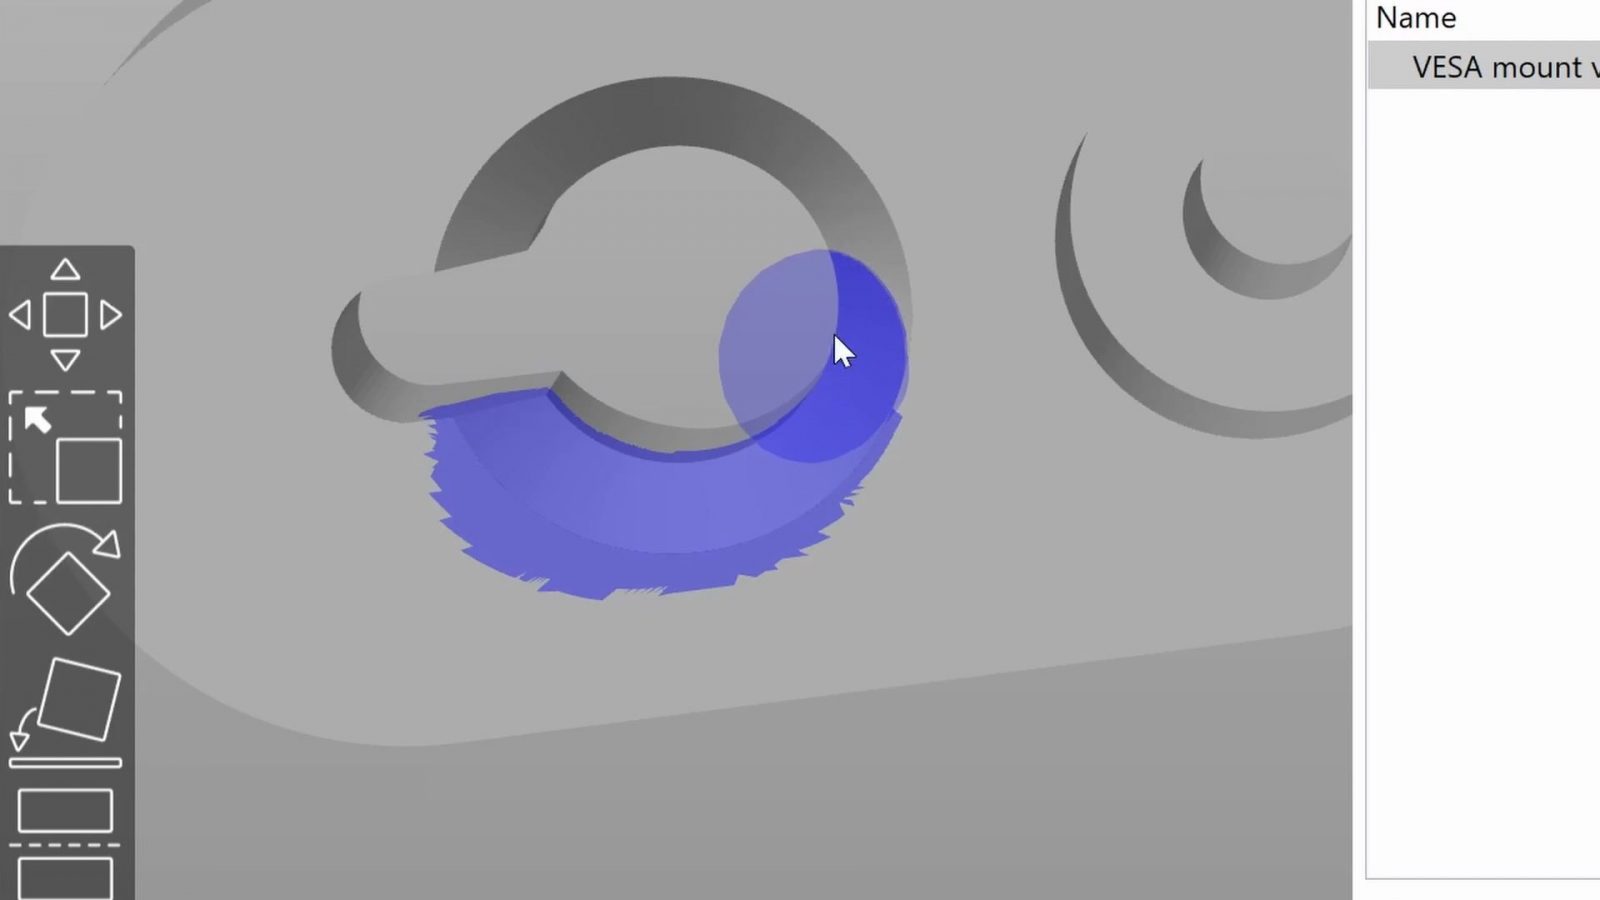
And of course, there are the new options of using paint-on support material, ironing, adaptive cubic infill, but covering all those in detail would be its own entire video. If you want to learn more about them, Prusa already has videos up, covering the new features.
In any case, if you create a profile that works really well for your specific printer, please do share it with people that could make use of it as well, you can export and import profiles directly from the file menu. Or, if you’re a manufacturer, there’s an official guide of how you can create your own config bundle that can then be included with the official PrusaSlicer releases.
Thanks again to PrusaResearch for sponsoring this video and thank you to all my Patrons for your continued support, without you, I really couldn’t be making these videos. 2020 has been a huge learning experience for me, and honestly, things can only get better in 2021. I would like to thank you all so much for watching, like the video if you did, subscribe to see more like it, keep on making, and I’ll see you in the next year. Happy holidays! Stay safe everyone.
Start gcode:
(the [ ] sections will get filled in by PrusaSlicer automatically in the exported gcode)
M104 S[first_layer_temperature] ; set extruder temp
M140 S[first_layer_bed_temperature] ; set bed temp
M190 S[first_layer_bed_temperature] ; wait for bed temp
M109 S[first_layer_temperature] ; wait for extruder temp
G28 ; home all axes
G29 ; autolevel
G1 Z5 F5000 ; lift nozzle
G1 Y0 F9001 ; go to front edge of the bed
G92 E0.0 ; reset extruder position
G1 X60.0 E9.0 F1000.0 ; intro line
G1 X100.0 E12.5 F1000.0 ; intro line
G92 E0.0 ; reset extruder position
End gcode:
M104 S0 ; turn off temperature
M140 S0 ; turn off heatbed
M107 ; turn off fan
G1 X0 Y200 F9001 ; home X axis, present print
M84 ; disable motors💙 Enjoying the videos? Support my work on Patreon!
Product links are affiliate links – I may earn a commission on qualifying purchases (at no extra cost to you)

Check out my second channel “More Layers” on YouTube for livestreams