
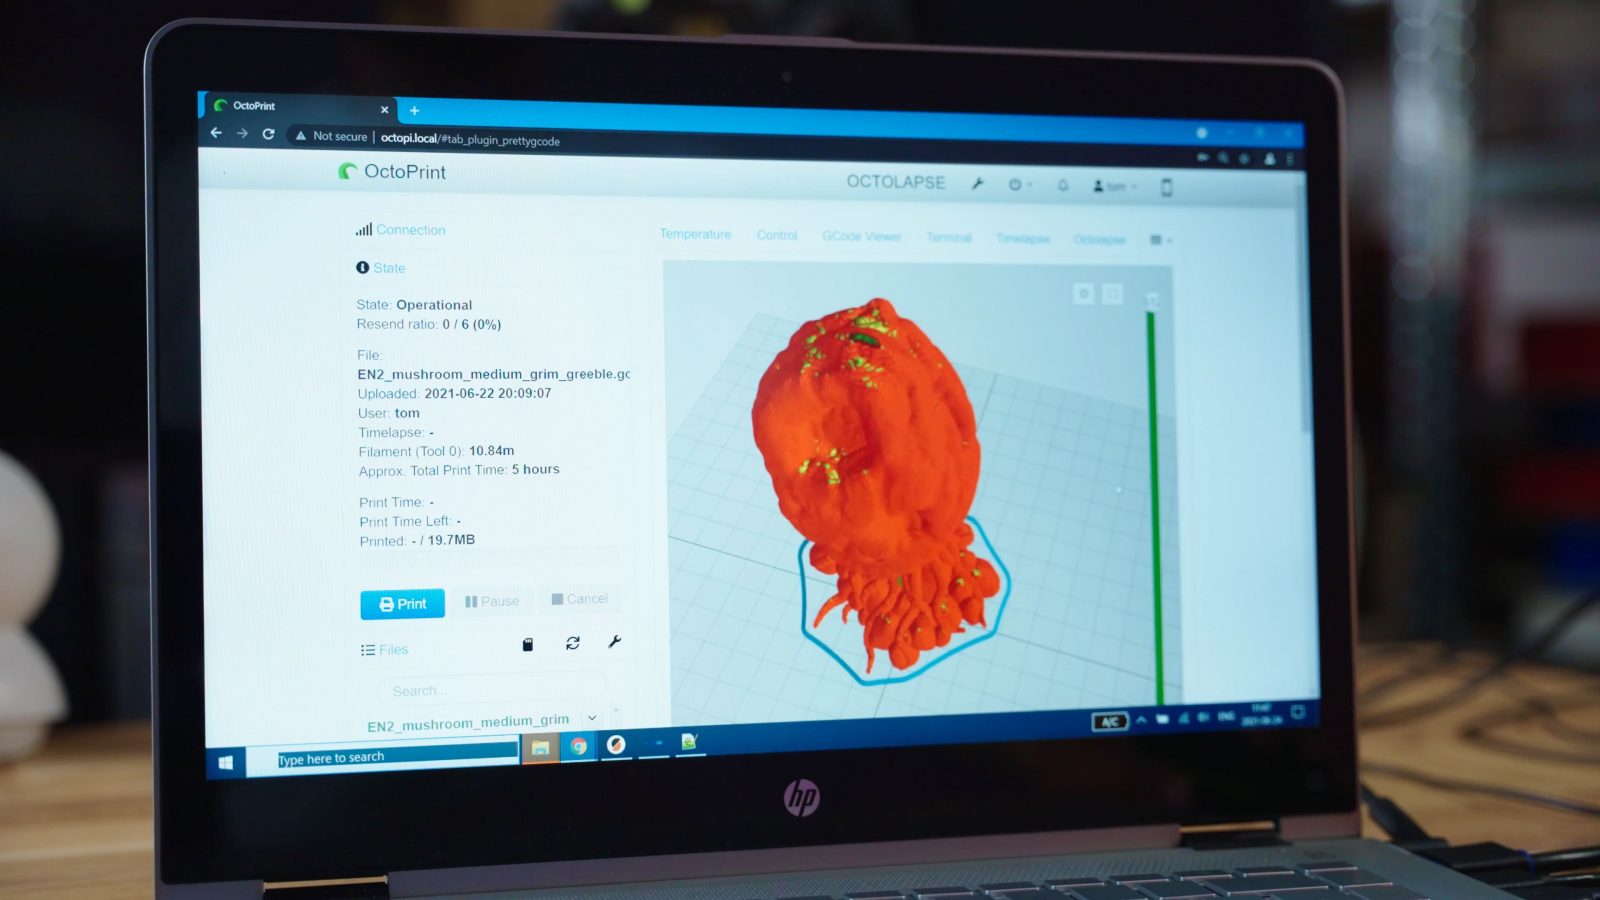
One of the most versatile pieces of tech for 3D printing is Octoprint – it’s a little webserver that runs on a Raspberry Pi and lets you remote-control a 3D printer from your computer. Or so you thought. Because the thing is, Octoprint is so much more than just a way to start and check in on prints remotely: It’s turning more and more into a full-on 3D printer operating system. There are plugins now that do everything from AI print watching over sending status infos over your favorite messenger to timelapse tools.
So today I’m going to walk you through the setup process on a Raspberry Pi, go over the hardware you need and I’m going to share some of my favorite plugins for Octoprint.
Hardware
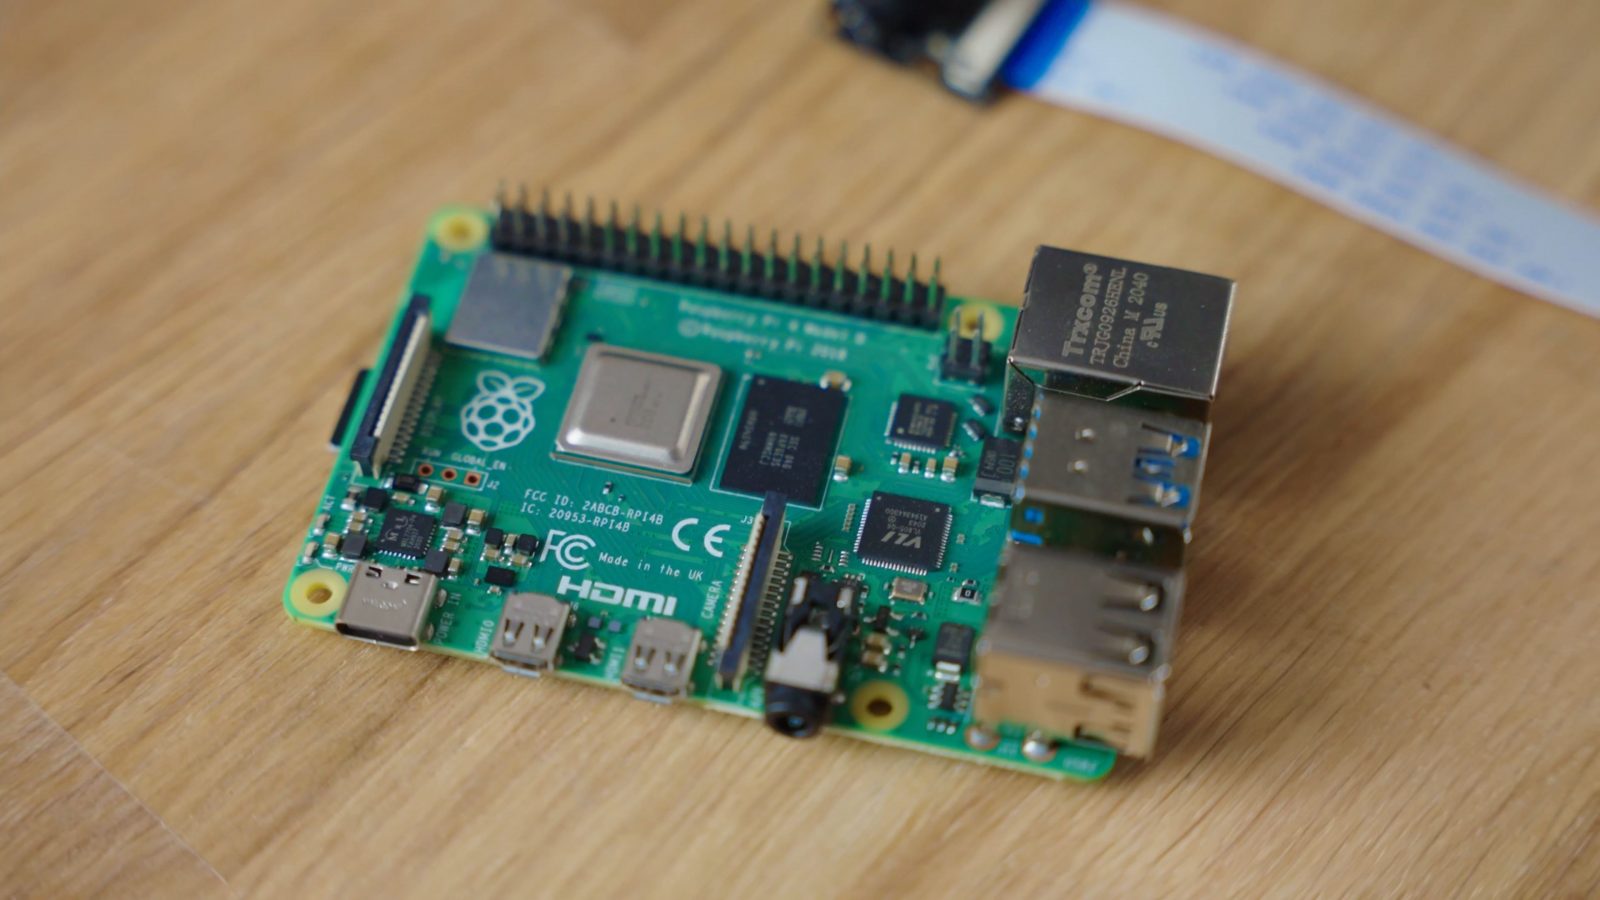
So let’s start out with the hardware needed. First of all, you’re going to need a Raspberry Pi. I’m using a Pi 4 with 2GB of RAM, and while OctoPrint can run on almost any Raspberry Pi ever made, you should stick to a Pi 3 and up for the best experience. Alternatively, you can also run OctoPrint on a Windows, Linux or Mac OS machine that you already have – as long as that’s not going to reboot in the middle of your prints someday. I’m looking at you, Windows 10.
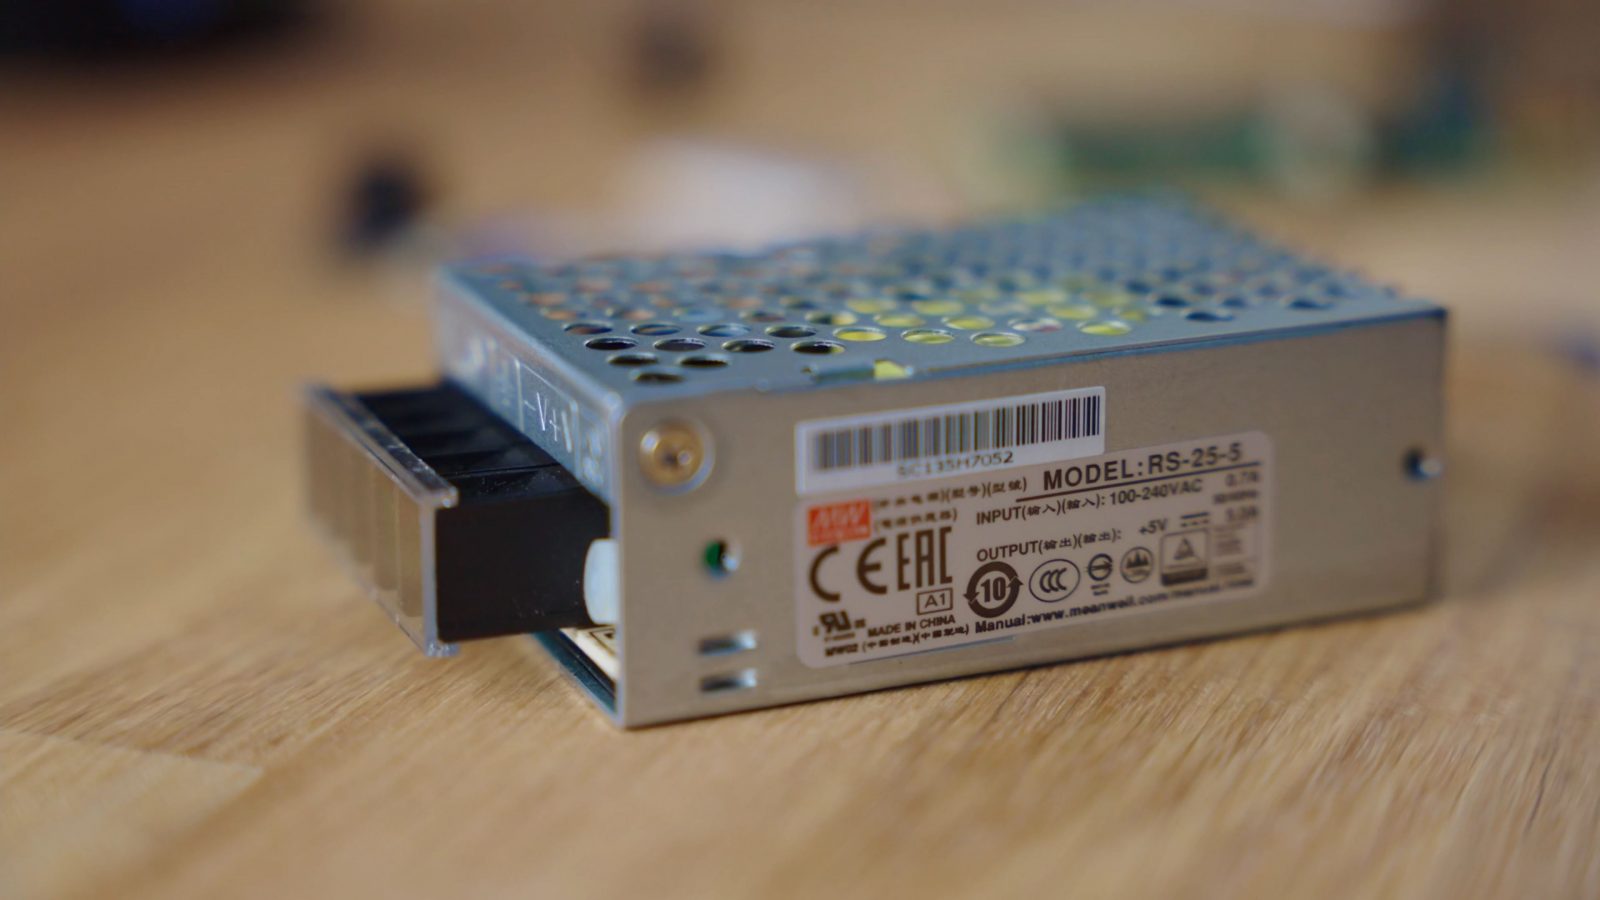
But for a Raspberry Pi, you’re also going to need a USB power supply, the recommendation is to not use a “charger”, but instead something that’s actually labeled a USB power supply. Though from a technical standpoint, there’s not really any difference between what they do, and especially after the 4, the Pis have also gotten much better power stages on them as well, so they’re not that finicky about the power supply you’re using anymore. However, in either case, it should be one with ample power, so your 1A charger you got from Apple is not going to work. I’ve had great experiences with the chargers/supplies from Anker, this basic dual- or triple-output one works perfectly. Or if you have a strong 5V supply in your printer, you can also hotwire that onto a USB cable. Just make sure to shut down the Pi through OctoPrint cleanly before you power off your printer.

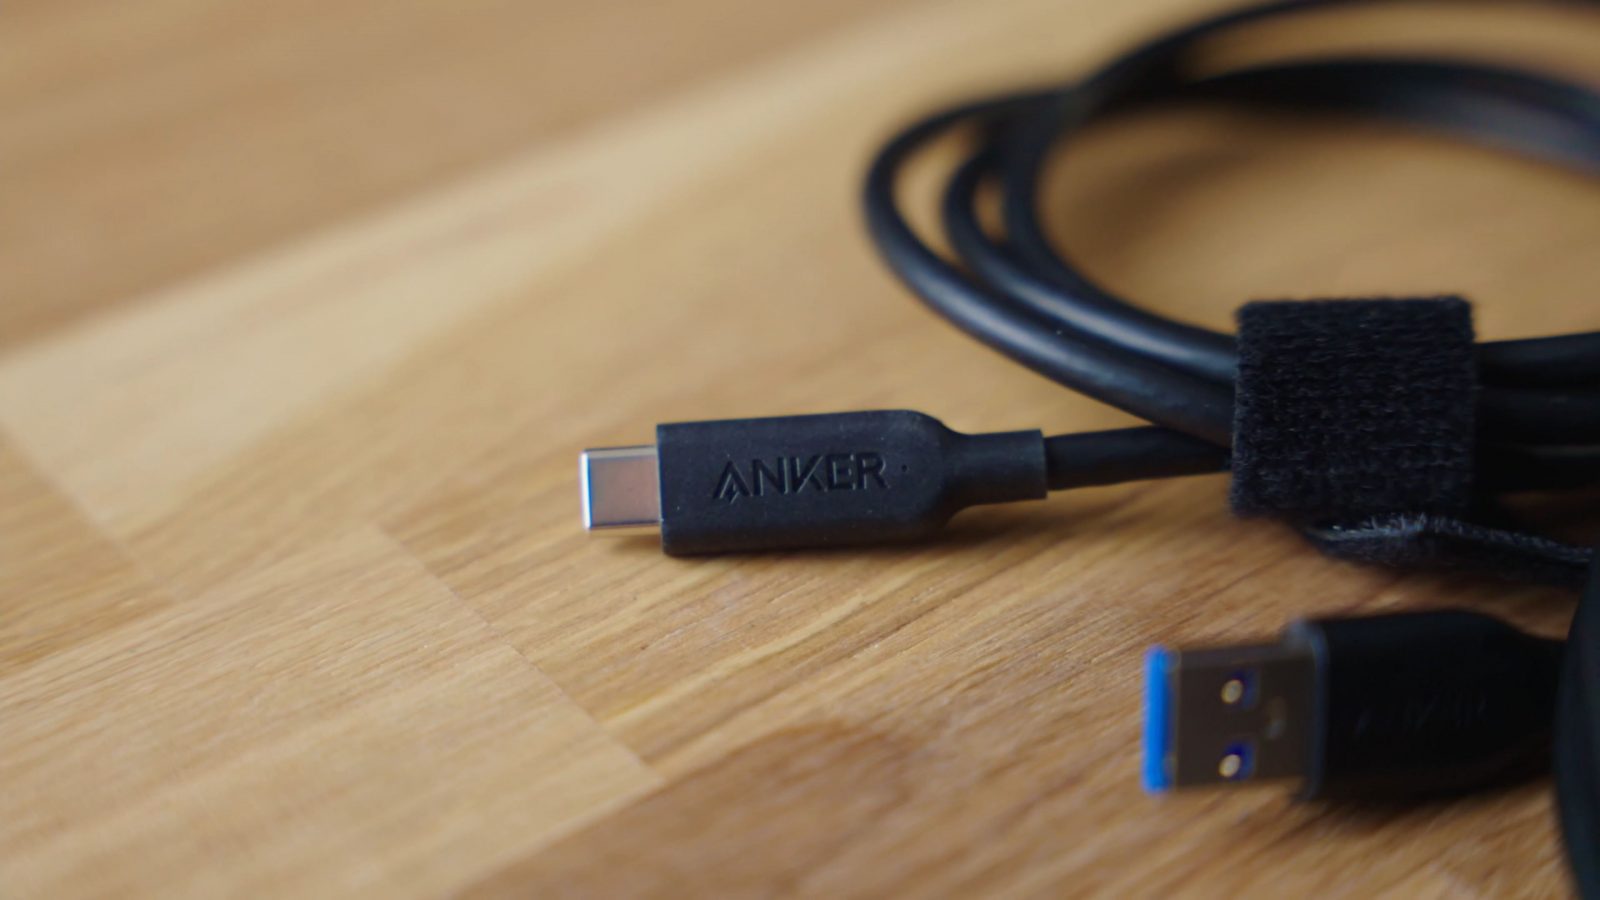
Speaking of USB cables, you’ll definitely need a decent one of those, the Pi 4 uses USB-C now, which is great, but many cables you get with gadgets and the likes are still too flimsy to provide stable power to the Pi. So, again, I really like the cables from Anker, but if you have for example a spare USB power delivery charge cable from your laptop, that should work, as well. The Raspberry Pi itself can detect when there are issues with your power supply, and OctoPrint will in turn show you a warning when it does.
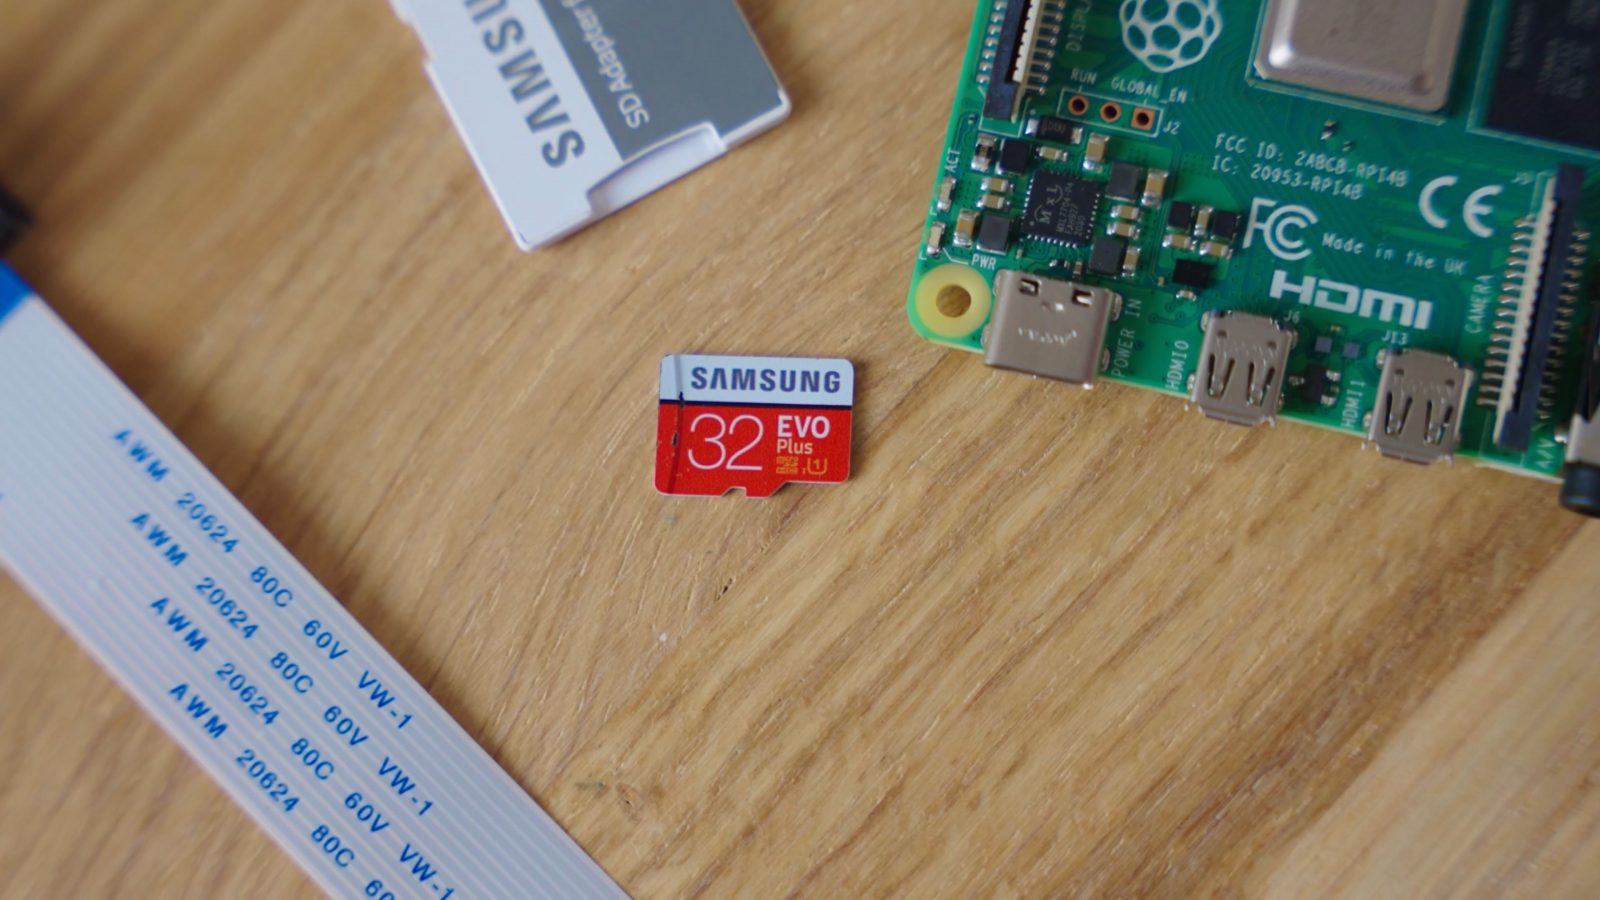
Lastly, to complete the set of parts for basic functionality, you need an SD card, any card works, but getting one that’s at least decently fast is going to speed up load times a lot. I’ve got a bunch of these Samsung Evo Plus cards from my cameras that work fine in a Pi as well, but any card that has an “A” rating for application performance, like A1 or A2, will work just fine as well. I mean, get something halfway decent and you’re fine, really.
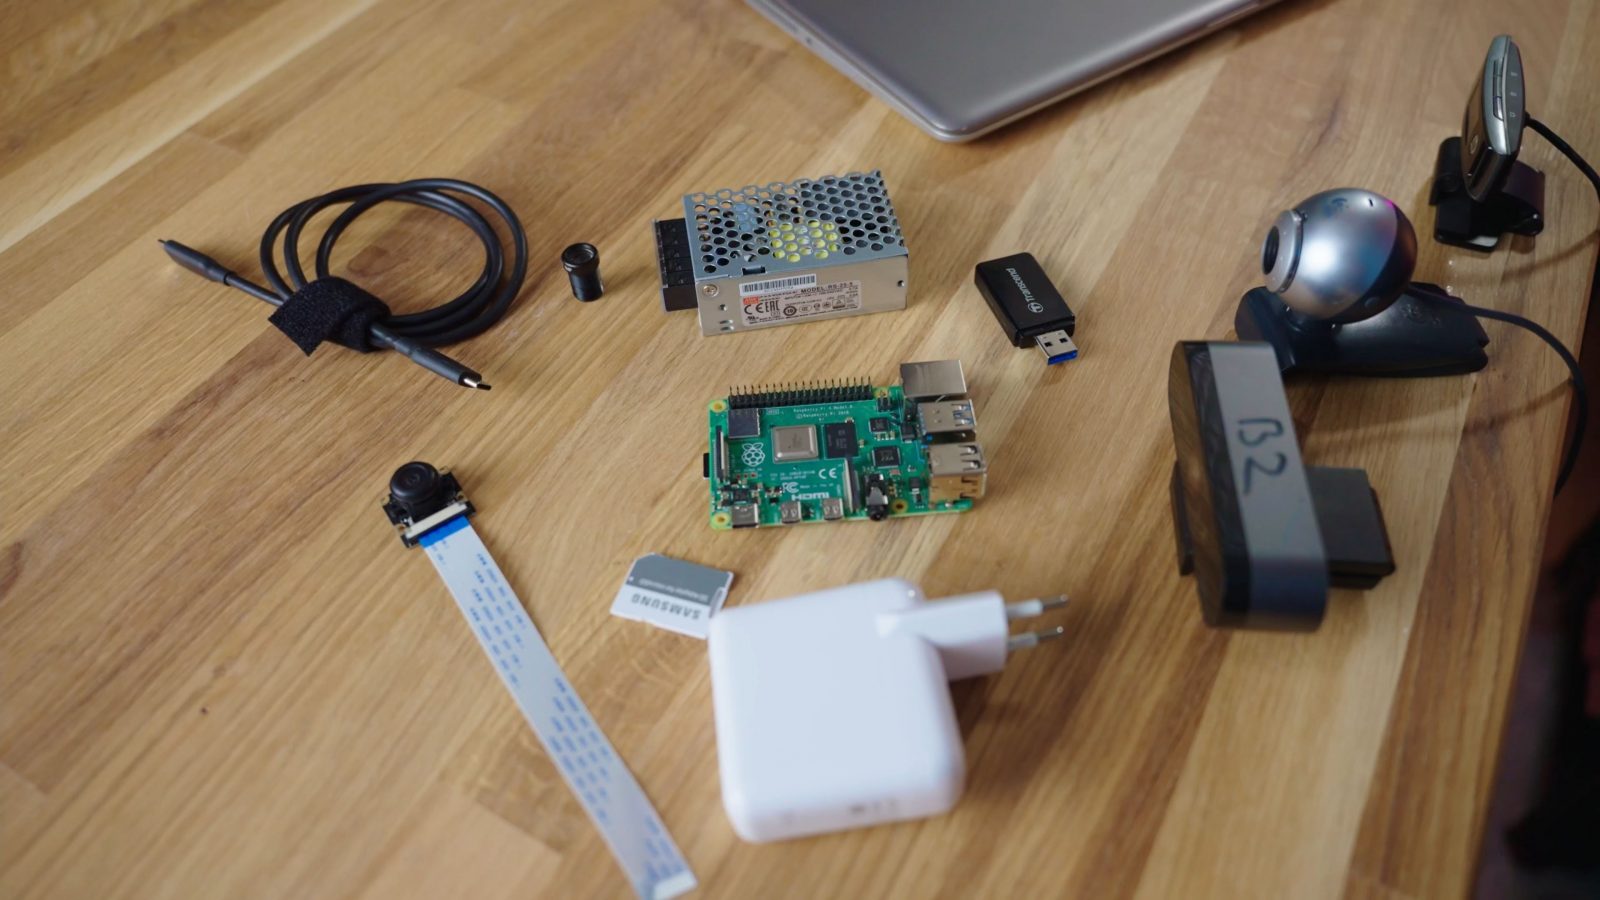
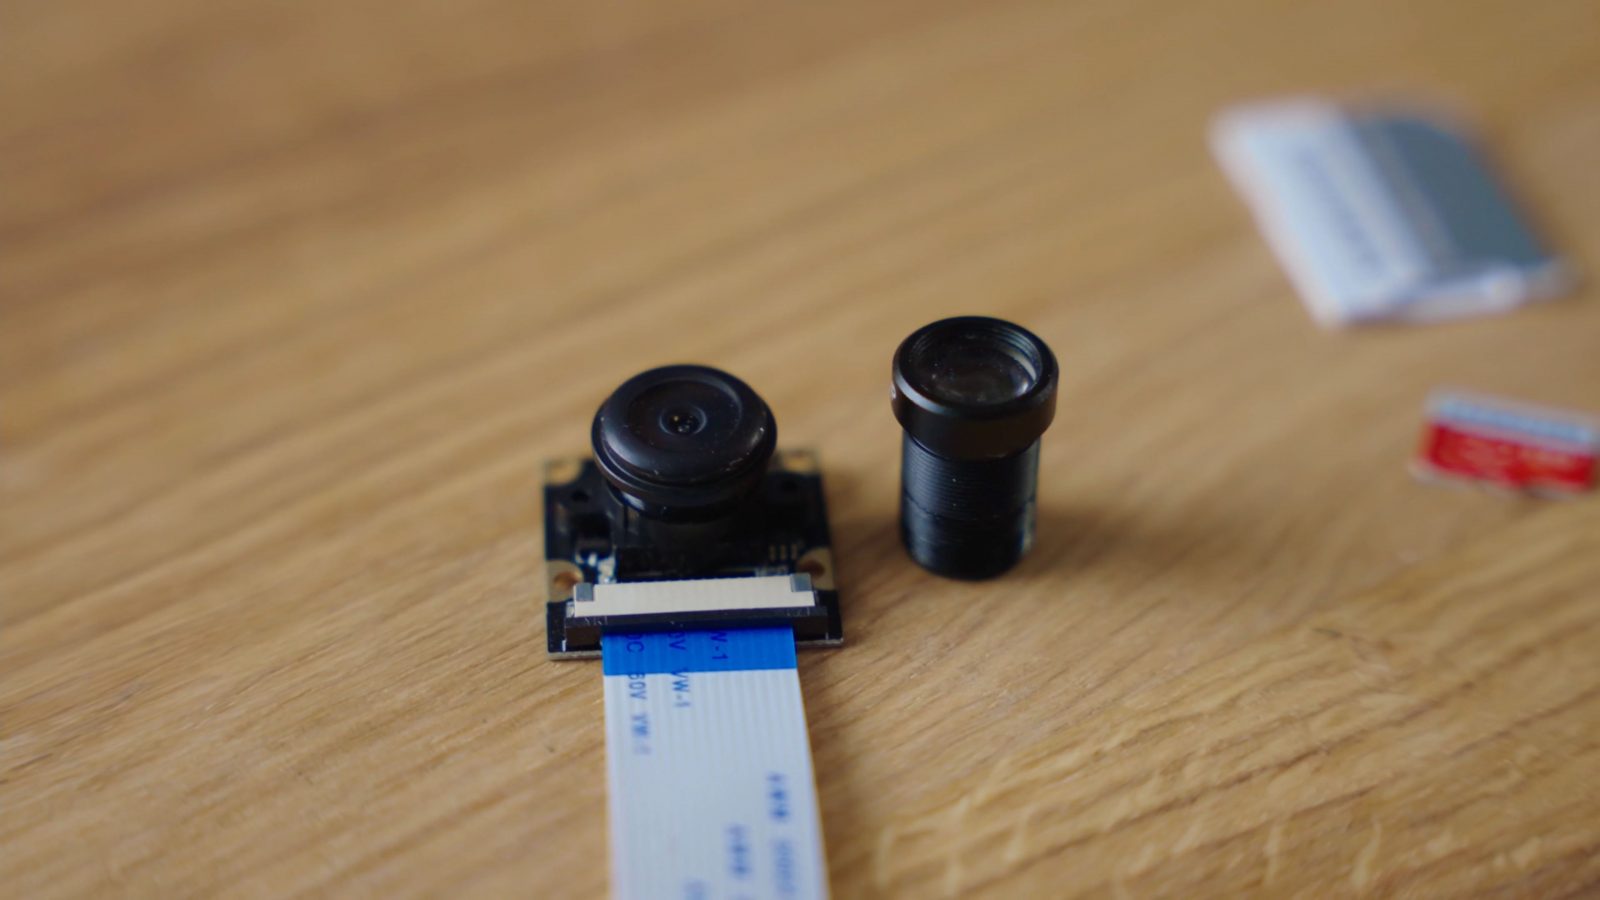
So that’s all the hardware that you actually need to get Octoprint running, all linked in the description below, but really, if you’re setting up OctoPrint, you probably want a webcam feed, too. Now, there are two basic options – getting a USB webcam or getting a Raspberry Pi camera module. Either one works. The Raspberry Camera is a fantastic value, but you’re going to need to print some sort of mount or enclosure, on the other hand, USB webcams are all kind of “meh” for image quality, they’re still good enough to check in on prints, but most importantly, they’re a bit more convenient to use. The standard camera would still be the “720p” Logitech C270, but even most off-brand webcams aren’t any worse for image quality, and they pretty much all work with OctoPrint with no fuss. But if you want something that’s proven, get a Raspberry Pi Camera or the C270.
And that’s it for hardware! Well, you will also need a computer and a card reader for the setup, but we’re just going to assume you already have those.
Setup
Now, for the setup, we’re actually not going to install OctoPrint directly, we’re going to use OctoPi, which is sort of the official Raspberry Pi image that has everything already laid out, OctoPrint set up in there, and it’s ready to get going. Now, I’m going to strongly recommend that you use the official OctoPi image. You’re going to find modified OctoPrint or OctoPi images from people that say “hey, we’ve got everything set up for you, it’s got all the plugins already installed”, but the thing is, if it’s just from some random dude on the internet, you don’t know what else is also installed on those images and how well they’ve been set up. So, you know, you’re basically inviting the person making that image into your home network. Best case, everything is fine, perhaps they run a Bitcoin miner on your Pi when it’s idle, but maybe they’ve got a full-on backdoor set up in that image that allows them to snoop around your devices, or perhaps they intentionally burn your printer down one day. You never know.
I trust Gina Häußge, who makes OctoPrint, and by extension, also Guy Sheffer, who makes OctoPi, and, again, I would highly recommend sticking to their official releases. Setting up plugins the normal way isn’t that hard anyway.
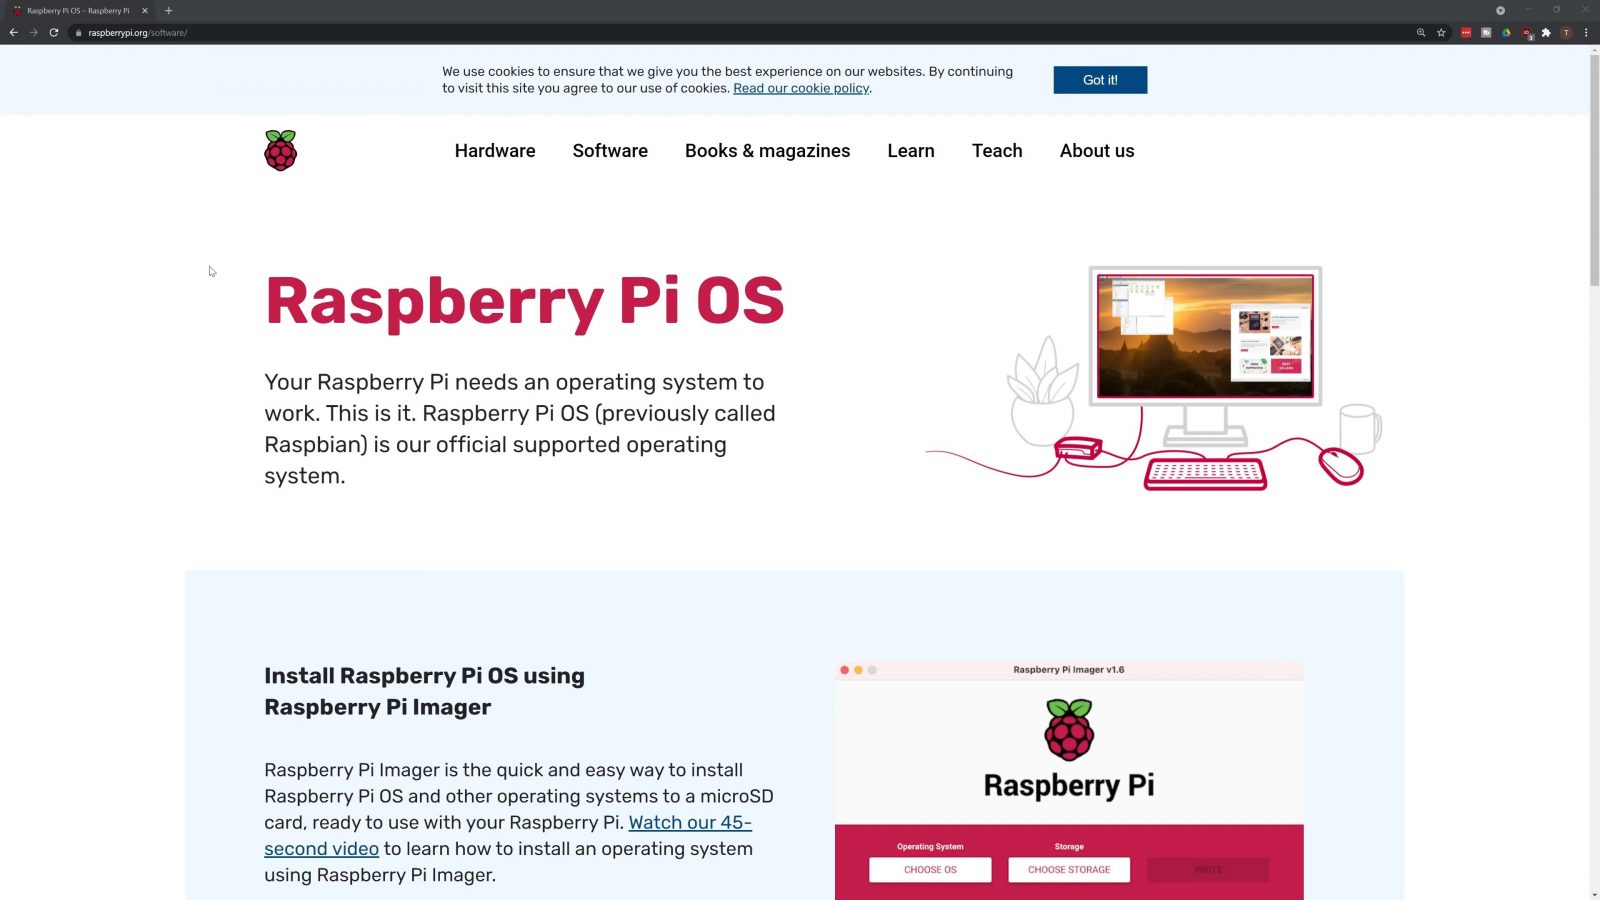
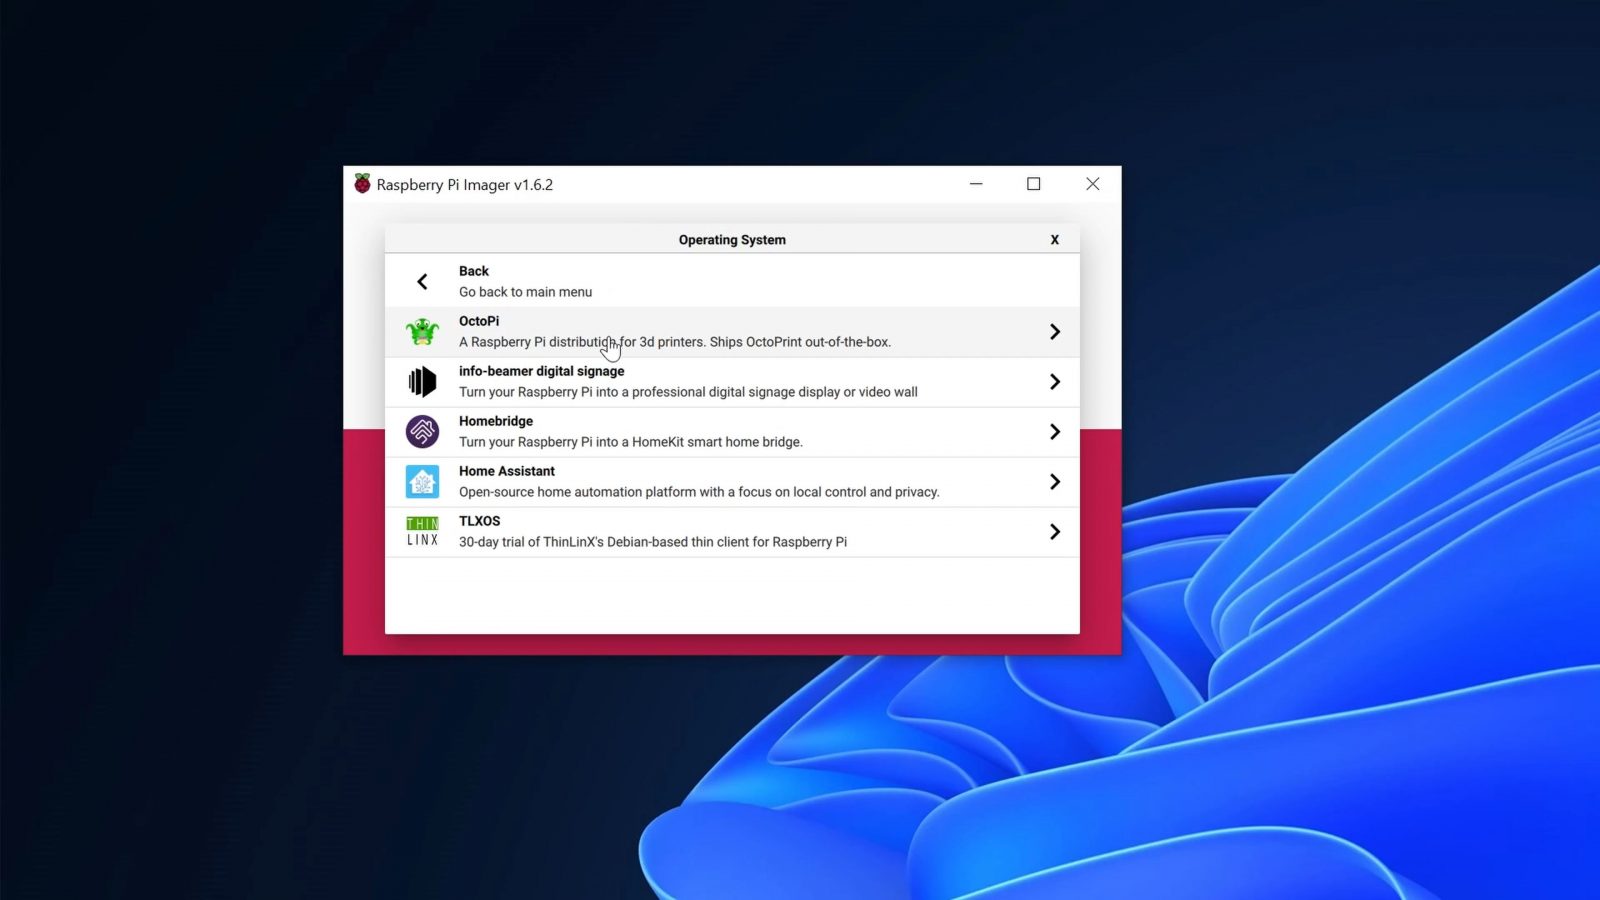
So let’s get started with the setup. I’d actually recommend using a pretty new, but super convenient way of setting up OctoPi, and that is through the Raspberry Pi imager you can get from raspberrypi.org/software. Install and run the imager. Under “Choose OS”, select “Other specific purpose OS” and choose OctoPi. This will automatically download the newest version of OctoPi for the setup.

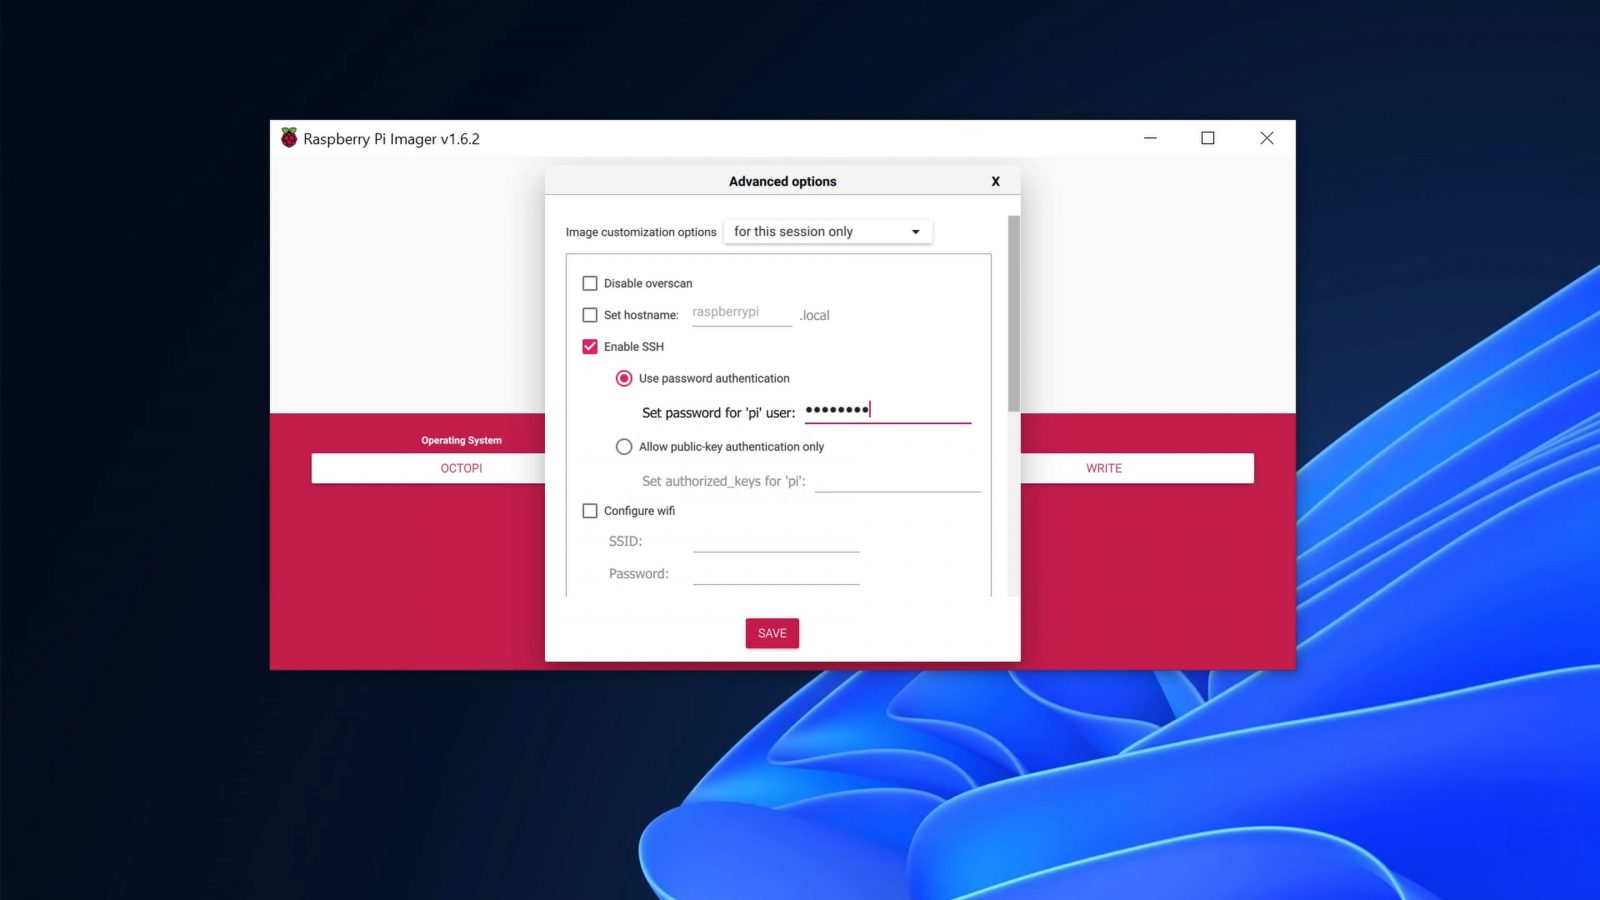
Then pick your SD card under “Choose Storage”, but make sure that card has no important files on it because they’ll be gone in a second. Now, for our special magic trick, press CTRL + SHIFT + X, and this will bring up the imager’s secret “Advanced options” menu. Here, enable “Enable SSH”, and pick a modestly secure password for the “pi” user. Choosing anything that isn’t the default “raspberry” password will automatically help protect your OctoPi install from malicious actors on the network.
Then, one step down, you can configure your WiFi connection, simply enter your WiFi’s name and password and choose the correct country code to prevent connectivity issues later on. Once everything is set up, click “Save” and then “Write”.
Once that’s done, eject the SD card, drop it into your Pi and we’re ready to power everything up. Plug in the USB cable to power up the Pi and watch the “ACT” LED, that’s going to be lit for a while, but once that turns off, OctoPrint is going to be ready for use at http://octopi.local. If your browser can’t find your OctoPrint install, check your router’s network overview page to find the Pi’s IP address or the “Network” page in Windows Explorer.
Since this is the first time this OctoPrint instance is running, it’s going to show you the first run wizard. There’s actually not much to say here, just follow the steps, set up your printer’s dimensions and you’re good to go!
All that’s left to do is to power up your printer, and plug it in through USB. Quick side note here, some printers have a flaw in their electronics where they will back power the Raspberry Pi through the USB port, which can cause all sorts of problems from OctoPrint crashing to the Pi’s WiFi disappearing. I’ve put the link to the forum post about that in the description below.
And at this point, you’re ready to start printing!
But wait, there’s more! Once you’ve gotten familiar with OctoPrint, surely you’ll be finding a couple of spots where you’d like to tailor the experience to your personal needs or preferences. And this is where plugins come in! There’s a plugin for pretty much everything.
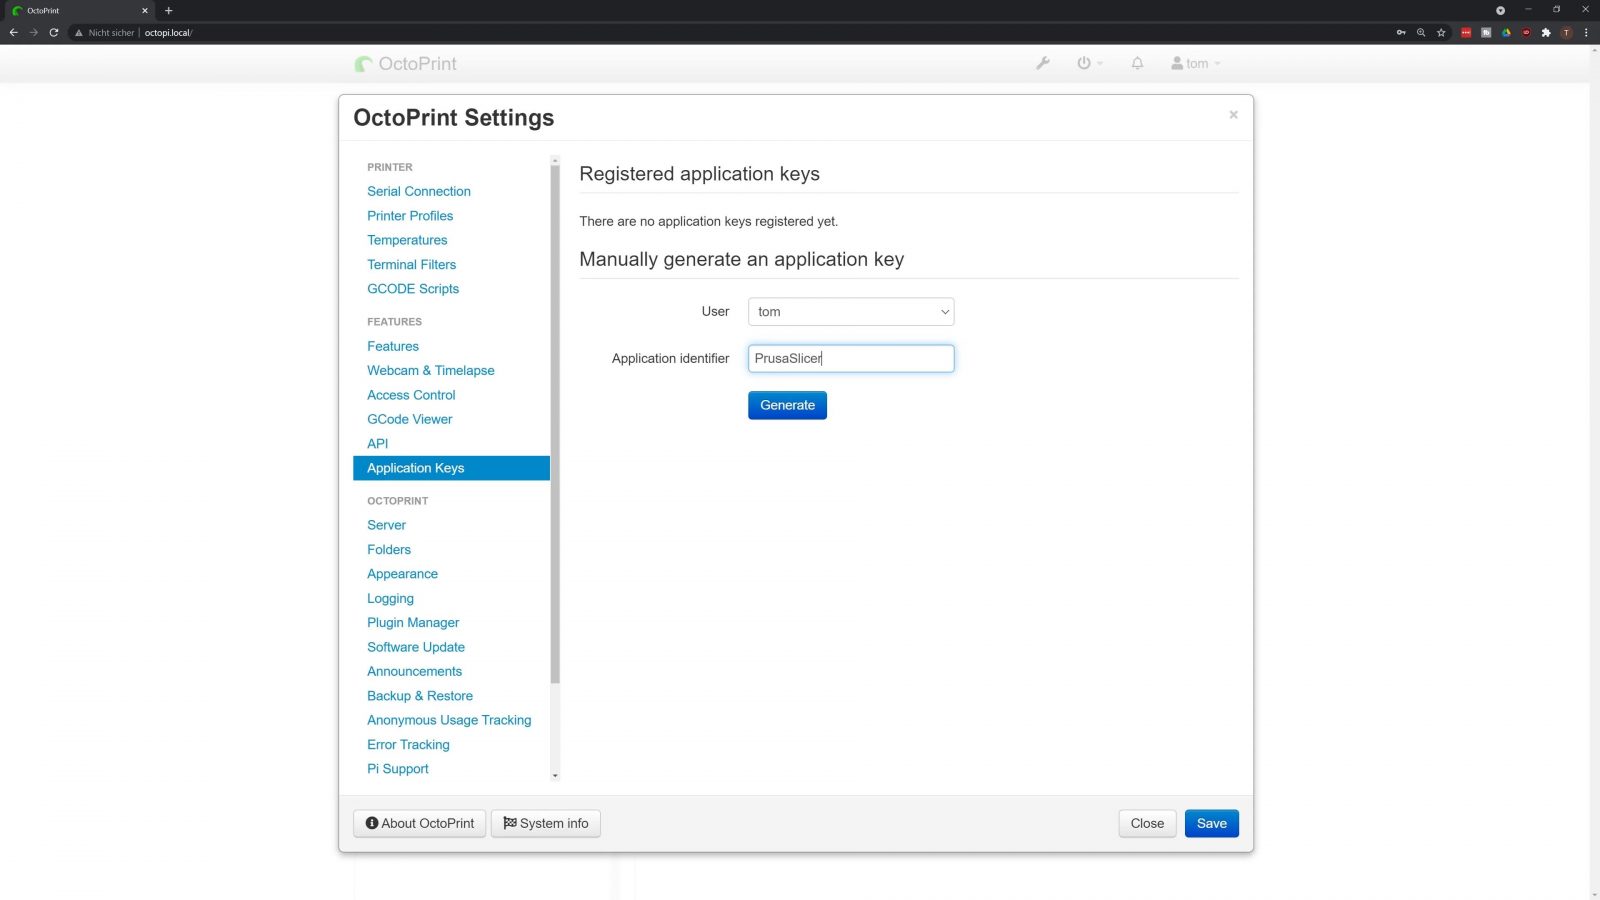
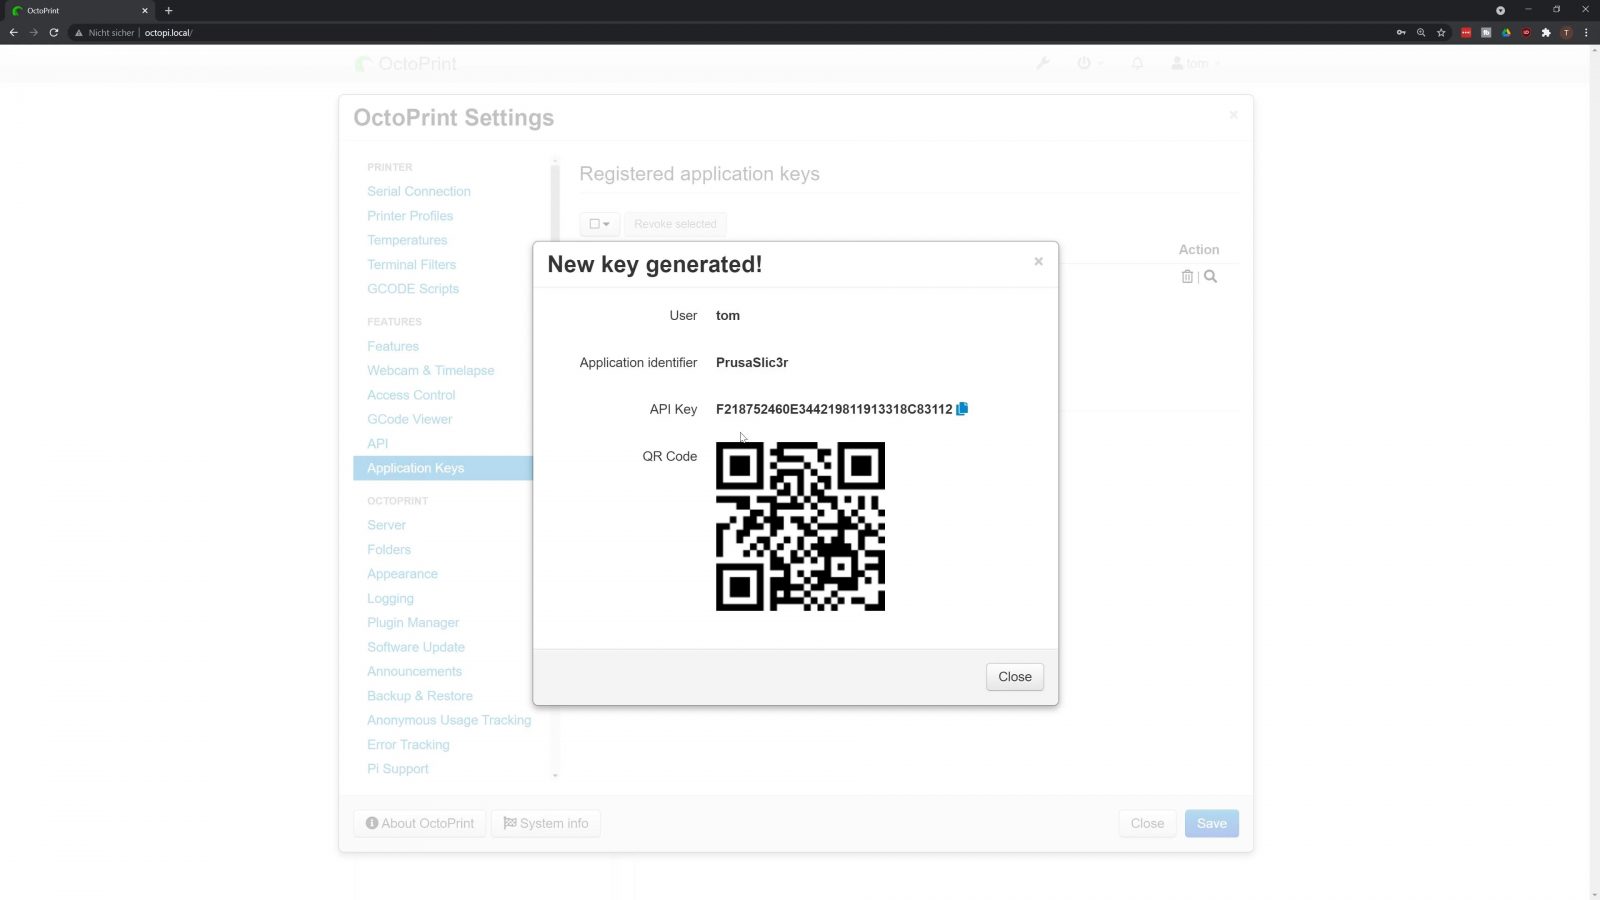
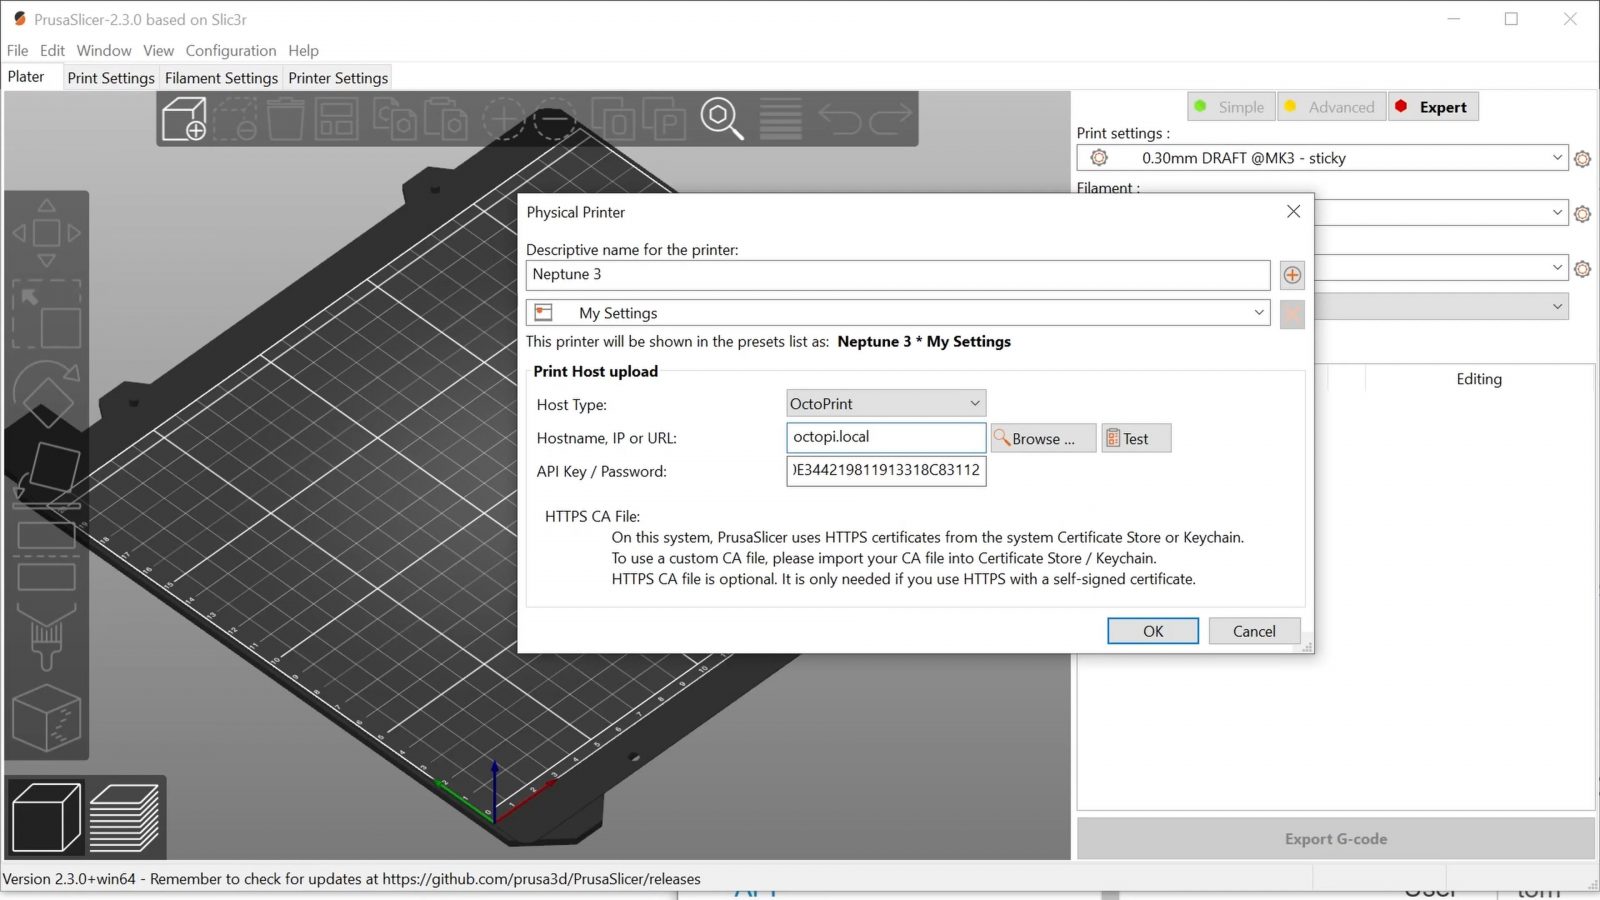
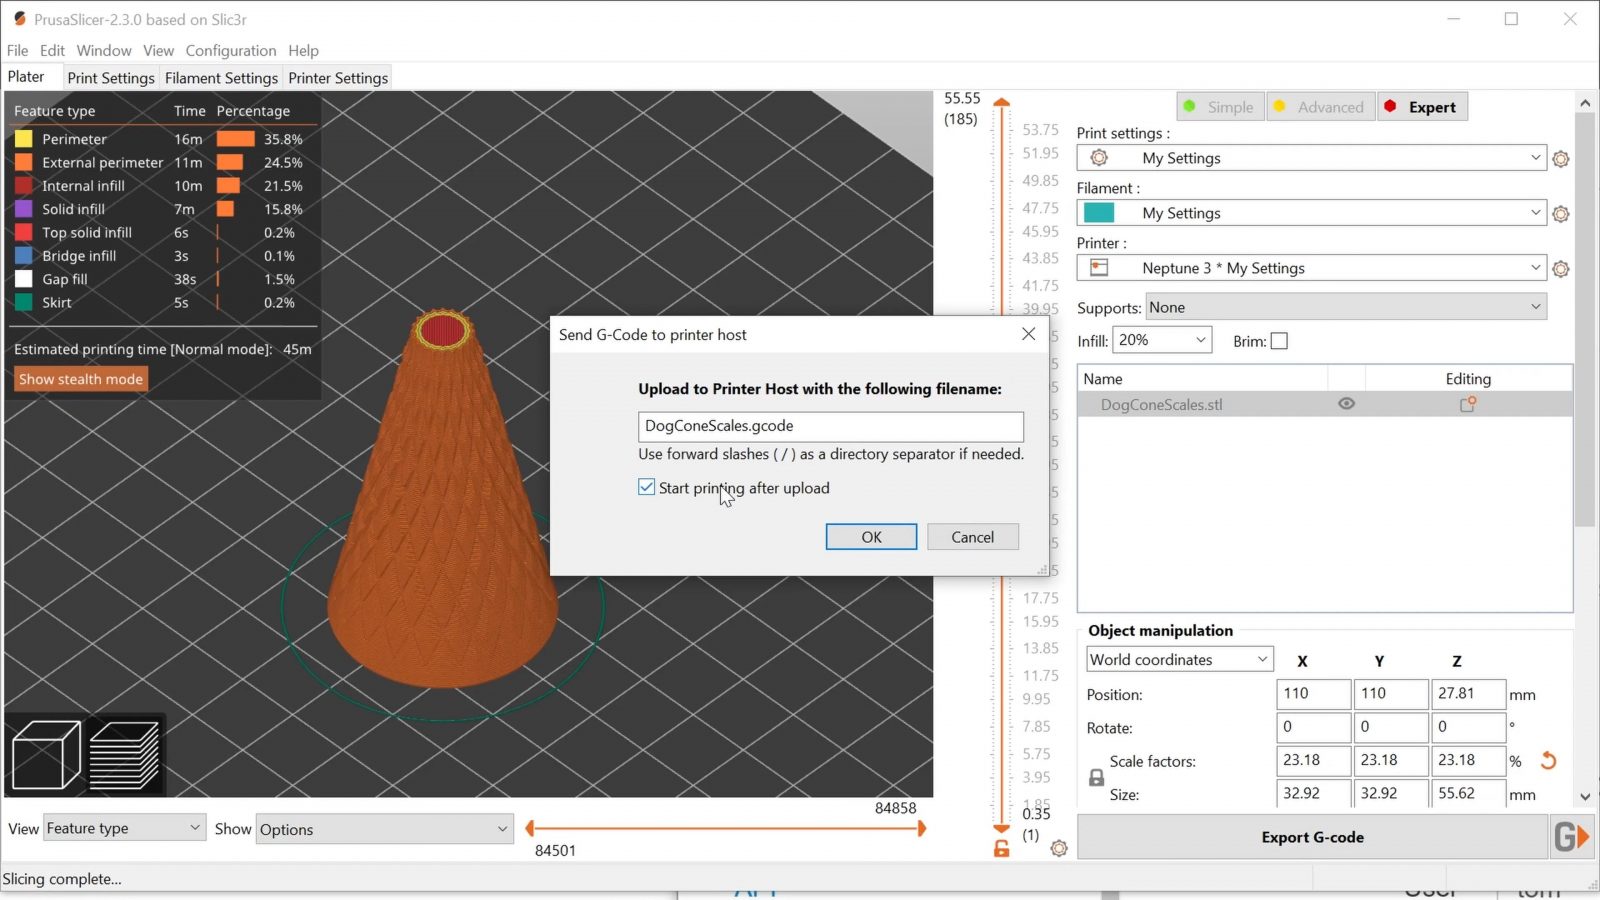
But before we go through some of the plugins I’d recommend, here’s one quick tip that’s going to be super useful. If you use a slicer that supports it, such as PrusaSlicer, you can directly upload your gcode files to an OctoPrint install straight from your slicer without saving it to your computer and then having to upload it manually. Go into OctoPrint’s settings, generate an application key, copy that into your slicer and then tell it where to find your OctoPrint setup – default is the same octopi.local hostname. And voila! You’ve got a new send gcode button in your slicer that is going to conveniently send off your prints to OctoPrint and if you want to, even automatically start them once they’re uploaded. That is a massive convenience feature.
Plugins
Okay, on to plugins. You can install plugins right inside the OctoPrint interface – go into the settings again, click “Plugin Manager” and then “Get more”.
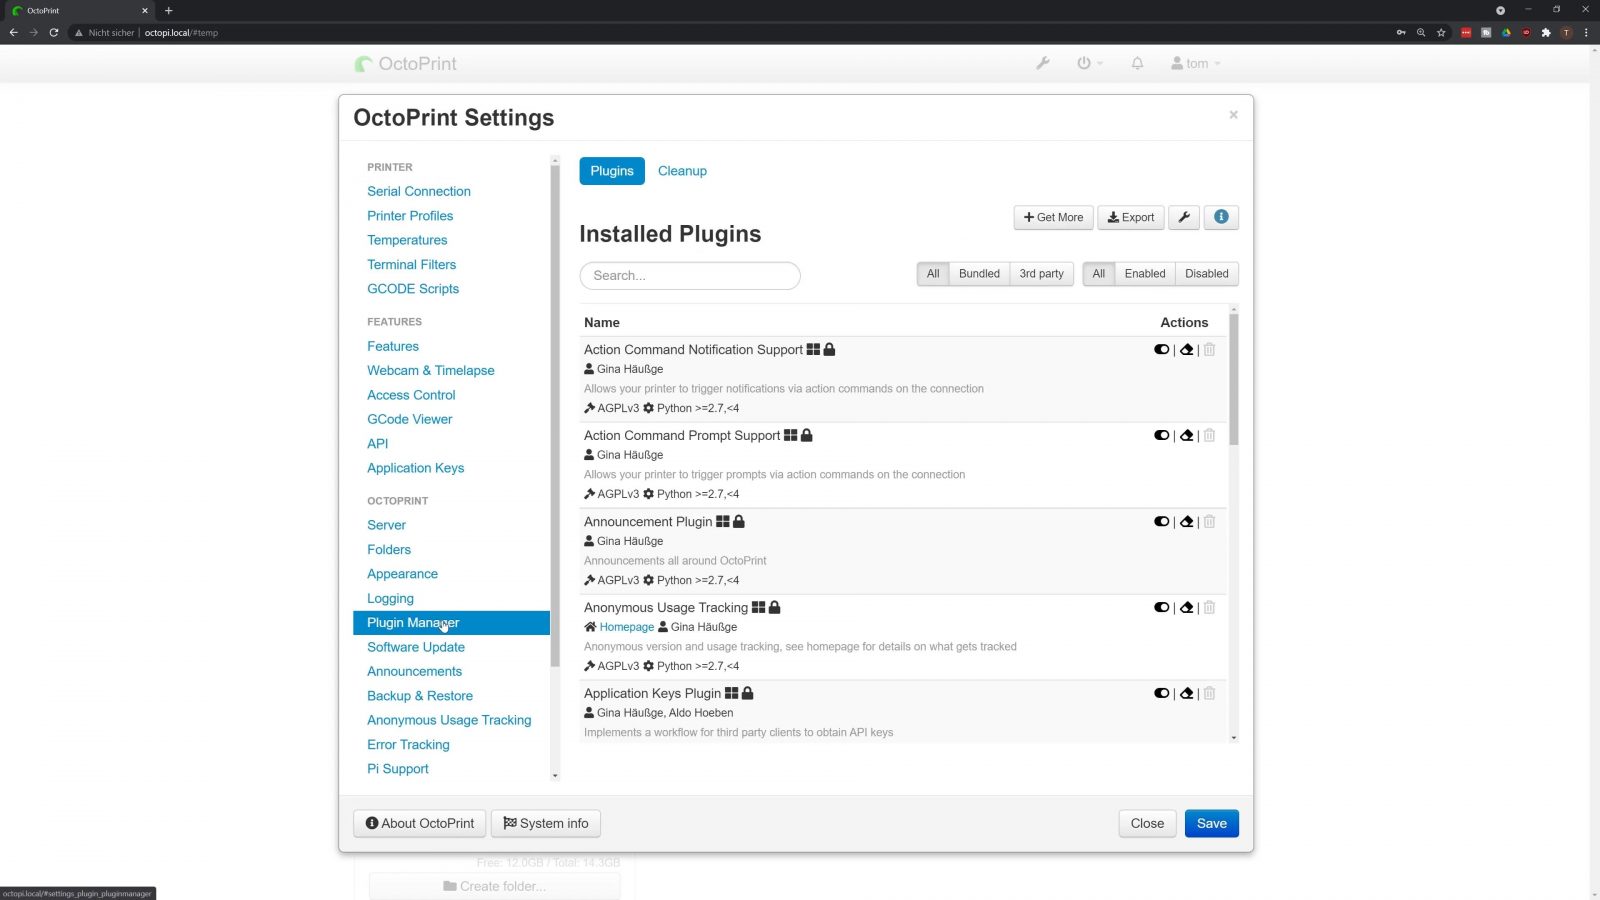
You can browse plugins right here, but the “Details” button is going to take you out of your OctoPrint install, so the most convenient way to install a plugin is to come back to the plugin manager on your OctoPrint page and just install them from there.
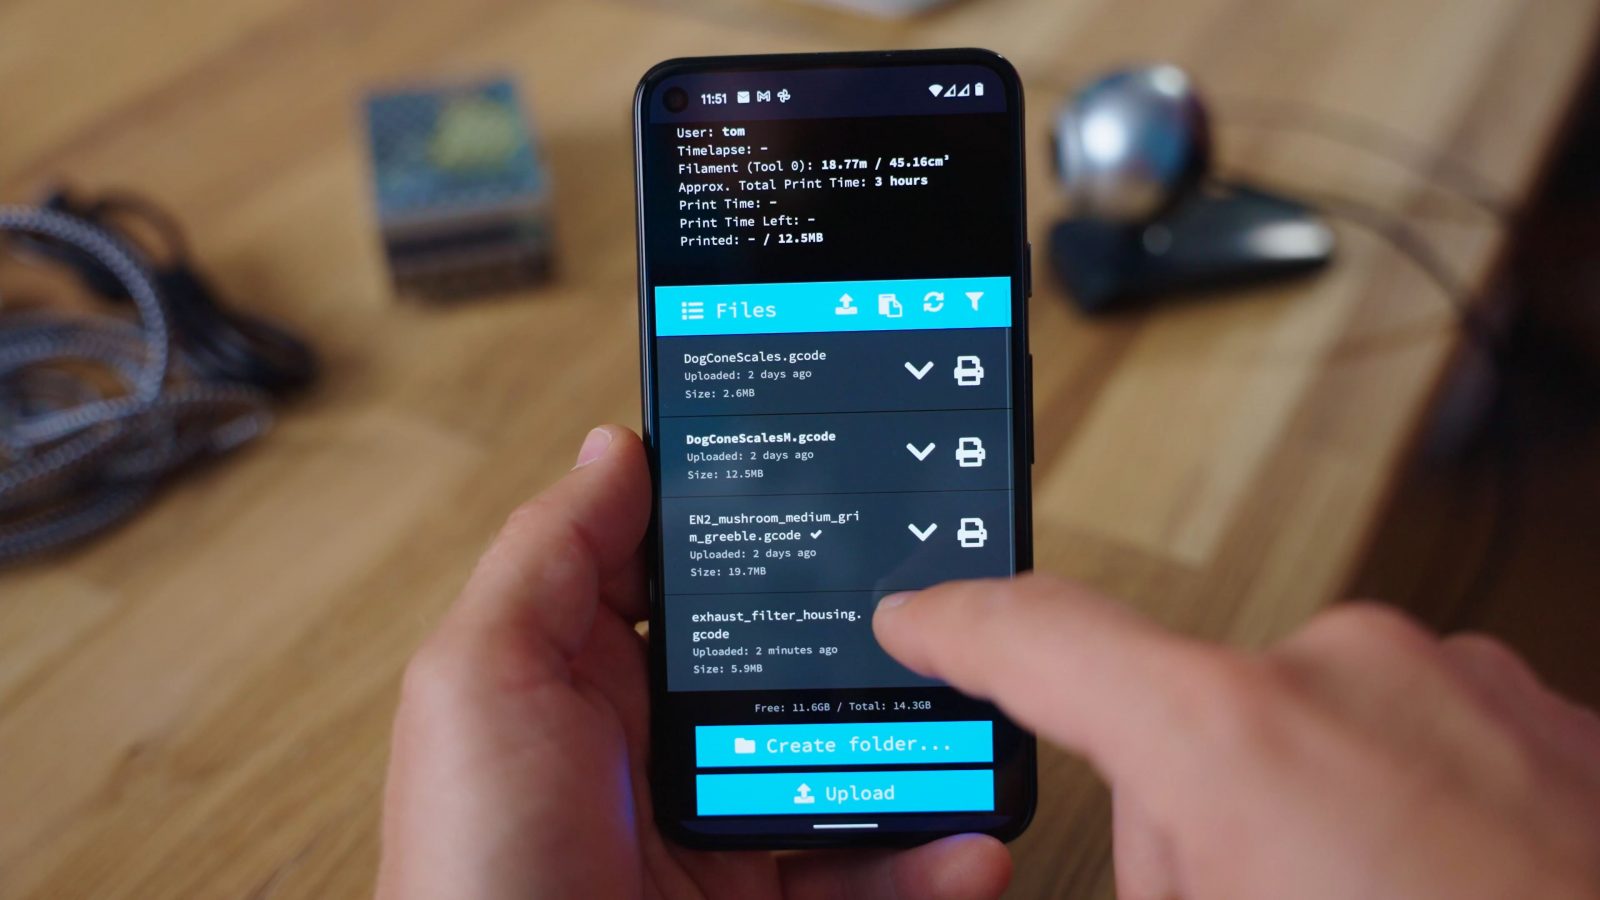
Touch UI
So the ones that I find really convenient for daily use are TouchUI, which gives you a basic, mobile-friendly interface if you want to quickly check in on your prints from your phone. By default, you get the full interface, which works, but you have to zoom around quite a bit and TouchUI makes that a lot more convenient.
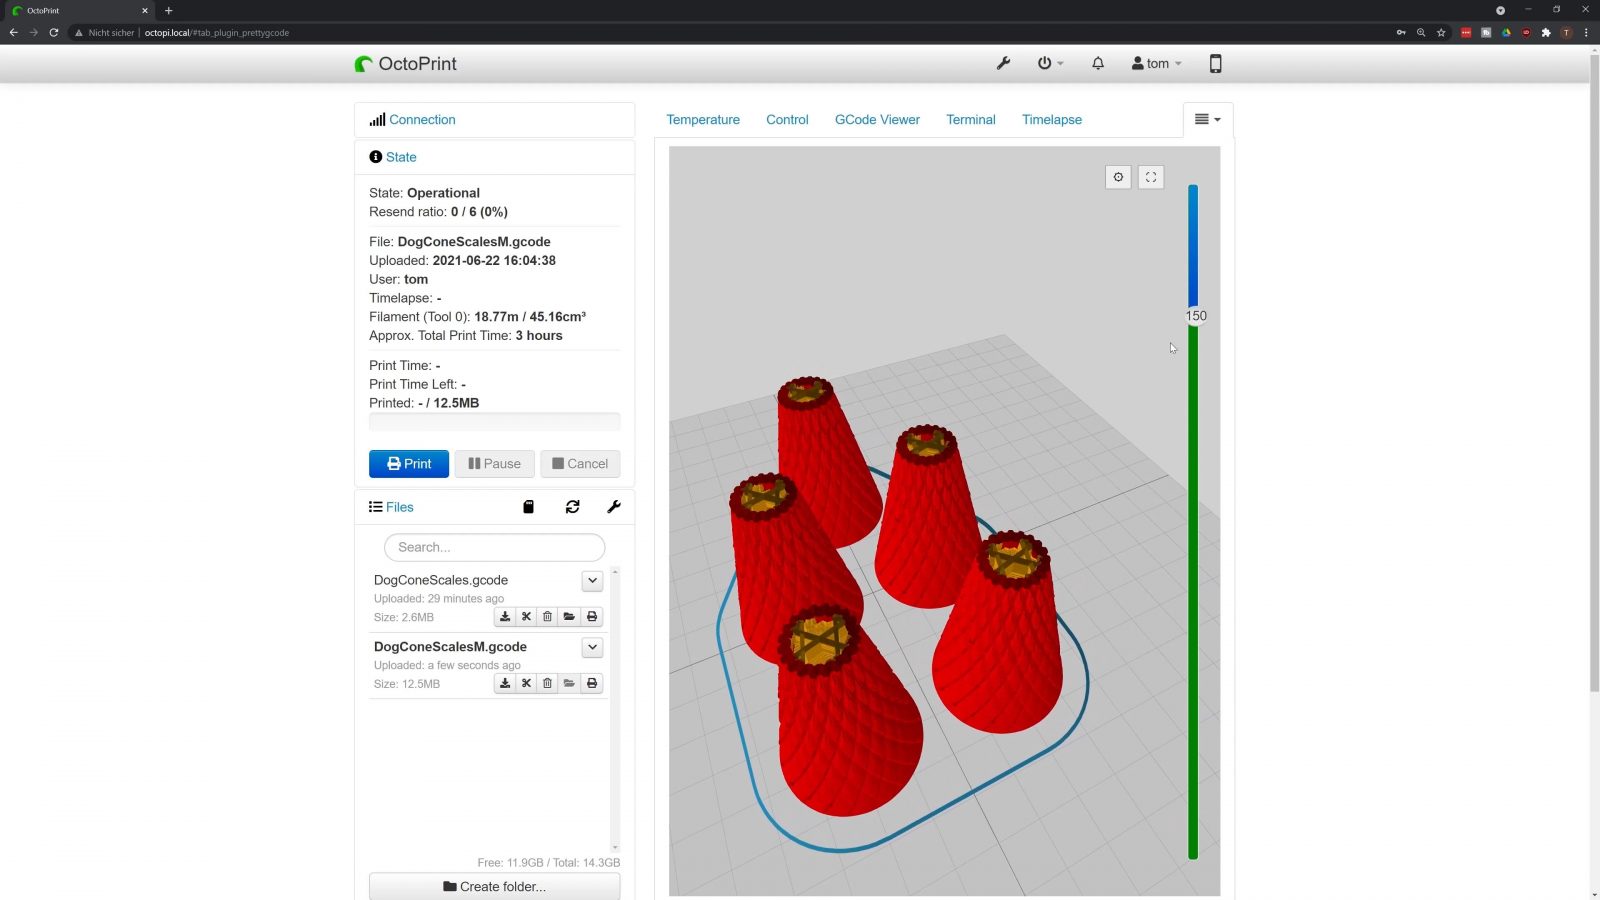
Pretty Gcode
Next up, for printing parts – OctoPrint includes a basic gcode viewer, but it’s only a layer view and we can certainly do better than that. Pretty Gcode is one of the options for that. It’s a full-on 3D gcode viewer that syncs up with your print progress. And while the way it displays extrusion lines isn’t volumetrically accurate, it’s still super helpful to see what the print you’ve loaded up is going to look like.
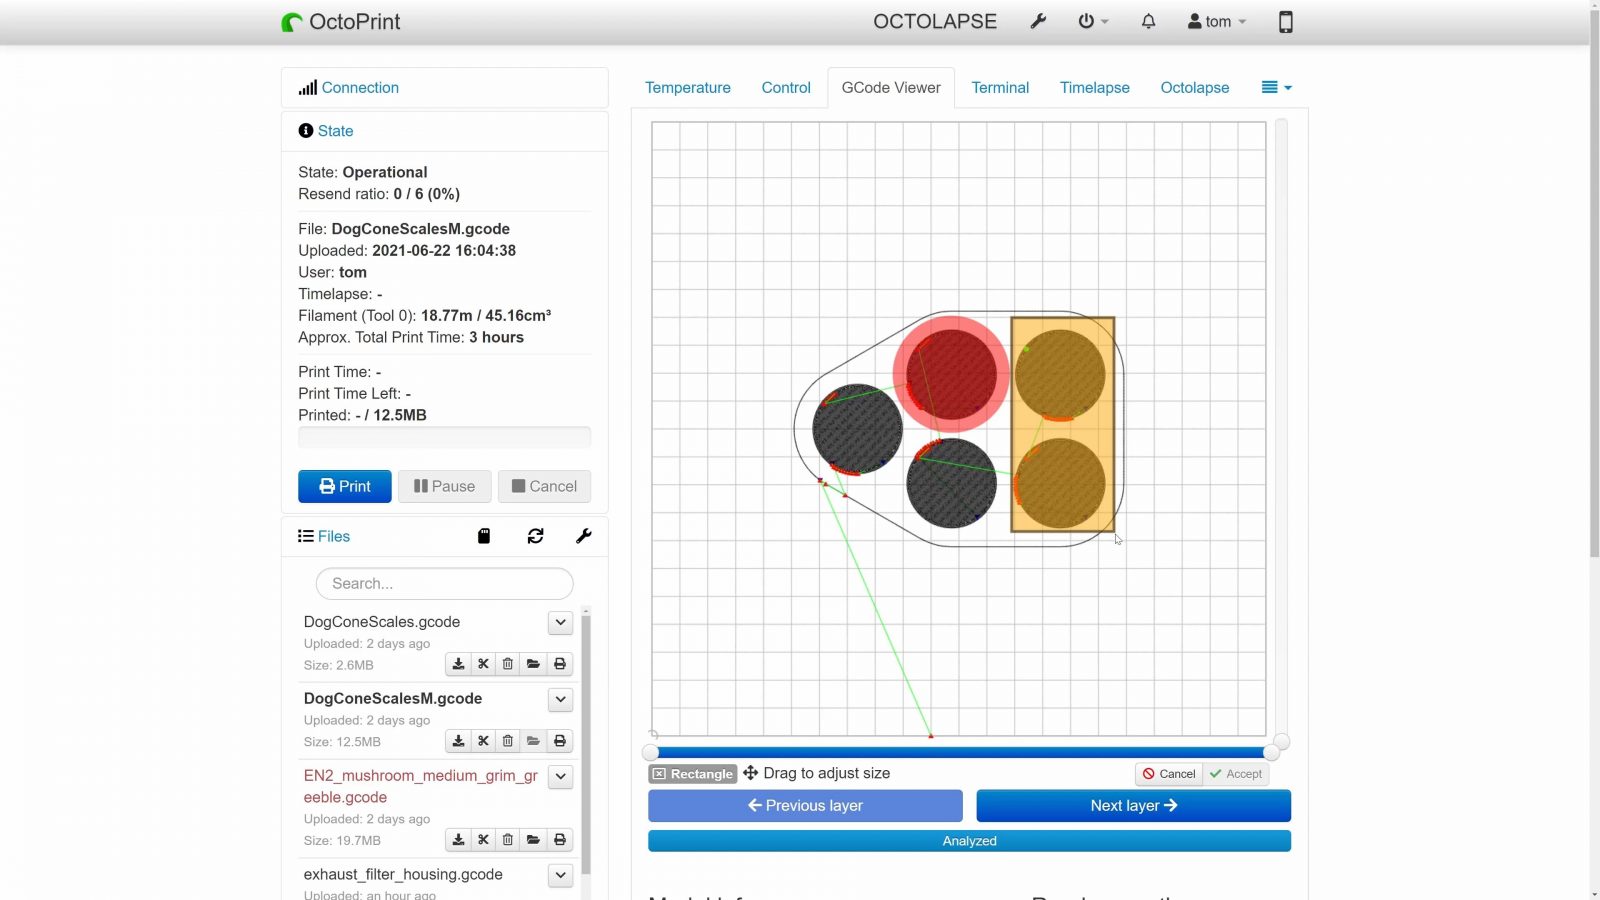
Exclude Region
But what if the print you’ve started isn’t going as intended? Well, especially if you have more than one part on the plate of your printer, that’s a bit of a messy situation when one of them, for example, comes loose from the bed. If you now stop the print, you can throw out all those parts, but if you keep going, the loose extruded material from the failing part might mess up all the other ones, too. So what the “Exclude Region” plugin allows you to do is to tell OctoPrint to, just not send any more print instructions for that area where the part has failed. That’s super useful and it can save you a lot of time and material should you ever need to use it. So install it before you need it.
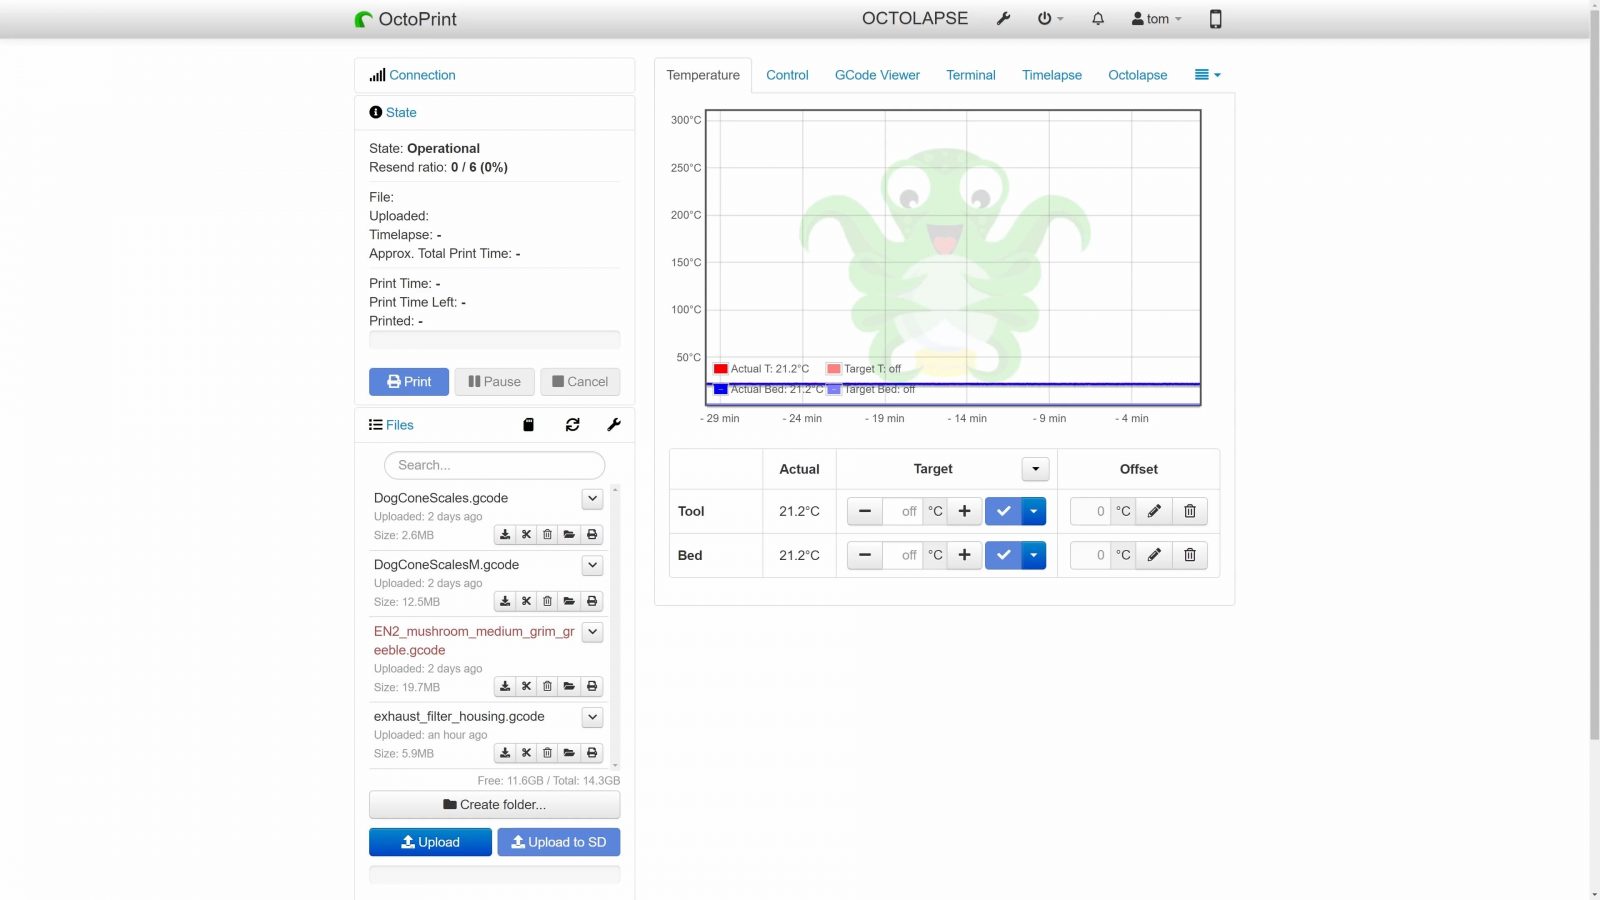
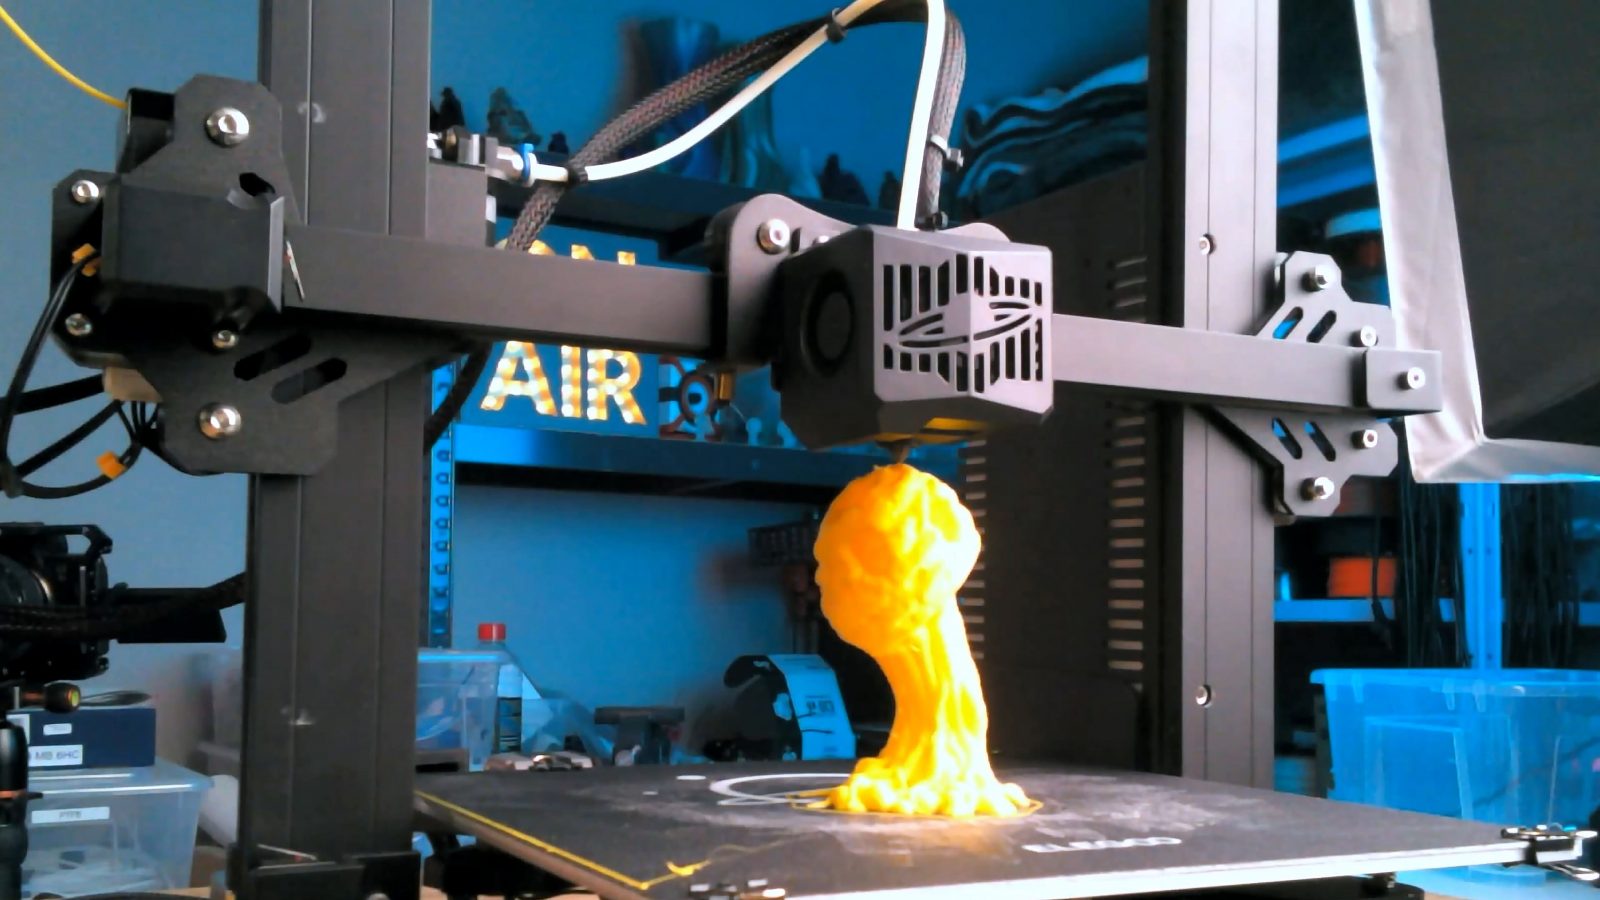
OctoLapse
Next up, of course, one of the coolest features OctoPrint enables is getting those magic timelapses of your prints. Instead of your camera just snapping a picture in a fixed interval, the OctoLapse plugin can sync that up with the end of a layer and even create those cool nozzle orbiting effects. OctoPi is already prepared to run OctoLapse without the extra step of installing the Python development package, so you can just click “Install” and you’ll be ready to use OctoLapse. The setup process will still take a second.
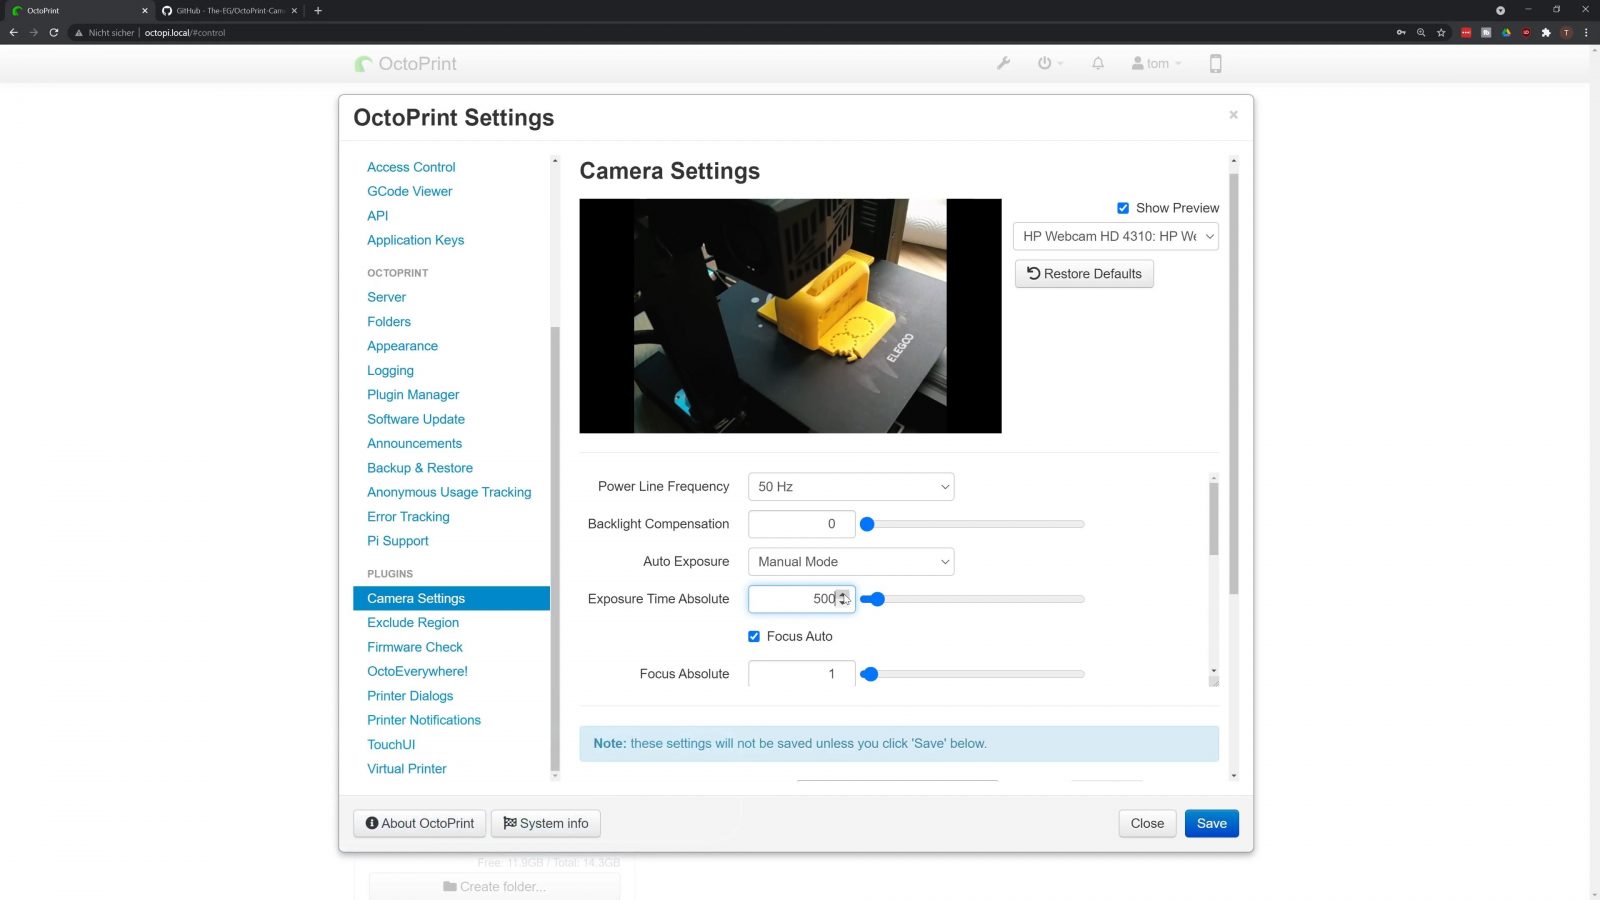
Camera Settings
One of the useful things that OctoLapse lets you do is to override your webcam’s exposure, white balance, and focus if you have one with autofocus, so if you just want those settings without full-on installing OctoLapse, the “Camera Settings” plugin lets you do exactly that for your viewing pleasure.
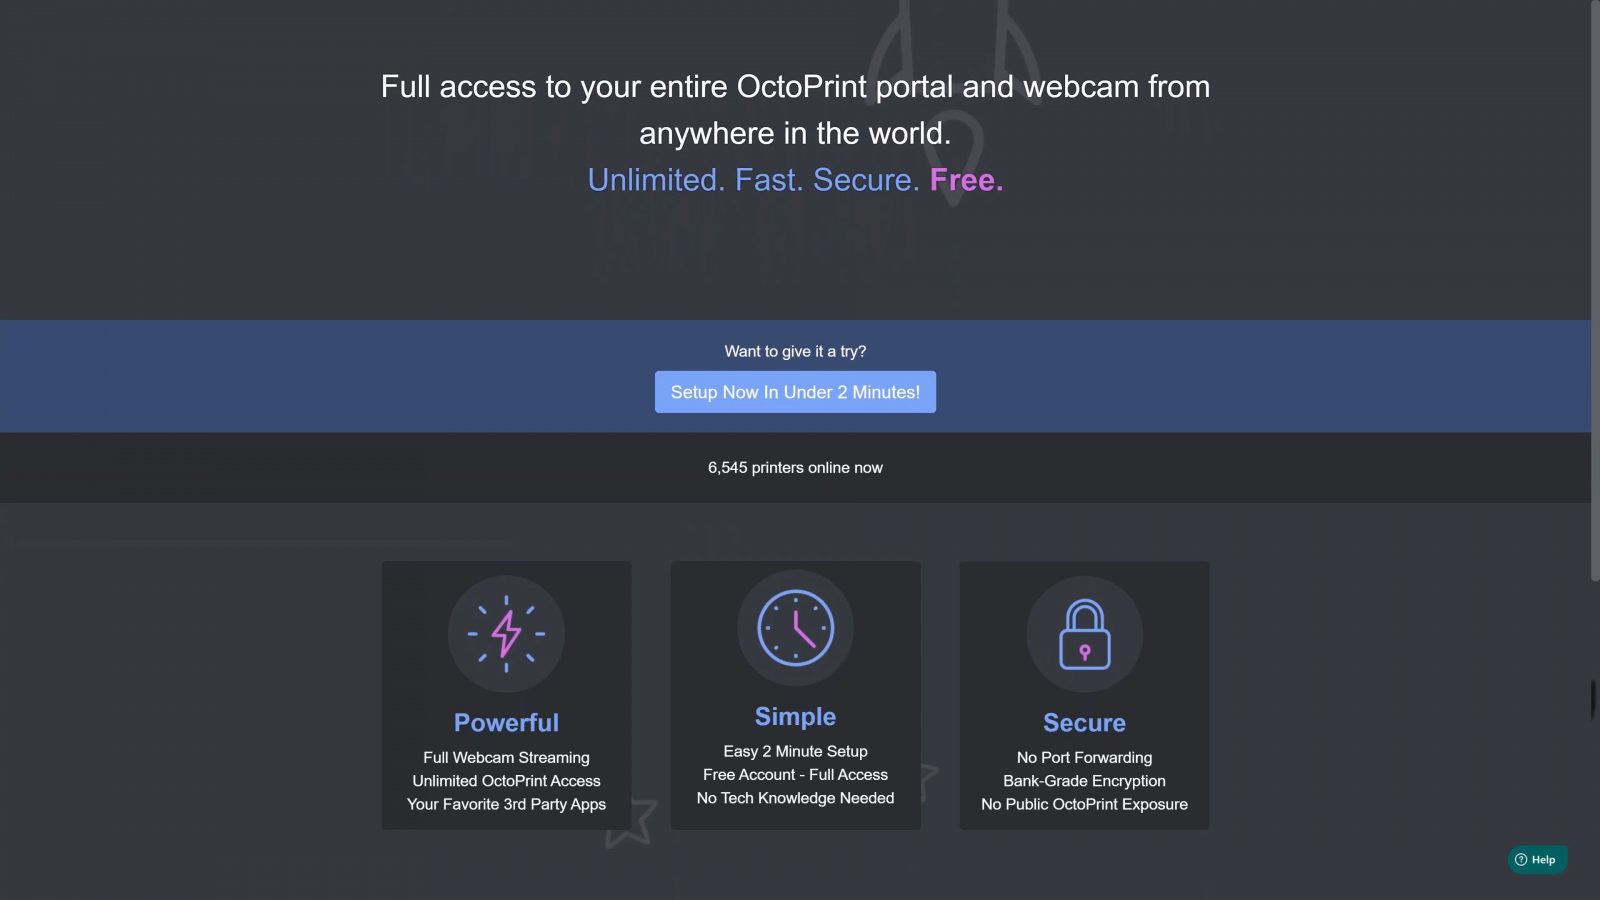
OctoEverywhere
And lastly, what if you want to check in on your printer when you’re out on the go. Well, first of all, letting a 3D printer run without supervision and without you being able to intervene physically is always going to be something that comes with some risks and you should only do if you really trust your machine. But, say you do and you want to be able to check in on your machine from anywhere, then the OctoEverywhere plugin is exactly what you need. You can get the full OctoPrint interface wherever you are and just check in and make sure things are doing well, and if you have to, you can stop the print or use Exclude Region to stop things from getting worse. OctoEverywhere is a free service.
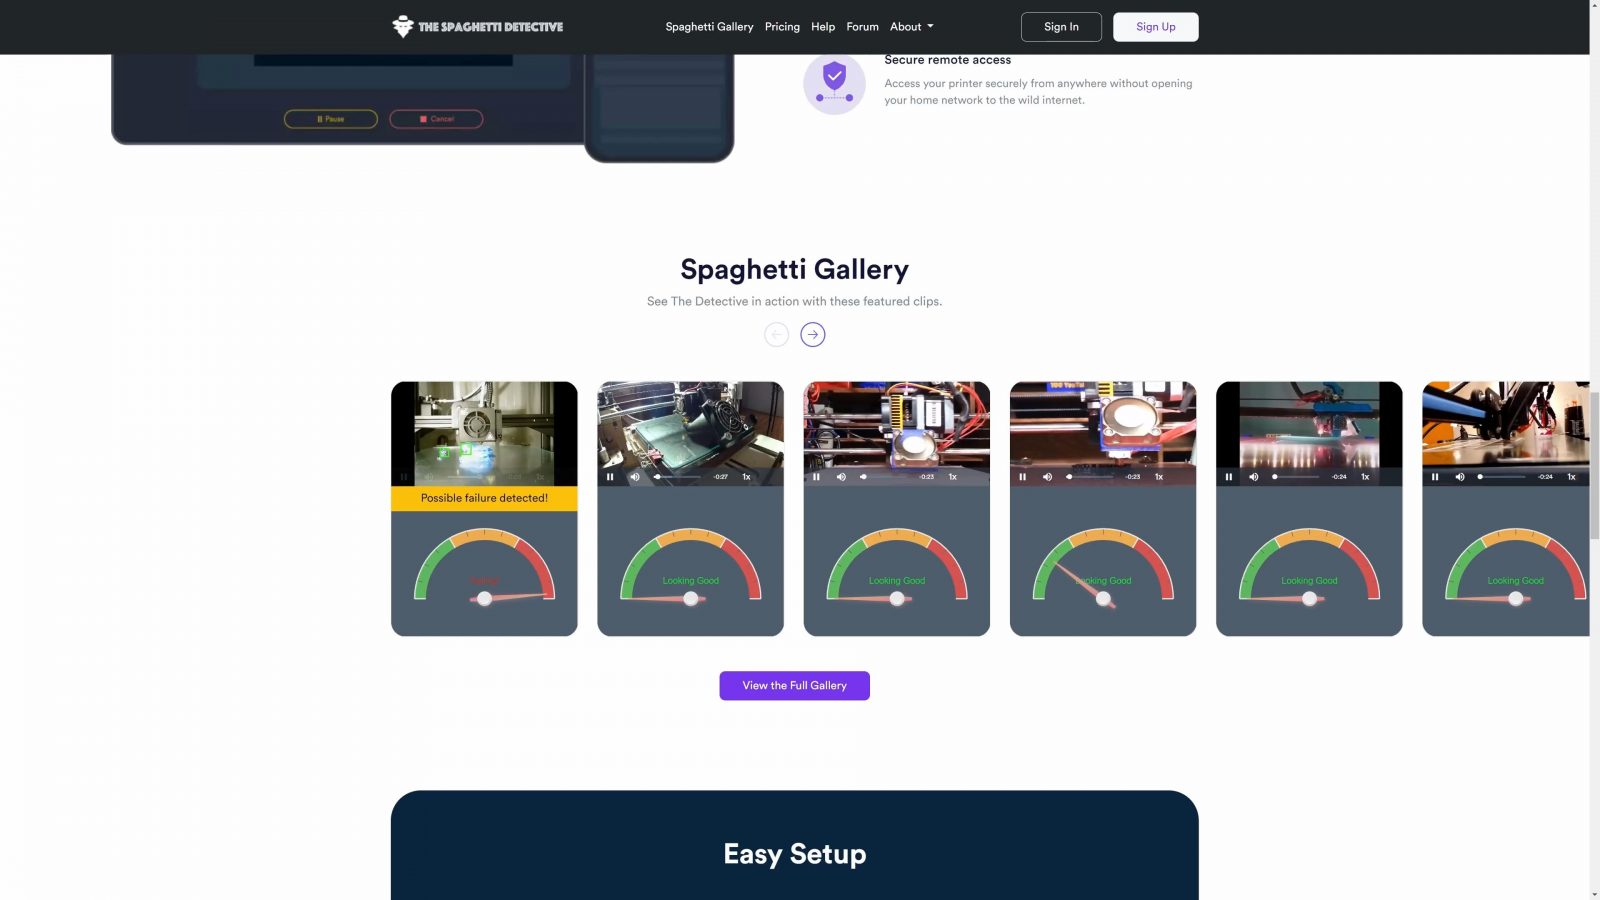
The Spaghetti Detective
The alternative The Spaghetti Detective is something you might want to look into as well – it’s got a free tier that allows time-limited use and then paid unlimited plans. But the big feature of The Spaghetti Detective is AI-based print failure detection. I did a whole video on that and you can check that out here.
So that should get you pretty much set with OctoPrint. A big shoutout to Gina Häußge for making OctoPrint a free and open-source project and a shoutout to her Patrons and supporters for making that possible as well. So if you enjoy OctoPrint, maybe consider supporting Gina directly, too.
That’s it for today, thank you all for watching, keep on making, and I’ll see you in the next one.
Download the RaspberryPi installer
Hardware to set up OctoPrint (on Amazon):
Anker two-port charger / supply options
Forum post about back powering issues
Confirmed webcam compatibility list
I use Epidemic Sound, sign up for a 30-day free trial here
🎧 Check out The Meltzone Podcast (with CNC Kitchen)!
💙 Enjoying the videos? Support my work on Patreon!
Product links are affiliate links – I may earn a commission on qualifying purchases (at no extra cost to you)

Check out my second channel “More Layers” on YouTube for livestreams