
The slicer. A mythical piece of software that decides the fate of your every 3D print. To tame it, you must first learn its language and appease the demons that live within.
Today we’re going to go over the common settings you might want to adjust to get better prints out of your filament printers!
So for this video, I’m going to be using Prusa Slicer, even though the name doesn’t suggest it, it actually works for any filament printer that accepts standard g-code, which means basically every relevant machine. Some of the settings might have slightly different names in Cura or Ideamaker, but the ones we’re going to go over today all work in the same way between different tools.
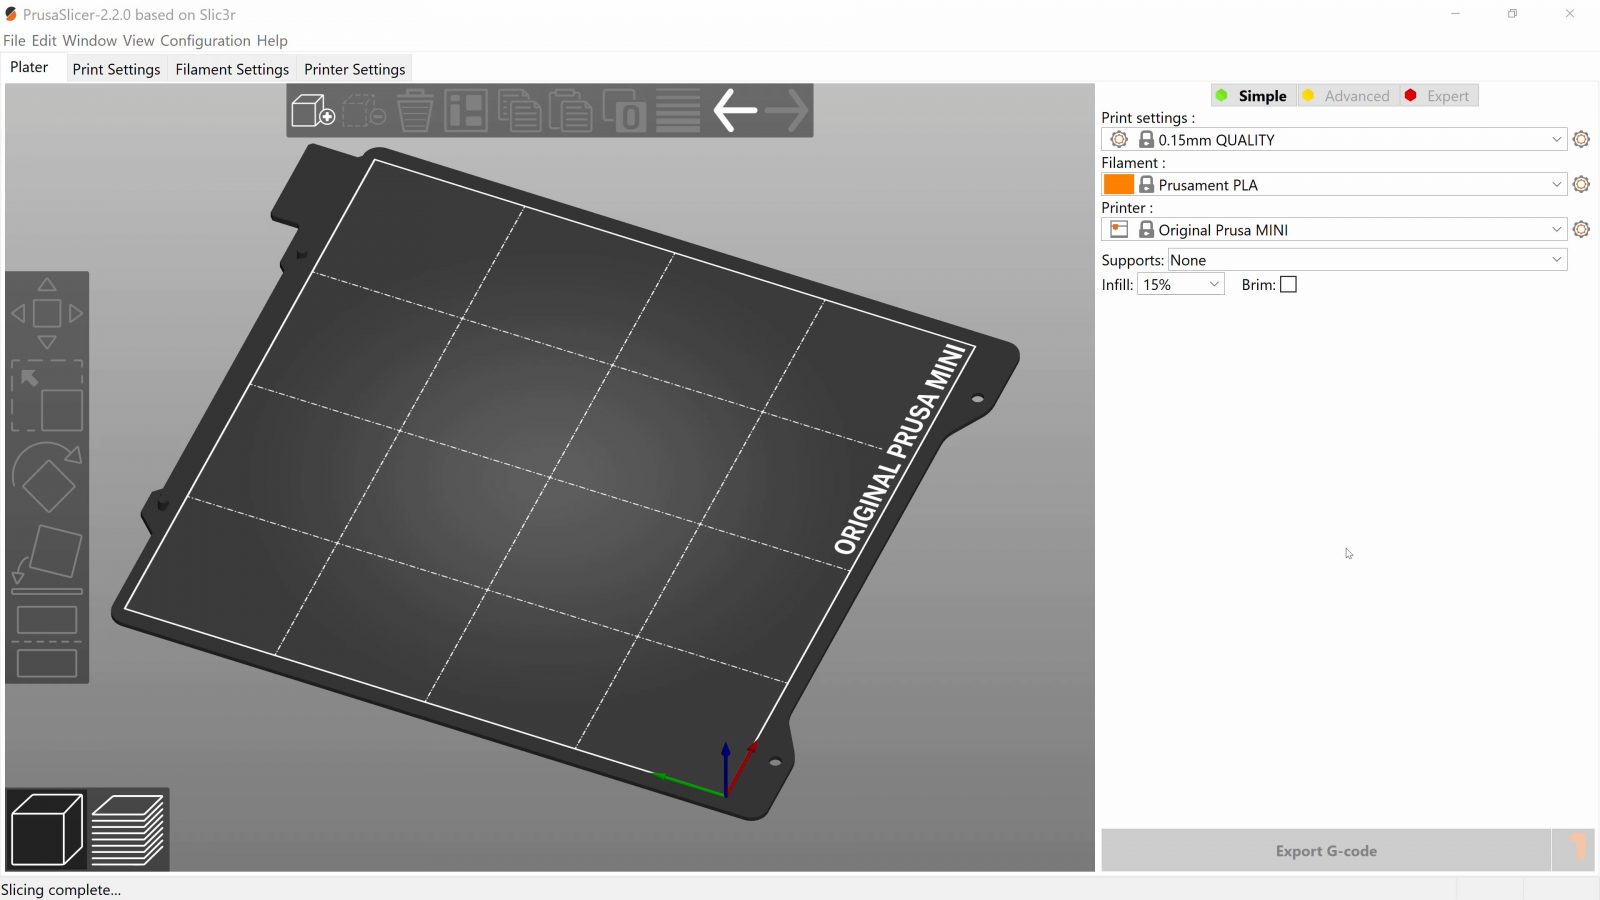
Plater
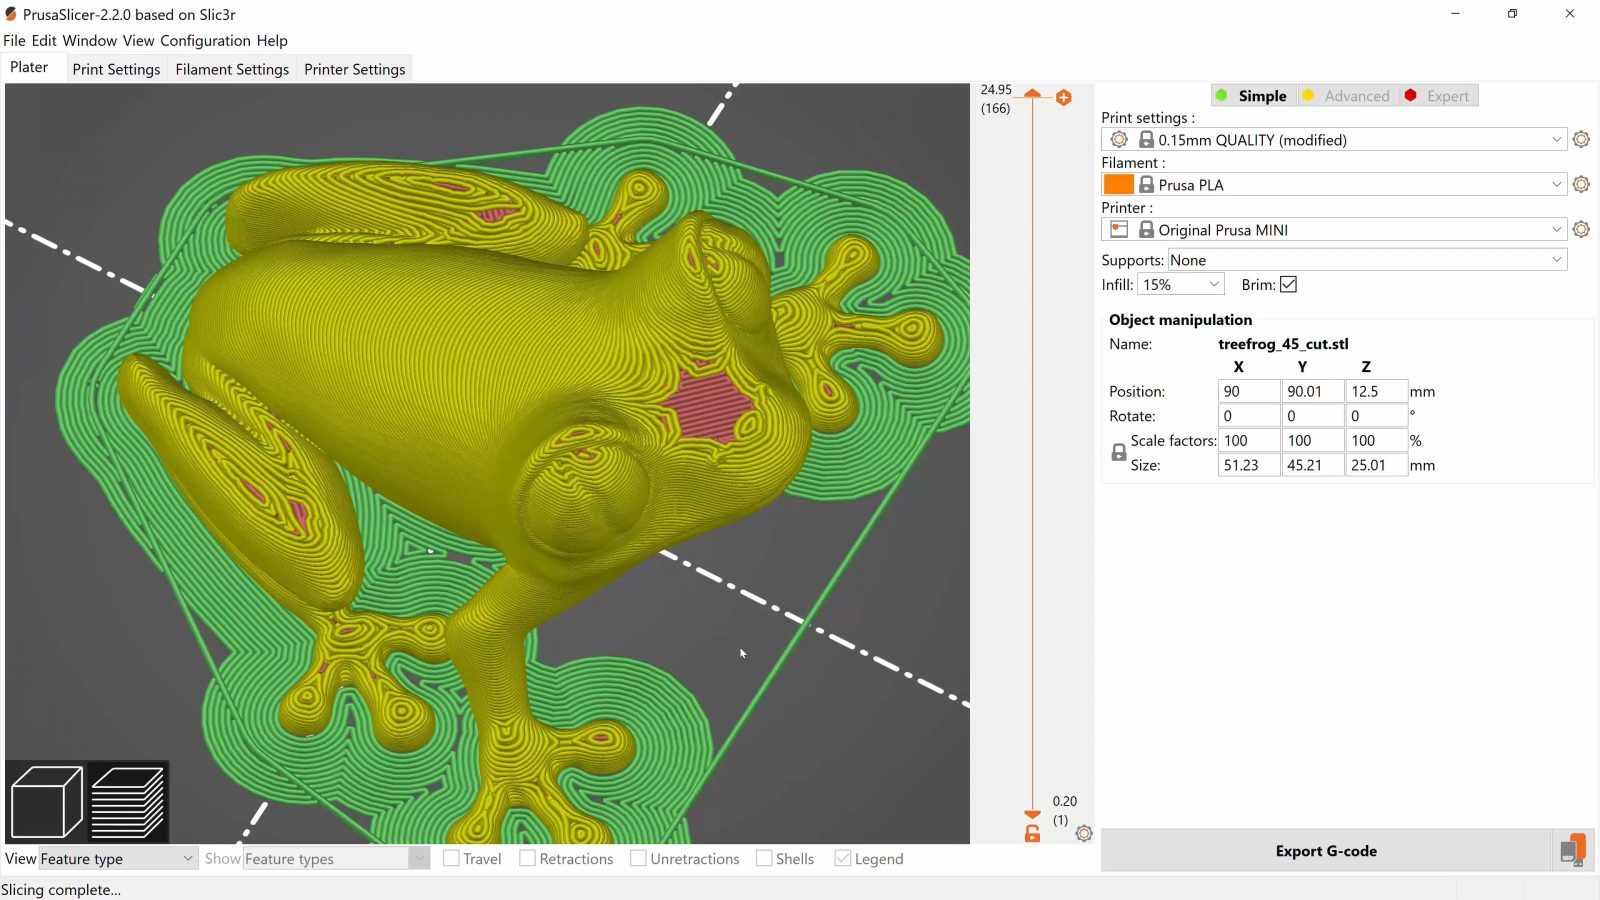
But before we move over into the settings, let’s start here on the “Plater” tab, this is the view that you’ll be using the most for actually printing stuff.
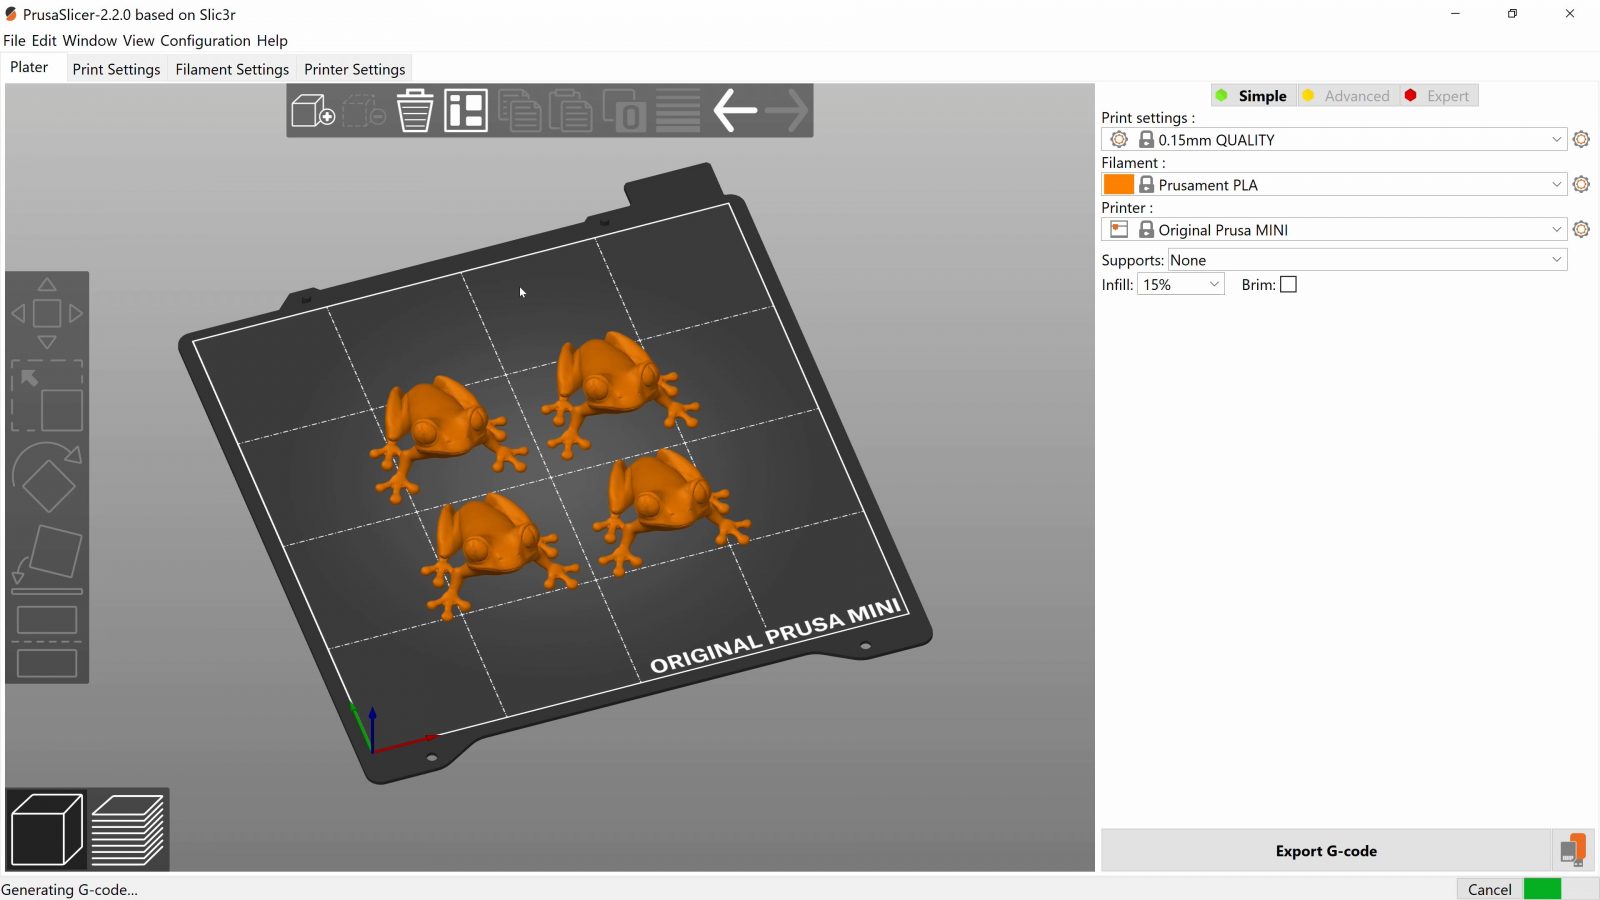
So obviously, after you’ve pulled in your model, you’ve got the basic tools of moving, scaling and rotating parts as well as automatically arranging models on your printer’s workspace.
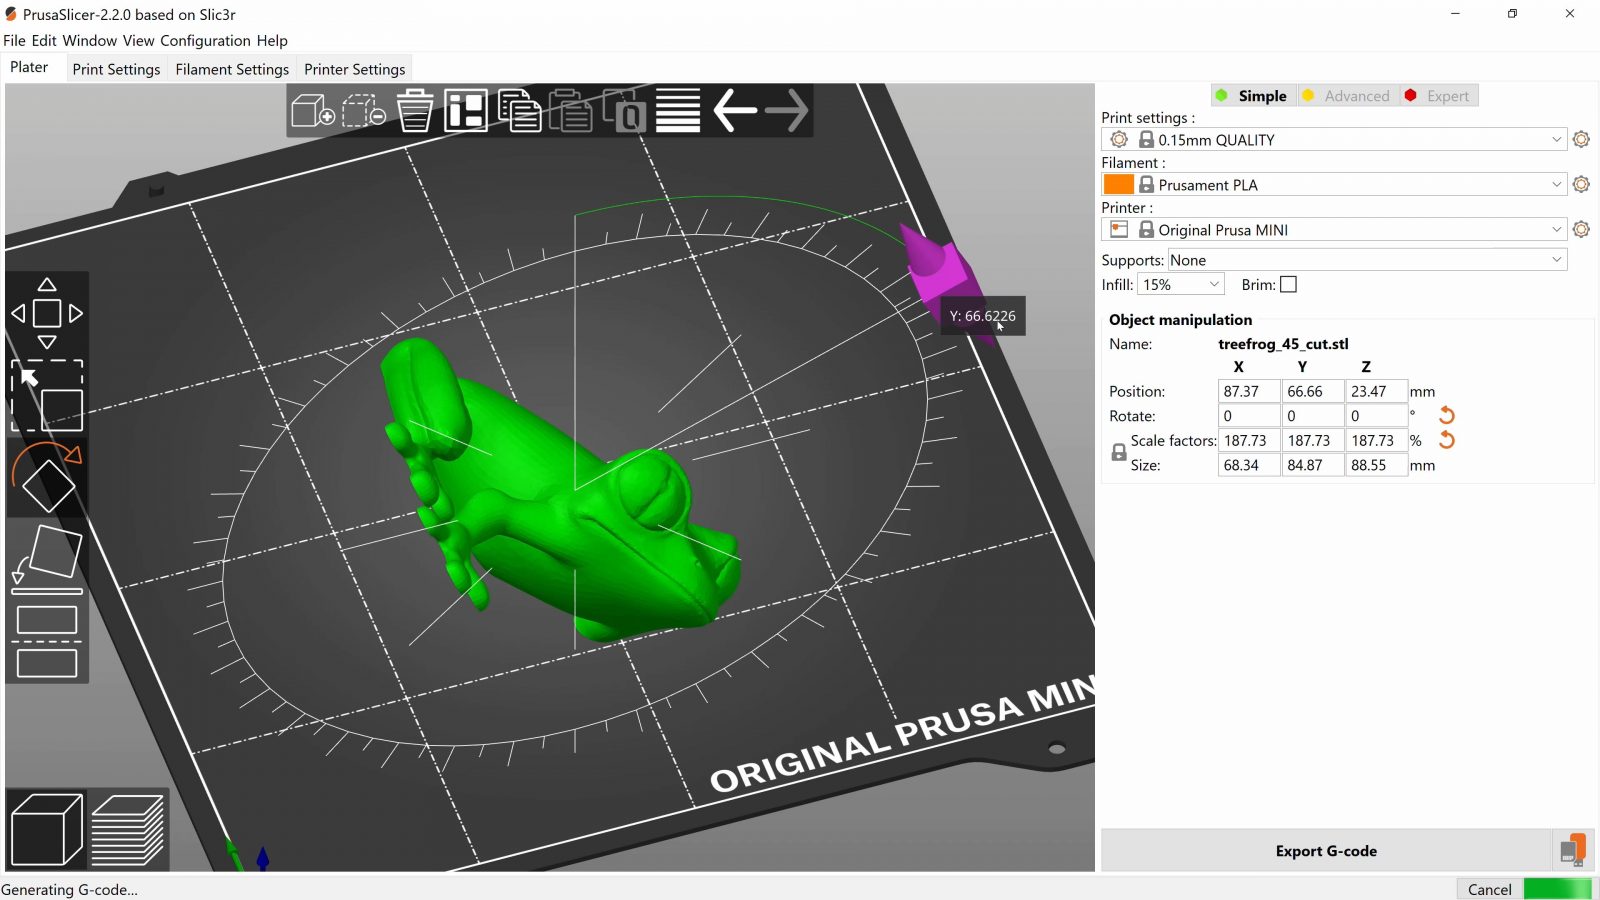
You’ve also got the 3D preview of your parts right here, but there are two neat features in here that you might miss.
First, you sometimes get parts that don’t have their right side up. You usually want a large, flat surface to stick to the build plate. Now, you could use the rotate tool and shimmy it in place, and that’s doable, but you’ve also got the “lay flat” tool that auto-detect ways how the part could lay down and just lets you pick one of the options it’s giving you.
Really quick, really effective.
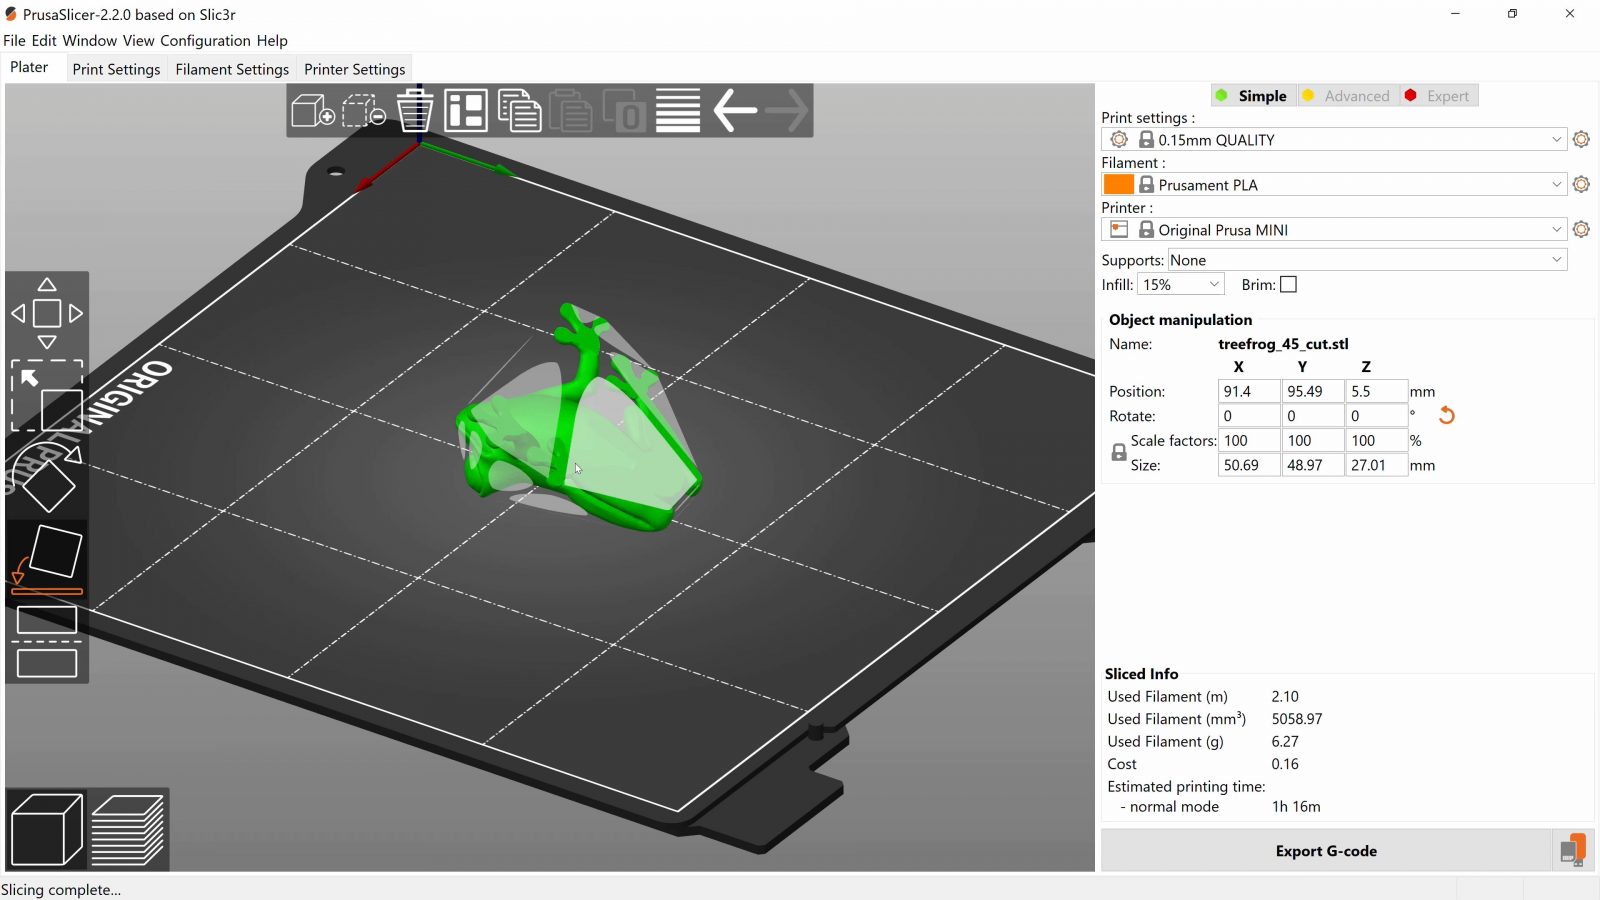
The other one is the “slice Z” tool that, if you use weird models that don’t have a flat bottom, you can just use to slice off a bit of your part and get that nice, clean bottom. You can also use it as a simple way to split parts in half that are, maybe, too tall to print in one go.
Alright, so over here you have the first few actual settings that you can tweak for a print. Of course, there are some presets up here, which change everything, but those are something that not every printer has. I mean, typically, on printers where I run my own profiles, I’ve got one, maybe two or three profiles that I can switch between, but really, I’m mostly going to be using one “compromise” profile that works for everything. But if you do decide to tweak stuff, these are a great way to at least save a backup of your status quo and then later compare how the results of your new settings differ.
Infill Ratio
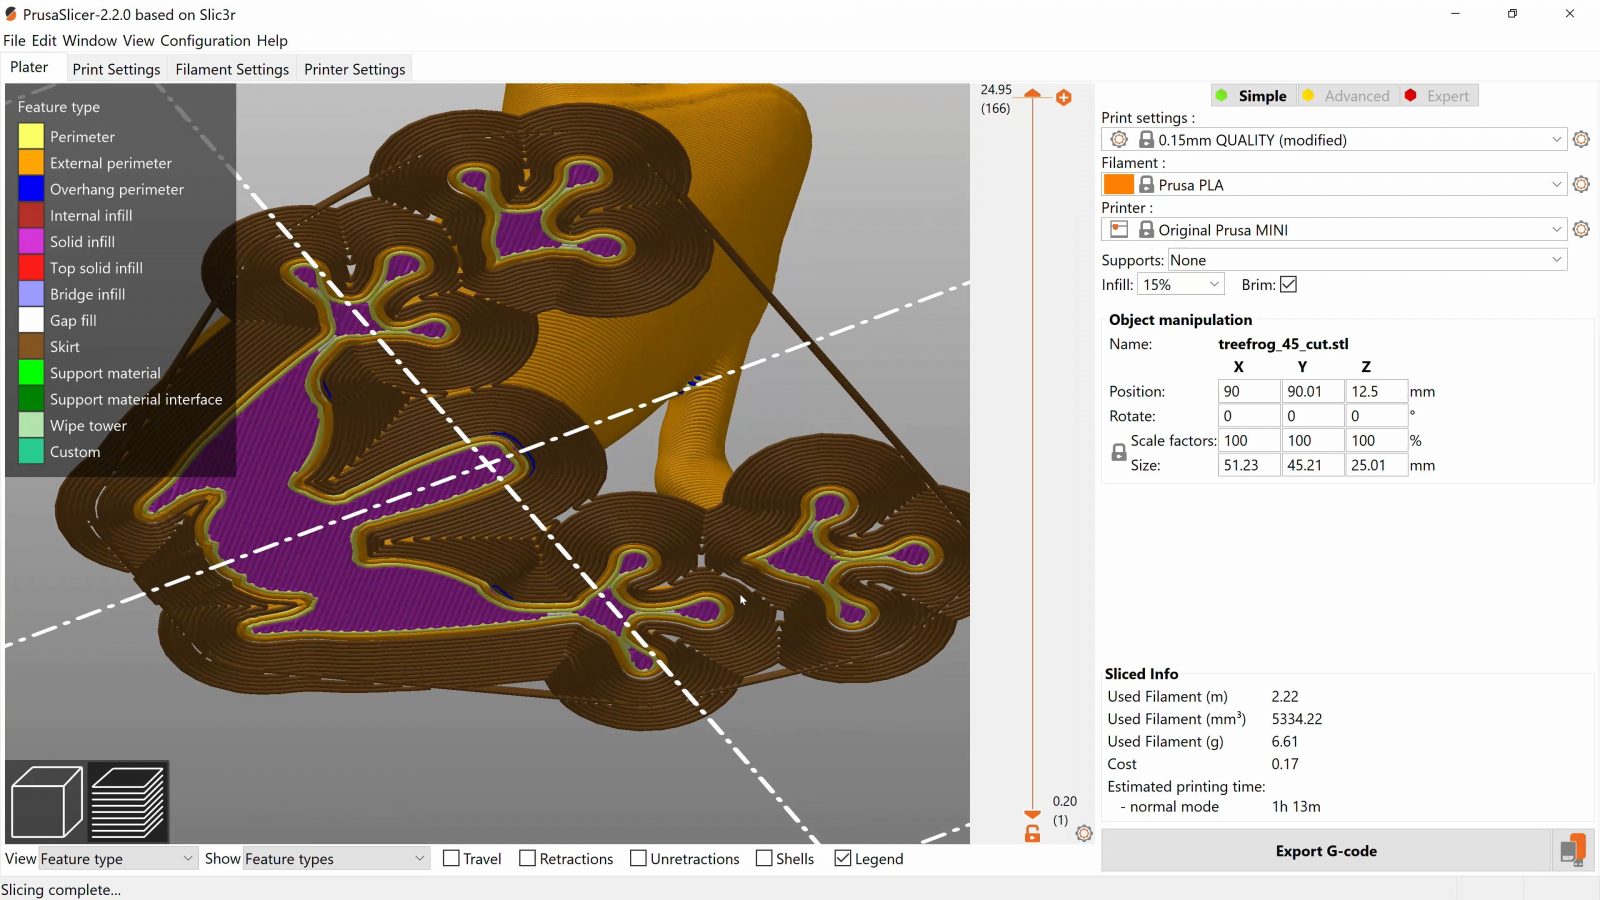
The three config options you get right here are “supports”, the “infill ratio” and “Brim”.
Let’s start with the infill ratio, this determines how dense that supporting structure on the inside on your parts is going to be.
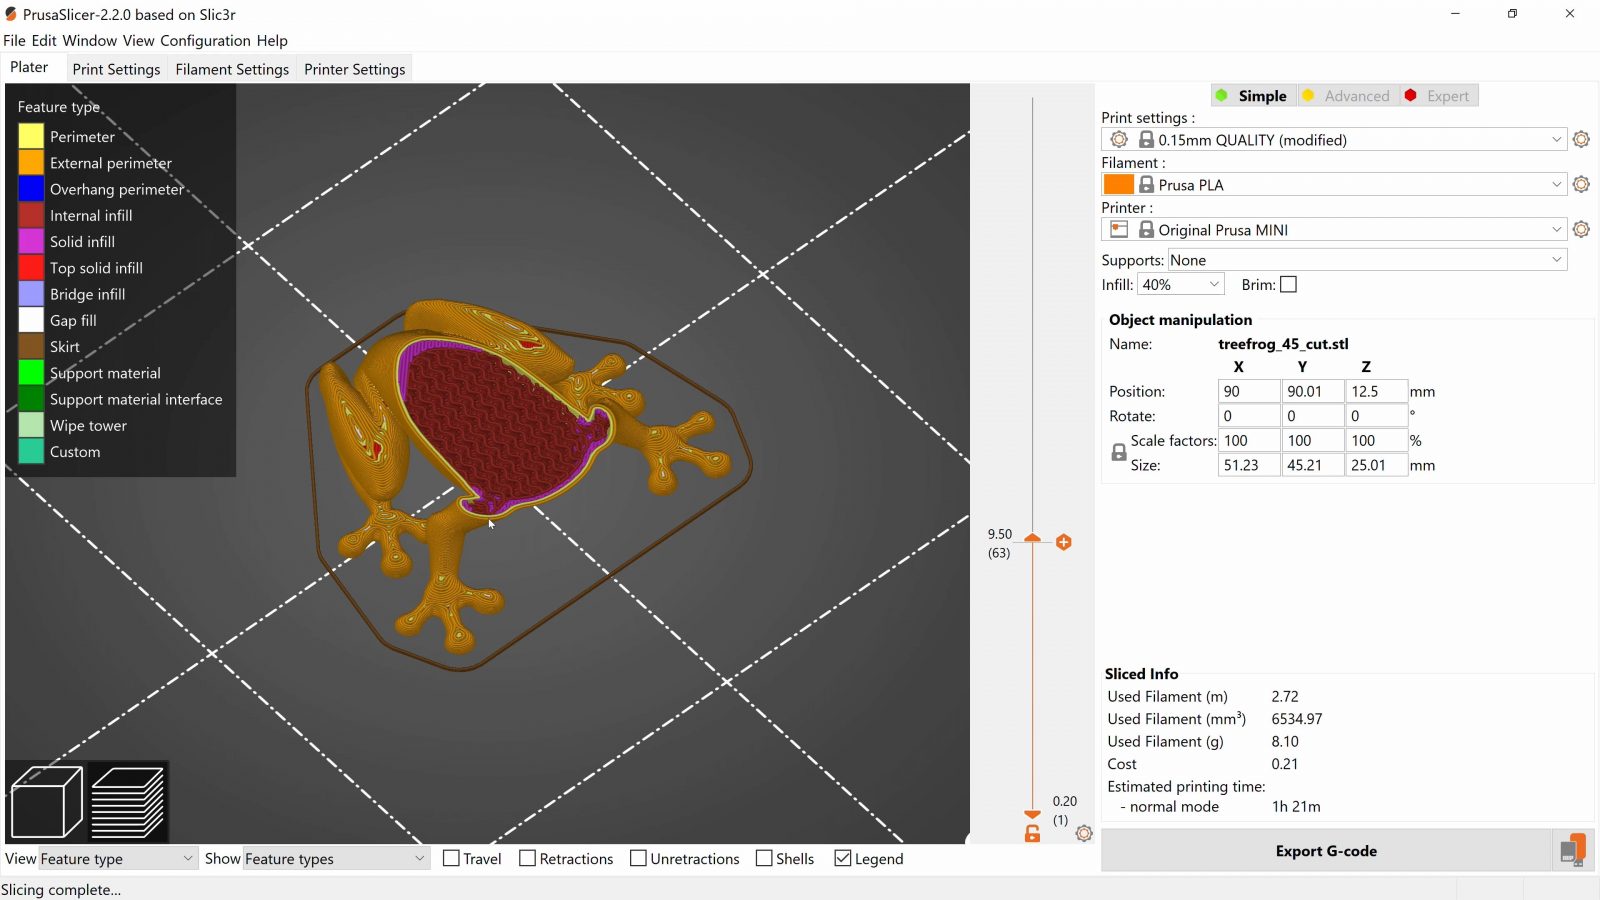
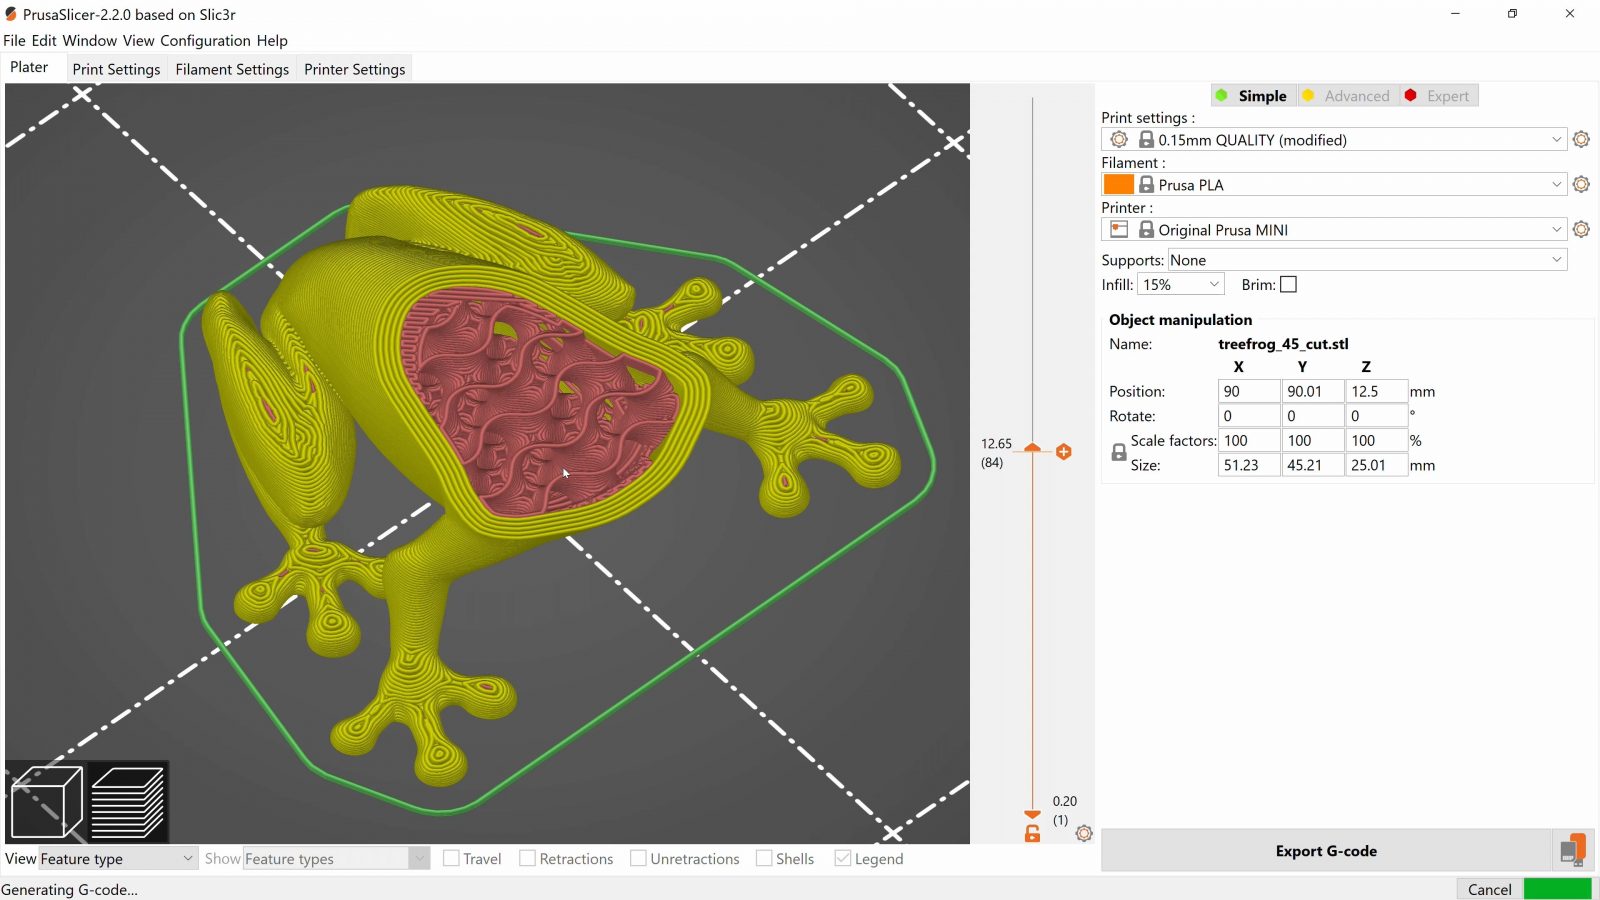
Now, putting more filament into the infill isn’t the best use of material if you want to increase the strength of your parts, its job is actually more to support the top surface, think of it as the roof of a print, so that that has something to rest on and doesn’t cave in, and also to tie together the wall of your parts. But, as I said, if you want a strong print, a thicker shell, which we’re going to look at in a second, is much more efficient, so typically, you’re going to be using anywhere from 10 to maybe 40% infill at most.
Support Material
Next, support material. If you’ve got parts that have geometry that’s hard to print, support material can help, well, support it while it’s being built up. The option “support on build plate only” isn’t something I ever use, because, usually, it doesn’t generate support material in many spots where I’d actually want it.
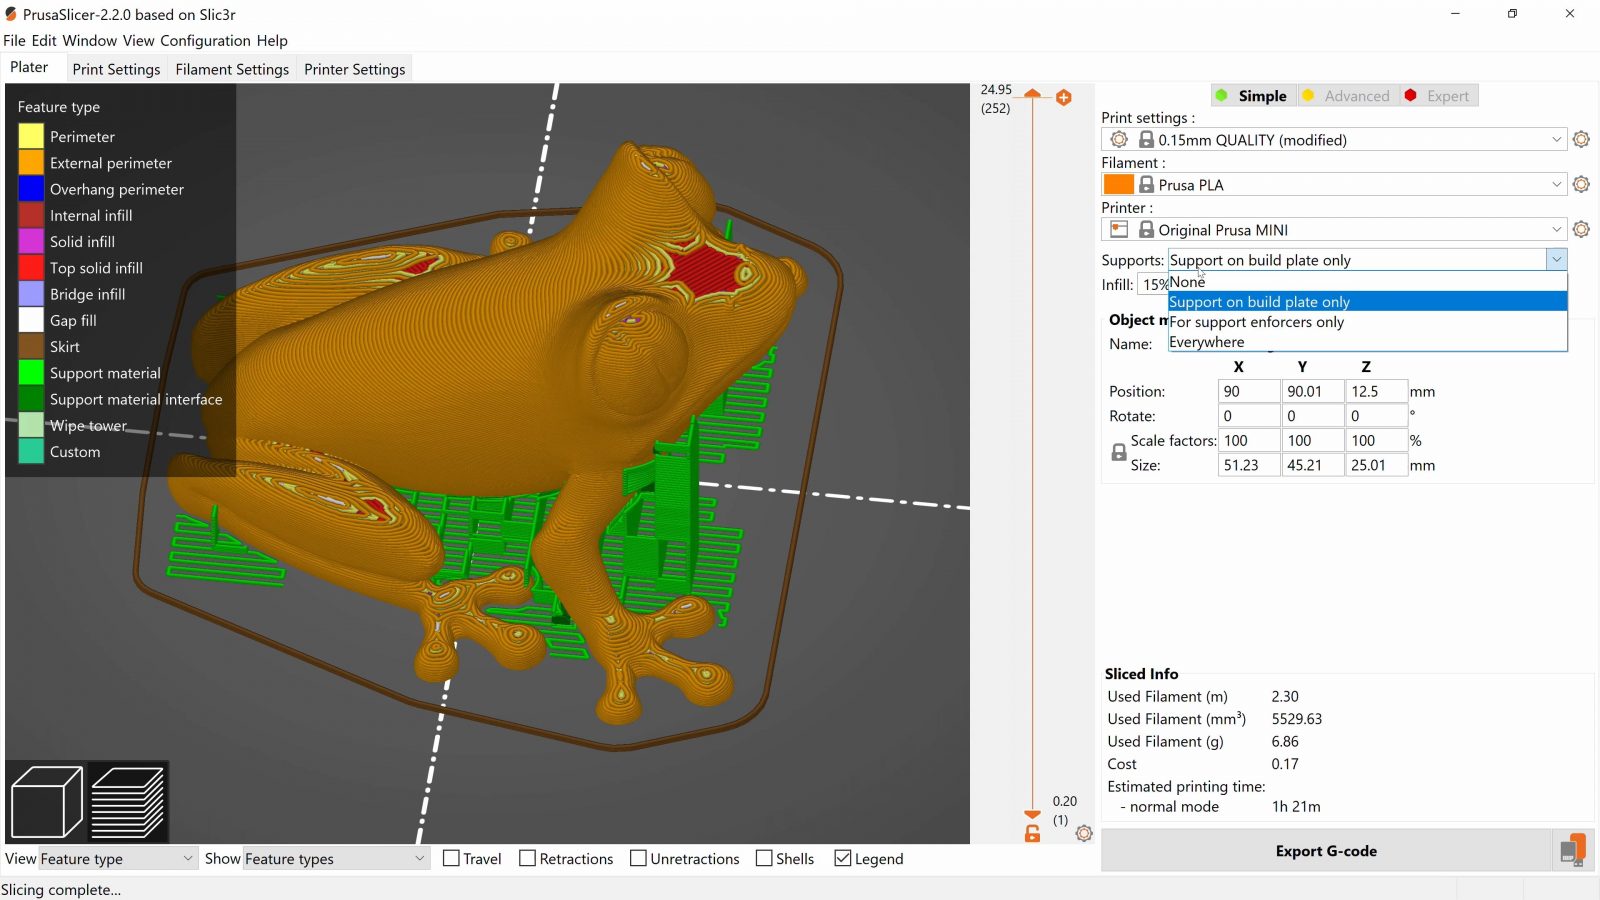
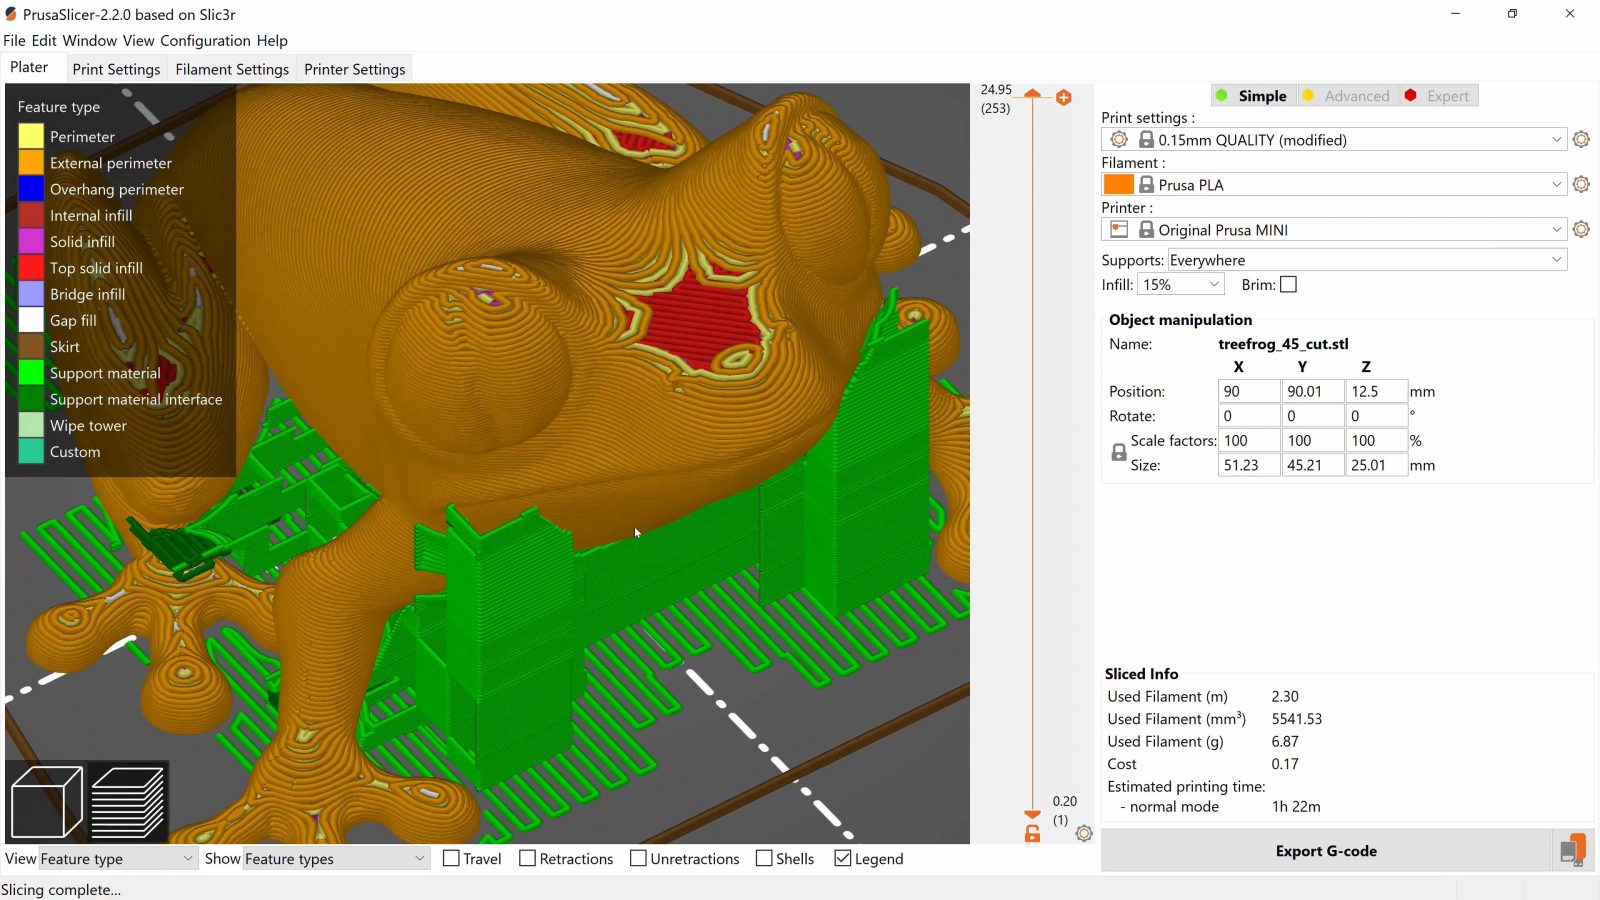
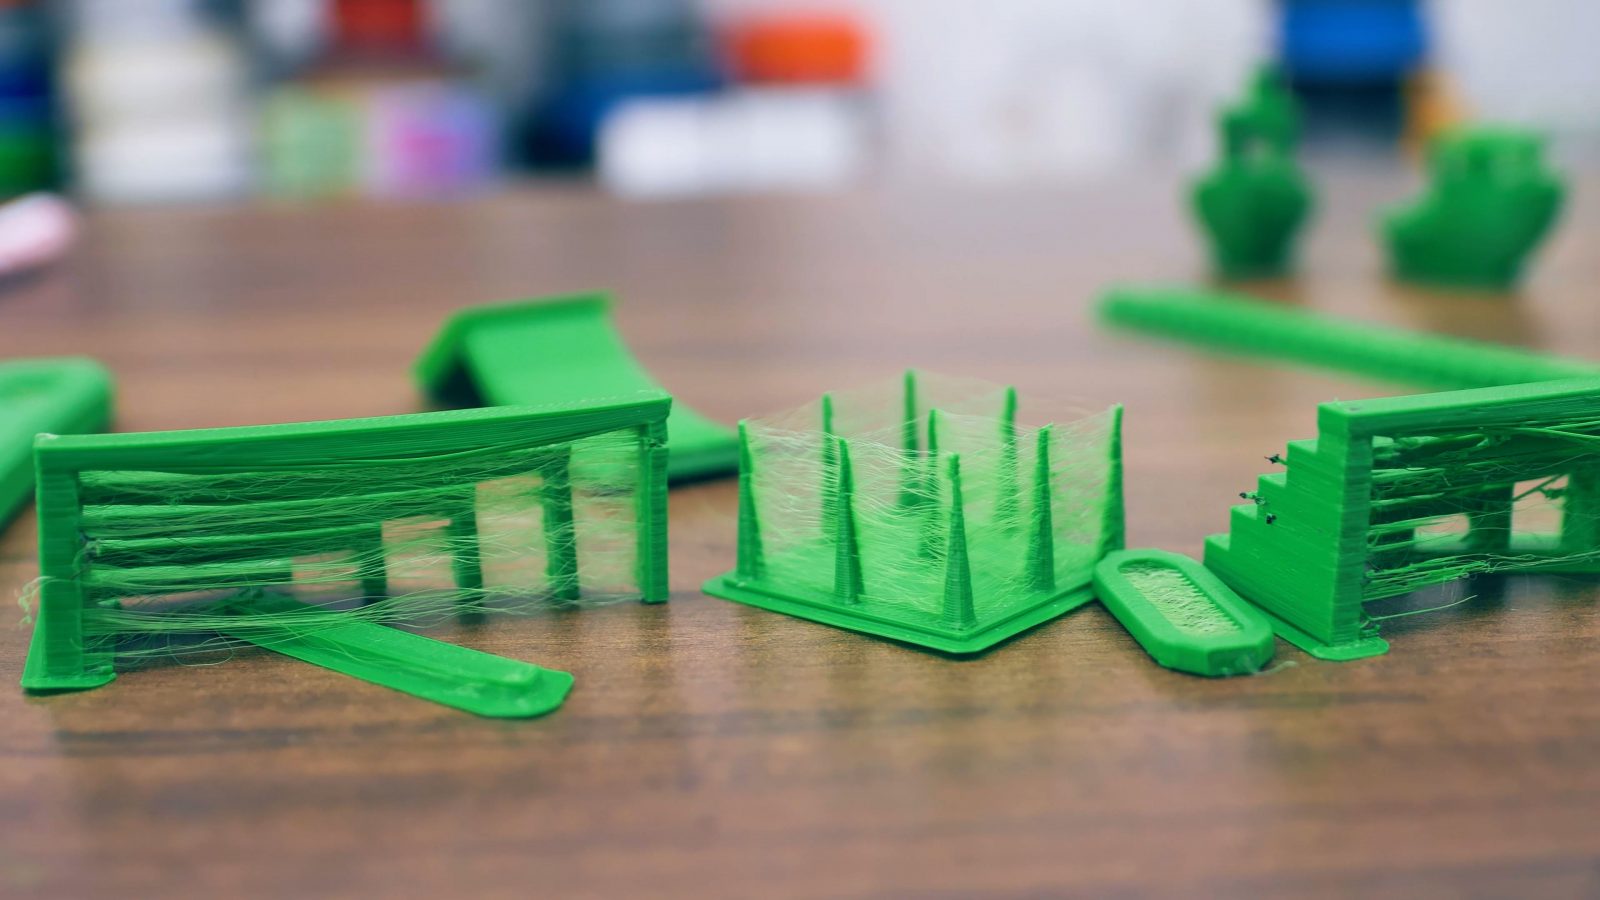
So for me, I either go “everywhere” or “for support enforcers only”, which is a really handy feature you have where you can overlay extra shapes on your model to tell the slicer where you want and don’t want support material. Now, support isn’t a perfect solution, which is why you generally want to use as little as possible. It uses extra material, makes prints slower, and usually leaves a surface finish behind that isn’t particularly great. You’d be surprised how far filament printers can go without needing support material, and usually, parts designed for being 3D printable will already have taken the limitations of the process into account.
Brim
Lastly, we’ve got “Brim”, which creates an extra lip around your part that helps it stick down better. If you’ve got parts where the edges tend to lift up, Brim is an easy solution and is fairly easy to peel or slice off after a print.
Slicer Settings
Okay, so that’s the plater, let’s head over into the settings tabs. Right now, we’re in “Simple” Mode, which hides many of the settings for “tweaking” a printer’s performance, like I said in an earlier video, tuning or tweaking a profile is not trivial, so we’ll be looking at the settings that you’d be changing to better suit a particular model, independently of what printer you use.
Layer Height
And the very first setting is one that I’d actually rarely change, and that’s layer height. It should be fairly self-explanatory what it does, but since so many of the currently hidden, “advanced” settings would get thrown off by changing the most fundamental setting, layer height, I usually leave that the same throughout. 0.15mm is a fairly fine layer height already, but you might see anything between ¼ and ¾ of your printer’s nozzle size, which usually is 0.4mm – that means layer heights between 0.1 and 0.3mm, and scales up and down if you’re using a different size nozzle.
Printers that don’t have auto bed leveling might have specific layer heights that they work best at.
Shell Thickness
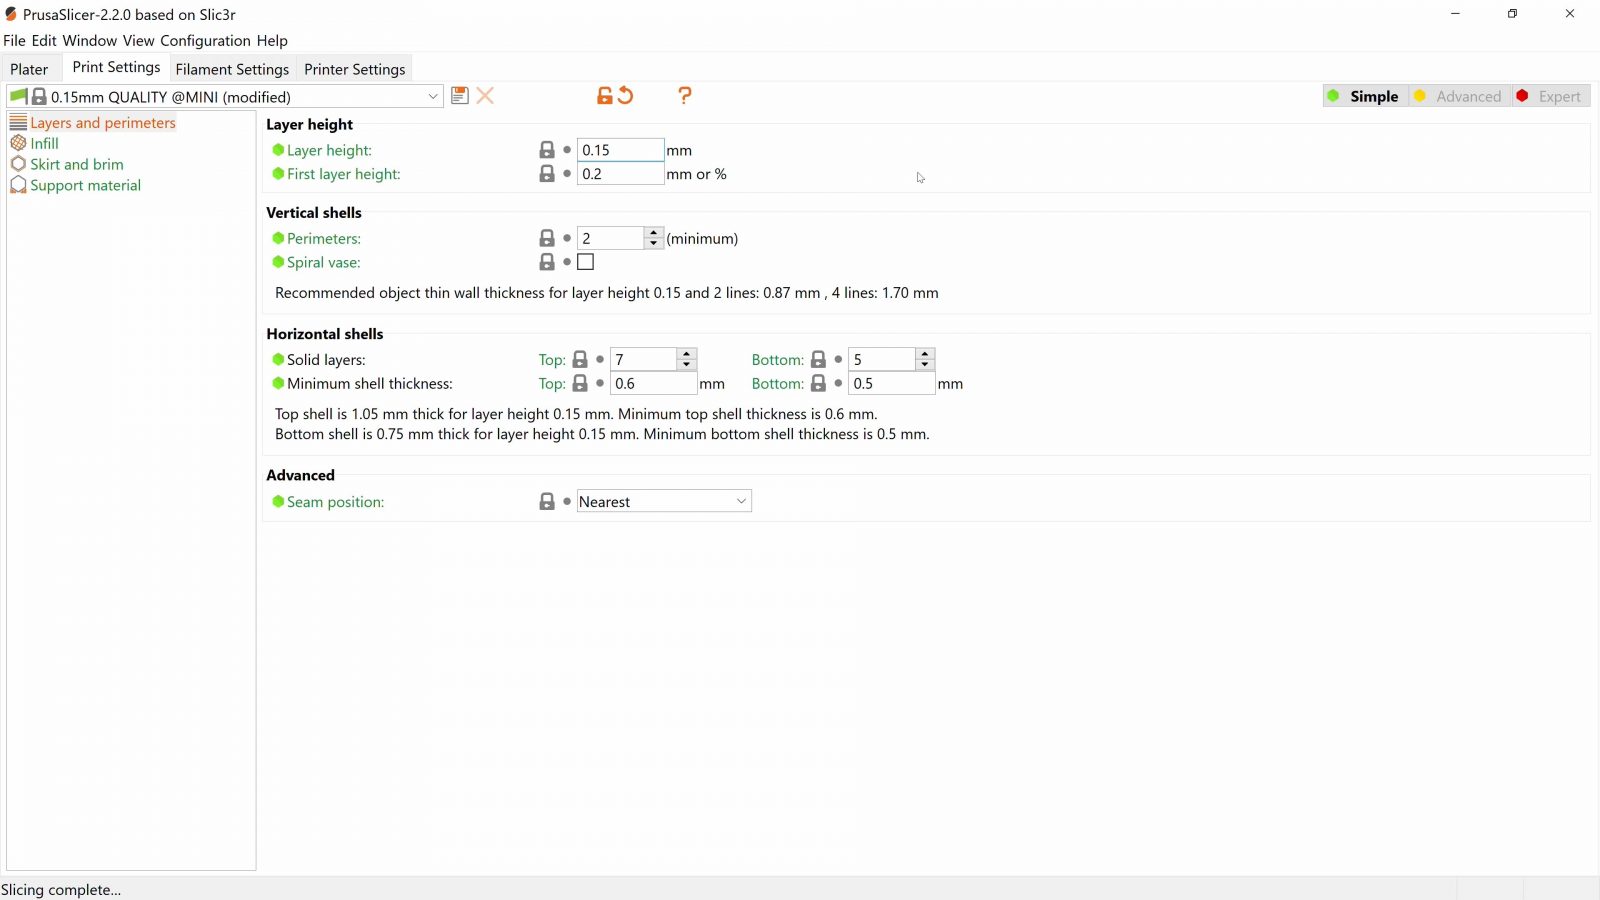
Next, everything related to the solid shell of your part. Now, the way this is all laid out is, honestly, kind of unintuitive. It has historically grown into what it is now, every slicer does it like this, but really, these could all be condensed down into a single setting, “shell thickness”. But as is, it’s really granular, so let’s go through it. Okay, first, the horizontal wall thickness within each layer is the “vertical shell”, counted in “Perimeters”. Basically, you’re setting how many times your printer is going to go around the outside of each layer, laying down an extra filament line before it moves on to filling the inside with infill.
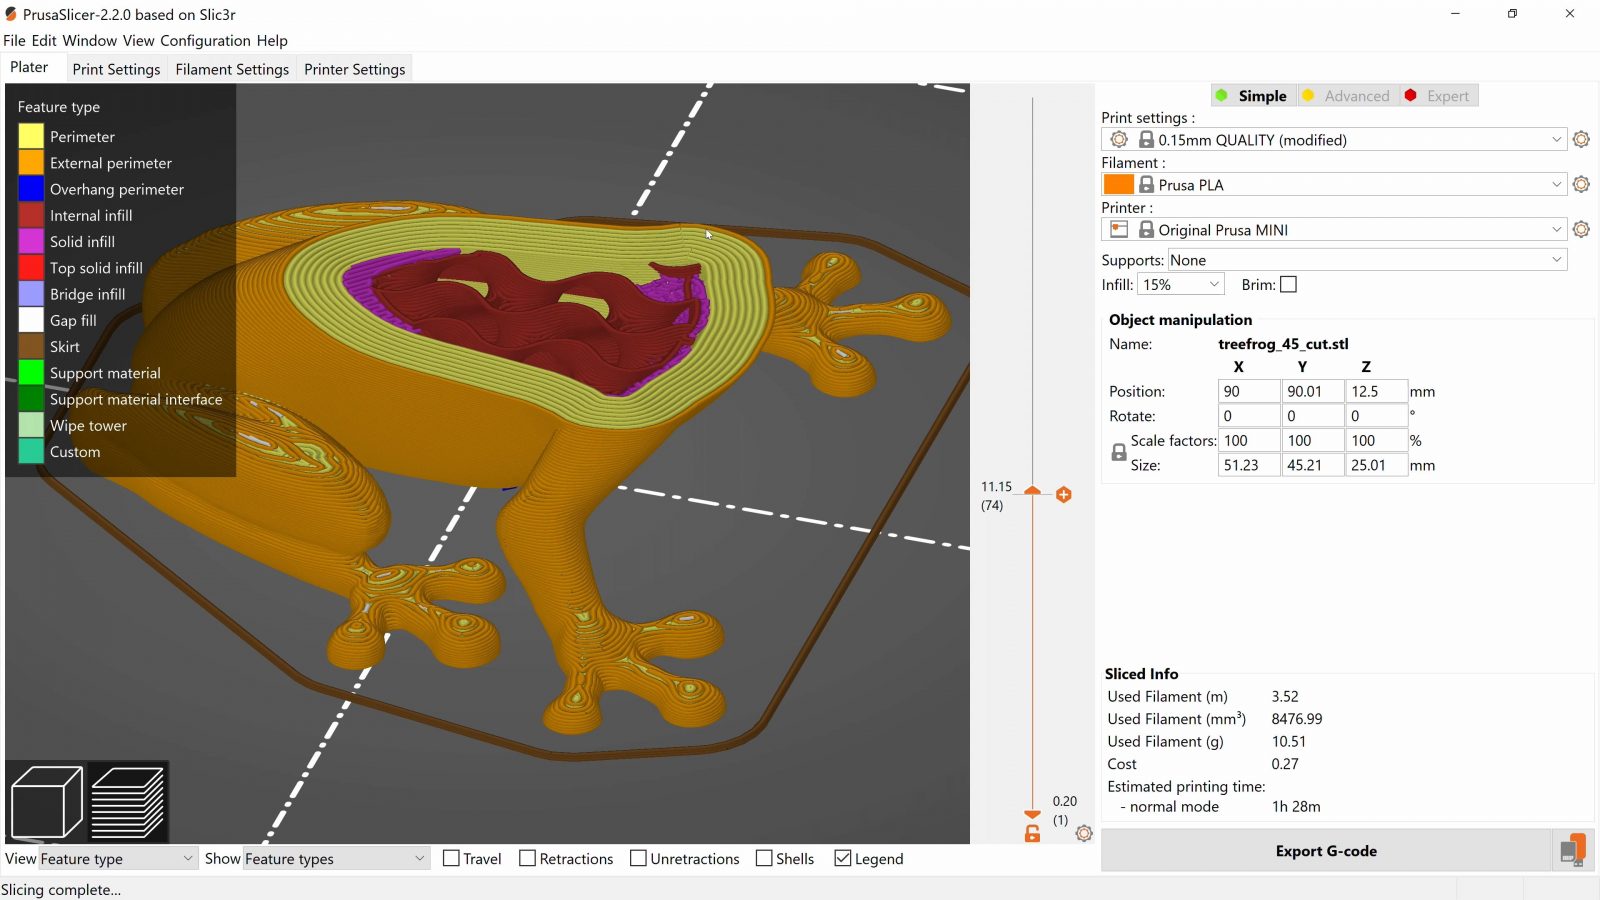
The equivalent to that, vertically, would be the “Solid layers” that cap off the top and bottom of your infill. If you want, for example, a fairly strong 1.5mm shell all around your part, you’re going to have to do some math with how things are currently laid out. With a 0.4mm nozzle, which is actually set to lay down a line slightly wider than that, you’d need 4 perimeters and, with a 0.15mm layer height, you’d need 10 solid layers top and bottom. At least for the solid layers, you could also just set specifically PrusaSlicer to 1 layer top and bottom and then use the “Minimum shell thickness” to have the program figure out how many it actually needs.
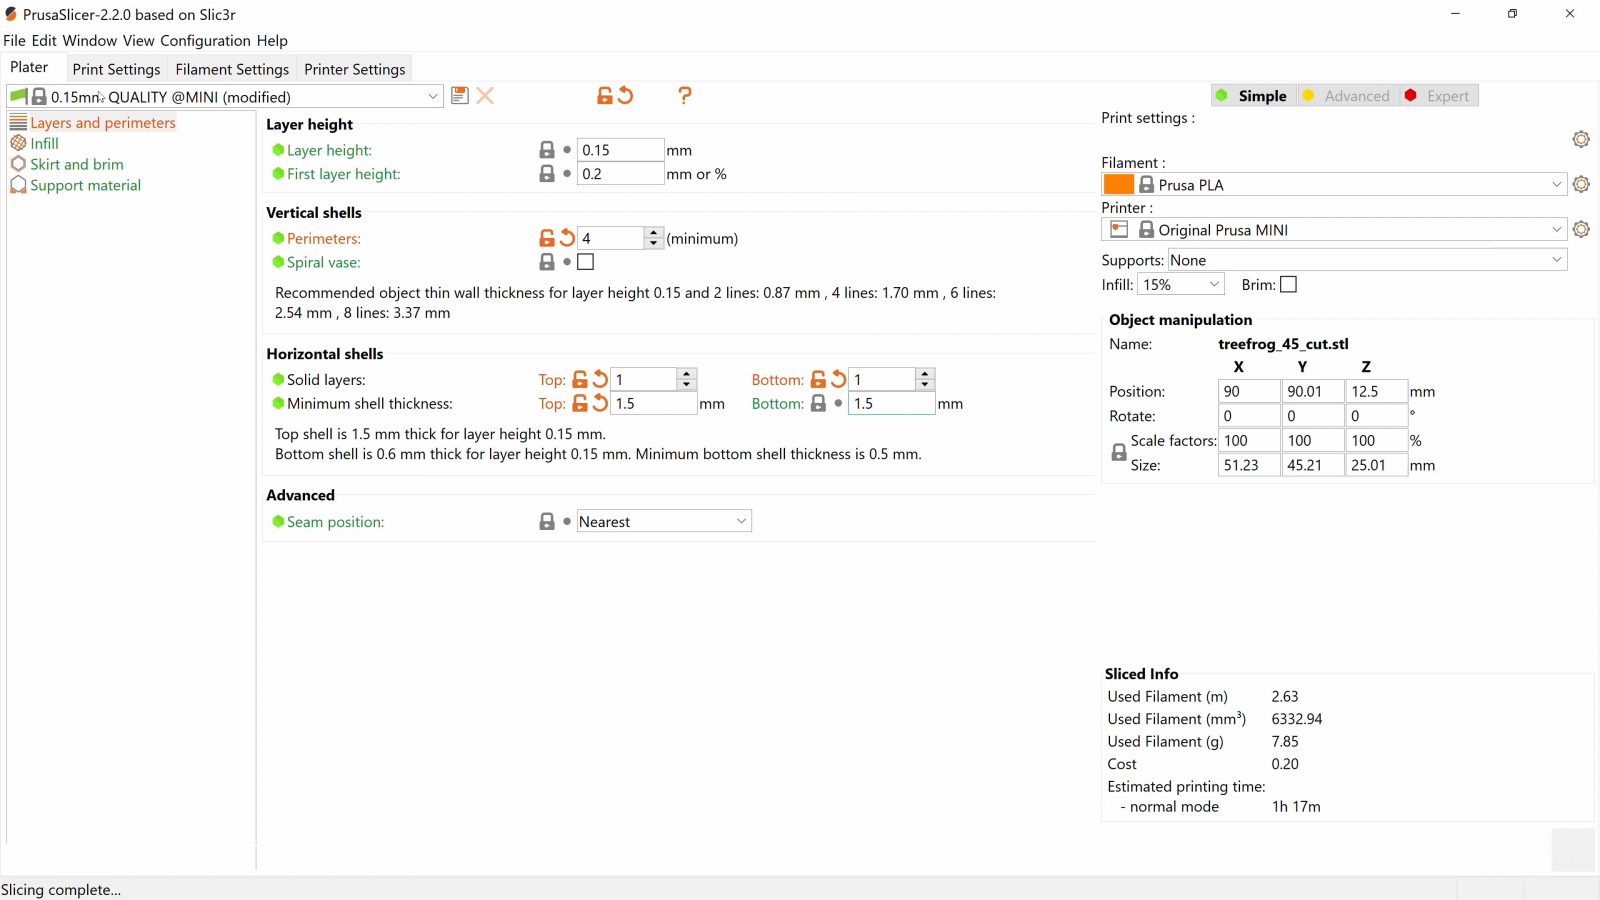
The lowest I’d go here would be a 1mm shell, that’s barely enough of giving you usable walls around the sides and a top shell that won’t have the infill structure printing through. With bigger thicknesses for stronger prints, you might also want to start increasing the infill ratio at some point. Probably the most I’d do is a 5mm shell and about 40% infill, anything that needs more than that should maybe be a part made from at least a stronger plastic or maybe even machined in metal.
There’s one more setting in here, spiral vase, if you want no infill and just a single, continuous perimeter all the way around your part, well, to print a vase.
Infill
Really the only setting to “adjust” is the fill density, less density gives you a coarser, less dense pattern. Now, for fill patterns, there are a lot to choose from, and probably 2/3rds of those are kind of fringe application or “because it sounds cool” patterns that have been carried over for years, but nobody should ever use them. The ones that I would say are worth using are Triangles, Cubic and Gyroid.
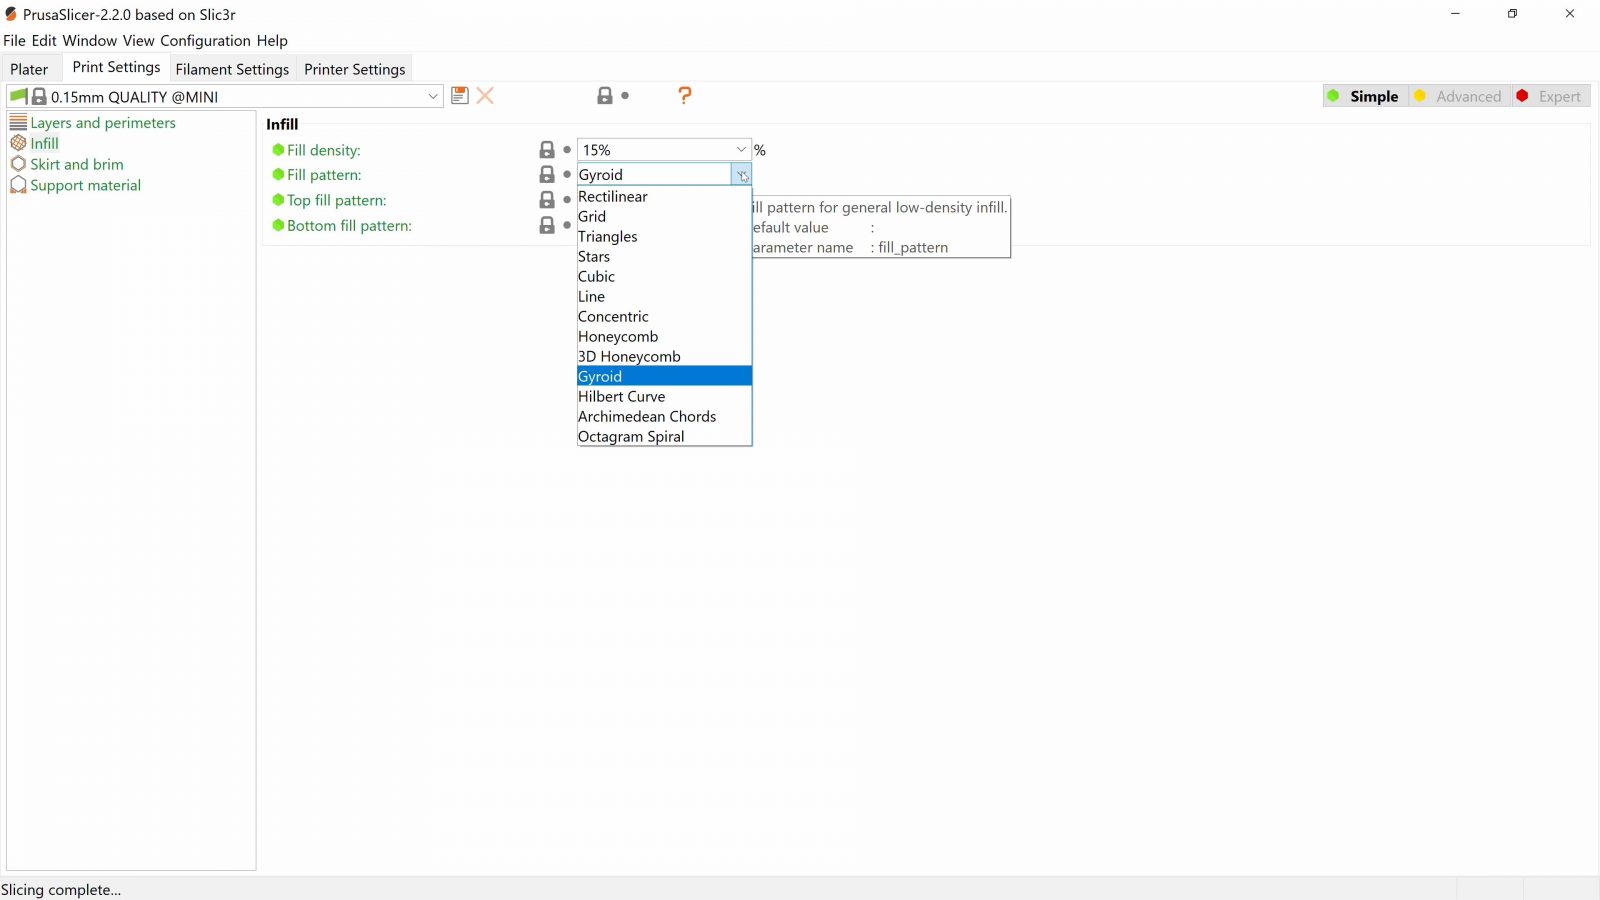
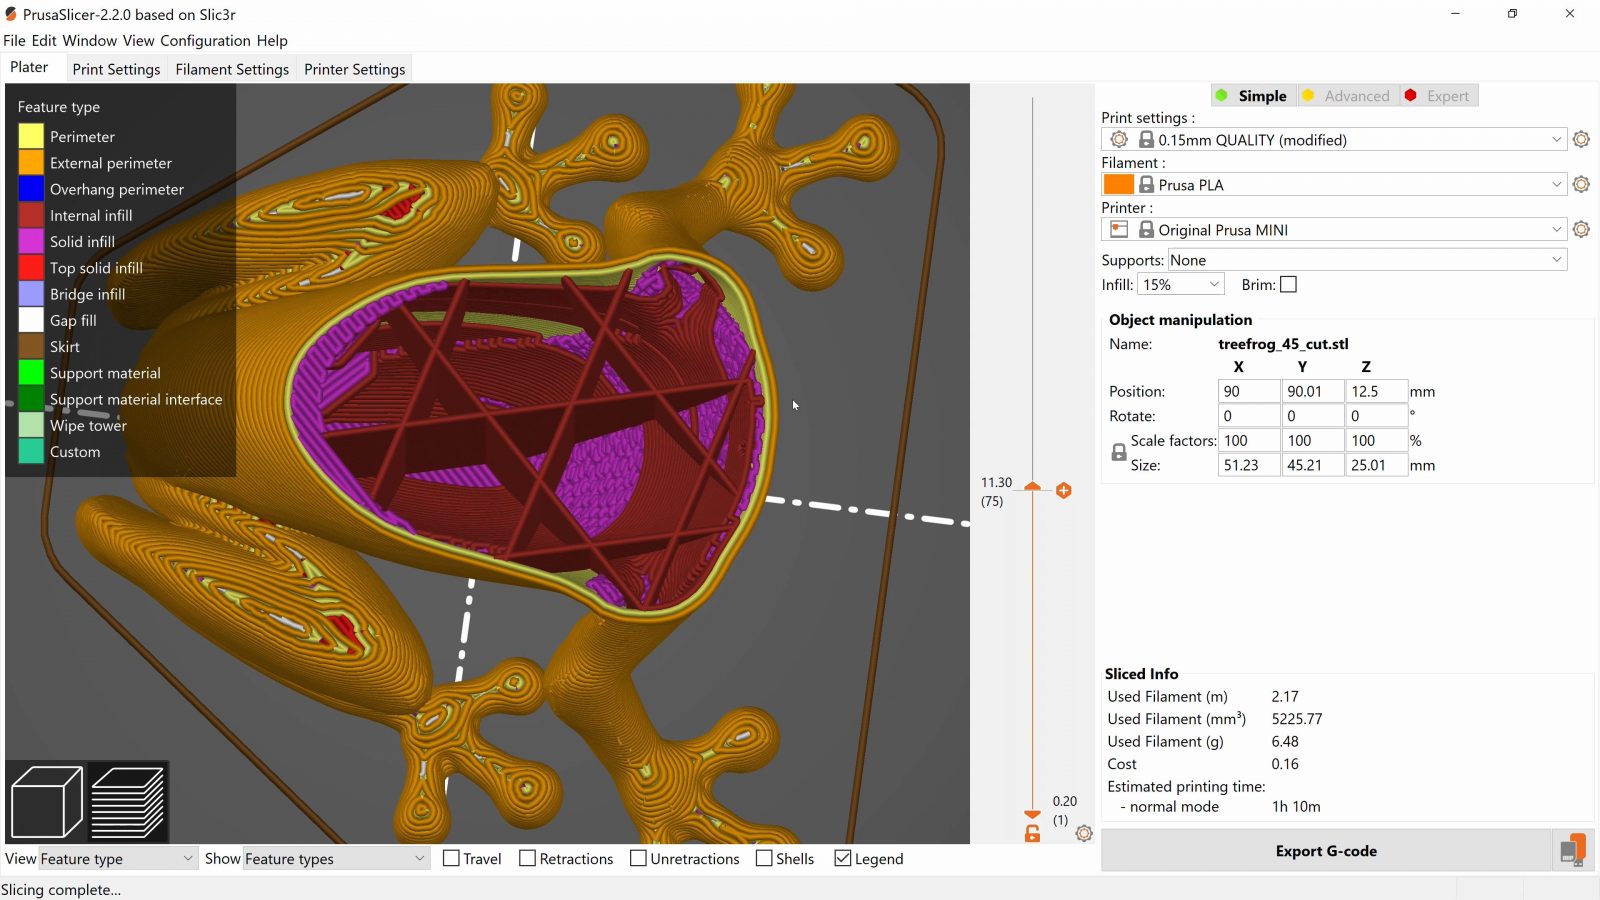
They’re all patterns that support your prints in all compression and shear directions, which should give your fairly consistent strength and stiffness in your prints. If we’re being honest, “Triangles” is probably the best one out of these, but Cubic and Gyroid are “better” on paper, but realistically, they just look really cool. Gyroid doesn’t always print quite as fast as the others, too.
The top and bottom patterns decide how your parts get capped off at the top and bottom, some patterns blend more nicely with specific prints, but for 99% percent of applications, “Rectilinear” is fine.
Skirt and Brim
Next, Skirt and Brim, Skirt distance, you usually don’t have to touch, and setting Brim width to 5mm here is exactly the same as checking “Brim” over on the plater tab. Maybe 10mm is something you might need to use with some prints if you’re using one of the warpier filaments.
Support Material
Then, support material, and here, I think the “Simple” view mode is hiding a bit too much, so let’s jump over into Mode -> Advanced. There are three settings in here that you should look at. First, “Generate support material”, this one turns on or off supports entirely, next, “Overhang threshold”, this determines how aggressive the support generation is. An angle of 0° will only support the most critical bits of your model, and 90° will support everything. Quite often, 30° is enough to just help out prints that would otherwise show a bit of drooping or curling. Remember, every bit of support material you generate here is something you will have to peel of later.

And when it comes to how easy it is to peel it off, the “Contact Z distance” is one setting that determines how big the gap between the support material and your part is going to be. Make it bigger, and it peels more easily, but also leave a more droopy surface, make it smaller, and it sticks better, but is harder to remove and leaves more scars.
Advanced Mode
Switching to advanced mode has actually opened up a whole bunch of other options, just in the print settings tab. Now, again, most of these you don’t need to touch for every print. Also, it might be tempting to head over into the “Speed” tab and try seeing how fast your printer can print stuff, but that will almost always be at the expense of reliability and quality. So in the case of the speed settings, instead of tuning “up”, I’d actually recommend tuning “down” first, because if you’re simply printing at a constant, say 40mm/s, there are now so many other things that can’t cause issues anymore. Plus, the speed gain isn’t linear when you just allow faster max speeds for your printer, it still needs to slowly accelerate up to speed and then brake back down.
But there are two settings that are only visible in “advanced” that are something I use to easily get prints to stick. So first, you want your first layer height to be fairly large, maybe 0.25 or 0.3mm. Well, that setting is actually always visible. Now, this will not just lift the nozzle higher for the first layer, but it will also pump out more material to make up for that extra distance. Combined with the other setting in Advanced -> Extrusion Width -> First layer, which I usually have at a millimeter, you’re increasing the width of that filament sausage being laid down as well. What that does is that now you don’t have just a round filament sausage that’s being dropped onto the bed, it’s actually being smooshed down a lot. What I’ve found is that, especially when you have a bed that isn’t flat or level, or your nozzle distance isn’t set right, this really helps with getting prints to stick down.
You might need to reduce the speed for the first layer if your extruder can’t keep up.
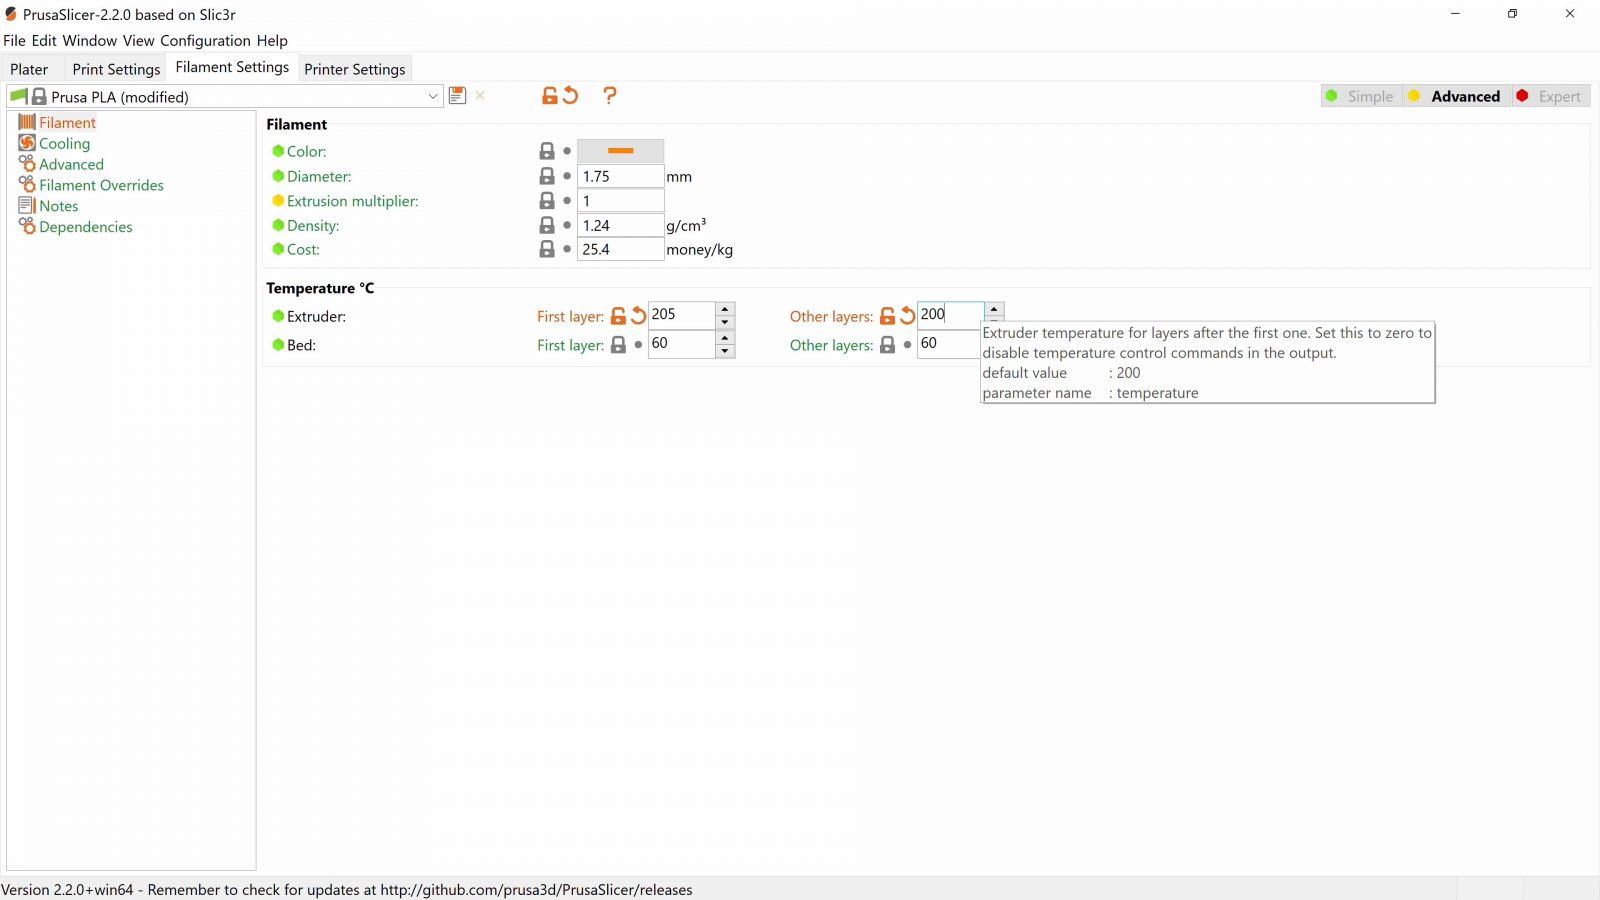
Filament Settings
Okay, so over in the “Filament Settings” tab, there’s nothing that you’d adjust for any particular print, but you’ll find the basics for setting up a specific filament type. That’s enough content for a video all by itself, so here’s the quick version. First layer temperatures determine how well your part sticks down onto the bed, and it’s usually a good idea to leave at least the bed temperature constant for the entire print as some beds like to bounce up and down as they heat and cool. Use the manufacturer’s recommended temperatures, but it’s actually not unusual if your specific printer reads its hotend temperature 10 or 15°C high or low, so if your layers split apart easily, increase temperature, and if you get melty-curly issues, reduce temperature or turn on or increase the part cooling fan speed.
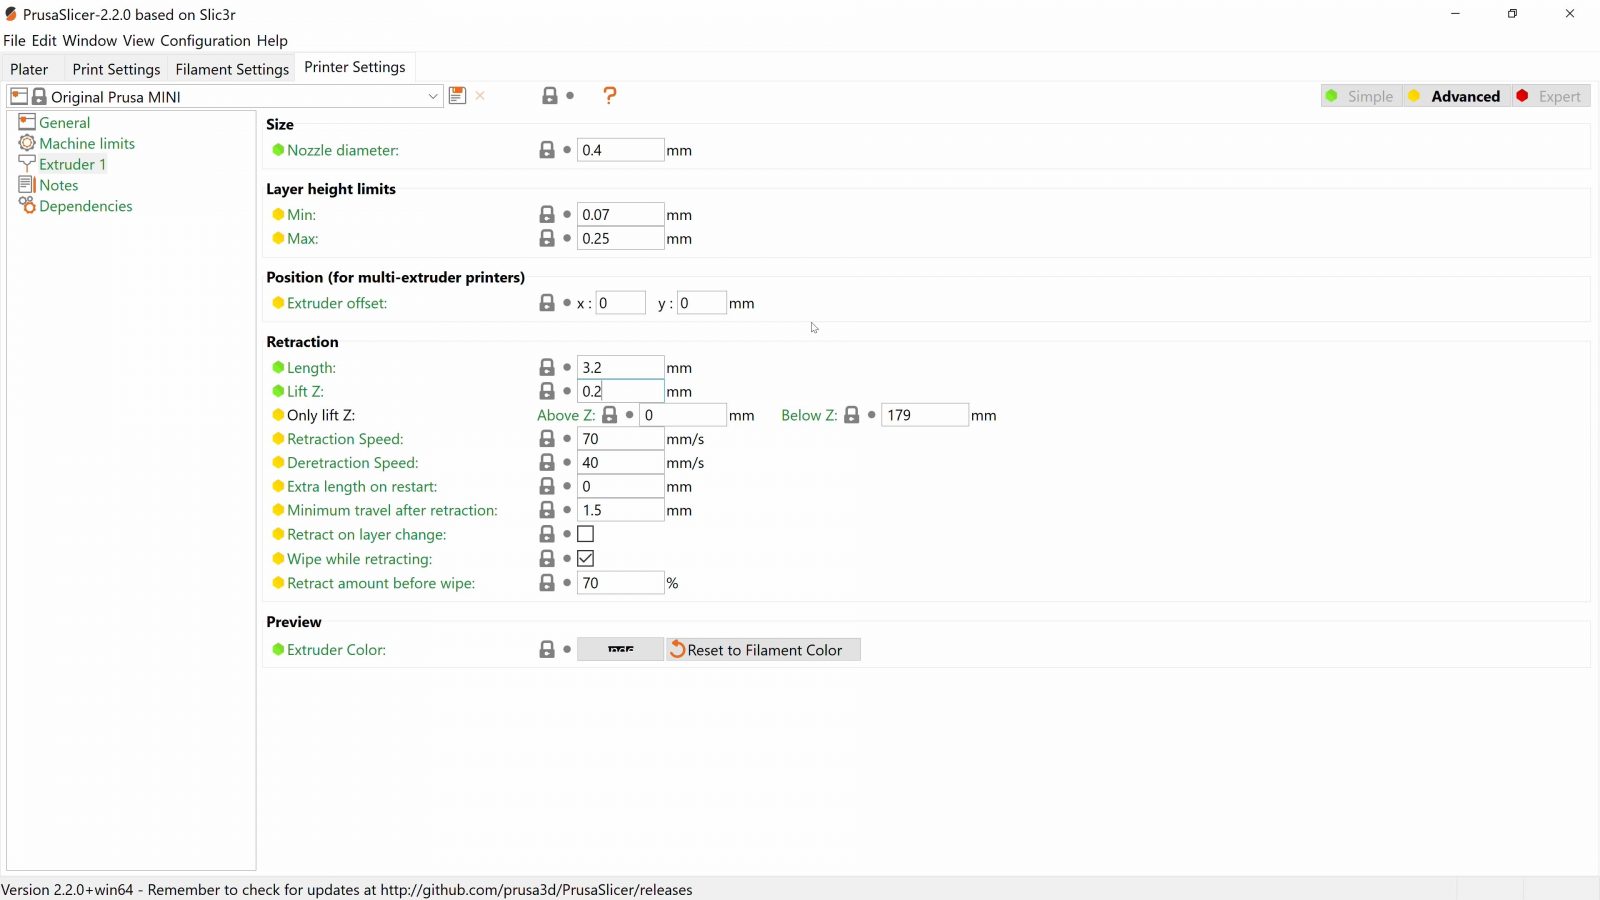
The “Overrides” page is, as the name implies, an override to one of the few “tunable” settings in the “Printer Settings” tab, and that’s retraction. When you get wisps or strings on your parts where the hotend was moving from one spot to the next, you’ll generally need to increase the retraction length. The other feature in here is Z hop, which lifts the nozzle up by a slight bit in addition to retracting and sucking the filament back up. It’s really useful to reduce stringing and reduced the risk of knocking over a tall print with the nozzle.
So obviously, we could go through every single setting, but we’re already starting to blur the lines between what it something you can adjust for a specific print and what is printer tuning.
In either case, the last thing you’ll do is to hit “Export gcode”, and then feed that gcode to your printer on an SD card or USB drive.
Let’s recap!
On the “Plater” tab, you get your basic move, scale, rotate and the super useful “lay flat” tool. If you think your print needs to be stronger or more rigid than normal, increase the shell thickness first before you start using material for the infill. There are reasonable limits for all of these settings. Resist the urge to start tweaking everything, but if you do, make sure you create a backup profile and compare the before and after. A good start to tuning things would actually be to de-tune and for example set your print speeds to a chill, constant 40mm/s. You don’t gain much by having prints come out unusable or fail outright – slow and steady wins the race. But then again, every printer is different, and what works for one doesn’t necessarily need to work for another.
So that’s it for this one, in the next video, we’ll look at what the entire process of going from an idea to a part looks like, until then, thank you for watching, make sure to get subscribed, keep on making, and I’ll see you later.
💙 Enjoying the videos? Support my work on Patreon!
Product links are affiliate links – I may earn a commission on qualifying purchases (at no extra cost to you)

Check out my second channel “More Layers” on YouTube for livestreams
3D Printing Basics – Episodes
- What is a 3D printer?
- Choosing a machine
- Resin printers
- Filament printer parts and maintenance
- Acquiring print files
- Basic slicer settings
- Whole 3D printing process
- Requirements for 3D printing
- Common issues
- Where to go from here